Challenge 1
Keep it swinging. Tune the wait until your pendulum is still swinging strongly after a full sixty seconds, timed. A swing that starts big and slowly dies has not passed — you are looking for one that holds its size, or grows.
Quick Learn — the model, the instructions, the program and the challenges. The theory is in Full Lesson.
EV3 Robotics›Level 1 · Beginner›Lesson 13
Level 1 · Lesson 13 · EV3-L01-1360 minutes · Ages 9–16 · Model: Clock Ticking
The Clock Ticking: a tall frame with a weighted pendulum hanging from it, and a Medium Motor that nudges the pendulum to keep it swinging.
Every model you have built so far obeyed its numbers. You asked for 60 degrees and got 60 degrees. This one is different, and it is the first model in the course that will argue with you.
A pendulum has a rhythm of its own. Your program does not get to choose it. What your program has to do is find it, and push in time — and you will find it by trying, not by working it out.
By the end, your pendulum will swing wide and steady off tiny nudges, and you will have found the one number that makes it work.
For nearly three hundred years, the most accurate clock in the world was a weight on a rod. Open an old wall clock and there it is behind the glass: a brass disc, swinging, tick, tock, tick.
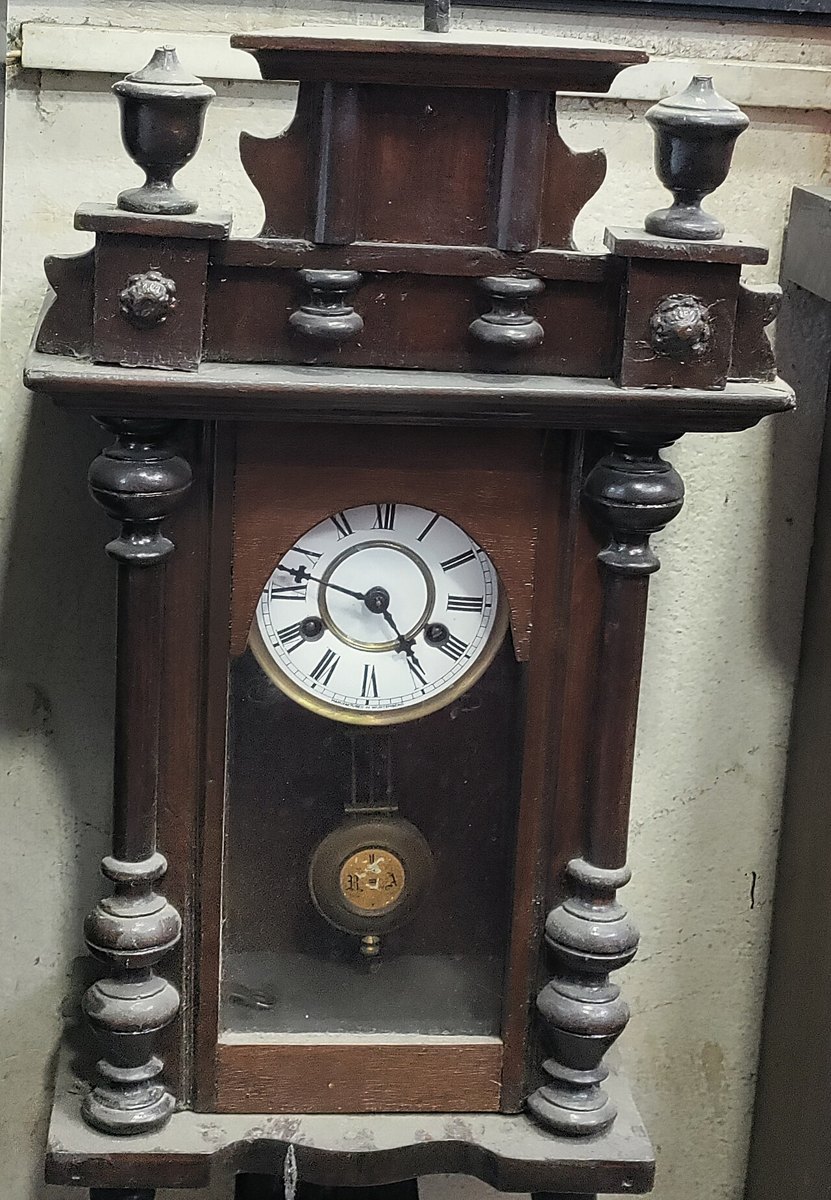
A pendulum is useful because it is stubborn. Give one a small push or a big one and it takes the same time to swing across and back. That time is called its period, and a clock counts periods the way you would count footsteps.
Here is the part that surprises everyone. The period depends on the pendulum’s length — and on nothing else you can easily change. Not how heavy the bob is. Not how far you pull it back. Make it longer and it swings slower; that is the whole story, and it is why a grandfather clock has to be tall.
You already know this in your body. On a playground swing you do not kick randomly. You kick in time, and small kicks in time build a huge swing. Kick out of time and you stop dead.
A clock’s pendulum would stop within a minute if nothing pushed it — air and friction take a little energy from every swing. So every pendulum clock has a mechanism that gives it a tiny shove, once per swing, at exactly the right moment. That shove is where the ticking noise comes from.
A small push at the right moment beats a big push at the wrong one. Get the timing wrong and you are not helping the swing — you are fighting it.
Some mechanisms take their rhythm from the motor. A pendulum does not. It has its own, and your program has to match it.
| Kind of mechanism | Who decides the rhythm |
|---|---|
| A wiper, a saw, a fan arm — driven directly by the motor | The motor. Speed it up and the mechanism goes faster. Simple. |
| A pendulum, a swing, a bouncing spring | The mechanism. It has one rate it likes. Push at that rate and the swing grows; push at any other and it fights you. |
The block that lets you choose when rather than how much is one you already have.
wait (0.5) seconds
Up to now a wait block has been dead time: somewhere for the program to sit while a motor ran on. Here it is doing real work. Change 0.5 to 0.4 and the whole behaviour of the machine changes, even though no motor block moved.
The wheel turns at a steady rate and the slider does not. Watch the two ends: it stops dead at both of them without the motor ever stopping.
When a machine has a rhythm of its own, the program’s job is to fit in with it, not to overrule it.
A motor does exactly one thing: it goes round. Everything that wipes, saws, pumps, nods or waves is a mechanism converting that rotation into oscillation — a movement that goes one way, stops, and comes back.
Put a pin near the edge of a turning wheel and connect a rod from the pin to something that can only slide in a straight line. The wheel keeps turning one way; the slider goes out, stops, comes back and stops, once per revolution.
A crank with the rod attached to a pivoting arm rather than a slider gives a rocking motion instead of a sliding one. Same mechanism, and it is how a windscreen wiper works.
The wheel turns at a steady rate and the slider does not. Watch the two ends: it stops dead at both of them without the motor ever stopping.
A pendulum swings at a rhythm of its own, and that rhythm is set by exactly one thing you can control: its length. Longer means slower. Specifically the period goes as the square root of the length, so making it four times as long makes each swing twice as slow.
Two things students expect to matter and which do not:
This is worth meeting because it is the first mechanism in the course whose timing is not yours to program. If a nodding or swinging model has to keep a particular beat, you change its geometry, not its code.
| Rhythm set by | To change it | |
|---|---|---|
| Crank mechanism | the motor | change the motor speed — see Motor speed |
| Pendulum | the mechanism | change its length |
Push a free-swinging thing at its own rhythm and the swings grow — that is resonance, and it is how a child on a swing goes higher without anybody pushing harder. Push at the wrong rhythm and you fight it. A model that has to swing widely is far easier to build by matching the push to the mechanism than by pushing harder.
Engines run this backwards: the up-and-down of a piston becomes the round-and-round of a crankshaft, using exactly the linkage above. Sewing machines, pumps, saws and metronomes are all in the same family, and a clock is a pendulum used as a ruler for time.
Waiting is how a program gives the physical world time to catch up. There are two kinds, and choosing between them is one of the first real design decisions in robotics.
| Block | What it does |
|---|---|
wait (1) seconds | Holds the program for a fixed length of time, whatever else is happening. |
wait until <> | Holds the program until a condition becomes true — usually a sensor reading. |
Most sensors bring their own ready-made wait block, already coloured to match the sensor and with its comparison built in. They are all the same idea — hold here until this is true — and they live in the sensor’s own palette rather than in Control.
| Sensor | Block | Waits until |
|---|---|---|
| Touch | [1 v] wait until [pressed v] :: sensors | the button is pressed. The dropdown also offers released and bumped. |
| Colour | [3 v] wait until color is [red v] :: sensors | the surface underneath is that one of the eight colours. |
| Ultrasonic | [4 v] wait until distance [< v] (15) [cm v] :: sensors | something is nearer than 15 cm. Flip the dropdown to > to wait for something to move away. |
| Gyro | [2 v] wait until angle [< v] (45) :: sensors | the robot has turned past that angle. |
| Brick buttons | wait until [center v] button is [pressed v] :: sensors | somebody presses that button on the Brick. No port — it is built in. |
Some readings have no wait block of their own — reflected light, ambient light, the timer, and a motor’s degrees counted. For those, drop the matching boolean into the plain wait until from Control. It does exactly the same job:
wait until <[3 v] is reflected light intensity [< v] (30) %? :: sensors>
wait until <[3 v] is ambient light intensity [> v] (50) %? :: sensors>
wait until <(timer) > (5)>
wait until <([A v] degrees counted :: sensors) > (720)>
This is also the way to wait for two things at once, which no ready-made block can do — the sensor blocks each take one condition, but a boolean can be combined:
wait until <<[1 v] is pressed? :: sensors> or <(timer) > (5)>>
That one says “stop waiting when the button is pressed, or after five seconds, whichever comes first” — which is how you stop a wait hanging for ever when the thing you are waiting for never happens.
Two robots, the same job: drive up to the wall and stop. One waits two seconds; the other waits for the wall. Let it run several times — the interesting part is what happens on the second and third run.
wait for a length of time
wait for a condition
Each orange dash is where a previous timed run finished. The sensing robot has never left a second mark, because it has never stopped anywhere else.
The timed robot is not being careless. Two seconds is a perfectly good guess, and on the first run it may look exactly right. But a second covers a different distance on a fresh battery, on a dusty floor, or with a heavier load, so the robot finishes somewhere new every run — sometimes short, sometimes into the wall. The sensing robot has never had to guess.
Prefer waiting for a condition wherever a sensor can tell you. Keep timed waits for things with no sensor to check — letting a sound finish, or pausing so a person can watch.
A lift that waits three seconds for its doors is guessing; one that waits for the door sensor knows. The first eventually closes on somebody.
Say this back before moving on: “The pendulum’s speed comes from its length. All I can change is when I push.”
Find the parts with cables first. There are two.
| Part | What it is doing here |
|---|---|
| EV3 Intelligent Brick | Runs the program, and stands upright as the body of the clock. |
| Medium Motor | Gives the pendulum its nudge. The flat slab one, with the small red axle boss on the end face. It is the right choice here precisely because the job is light and quick — the opposite of the Walking Bot. |
Do this with the Brick switched off. You are about to need the answer.
Half of that number is the one you want. The pendulum passes the motor twice in each full swing, so a push at every pass happens twice per period.
Sensors go in ports 1, 2, 3, 4. Motors go in ports A, B, C, D. They are not interchangeable, and nothing will tell you politely if you swap them.
| Part | Port | Why this one |
|---|---|---|
| Medium Motor (nudges the pendulum) | A | One motor doing a job of its own takes A, and every program on this page says A. |
| Sensors | none | Nothing here watches the pendulum. The program is working blind and in time — which is exactly why the timing has to be right. |
Check your own build now:
Two routes, and either is fine. USB is the reliable one and the one to fall back on when a room’s Bluetooth is busy; Bluetooth leaves the robot free to move, which some models need.
Do these in order. Naming the Brick after you go looking for it in the list is how groups end up driving each other’s robots.
EV3 until somebody changes it.EV3.The two failures, every class, every time. The Brick has gone to sleep while you were building — press the centre button to wake it. Or you have paired with the group at the next table, which is why the name matters.
The long version, including Port View and how to read the port tiles, is in the Brick & Bluetooth guide.
Keep the cable off the pendulum. A cable resting against the swinging rod is a brake, and it will look exactly like bad timing. Route it behind the frame.
This section is the point of the lesson. Change one thing, run it, and watch for a full ten seconds before deciding — a swing that is growing looks a lot like one that is not, for the first few passes.
Step 5 is worth sitting with. Nothing in the program changed and the machine stopped working. The number in your wait block was never a fact about the program — it was a fact about the pendulum, written down in the program.
Shorter pendulum, faster swing, smaller wait. Longer pendulum, slower swing, bigger wait.
Build the model before you read any further. Everything after this is about making it do something, and none of it will make much sense with nothing on the table in front of you.
Use the viewer's own controls to zoom and turn pages. Fullscreen makes it big enough to build from.
Check the finished build against the picture before you switch anything on. A motor mounted the wrong way round is far easier to spot now than it is to debug later, when it looks like a program fault.
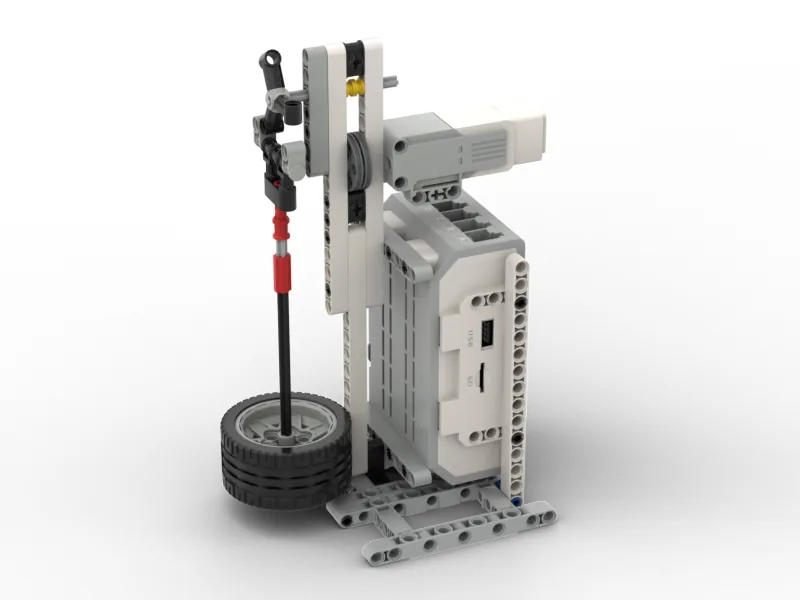
Six blocks. A small nudge out, the same nudge back, then a wait — and round again forever. Put half your measured period in the wait block to begin with.
when program starts :: events hat
[A v] set speed to (25) % :: motors
forever
  [A v] run [clockwise v] for (25) [degrees v] :: motors
  [A v] run [counterclockwise v] for (25) [degrees v] :: motors
  wait (0.5) seconds
end
Walk it in the order the Brick runs it:
What success looks like: start the pendulum by hand, run the program, and the swing should slowly grow rather than fade. You are looking for the nudge to arrive as the bob comes back towards the motor — never as it is moving away.
It almost certainly will not work first time. That is the lesson, not a failure. Your 0.5 was a starting guess. The next section is how you find the right one.
Work through them in order — each is harder than the last. The extra challenge comes after all three, and it is meant to make you plan before you build.
Keep it swinging. Tune the wait until your pendulum is still swinging strongly after a full sixty seconds, timed. A swing that starts big and slowly dies has not passed — you are looking for one that holds its size, or grows.
Build the swing up deliberately. Starting from a pendulum hanging still, your program must get it moving and grow the swing to its biggest, then hold it there rather than letting it keep growing until it hits something. You may change the size of the nudge but not the timing once you have found it.
Show the relationship. Move the bob to make the pendulum a different length, then measure the new period and re-tune the wait. Do this for three different lengths and record all three pairs of numbers. Then state the rule you found in one sentence: as the pendulum gets shorter, the wait must get what?
Build a clock that keeps itself going. Your pendulum must run for three unbroken minutes without the swing dying away and without anyone touching the model. It must also be able to recover: if somebody stops the pendulum with a hand, the machine should be able to get it going again on its own rather than needing to be restarted. Plan on paper before you build. Recovering is a genuinely different problem from keeping going — a still pendulum and a swinging one need different treatment from the same program — so work out what could get a stopped pendulum moving before you write anything. Two questions when you demonstrate it. What sets your pendulum's period, and how do you know it is not the weight of the bob? And why does a nudge at the wrong moment slow the swing instead of just helping less?