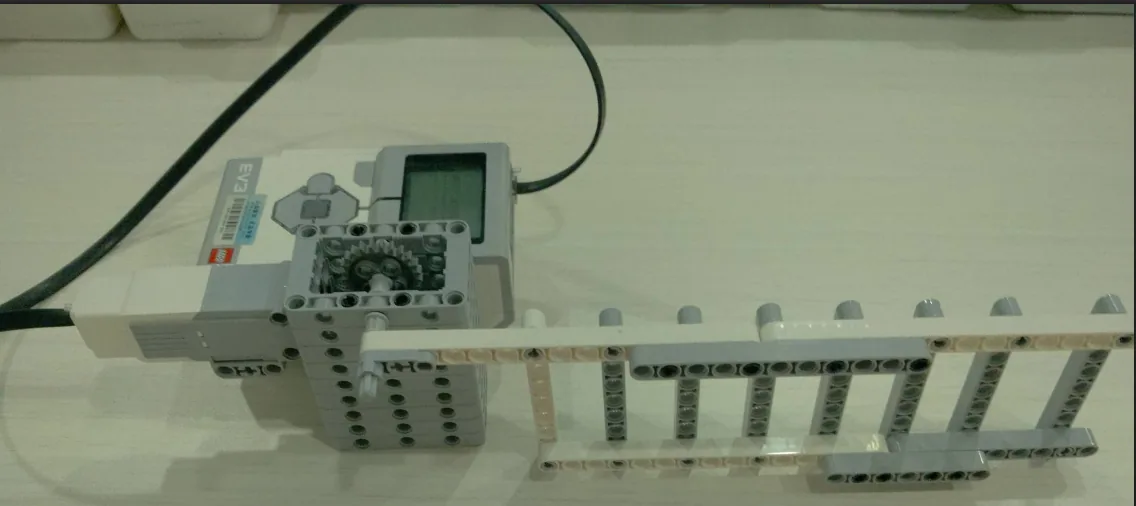
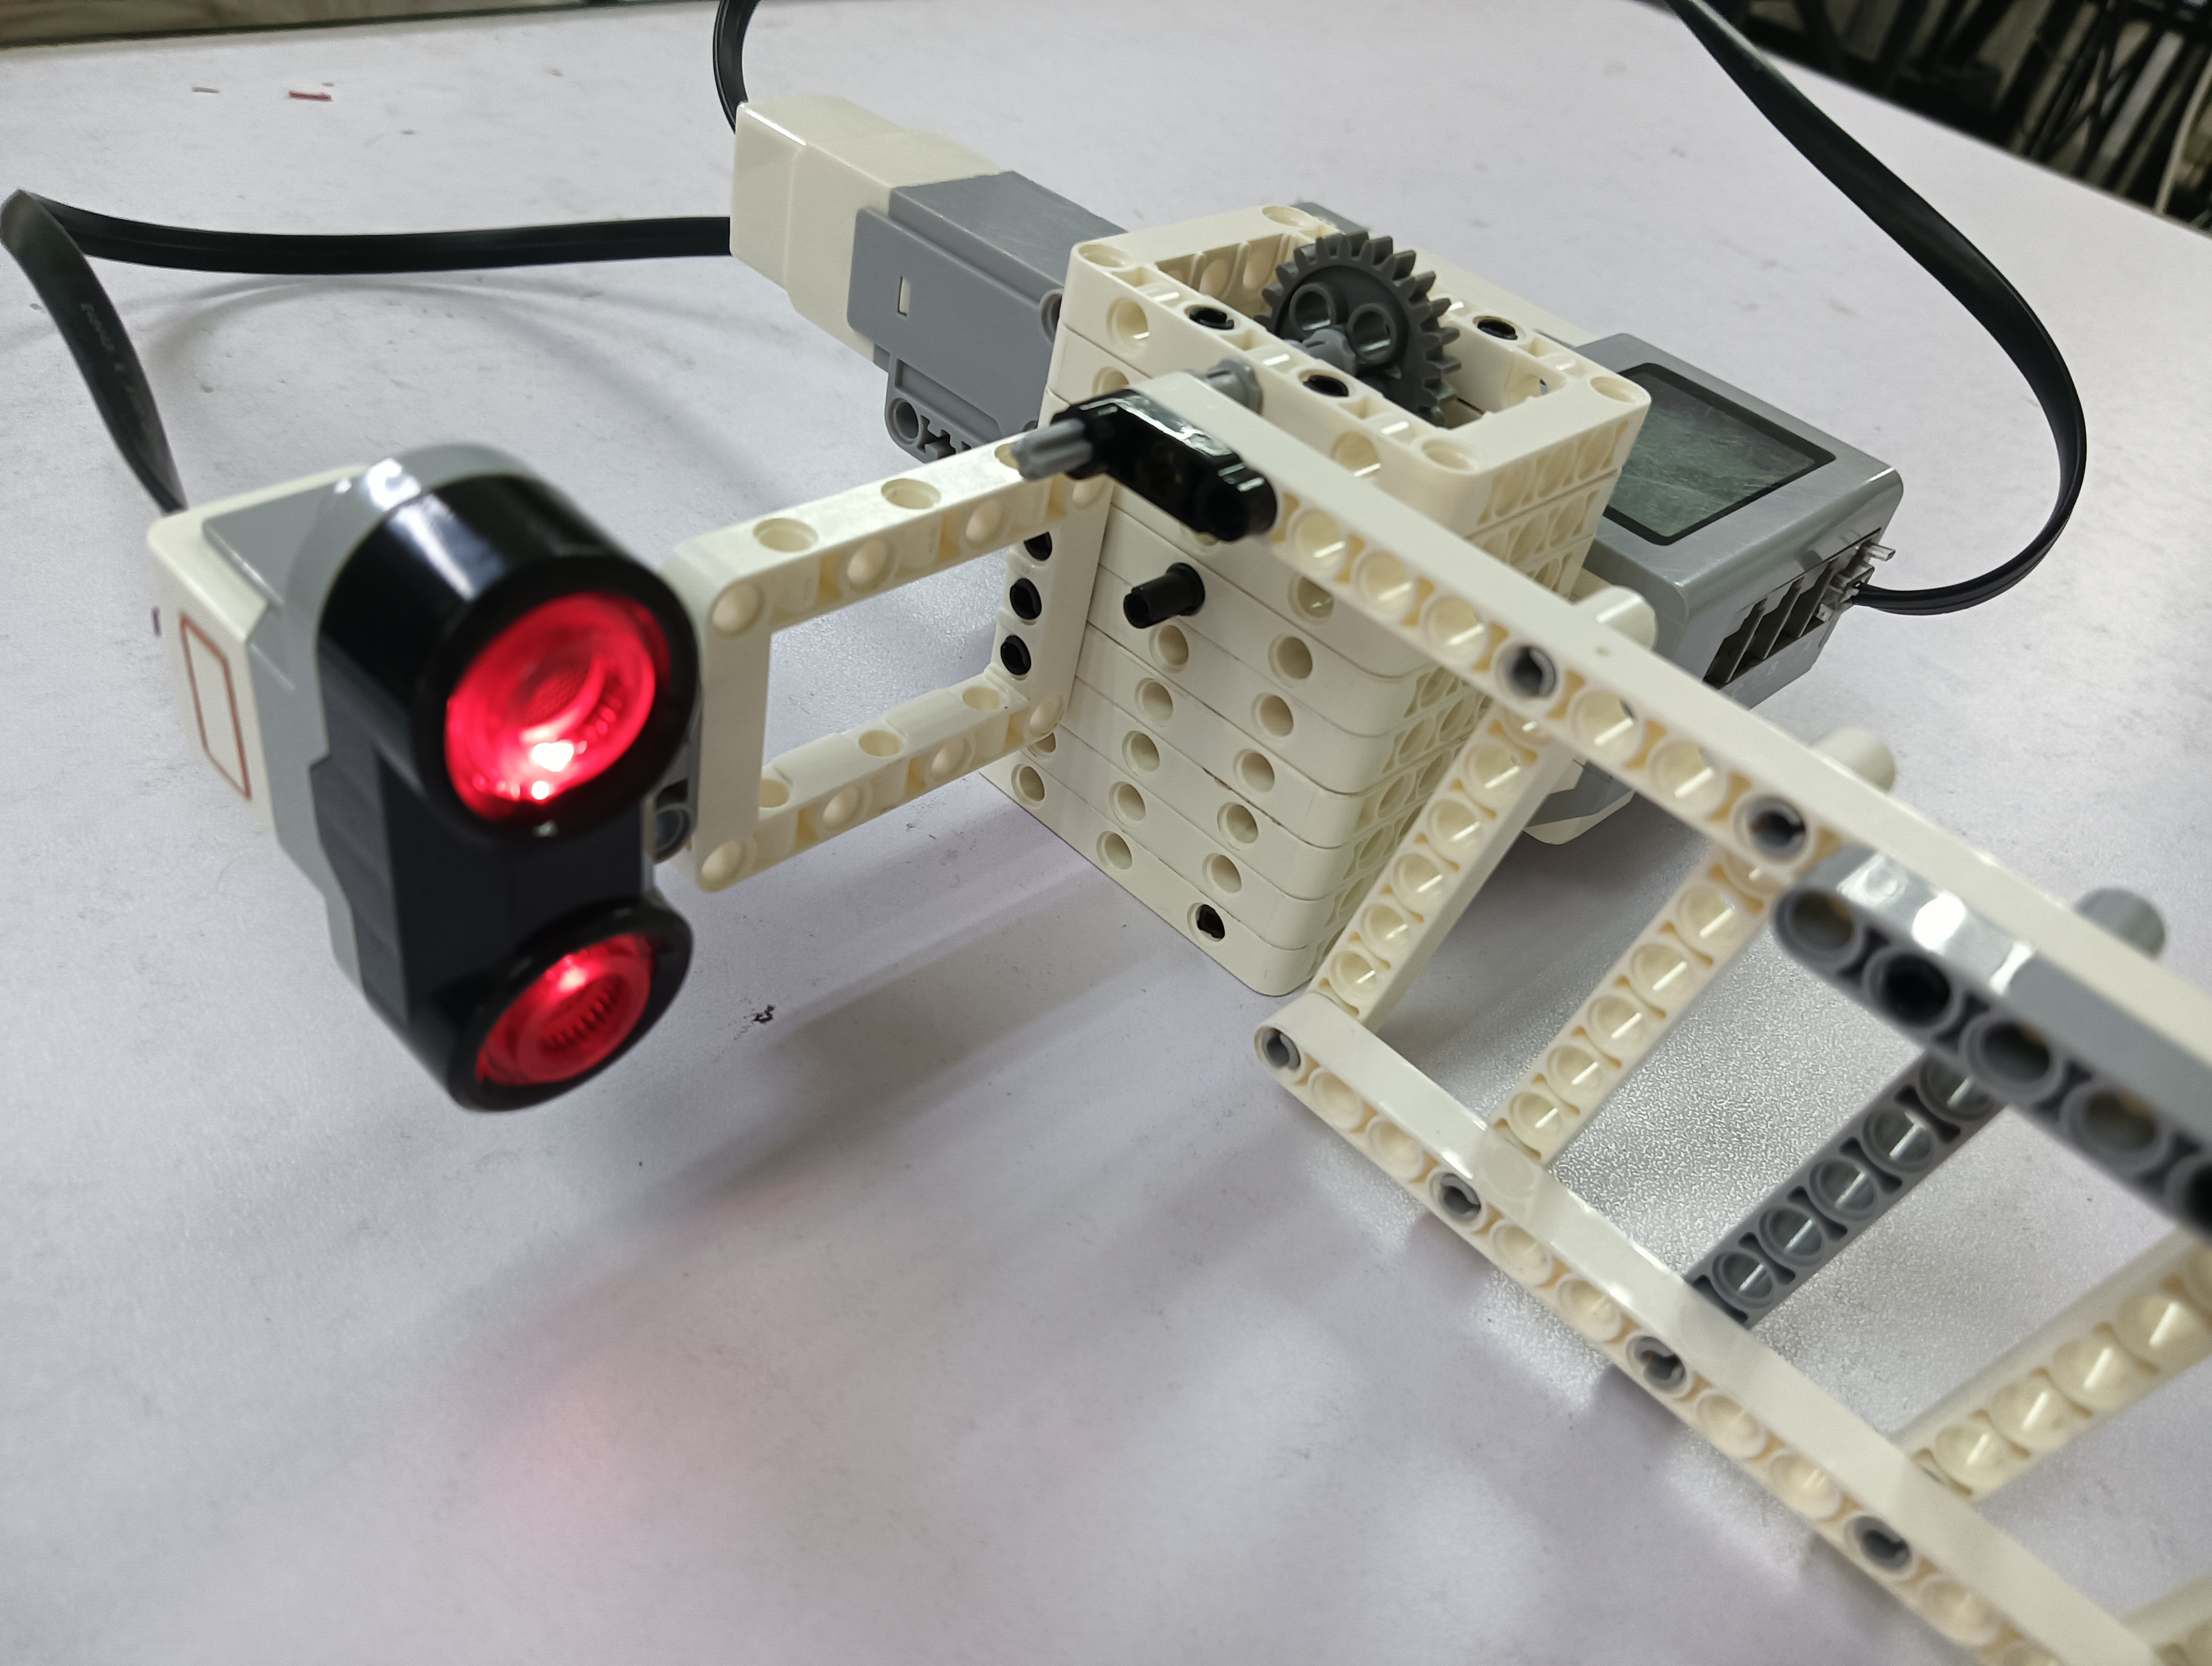
The Auto Gate: a barrier arm on a post, geared to a Medium Motor, that lifts to let traffic through and lowers to stop it.
You have made models beep before. The Ferris Wheel beeped, the Stegosaurus made a noise on every step. In both cases the sound was decoration — pleasant, and it would not have mattered if it arrived slightly late.
A barrier is different. Its sound is a warning, and a warning that arrives after the arm has already moved is not a warning. It is an announcement.
So today’s question is not which sound, or how loud. It is: while the sound plays, what is the rest of the program doing?
In the real world 5 min
Where you have seen it
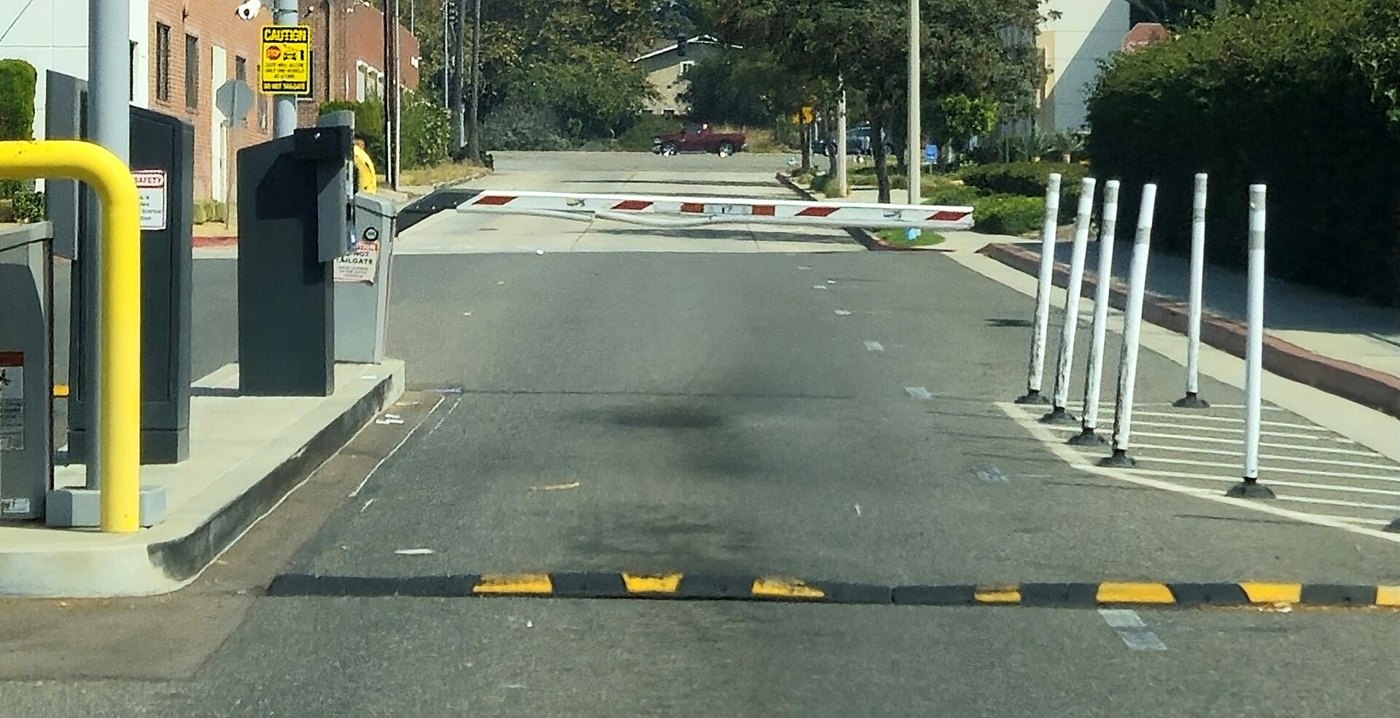
The arm at the entrance to every shopping-mall car park where you live. The toll plazas on the PLUS highway. The gate at your own school. They all do the same thing: a hinged arm across a road, up to let you in, down to keep you out.
A boom barrier in its closed position at a car park exit. Photo: Epolk / Wikimedia Commons (CC BY-SA 4.0).
Why it is built that way
The arm is a lever turning about a pivot at the post. All its weight hangs out on one side, so the further out the weight sits the harder the motor must work to lift it — that turning effort is torque, which you met with the Walking Bot.
Real barriers cheat. They bolt a lump of metal on the short side of the pivot so the two sides nearly balance, and then a small motor can lift a long arm. Look behind the post next time you are at a car park; the counterweight is usually right there.
And a barrier only ever needs a quarter turn. Horizontal blocks the road, upright lets traffic through. It never spins, which is exactly why degrees — from Lesson 10 — is the right unit for it.
What would go wrong without it
At a railway level crossing the barriers do not simply drop. The lights flash and the alarm sounds first, for several seconds, and only then does the arm come down. Those seconds exist because a car travelling towards the crossing needs time to stop.
Reverse the order and you have a machine that tells people about a danger they are already in. The sound has not become useless — it has become worse than useless, because it sounds like a working safety system.
A warning has to finish before the thing it is warning about starts. Otherwise it is not a warning, it is a sound effect.
The main concept — a block that waits, and one that does not 6 min
Two sound blocks. They play the same file, at the same volume, for the same length of time. The difference is what happens underneath them.
Block
What the rest of the program does meanwhile
play sound [Information / Blip 1 v] until done :: sound
Waits. Nothing below this block runs until the sound has finished playing.
start sound [Information / Blip 1 v] :: sound
Carries straight on. The sound plays while the next blocks are already running.
You have met this shape before without it having a name. In Lesson 4 the Ferris Wheel’s start motor let the program run on while the wheel turned, and run for 2 rotations made it wait. Sound works exactly the same way, and so will most things you meet later.
Neither block is the better one. A level crossing wants until done for the warning before the arm moves, and start sound for the alarm that carries on ringing while it comes down. Same machine, both blocks, chosen by what has to happen at the same time.
play sound until done
when program starts
play sound Communication / Hello until done
A run clockwise for 1rotations
start sound
start sound Communication / Hello
A run clockwise for 1rotations
0.0suntil done0.0sstart sound
until done: warn first, then movestart sound: warn while moving
Two programs. Same sound, same movement — only the sound block is different.The sound is playing on both. On the left the program is waiting for it, so the barrier has not moved. On the right the barrier is already lifting.The sound has finished. Only now does the left barrier lift — the right one finished a moment ago, sound and movement together.Both played the warning and both lifted the barrier. One took twice as long to do it.Finished. Neither program is wrong — they are answers to two different questions.
stopped
Watch the barriers, not the clock. On the left the warning finishes before anything moves; on the right it sounds while the barrier lifts.
Ask “does the next block have to wait for this one?” Until done means yes. Start means no.
▶Sound, the Medium Motor, the screen, and leversThe full reference for the four parts this model needs. Open whichever is not clear yet.Show meHide
ComponentOutput5 min
Sound and beeps
The Brick has a small speaker. It can play one of the built-in sound files, or beep a note you choose. Sound is what makes a machine feel finished — and it is also a way for the robot to tell you something without you having to look at it.
The speaker is in the side of the Brick. It is the one output a person notices without looking at the robot.
Blocks reference
Block
What it does
play sound [Communication / Hello v] until done :: sound
Plays the sound and waits for it to finish before the next block runs.
start sound [Communication / Hello v] :: sound
Starts the sound and moves straight on to the next block, so the sound plays while the robot keeps working.
play beep (60) for (0.5) seconds :: sound
Plays a single note for a set time — useful for short alerts. The number is a note, not a volume: bigger means higher.
set volume to (100) % :: sound
Sets how loud everything after it will be. Worth putting at the top of a program — the Brick remembers the last volume it was given, even from somebody else’s program.
stop all sounds :: sound
Cuts off anything that is still playing, including a long sound started earlier.
Wait for it, or not
These two blocks play the very same file. The difference is what the rest of the program does while it plays — so it cannot be heard on its own, only seen. Here are both, each lifting a barrier.
play sound until done
when program starts
play sound Communication / Hello until done
A run clockwise for 1rotations
start sound
start sound Communication / Hello
A run clockwise for 1rotations
0.0suntil done0.0sstart sound
until done: warn first, then movestart sound: warn while moving
Two programs. Same sound, same movement — only the sound block is different.The sound is playing on both. On the left the program is waiting for it, so the barrier has not moved. On the right the barrier is already lifting.The sound has finished. Only now does the left barrier lift — the right one finished a moment ago, sound and movement together.Both played the warning and both lifted the barrier. One took twice as long to do it.Finished. Neither program is wrong — they are answers to two different questions.
stopped
Watch the barriers, not the clock. On the left the warning finishes before anything moves; on the right it sounds while the barrier lifts.
The bars underneath are when the speaker was on and when the motor was turning. On the left they never overlap: the program is stuck at the sound block until the file has finished, and only then does the barrier lift. On the right they overlap almost completely, and the whole job is done in half the time.
play sound until done — everything stops and waits. Use it for a warning that must be heard before something moves.
start sound — the sound and the movement happen together. Use it when the noise belongs to the movement, like a motor whirring as an arm lifts.
Why it matters
Real machines warn before they move, not after: a lift chimes before the doors close, a reversing lorry beeps while it rolls back, a level crossing sounds before the barrier drops. Getting the order right is the difference between a warning and an apology.
ComponentMotion5 min
The Medium Motor
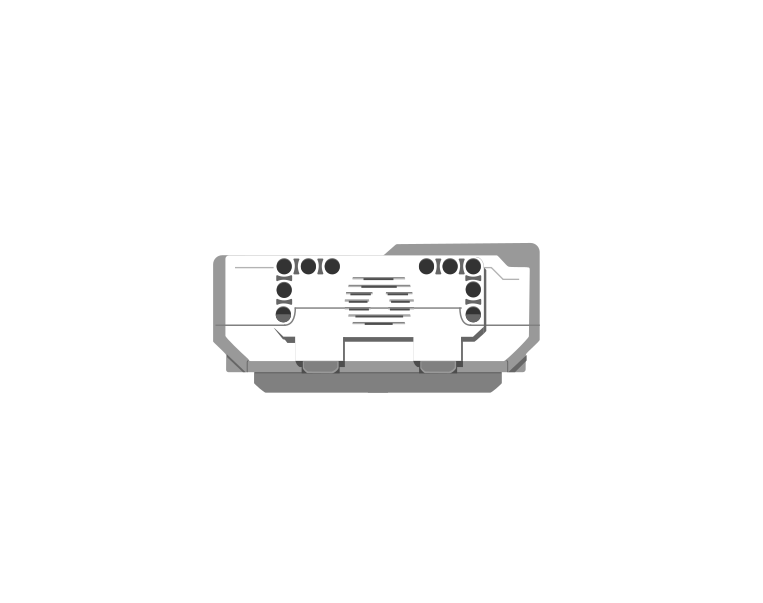
The Medium Motor is the smaller of the two EV3 motors. It is quick and light rather than strong, which makes it the right choice for anything that has to move a part of the robot rather than the whole robot — a gate arm, a pair of jaws, a winch, a pointer.
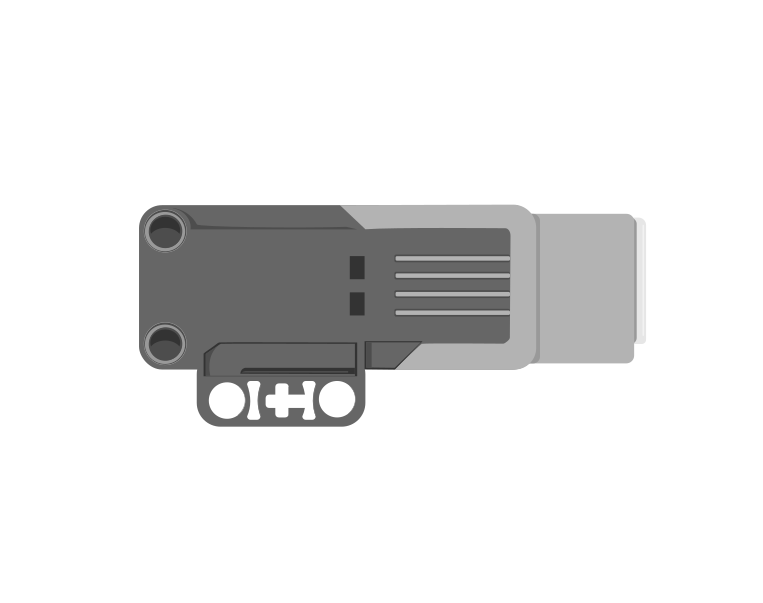
side
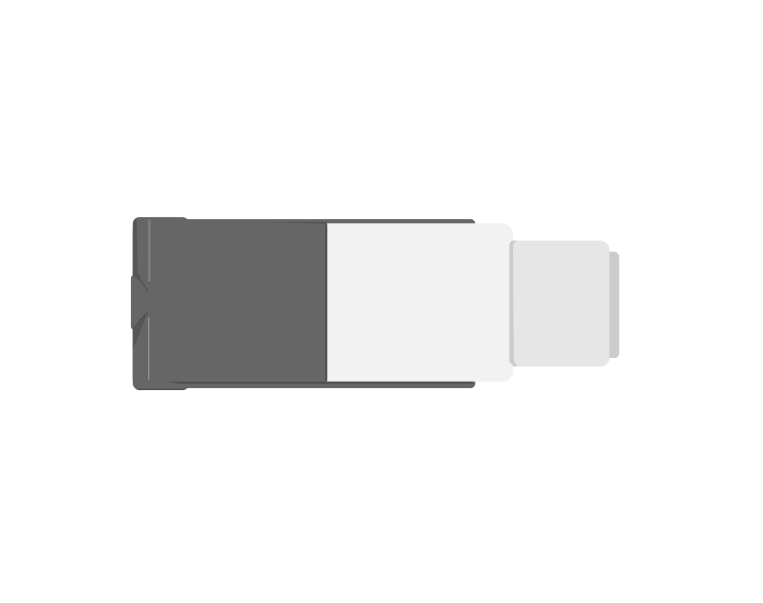
from above
The Medium Motor. The output shaft is the part that turns — everything the motor drives is attached to it, and every rotation you ask for is a rotation of that shaft.
Blocks reference
Block
What it does
[A v] run [clockwise v] for (1) [rotations v] :: motors
Turns the motor a measured amount, then stops. One rotation is one full turn of the motor shaft.
[A v] run [clockwise v] for (90) [degrees v] :: motors
The same idea, but in degrees — useful when a quarter or a half turn is what the mechanism needs. 360 degrees is one rotation.
[A v] run [clockwise v] for (2) [seconds v] :: motors
Turns the motor for a length of time and then stops, whatever the shaft managed to do in it. The one measurement that always finishes.
[A v] set speed to (50) % :: motors
Sets how fast the motor will run from now on. It does not start the motor by itself.
[A v] start motor [clockwise v] :: motors
Starts the motor turning and moves straight on to the next block. It keeps going until something stops it.
[A v] stop motor :: motors
Stops the motor.
Measured, or not measured
These two look similar and behave completely differently, and almost every early EV3 bug comes from picking the wrong one. Watch both run the same job, over and over.
when program starts
A run clockwise for 1rotations
versus
A start motor clockwise
wait 1 seconds
A stop motor
0°measured0°timed1run
Measured: on the mark, againTimed: 48° off the mark
Both programs begin. Both shafts are on the black target mark.Both motors are turning, and they look much the same.Stopped. The measured motor is back on the target; the timed one is wherever a second happened to take it.Finished — it will run again in a moment.
both stopped
Let it loop a few times. The left dial keeps landing on the same mark; the right one leaves a new mark almost every run — that scatter is what “not repeatable” means.
The black mark is where the shaft should finish. The measured motor hits it every single run, because the program waits at that block until the motor has turned exactly that far. The timed motor is only running for a second — and a second covers a different amount depending on the battery, the friction and whatever the mechanism is carrying. Each orange dash is a run that finished somewhere it was not asked to.
run for () rotations is measured. Run it twice and you get the same movement twice.
start motor is not measured. It hands the motor its instruction and moves straight on, so how far the motor gets depends on how long it happens to be left running.
If a mechanism has to end up in a particular place — a gate that must finish upright, a jaw that must close fully — use the measured block.
The third one: run for () seconds
The dropdown at the end of the run block has a third setting, and it is the one that saves lifting mechanisms. for () seconds switches the block off a distance and onto a duration: it drives the motor for that long and then stops, whatever the shaft managed to do in the time.
That sounds strictly worse than a measured turn, and for most jobs it is. It matters because of what the measured block actually waits for. run for (90) degrees does not finish when 90 degrees’ worth of time has passed. It finishes when the shaft has turned 90 degrees — and if the mechanism runs out of travel first, the shaft never will.
Stalling, and the program that never moves on
Every arm, jaw and lift has a physical limit: a point where the mechanism reaches the top of its travel, or something in the build gets in the way. Push a motor into that limit and it stalls — the shaft stops turning and the motor sits there straining. The motor is fine and the program is spelled correctly. But the encoder has stopped counting, so a measured block that was told a bigger number is still waiting, and it will wait until the Brick is switched off.
Nothing after that block ever runs. Not the next motor block, not the sound, not the display, not the rest of the program. That is the whole failure, and it looks like a crash even though nothing has crashed.
when program starts :: events hat
[A v] set speed to (30) % :: motors
[A v] run [clockwise v] for (90) [degrees v] :: motors
[A v] reset degrees counted :: motors
write [HOME SET] at line (1) :: display
0°degrees counted90°what the block asked for0.0swaiting at that block
60° reached, 90° asked — waits for everrest of the program never runs
Same arm, same end stop at 60°. One number is different: this program asks for 90.It lifts, and at 60° the arm meets its stop. The shaft cannot turn any further, however hard the motor pushes.Stalled. The block was told 90 and the shaft says 60, so it is still waiting — and it will wait for as long as the Brick is switched on.The screen is still blank. Every block after the motor block is unreachable — the program has not crashed, it is waiting.Finished. One arm, one end stop, and three programs — only one of which is safe to leave running.
lifting
Watch the Brick screen, not the arm. HOME SET is the block after the motor block, so a blank screen means the program never got past it.
Compare the first two. The only difference between them is 45 and 90, the mechanism is identical, and one of them is a working program while the other locks up on the third block. Nothing in the listing distinguishes them — the end stop is a fact about the build, and the program has never heard of it.
This is the mistake almost every student makes the first time a Medium Motor lifts something. A lifting arm has a lowest position and a highest one; ask it to turn past either and the program hangs. It is worse than an ordinary bug, because the robot looks alive — the motor is still being driven, still buzzing, still hot — and the next block never comes.
Finding a home position by stalling on purpose
The fix turns the problem into the technique. You often do not know how many degrees it is to the top of an arm’s travel — it depends on the build, and it changes the moment somebody rebuilds it. So do not measure it. Drive the arm gently into its own end stop for a couple of seconds, and then declare that position to be zero:
when program starts :: events hat
[A v] set speed to (30) % :: motors
[A v] run [counterclockwise v] for (2) [seconds v] :: motors
[A v] reset degrees counted :: motors
write [HOME SET] at line (1) :: display
Three things make that work, and all three are deliberate:
Slowly. 20–30% is enough to reach the stop and gentle enough not to strain the gears or shake the build apart while it sits there.
Long enough. Pick a time comfortably longer than the arm needs — one to three seconds for most mechanisms. It stalls partway through and spends the remainder pressed against the stop, which is exactly what you want.
Then reset.reset degrees counted makes this position 0, so every measured move afterwards is measured from a place you know. Now run for (120) degrees is safe, because you know where it is starting from.
After that, use measured blocks for everything inside the travel and timed blocks whenever you are driving to a limit. The rule of thumb: if the movement ends against something solid, run for seconds.
Ports
A Medium Motor is normally plugged into port A or D, which leaves B and C free for the Large Motors that drive wheels. The letter in the block must match the port the cable is actually in — this is the single most common reason a program appears to do nothing at all.
ComponentOutput5 min
The Brick display
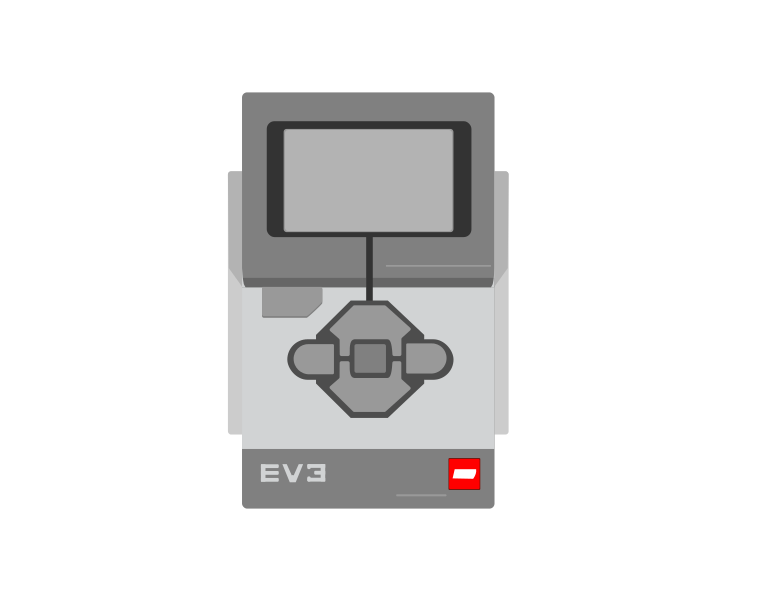
The Brick’s screen is a small black-and-white whiteboard. You can wipe it, draw one of the built-in pictures on it, or write your own words at a spot you choose. It is how the robot tells a person what it is doing.
The screen sits above the buttons on the face of the Brick. It is small and black-and-white, so short messages work and long ones do not.
Blocks reference
Block
What it does
clear display :: display
Wipes the screen blank, ready for something new.
display [Eyes / Neutral v] :: display
Draws a built-in picture chosen from a list — eyes, faces, arrows, symbols.
display [Eyes / Neutral v] for (2) seconds :: display
Draws the picture, holds the program for that long, and then carries on. Handy when a face should be seen before anything else happens.
write [Hello] at line (1) :: display
Writes your own text on one of the screen’s eight lines.
write [Hello] at x: (10) y: (40) with font [normal black v] :: display
Writes text at an exact spot instead of a line, and lets you choose the size. Use it when a message has to line up with something else on the screen.
Clear it, or write on top of what is there
The screen has no memory of whose writing is whose. It keeps every mark until something wipes it — including the marks left by the last run. Watch the same program with and without its clear display block.
with clear display
when program starts
clear display
display Eyes / Neutral
write GATE OPEN at line 7
without it
display Eyes / Neutral
write GATE OPEN at line 7
1lines · cleared1lines · not cleared1run
Cleared: one message, readableNot cleared: 1 messages on line 7
Both Bricks still show whatever was left on the screen when the last run ended.The left program clears its screen. The right one has no clear block, so the old writing stays where it is.Both draw the eyes.Both write this run's message on line 7 — and on the right it lands on top of the message that was already there.Finished. The right-hand screen keeps everything it has ever been told to write.
drawing
Let it loop two or three times. The left screen still reads cleanly; the right one is the same program with one block missing.
Both Bricks are told exactly the same thing. The left one wipes the screen first, so line 7 holds one message and reads correctly. The right one never wipes, so each new message is drawn over the last and the words turn into a smudge. This is why a program that seems to display nonsense is usually displaying the truth — several times over.
Where the writing goes
There are two blocks for writing text, and they describe where in two completely different ways. Watch one message move around the screen under both of them.
clear display
write READY at line 1
write READY at x: – y: – with font normal black
the screen is 178 pixels across and 128 down
0x · across0y · down1line
write [READY] at line (1). Line 1 is the top of the screen, hard against the left edge.The same block, with line 4. Same words, three lines further down — the lines are evenly spaced, about ten pixels apart.Line 8 is as far as the line block goes, and that is only part of the way down. The bottom of the screen is out of its reach.So here is the other block: write [READY] at x: (0) y: (0). That has landed in exactly the same place as line 1 — because x: 0 y: 0 IS the top-left corner.x is how far across, from the left. x: 90 moves it towards the middle.y is how far DOWN, from the top. y: 110 is near the bottom — a bigger y means lower, and that is the one that catches everybody.Finished. Two blocks, two ways of saying where — and one of them can reach the whole screen.
line 1
The arrows are the two numbers. The one along the top is x; the one down the side is y, and it counts downwards from the top edge.
Writing on a line
write [EV3] at line (1) is the simple one. You give it a line number and it puts the text there, starting hard against the left edge — you do not choose how far across, only how far down.
Line 1 is the top. The numbers count downwards, so line 2 is below line 1, not above it.
There are eight of them, each about ten pixels lower than the last. That means all eight sit in the upper part of the screen and the line block cannot reach the bottom at all.
One message per line. Two messages sent to the same line land on top of each other and turn into a smudge — put them on different lines, or clear the screen in between.
For most robots this is all you need: a status word on line 1, a reading on line 3, a warning on line 5. Pick your lines at the start and keep each one for one job, the way you would keep one colour of status light for one meaning.
Writing at x and y
write [EV3] at x: () y: () with font [] treats the screen as a grid of pixels — 178 across and 128 down — and lets you put the text anywhere on it.
x is how far across, from the left edge. x: 0 is the far left; x: 177 is the far right. Bigger x moves right, which is what everybody expects.
y is how far down, from the top edge. y: 0 is the very top; y: 127 is the bottom. Bigger y means lower — this is the one that catches people out, because on a graph at school a bigger y means higher.
The corner is 0, 0. x: 0 y: 0 is the top-left, and it puts the text in exactly the same place as at line 1 — the two blocks are describing the same screen.
The pair of numbers is the top-left corner of the text, not its middle. The letters go down and to the right from the point you name.
The block ends with a font dropdown, and normal black is the usual choice. A larger font makes the writing easier to read from across the room but takes more room across the screen, so fewer characters fit before the text runs off the edge.
Which one to use
Use lines for ordinary status messages — quick to write, impossible to get wrong, and eight of them is plenty for one robot.
Use x and y when the position itself matters: putting a label and its number side by side, lining a heading up over a reading, filling the lower part of the screen, or moving something across the screen as a value changes.
Putting a number on the screen
The text slot of either block will take a reporter, so a sensor value can be shown directly: drop (4 distance in cm) into the slot and the screen shows the reading. That is the EV3’s version of a print statement, and it is the fastest way to find out what a robot actually thinks it is seeing.
A bare number on its own is hard to read, though. To show DIST: 23 rather than 23, use the operator block join [DIST: ] () to glue the label to the value, and put the join into the write block’s text slot.
when program starts :: events hat
clear display :: display
forever
  write (join [DIST: ] ([4 v] distance in [cm v] :: sensors)) at line (1) :: display
end
Note the forever: a value written once is a value from the start of the program. To watch a reading change, the write block has to be inside a loop.
Advanced — a dashboard, not a number
Once one value is on the screen the rest follows, and the useful trick throughout is join: it glues two pieces of text together and hands the result to the write block. Anything that reports a value can go in either slot — a variable, a sensor, or another join.
A variable with a label on it
Counting is the classic case. A variable counts how many times the Touch Sensor has been pressed, and a bare 5 on the screen tells nobody anything — PRESSED: 5 tells them everything:
when program starts :: events hat
clear display :: display
set [count v] to (0) :: variables
forever
  wait until <[1 v] is pressed? :: sensors>
  change [count v] by (1) :: variables
  write (join [PRESSED: ] (count)) at line (1) :: display
  wait until <not <[1 v] is pressed? :: sensors>>
end
The two wait until blocks are what make it count presses rather than counting as fast as the loop runs while your finger is down. That is the Touch Sensor’s own lesson, but it shows up here because a counter on the screen is where you first notice it going wrong.
Several sensors, one line each
Give every reading its own line and keep it. A line that changes meaning halfway through a program is unreadable at a glance, which is the only speed a screen on a moving robot gets read at.
when program starts :: events hat
clear display :: display
forever
  write (join [DIST: ] ([4 v] distance in [cm v] :: sensors)) at line (2) :: display
  write (join [DEG: ] ([A v] degrees counted :: sensors)) at line (5) :: display
end
degrees counted is worth putting on the screen the first time you use it — it is the fastest way to find out whether a motor is turning as far as you think it is, and it is the block behind every “why did it stop early” question.
Turning a number into a word
Sensors report numbers, and people read words. The Colour Sensor reports 5; the person watching wants RED. A chain of if … then … else blocks does the translation, and it is worth doing once into a variable rather than in every write block:
if <([3 v] color :: sensors) = (5)> then
  set [name v] to [RED] :: variables
else
  if <([3 v] color :: sensors) = (4)> then
    set [name v] to [YELLOW] :: variables
  else
    set [name v] to [OTHER] :: variables
  end
end
write (join [COLOR: ] (name)) at line (4) :: display
The same shape turns a distance into a warning. Here the screen carries the number and what the number means, which is what lets somebody across the room tell whether the robot is about to hit something:
if <([4 v] distance in [cm v] :: sensors) < (10)> then
  set [status v] to [TOO CLOSE!] :: variables
else
  if <([4 v] distance in [cm v] :: sensors) < (30)> then
    set [status v] to [OBSTACLE FOUND] :: variables
  else
    set [status v] to [NOTHING FOUND] :: variables
  end
end
write (status) at line (3) :: display
Drive all four of those at once below. The screen is the real thing — five write blocks, five lines, and every one of them a join.
Drive the sensors and read the screen. Every line is one write block with a join in its text slot.
24 cm
180°
Colour Sensor5 → RED
Touch Sensor3 presses
Line
What goes in the write block
On the screen now
1
join "PRESSED: " (count)
PRESSED: 3
2
join "DIST: " (4 distance in cm)
DIST: 24
3
(status) — set by the if chain
OBSTACLE FOUND
4
join "COLOR: " (name)
COLOR: RED
5
join "DEG: " (A degrees counted)
DEG: 180
Line 4 says COLOR: RED, but the sensor only ever said 5. The if chain in between is what turns a number into a word.
Advanced — stopping the screen from flickering
The moment a reading goes inside a loop, one of two things goes wrong, and which one depends on where the clear display block went.
Almost everybody tries clear inside the loop first. It gives the right text — and a screen that blinks several times a second, because between the clear and the write there is genuinely nothing on the screen and the loop goes round faster than your eye.
So the clear gets moved to the start of the program, the blinking stops, and the words go wrong. Writing text paints only the characters it has and leaves everything past them exactly where it was. Write RED over YELLOW and the LOW is still there: the screen says REDLOW. Go the other way — yellow first, then red — and it looks fine, which is why this bug takes so long to pin down.
when program starts :: events hat
clear display :: display
forever
  write (name) at line (3) :: display
end
YELLOWwhat the sensor says—what the screen says0characters left behind
never blankleftovers survive
The Colour Sensor reads a colour and the name goes on line 3, over and over, inside a forever loop.Rock steady, and wrong. Writing paints only the characters it has, so the tail of the longer word before it is still sitting there.Nothing is misspelled and nothing is broken. Every red character is the tail of a longer word that was never wiped — RED over YELLOW reads REDLOW.Finished. Three programs, one screen, and only one of them is both steady and right.
waiting
Watch the bottom three rows rather than the Brick. They are what the screen is actually doing: old characters, new characters, and whatever survives.
The fix is to make the new text at least as long as the old one, and join already does that: pad it with spaces. RED plus three spaces is six characters — exactly enough to paint over YELLOW. Nothing is left behind, and nothing is ever blank.
write (join (name) [ ]) at line (3) :: display
Pad to the length of the longest thing that line can ever show. Six characters covers RED, BLUE and GREEN but not NOTHING FOUND — count the longest message, and add spaces to match. The same applies to numbers: DIST: 5 after DIST: 40 leaves a stray 0 on the end, so a line that shows a two-digit reading needs a trailing space.
Use clear-inside-the-loop when the whole screen changes at once and a flicker does not matter; use the padding trick whenever a value is being watched.
Advanced — a whole list on the screen
Once several values need showing, the line number becomes a counter and the values come out of a list: write item 1 at line 1, item 2 at line 2, and so on inside a repeat. That needs the list blocks rather than the display blocks, so it lives with them — Lists covers building one and reading it back item by item, and the loop that walks it is the same loop that fills the screen.
Why it matters
Machines in the real world tell you what they are doing: a microwave counts down, a lift shows its floor, a car dashboard warns you. A robot that shows WAITING and then OPEN is far easier to understand — and far easier to debug — than one that moves silently.
ComponentMechanics5 min
Levers — effort, load and pivot
A lever is a bar that turns about a point. Three things matter and no others: where the load is, where your effort goes, and where the pivot sits between or beside them.
Turning force, not just force
What a lever actually balances is torque — a force multiplied by how far it is from the pivot. A small force a long way out does the same job as a large force close in, which is why a spanner with a longer handle undoes a tighter bolt.
effort × effort arm = load × load arm
Both distances are measured from the pivot. That is the part people get wrong: the arm is not the length of the bar, it is the distance from the pivot to where the force is applied.
Move the pivot and watch both sides of that equation change.
Drag the triangle, or use the arrow keys. The load never changes — only where you put the pivot.
12.0
10.6effort needed to balance×1.1force multiplied×1.1further your end travels
load end lifts12 × 44 = 10.6 × 50
The pivot is near the middle, so effort and load are close to equal. This is a seesaw: no force gained, no distance gained, and easy to reason about.
The same bargain again
The mechanical advantage — how much your force is multiplied — is just the ratio of the two arms. And exactly as with pulleys and gears, whatever you gain in force you pay for in distance: a lever that lets you lift with a third of the effort makes your end travel three times as far.
The three classes
Class
Arrangement
Examples
First
pivot in the middle, effort and load on opposite sides
seesaw, crowbar, scissors, a pair of pliers
Second
load in the middle, pivot at one end
wheelbarrow, nutcracker, a bottle opener
Third
effort in the middle, pivot at one end
tweezers, a fishing rod, your own forearm
A third-class lever always needs more effort than the load, which sounds useless until you notice what it buys: speed and reach. Your bicep pulls hard over a couple of centimetres and your hand travels half a metre quickly. A catapult arm and a robot’s throwing arm are the same idea.
Levers in a LEGO build
A motor plus a lever arm is the cheapest way to turn a small rotation into a big movement — or a weak motor into a strong push. Which one you get depends entirely on which side of the pivot the motor is.
The pivot has to be braced. A pivot pin in a single beam flexes under load, and the arm you carefully calculated stops being the arm you built.
Long arms magnify play as well as force. A wobbly 15-stud arm has a very wobbly tip.
Why it matters
Every gripper, every digger arm and every set of scales is a lever. So is a light switch, a car’s brake pedal and the claw on a claw machine. The question to ask of any of them is always the same: where is the pivot, and how far is each force from it?
Say this back before moving on: “Until done holds the program. Start lets it carry on.”
What’s in this build 4 min
Find the parts with cables. Two, as usual — but three things do work.
Part
What it is doing here
EV3 Intelligent Brick
Runs the program — and this time it is also the speaker and the screen. Both are built into it, so neither needs a port.
Medium Motor
Drives the barrier arm through a gear train. The flat slab one. Light and quick suits a barrier: it is not lifting much, and it wants to react.
Find the arm’s two positions by hand
Brick off. Same routine as the Folding Fan, for the same reason.
Turn the arm gently by hand down to horizontal — across the road. That is closed.
Now lift it gently to upright. That is open.
How much of a turn was that, at the arm? A quarter — about 90 degrees.
But the motor is geared to the arm, so the motor may have to turn much more than 90 degrees to move the arm 90. Watch the motor drum while you swing the arm and estimate how many motor turns one quarter-turn of the arm takes.
The number in your program is the motor’s degrees, not the arm’s. This trips up nearly everyone. If your gearing is 3:1 then a 90-degree arm lift needs roughly 270 degrees at the motor. Start with 90, watch what actually happens, and adjust.
Ports — and the rule 4 min
Sensors go in ports 1, 2, 3, 4. Motors go in ports A, B, C, D. They are not interchangeable, and nothing will tell you politely if you swap them.
Part
Port
Why this one
Medium Motor (lifts the arm)
A
One motor with a job of its own takes A, and every program on this page says A.
The speaker and the screen
none
Both are part of the Brick. There is nothing to plug in and no port to get wrong.
Sensors
none
Not today. A real barrier has a sensor that spots the car — that is what the mission is about.
Check your own build now:
Motor cable in port A — a letter, not a number.
Set the arm horizontal before every run. The program assumes it starts closed, and it has no way of checking.
Is the screen facing where a person would stand? The gate is telling somebody something, and it can only do that if they can see it.
Turn the volume up on the Brick. A warning nobody hears is the same problem as a warning that comes too late.
Connect the Brick 4 min
Two routes, and either is fine. USB is the reliable one and the one to fall back on when a room’s Bluetooth is busy; Bluetooth leaves the robot free to move, which some models need.
▶How to connect the BrickUSB and Bluetooth, step by step, with a photograph of every screen. Open it if you have not done this before — or if pairing is not working.Show meHide
USB — the reliable one
Switch the Brick on with the dark grey centre button.
Cable into the Brick’s PC port — the small square socket beside the numbered ports, not one of the numbered ones.
Other end into the computer.
Bluetooth — name it first
Do these in order. Naming the Brick after you go looking for it in the list is how groups end up driving each other’s robots.
Name your Brick. On the Brick: Settings (the spanner) → Brick Name. Type something nobody else will pick, then press the tick. Every Brick is called EV3 until somebody changes it.
Turn Bluetooth on. Settings → Bluetooth. Tick Bluetooth and Visibility. Leave iPhone/iPad/iPod unticked.
Connect from EV3 Classroom. Click the Brick icon at the top of the programming area, find your Brick by name, and click Connect.
Say yes on the Brick. It asks “Connect?” with the computer’s name — choose the tick, then accept the passkey, which is already 1234.
Where to read it. The name sits in the bar across the very top of the screen, on every screen — so you can check which Brick you are holding at any moment without going into a menu. This one is EV3VE. A Brick nobody has renamed says EV3.Step 3, and the reason step 1 exists. Three Bricks in range — read the name before you click Connect. Pairing with the wrong one is not an error: it works perfectly, on somebody else’s robot.
Step 2.Bluetooth switches the radio on; Visibility is what lets the computer find you. With Visibility off your Brick works perfectly and simply never appears in the list.Step 4. Look at the Brick. It asks whether to accept and names the computer. Choose the tick.Then the passkey, already 1234. Press the tick again and you are connected.
The two failures, every class, every time. The Brick has gone to sleep while you were building — press the centre button to wake it. Or you have paired with the group at the next table, which is why the name matters.
The long version, including Port View and how to read the port tiles, is in the Brick & Bluetooth guide.
The two usual failures. The Brick has gone to sleep while you were building — wake it. Or you have paired with the group behind you, because every Brick in the room is called EV3 — rename yours.
Confirm the connection 2 min
Check the Brick icon: connected, or not.
Check the port tiles. A motor on A, and nothing on 1, 2, 3 or 4.
The tile should read Medium Motor.
Swing the arm by hand and watch degrees counted change. Swing it from horizontal to upright and read the number — that is your real gearing, measured. Use it in the program instead of guessing.
Step 4 gives you the exact degrees your gate needs. Write it down and use it below.
Change it and test 8 min
One change at a time, and predict before each run. Reset the arm to horizontal before every single run — the program assumes it.
Change until done to start sound. Predict what a person standing at the gate now sees and hears. Run it. The beep and the lift happen together, and the warning has warned nobody.
Put it back, and now move the sound block below the motor block. Predict again. This is the worst of the three: the arm lifts in silence and then beeps at nobody.
Put it back, and add a second run counterclockwise for 90 degrees at the end, with a wait 3 seconds before it. That is the car passing through and the gate closing. Does the arm come back to exactly horizontal?
Change the closing speed to 80 %. Predict whether it still finishes in the same place. A barrier that slams is also a barrier that bounces.
Delete the clear display and run twice in a row. Watch what the screen says at the start of the second run.
Steps 1 and 2 are the lesson. The same three blocks, in three different arrangements, giving a safe machine, a useless one and a faintly ridiculous one. Order is not style. Order is the behaviour.
This is what you are building: the Auto Gate.
Build it 15 min
Build the model before you read any further. Everything after this is about making it do something, and none of it will make much sense with nothing on the table in front of you.
Use the viewer's own controls to zoom and turn pages. Fullscreen makes it big enough to build from.
Check the finished build against the picture before you switch anything on. A motor mounted the wrong way round is far easier to spot now than it is to debug later, when it looks like a program fault.
Make it move 10 min
Set the motor speed to 10%
When up button is pressed, gate will slowly open
When down button is pressed, gate will slowly close
Fullscreen it while you build — you can pause and scrub with the player's own controls.
Challenges 27 min
Work through them in order — each is harder than the last. The extra challenge comes after all three, and it is meant to make you plan before you build.
Challenge 1
When Up Button is pressed:
1. Set the motor speed to 30%
2. Play a sound "Information/Up", Gate will slowly open here for 4 second
3. Wait after 3 second, Play a sound "Information/Down", Gate will slowly close for 4 second.
Fullscreen it while you build — you can pause and scrub with the player's own controls.
Watch it done
Challenge 2
Add the ultrasonic sensor
- Set the motor speed 50%
- When Center button is pressed, if detect an object with using ultrasonic sensor less than 10 cm, gate open for 3 second. If no object detected, wait 1 second and close the gate.
Fullscreen it while you build — you can pause and scrub with the player's own controls.
Watch it done
Challenge 3
- Program an EV3 security gate that unlocks using the button sequence Up → Down → Left → Right.
- Using a variable step to track progress, ensure any wrong direction resets the code.
- Pressing the Center button checks the input: if correct, display "Correct", play sound "Okey-dokey", and open the gate and wait for 3 second to close the gate; if incorrect, display "Wrong" and play an "error" sound. Both outcomes must reset the system back to "Enter Password:".
Fullscreen it while you build — you can pause and scrub with the player's own controls.
Watch it done
Extra challenge
- Program an EV3 security gate that unlocks using the button sequence (Up → Down → Left → Right) using two variables: "step" to track passcode input and "attempt" to track failed tries.
- When the Center button is pressed with the correct password, display "Correct", play sound "Okey-dokey", and open the gate and wait for 3 second to close the gate.
- If incorrect increase attempt by 1 and reset step to 0. For attempts 1 through 4: Display "Wrong", play sound "Error", and return to "Enter Password:" to allow another try.
- On the 5th failed attempt: Play sound "General alert", display "Locked Out", play sound "Boing", wait 1 second, reset attempt to 0, and stop and exit the program.