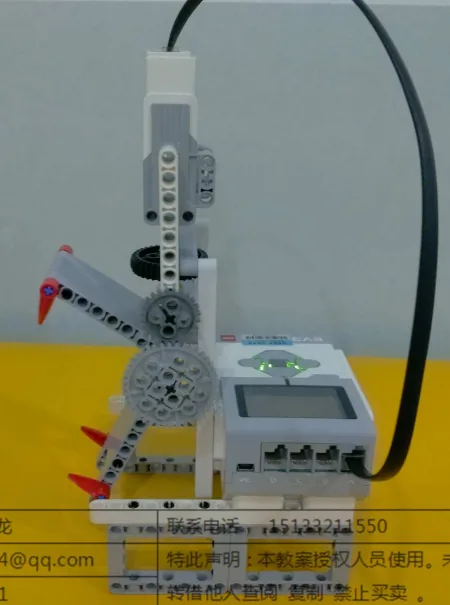
The Big Mouth Monster: a pair of jaws on a frame that open wide and snap shut, driven by a single motor.
It is a silly machine and a serious one at the same time. Silly, because it is a monster made of grey beams with red teeth. Serious, because it is the first model in this course that you would not want to put your finger into at the wrong moment.
The Timber Saw solved that with a switch you could reach from a safe distance. This one solves it a different way: the machine will tell you, from across the room, whether it is about to bite — using a part of the Brick you have not touched yet.
In the real world 5 min
Where you have seen it
A crocodile’s jaw is the most famous pair of jaws on the planet. the world has its own — the saltwater crocodile lives in the rivers and mangroves of Iceland and Finland, and it is not a small animal.
A Nile crocodile with its jaws open on a riverbank. Photo: Steve Slater / Wikimedia Commons (CC BY 2.0).
Why it is built that way
A jaw is a lever, like the barrier arm in Lesson 15 — but hinged the other way round. The muscle pulls close to the hinge and the teeth are far from it, which trades distance for force: the muscle moves a little, the jaw tip moves a lot.
That is why a crocodile’s bite is famously strong and its opening is famously weak. All the muscle is on the closing side. A person can hold a crocodile’s mouth shut with two hands, which is a true fact and a terrible idea.
What would go wrong without it
Here is the problem your model has. Between snaps, the jaws sit open and completely still. A machine that is waiting to move looks exactly like a machine that has finished moving.
You cannot tell them apart by looking, and the difference is the entire question of whether it is safe to reach in. Every dangerous machine in the world has solved this the same way: a light.
Still is not the same as finished. A machine that is armed and waiting has to say so.
The main concept — the status light 6 min
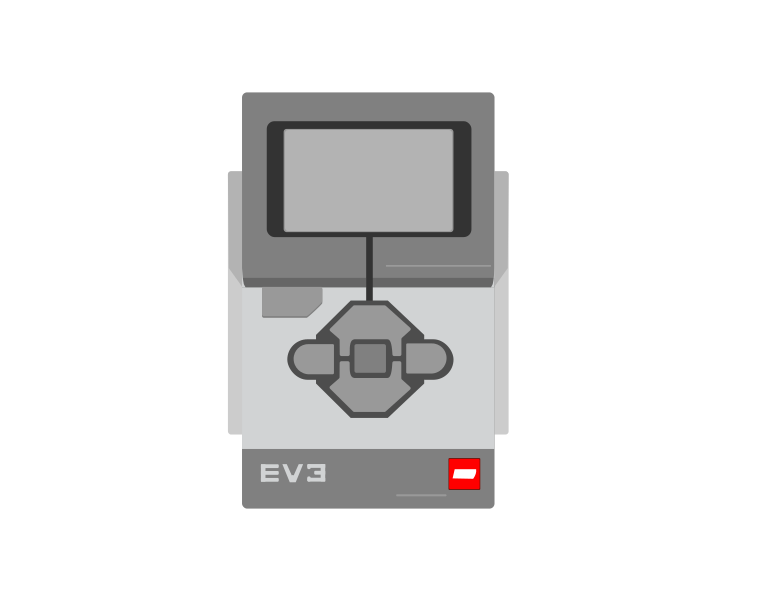
The ring of light around the Brick’s buttons is an output, just like the screen and the speaker. One block controls it.
set status light to [green v] :: display
One block, one dropdown. It changes the light and moves straight on — it never waits.
The dropdown holds six choices, and they are three colours twice:
Choice
What people already read it as
green / green pulse
Fine. Safe. Ready.
orange / orange pulse
Busy, working, or about to do something.
red / red pulse
Stop. Danger. Something is wrong.
The pulse versions flash slowly instead of staying lit. Use a pulse when the machine is in the middle of something and a steady colour when it has settled — a flashing light says “happening now” in a way a steady one does not.
You do not get to invent what the colours mean. Every traffic light, every kettle and every charger in the world has already taught your audience, and a robot that lights up green while it is about to snap is not being clever — it is lying.
when program starts
set status light to green
wait until is center button pressed?
set status light to orange pulse
A run clockwise for 1rotations
set status light to red
the ring around the buttons is the status light
The program sets the light green. Green means the robot is ready.It is now waiting for the centre button. The light still says ready — that is how you know it is waiting rather than stuck.Pressed. The light changes to orange pulse: the robot is about to move.The motor is running, and the ring is pulsing orange the whole way.Finished. Red, and nothing is moving — readable from across the room.Finished, and the light stays red until something sets it otherwise.
waiting
The light is the only output here you can read without looking at the screen — which is why it is worth setting deliberately at every stage of a program.
The screen needs to be read. The light only needs to be seen. That is why it is the right output for a warning.
▶The status light, and the Medium MotorThe full reference for both. Open it if either the light or the motor is not clear yet.Show meHide
ComponentOutput3 min
The Brick status light
The ring of light around the Brick’s buttons can be set to green, orange or red. It is the fastest possible way for a robot to say what it is doing — no reading required, visible from across the room.
The status light is the ring surrounding the buttons. It is visible across a room, which is what makes it useful for showing state at a glance.
Blocks reference
Block
What it does
set status light to [green v] :: display
Sets the ring to a chosen colour and carries straight on.
set status light to [red v] :: display
The same block with a different colour picked from the dropdown.
set status light to [orange pulse v] :: display
The three colours each have a pulse version, which flashes on and off until something changes it. A pulse reads as “busy”; a steady colour reads as “settled”.
A colour per state
The light is most useful when each colour means one thing, consistently, for the whole program. Watch a short program set it three times as it goes.
when program starts
set status light to green
wait until is center button pressed?
set status light to orange pulse
A run clockwise for 1rotations
set status light to red
the ring around the buttons is the status light
The program sets the light green. Green means the robot is ready.It is now waiting for the centre button. The light still says ready — that is how you know it is waiting rather than stuck.Pressed. The light changes to orange pulse: the robot is about to move.The motor is running, and the ring is pulsing orange the whole way.Finished. Red, and nothing is moving — readable from across the room.Finished, and the light stays red until something sets it otherwise.
waiting
The light is the only output here you can read without looking at the screen — which is why it is worth setting deliberately at every stage of a program.
Nothing in that program is about the light — it starts, waits for a button, turns a motor and stops. The light is simply told the truth at each stage, and the result is a robot whose state you can read without touching it. A common scheme:
Green — ready, or running normally.
Orange — waiting for something, or about to move. Pulsing orange is the natural choice here, because something is going on.
Red — stopped, blocked, or finished.
Why it matters
Machines everywhere signal with colour — traffic lights, a kettle’s power light, the charging light on a laptop. It also makes debugging far easier: set the light at each stage of a program and you can see how far it got without adding a single screen message.
ComponentMotion5 min
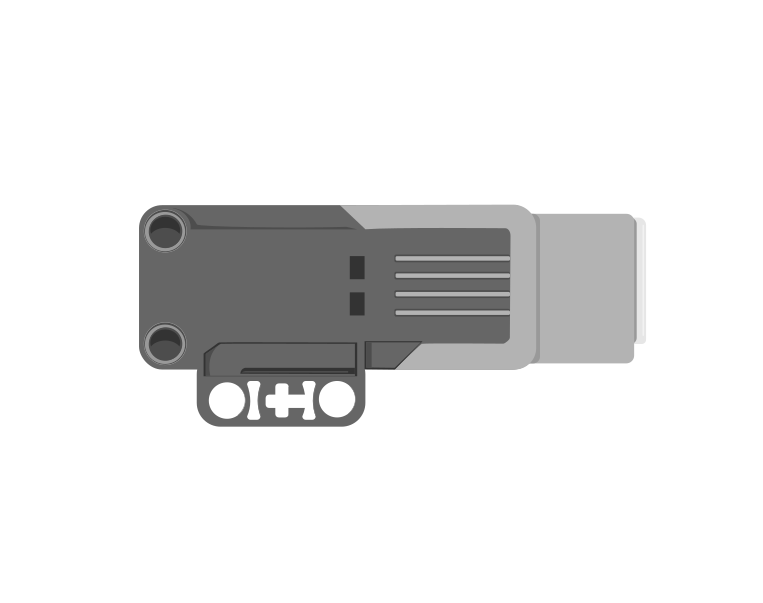
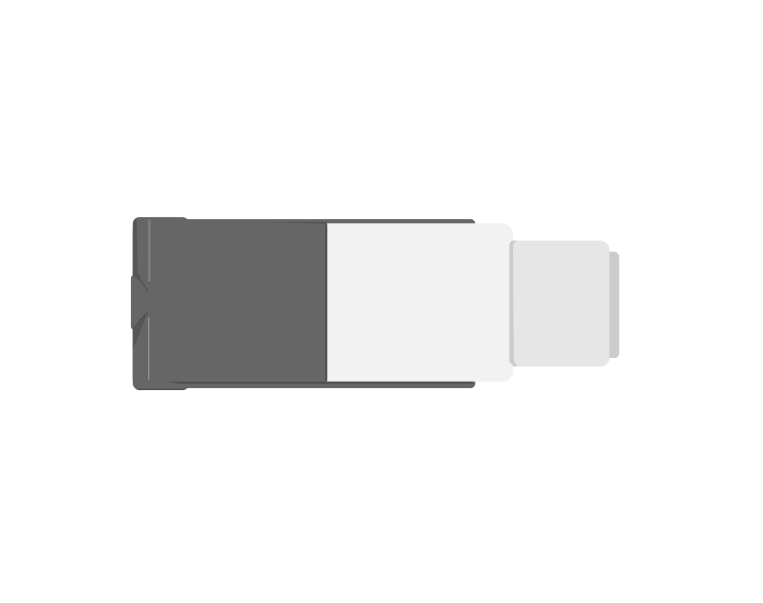
The Medium Motor
The Medium Motor is the smaller of the two EV3 motors. It is quick and light rather than strong, which makes it the right choice for anything that has to move a part of the robot rather than the whole robot — a gate arm, a pair of jaws, a winch, a pointer.
side
from above
The Medium Motor. The output shaft is the part that turns — everything the motor drives is attached to it, and every rotation you ask for is a rotation of that shaft.
Blocks reference
Block
What it does
[A v] run [clockwise v] for (1) [rotations v] :: motors
Turns the motor a measured amount, then stops. One rotation is one full turn of the motor shaft.
[A v] run [clockwise v] for (90) [degrees v] :: motors
The same idea, but in degrees — useful when a quarter or a half turn is what the mechanism needs. 360 degrees is one rotation.
[A v] run [clockwise v] for (2) [seconds v] :: motors
Turns the motor for a length of time and then stops, whatever the shaft managed to do in it. The one measurement that always finishes.
[A v] set speed to (50) % :: motors
Sets how fast the motor will run from now on. It does not start the motor by itself.
[A v] start motor [clockwise v] :: motors
Starts the motor turning and moves straight on to the next block. It keeps going until something stops it.
[A v] stop motor :: motors
Stops the motor.
Measured, or not measured
These two look similar and behave completely differently, and almost every early EV3 bug comes from picking the wrong one. Watch both run the same job, over and over.
when program starts
A run clockwise for 1rotations
versus
A start motor clockwise
wait 1 seconds
A stop motor
0°measured0°timed1run
Measured: on the mark, againTimed: 48° off the mark
Both programs begin. Both shafts are on the black target mark.Both motors are turning, and they look much the same.Stopped. The measured motor is back on the target; the timed one is wherever a second happened to take it.Finished — it will run again in a moment.
both stopped
Let it loop a few times. The left dial keeps landing on the same mark; the right one leaves a new mark almost every run — that scatter is what “not repeatable” means.
The black mark is where the shaft should finish. The measured motor hits it every single run, because the program waits at that block until the motor has turned exactly that far. The timed motor is only running for a second — and a second covers a different amount depending on the battery, the friction and whatever the mechanism is carrying. Each orange dash is a run that finished somewhere it was not asked to.
run for () rotations is measured. Run it twice and you get the same movement twice.
start motor is not measured. It hands the motor its instruction and moves straight on, so how far the motor gets depends on how long it happens to be left running.
If a mechanism has to end up in a particular place — a gate that must finish upright, a jaw that must close fully — use the measured block.
The third one: run for () seconds
The dropdown at the end of the run block has a third setting, and it is the one that saves lifting mechanisms. for () seconds switches the block off a distance and onto a duration: it drives the motor for that long and then stops, whatever the shaft managed to do in the time.
That sounds strictly worse than a measured turn, and for most jobs it is. It matters because of what the measured block actually waits for. run for (90) degrees does not finish when 90 degrees’ worth of time has passed. It finishes when the shaft has turned 90 degrees — and if the mechanism runs out of travel first, the shaft never will.
Stalling, and the program that never moves on
Every arm, jaw and lift has a physical limit: a point where the mechanism reaches the top of its travel, or something in the build gets in the way. Push a motor into that limit and it stalls — the shaft stops turning and the motor sits there straining. The motor is fine and the program is spelled correctly. But the encoder has stopped counting, so a measured block that was told a bigger number is still waiting, and it will wait until the Brick is switched off.
Nothing after that block ever runs. Not the next motor block, not the sound, not the display, not the rest of the program. That is the whole failure, and it looks like a crash even though nothing has crashed.
when program starts :: events hat
[A v] set speed to (30) % :: motors
[A v] run [clockwise v] for (90) [degrees v] :: motors
[A v] reset degrees counted :: motors
write [HOME SET] at line (1) :: display
0°degrees counted90°what the block asked for0.0swaiting at that block
60° reached, 90° asked — waits for everrest of the program never runs
Same arm, same end stop at 60°. One number is different: this program asks for 90.It lifts, and at 60° the arm meets its stop. The shaft cannot turn any further, however hard the motor pushes.Stalled. The block was told 90 and the shaft says 60, so it is still waiting — and it will wait for as long as the Brick is switched on.The screen is still blank. Every block after the motor block is unreachable — the program has not crashed, it is waiting.Finished. One arm, one end stop, and three programs — only one of which is safe to leave running.
lifting
Watch the Brick screen, not the arm. HOME SET is the block after the motor block, so a blank screen means the program never got past it.
Compare the first two. The only difference between them is 45 and 90, the mechanism is identical, and one of them is a working program while the other locks up on the third block. Nothing in the listing distinguishes them — the end stop is a fact about the build, and the program has never heard of it.
This is the mistake almost every student makes the first time a Medium Motor lifts something. A lifting arm has a lowest position and a highest one; ask it to turn past either and the program hangs. It is worse than an ordinary bug, because the robot looks alive — the motor is still being driven, still buzzing, still hot — and the next block never comes.
Finding a home position by stalling on purpose
The fix turns the problem into the technique. You often do not know how many degrees it is to the top of an arm’s travel — it depends on the build, and it changes the moment somebody rebuilds it. So do not measure it. Drive the arm gently into its own end stop for a couple of seconds, and then declare that position to be zero:
when program starts :: events hat
[A v] set speed to (30) % :: motors
[A v] run [counterclockwise v] for (2) [seconds v] :: motors
[A v] reset degrees counted :: motors
write [HOME SET] at line (1) :: display
Three things make that work, and all three are deliberate:
Slowly. 20–30% is enough to reach the stop and gentle enough not to strain the gears or shake the build apart while it sits there.
Long enough. Pick a time comfortably longer than the arm needs — one to three seconds for most mechanisms. It stalls partway through and spends the remainder pressed against the stop, which is exactly what you want.
Then reset.reset degrees counted makes this position 0, so every measured move afterwards is measured from a place you know. Now run for (120) degrees is safe, because you know where it is starting from.
After that, use measured blocks for everything inside the travel and timed blocks whenever you are driving to a limit. The rule of thumb: if the movement ends against something solid, run for seconds.
Ports
A Medium Motor is normally plugged into port A or D, which leaves B and C free for the Large Motors that drive wheels. The letter in the block must match the port the cable is actually in — this is the single most common reason a program appears to do nothing at all.
Say this back before moving on: “The light does not wait. It changes colour and the program carries straight on.”
What’s in this build 4 min
Two electronic parts — and today one of them is doing three jobs at once.
Part
What it is doing here
EV3 Intelligent Brick
Runs the program, and is the model’s head — the status light is on the Brick, so wherever the Brick faces is where the warning can be seen from.
Medium Motor
Works the jaw. The flat slab one, with the small red boss on the end face. Fast and light, which is what a snap needs.
Find the bite, by hand
Brick off. You need two numbers before you can program anything.
Open the jaw gently by hand as far as it will comfortably go. Stop at the first resistance — do not force the last few degrees.
Close it until the teeth just meet. Not past that: a jaw that closes too far is a jaw fighting itself, and the motor will happily keep pushing.
That travel, from open to shut, is your bite. Everything the motor is allowed to do lives inside it.
Now decide which direction of the motor closes the jaw. Turn the drum both ways and watch. Write down: clockwise closes, or counterclockwise closes?
Step 4 catches half the class. If you get it backwards, your monster will try to open past its stop instead of biting, and it will sound like it is breaking — because it is.
Ports — and the rule 4 min
Sensors go in ports 1, 2, 3, 4. Motors go in ports A, B, C, D. They are not interchangeable, and nothing will tell you politely if you swap them.
Part
Port
Why this one
Medium Motor (works the jaw)
A
A single working motor takes A, and every program on this page says A.
The status light
none
Built into the Brick, like the screen and the speaker. Three outputs, no cables between them.
Check your own build now:
Motor cable in port A — a letter, not a number.
Set the jaw open before every run. The program assumes it starts open and has no way to check.
Can you see the Brick’s buttons from where a person would stand? The status light is a ring around them. If the Brick is buried inside the model facing backwards, today’s whole idea is wasted.
Nothing loose near the jaw. It closes harder than you expect.
Connect the Brick 4 min
Two routes, and either is fine. USB is the reliable one and the one to fall back on when a room’s Bluetooth is busy; Bluetooth leaves the robot free to move, which some models need.
▶How to connect the BrickUSB and Bluetooth, step by step, with a photograph of every screen. Open it if you have not done this before — or if pairing is not working.Show meHide
USB — the reliable one
Switch the Brick on with the dark grey centre button.
Cable into the Brick’s PC port — the small square socket beside the numbered ports, not one of the numbered ones.
Other end into the computer.
Bluetooth — name it first
Do these in order. Naming the Brick after you go looking for it in the list is how groups end up driving each other’s robots.
Name your Brick. On the Brick: Settings (the spanner) → Brick Name. Type something nobody else will pick, then press the tick. Every Brick is called EV3 until somebody changes it.
Turn Bluetooth on. Settings → Bluetooth. Tick Bluetooth and Visibility. Leave iPhone/iPad/iPod unticked.
Connect from EV3 Classroom. Click the Brick icon at the top of the programming area, find your Brick by name, and click Connect.
Say yes on the Brick. It asks “Connect?” with the computer’s name — choose the tick, then accept the passkey, which is already 1234.
Where to read it. The name sits in the bar across the very top of the screen, on every screen — so you can check which Brick you are holding at any moment without going into a menu. This one is EV3VE. A Brick nobody has renamed says EV3.Step 3, and the reason step 1 exists. Three Bricks in range — read the name before you click Connect. Pairing with the wrong one is not an error: it works perfectly, on somebody else’s robot.
Step 2.Bluetooth switches the radio on; Visibility is what lets the computer find you. With Visibility off your Brick works perfectly and simply never appears in the list.Step 4. Look at the Brick. It asks whether to accept and names the computer. Choose the tick.Then the passkey, already 1234. Press the tick again and you are connected.
The two failures, every class, every time. The Brick has gone to sleep while you were building — press the centre button to wake it. Or you have paired with the group at the next table, which is why the name matters.
The long version, including Port View and how to read the port tiles, is in the Brick & Bluetooth guide.
One thing to know about the light before you start. When a program is running, the Brick lights the ring green all by itself. So a green ring at the start does not mean your program said green — it means the program is running. Your first block will take it over.
Confirm the connection 2 min
Check the Brick icon: connected, or not.
Check the port tiles. A Medium Motor on A, nothing on 1, 2, 3 or 4.
Open and close the jaw by hand and watch degrees counted move. Note the number at fully open and at fully shut — the difference between them is your bite in degrees, measured instead of guessed.
Use a number a little smaller than the one you measured. Stopping just short of the limit costs you nothing and saves the gears.
Change it and test 8 min
One change at a time, and predict before each run. For each one, ask the real question: would a person standing nearby be correctly warned?
Change the red to orange. Predict whether it still reads as a warning. Most people find orange says “busy” rather than “keep back” — useful, but not the same message.
Change it to red pulse. Run it and watch from across the room. Which catches your eye first, steady or flashing?
Now the important one. Delete the last block — the green at the end. Run it. The jaws stop, but the ring stays red for ever, so the machine is still warning you about something that finished. Nobody will trust the next warning.
Put it back, and move the red block to after the two motor blocks. Predict what a person sees. The jaw snaps while the light is still green — a lie, and a dangerous one.
Wrap the whole thing in a repeat (5) so it bites five times. Does your light sequence still make sense every time round?
Steps 3 and 4 are the lesson, and they are the two ways every warning light in the world fails: one that never goes off, and one that comes on too late. Both are worse than no light at all, because both teach the person watching to ignore it.
A signal is a promise. If it is ever wrong, it stops being a signal and becomes decoration.
Build it 15 min
Build the model before you read any further. Everything after this is about making it do something, and none of it will make much sense with nothing on the table in front of you.
Use the viewer's own controls to zoom and turn pages. Fullscreen makes it big enough to build from.
Check the finished build against the picture before you switch anything on. A motor mounted the wrong way round is far easier to spot now than it is to debug later, when it looks like a program fault.
Make it move 10 min
Seven blocks: safe, then a warning, then the bite, then safe again. Swap the two directions if you decided counterclockwise closes.
when program starts :: events hat
set status light to [green v] :: display
wait (2) seconds
set status light to [red v] :: display
[A v] run [clockwise v] for (60) [degrees v] :: motors
[A v] run [counterclockwise v] for (60) [degrees v] :: motors
set status light to [green v] :: display
Green while nothing is happening, red for the two blocks that move, and green again at the end.
Walk it in the order the Brick runs it:
set status light to green — safe to approach. The block does not wait; the program is already on the next line.
wait 2 seconds — nothing moves. This is the pause where a person decides whether to put a finger in, and the light is what they are deciding on.
set status light to red — the warning. Note that it comes before the movement, exactly like the Auto Gate’s beep.
run clockwise for 60 degrees — the jaw closes.
run counterclockwise for 60 degrees — and opens again. Equal and opposite, so it ends where it began.
set status light to green — safe again.
What success looks like: a green ring, a pause long enough to notice, the ring turning red, a clean snap and re-open, and green again. Stand back three metres and watch. Can you still tell what state it is in? That is the test.
If the jaw grinds at the closed end, 60 degrees is more than your bite. Take it down in steps of 10 until the teeth meet without straining.
This is what you are building: the Big Mouth Monster.
Challenges 27 min
Work through them in order — each is harder than the last. The extra challenge comes after all three, and it is meant to make you plan before you build.
Challenge 1
Add a third colour. Your monster must show orange while it is getting ready — after the green waiting period but before the jaw moves — so a person sees a clear green, then orange, then red before anything happens. Each colour must be on long enough to notice.
Challenge 2
Make the monster bite five times in a row, with the light correct on every single bite. Green between bites, red during each one, and green again at the very end. The trap is the last one: after the fifth bite the light must not be left red.
Challenge 3
Give it a fake-out. The monster should sometimes go red and then not bite, so a person cannot rely on the timing alone — but every real bite must still be preceded by red. Then answer in one sentence: does a warning that sometimes means nothing still count as a warning?
Extra challenge
Build a machine a stranger could stand next to safely.
Your monster must run unattended for at least a minute, biting when it chooses, and at every single moment its status light must correctly say whether it is safe to reach in. Somebody who has never seen your model must be able to work out the rule by watching for thirty seconds, without being told anything.
Plan on paper before you build. Write down every state your machine can be in, and beside each one the colour it will show. That list is your design; the blocks are just typing it in.
Two questions when you demonstrate it. Point to a moment where your light could be wrong — and if you believe there is none, say what makes you sure. And why is a warning light that is sometimes late worse than having no light at all?