The Hexapod: a robot that walks on six legs. The Brick is its body. It has one motor, and a crank that moves all six legs together. It walks across the table like an insect.
Most robots you built started straight away. They began when you pressed play on the computer. The Timber Saw in Lesson 16 waited for its Touch Sensor. This one waits too, but it needs no sensor. It stands still and tells you what it wants. It does nothing until a person presses a button on the Brick.
So the Brick itself can listen to a person. You need no extra parts.
In the real world 5 min
Where you have seen it
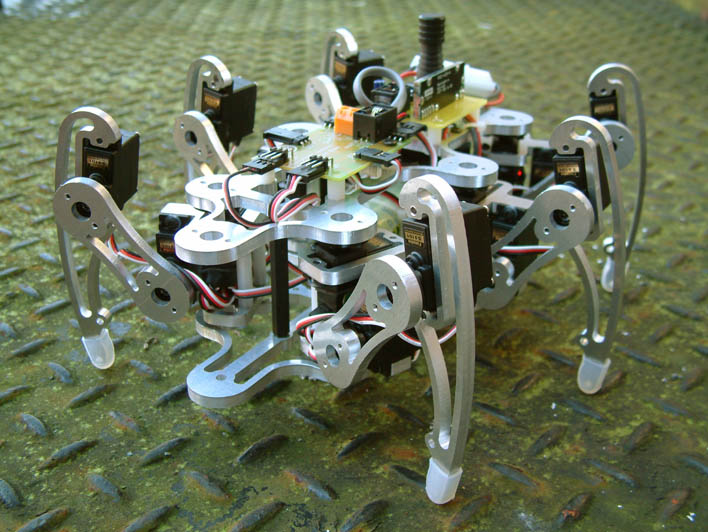
People use six-legged robots where wheels get stuck. They work in fallen-down buildings and in pipes. They even work on other planets. Engineers did not invent this idea. They copied it from ants and beetles. Insects have walked on rough ground for a very long time.
A six-legged hexapod walking robot. Photo: Wikimedia Commons (public domain).
Why it is built that way
Why six legs, not four? The answer is simple maths. A six-legged walker can always keep three feet on the ground. The other three swing forward. Three feet down make a tripod. A tripod cannot rock. So the robot is steady at every moment of every step. It never has to balance.
A two-legged robot must catch itself on every step. A hexapod never falls over at all. Watch your model from the side as it walks. Count the feet that are down.
What would go wrong without it
What if a machine starts the moment it is switched on? Nobody can get ready for it. Real machines wait for a person first. Lifts, rides and power tools all do this. The wait keeps people safe.
A robot that starts when you say so is safer and easier to use. It is better than one that starts when it is switched on.
The main concept — the program can wait for a person 6 min
The Brick’s five buttons are not only for finding files. A running program can read them too. They are the first input in this course with no sensor. You need no extra cable.
wait until stops the program until something becomes true. The blocks below it must wait. The blocks above it have already run.
You have used waits before. The Ferris Wheel waited for time: ten seconds. Time always passes. The Timber Saw waited for its Touch Sensor. This wait is like that one. It might never end. That is why it is useful. The robot is not counting down. It is watching for you.
when program starts
wait until is center button pressed?
A run clockwise for 1rotations
the other way to do it
when center button pressed
A run clockwise for 1rotations
The program has reached the wait block. It is not stuck — it is waiting, and nothing below it will run until the centre button goes down.Up is pressed. The button reporter changes to 4, but this wait is watching the centre button, so the program stays where it is.Right: 3. Still not the one.Centre: 2. The condition is true and the wait lets go.The motor runs. One press, at the moment a person chose.Finished. The robot did nothing at all until a person said so.
waiting for centre
A program parked on a wait block looks identical to a crashed one. This is why the status light or a line on the screen is worth setting before you wait.
▶The Brick buttons, and copying nature's mechanismsHow both work. Open it if you are not sure how to read a button, or how one motor moves six legs.Show meHide
ComponentSensing4 min
The Brick buttons
The Brick has five buttons of its own — up, down, left, right and centre. They need no sensor, no cable and no port, which makes them the easiest way to let a person tell the robot to do something.
Five buttons — up, down, left, right and centre — built into the Brick. No cable, no port, no sensor to plug in.
Blocks reference
Block
What it does
when [center v] button [pressed v] :: events hat
Starts a whole stack when that button is pressed.
wait until <is [center v] button pressed? :: sensors>
Holds an existing program until the button is pressed.
Press to begin
A program sitting on a wait block looks exactly like a program that has crashed. Watch one wait — including through two presses of the wrong button.
when program starts
wait until is center button pressed?
A run clockwise for 1rotations
the other way to do it
when center button pressed
A run clockwise for 1rotations
The program has reached the wait block. It is not stuck — it is waiting, and nothing below it will run until the centre button goes down.Up is pressed. The button reporter changes to 4, but this wait is watching the centre button, so the program stays where it is.Right: 3. Still not the one.Centre: 2. The condition is true and the wait lets go.The motor runs. One press, at the moment a person chose.Finished. The robot did nothing at all until a person said so.
waiting for centre
A program parked on a wait block looks identical to a crashed one. This is why the status light or a line on the screen is worth setting before you wait.
The wait is watching one button. Up and right change the (button) reading, and the program does not care. That reading is a number rather than a name: 0 for nothing, then 1 left, 2 centre, 3 right, 4 up, 5 down.
A hat, or a wait?
A hat gives the button its own separate stack, which can run at any time. Good for a control the user may press whenever they like.
A wait puts the button in the middle of a sequence. Good for “press to begin”, where nothing should happen before it.
Why it matters
Nearly every machine has a start button that is deliberately separate from switching the power on. A robot that begins moving the instant it is powered up is hard to set down and hard to test — one that waits for a press can be positioned first.
ComponentMechanics5 min
Biomimetic mechanisms
Biomimetics is copying a solution from nature. Not the look of an animal — the mechanism. Wheels are a human invention and a very good one, but nothing in nature has them, and there are places a walking machine goes that a wheeled one cannot.
The idea that has to land first
Nothing in a walking robot walks. There is a motor going round and round at a perfectly steady rate — the same motion that drives a car — and a linkage: a set of bars pinned together whose shape turns that circle into a footstep.
Push down, lift, swing forward, put down. No sensor decides when to do each part, and no block in the program says step. The bars do it, because of how long they are and where they are pinned.
1motor, turning one waydownnear foot½turn between the legs
rotation ina stride outno sensors, no code
One motor, turning steadily — the same motion that drives a wheel. Nothing here speeds up, slows down or reverses.Watch the foot rather than the crank. It is flat and slow along the ground, then lifts and swings quickly over the top.The two legs are half a turn apart, so one foot is always down. That is what stops the body dropping between steps.Finished. A steady circle in, a stride out — and not one part of it was told to walk.
still
The faint circle is the crank pin. The green outline is where the foot goes. They are driven by the same axle and they are not remotely the same shape — that difference is the linkage.
The two paths on that stage are the whole module. The crank pin travels a perfect circle. The foot travels something flat along the bottom and arched over the top — and they are driven by the same axle at the same speed. Everything between them is link lengths.
Why the foot path matters
Flat along the bottom. While the foot is on the ground it must travel in a straight line at a steady rate, or the body bounces and the robot shuffles instead of walking.
Lifted on the return. High enough to clear the ground and whatever is on it. A higher arch climbs better and wastes more effort.
Legs out of phase. With legs half a turn apart there is always a foot down, so the body never drops. Four or six legs in pairs is steadier still — which is why insects keep three feet down at a time and are almost impossible to knock over.
The famous designs are worth looking up by name: Jansen linkages (the strandbeest walkers), Klann linkages, and the four-bar “Chebyshev” walker. All of them are the same trick with different numbers.
Other things worth copying
In nature
As a mechanism
A caterpillar or inchworm
Anchor one end, contract, anchor the other, extend. Slow, and it climbs anything.
A fish tail or a snake
A chain of segments swung out of phase — a travelling wave that pushes backwards.
A bird wing
A four-bar linkage that flaps and feathers at once, from one rotation.
A hand or a claw
Linked fingers driven from a single input, so they close around a shape rather than onto a fixed position — a lever chain that adapts by itself.
Walking versus wheels
Be honest about the trade, because it is the engineering content of the whole topic. Wheels are far more efficient, far simpler and far faster on anything flat. Legs are worth their complexity when the ground is not flat: steps, rubble, soft sand, gaps. A walking machine chooses where to put its feet; a wheel has to roll over everything in between.
Building one out of LEGO
Link lengths are everything, and a stud out is a broken gait. Build one leg, get its foot path right, and only then copy it.
Legs need to be built in mirrored pairs on a common axle, half a turn apart. Getting that phase wrong is the usual reason a walker rocks in place.
Walking is hard work — expect to gear down heavily, and expect it to be slow.
A tall walker tips easily. Keep the Brick low and the stance wide — see Centre of gravity.
Why it matters
Robots that copy animals are how machines reach places wheels cannot: search and rescue in collapsed buildings, inspection inside pipes, planetary rovers over loose ground. Studying the mechanism instead of the appearance is what turns an interesting animal into a working machine.
Say this back before moving on: “wait until holds my program until something is true. It does not check the clock. It checks the world.”
What’s in this build 4 min
Look for the parts with cables. There is only one motor. That may surprise you, because the robot has six legs!
EV3 Brick × 1
Large Motor × 1
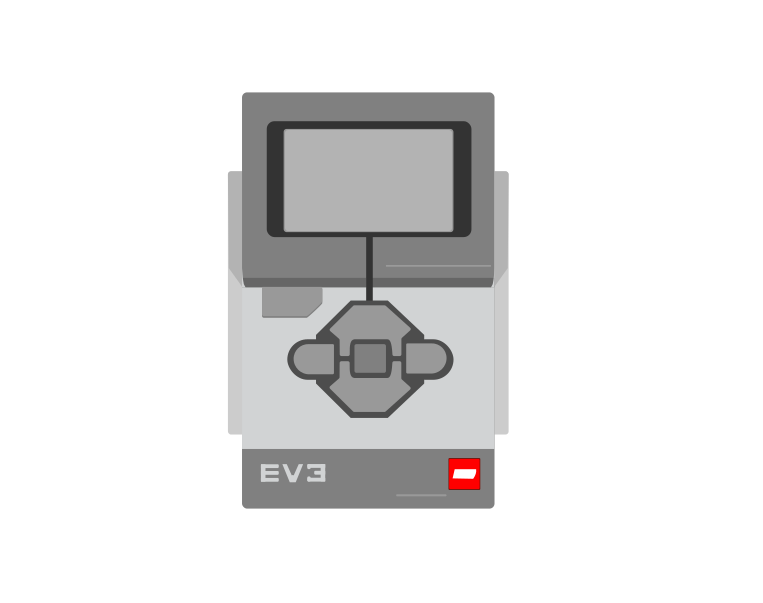
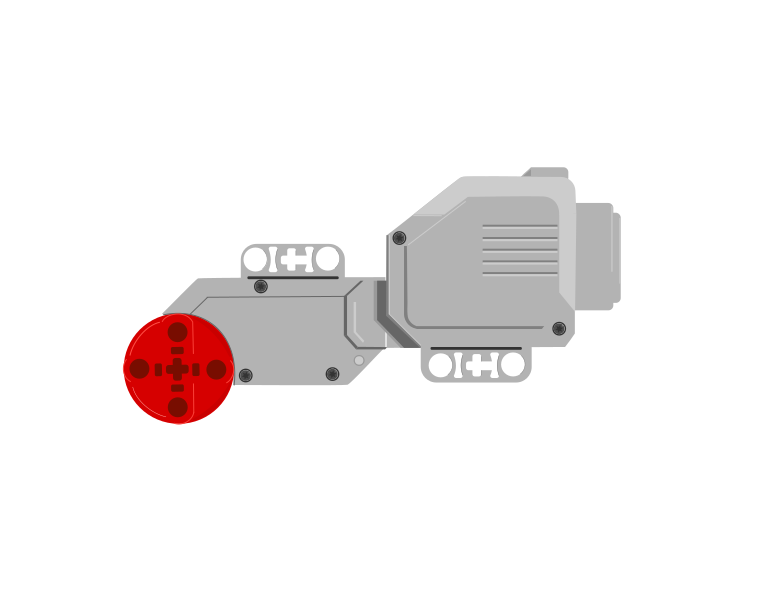
The Hexapod's electronics. The Brick is the body. One Large Motor moves all six legs. The buttons on the Brick are the input. No sensor is needed.
One motor, six legs
The motor turns a crank. A crank is an axle with an arm fixed off to one side. The crank goes round. The arm goes up, forward, down and back. Beams carry that movement out to every leg. The motor goes round and round. The feet go step, step, step.
The legs do not all move the same way at once. That is on purpose. It keeps three feet down all the time.
Turn the crank slowly by hand and watch one leg. Follow it through a full turn: up, forward, down, back. Then look at the leg on the other side. It does the other half of the same step.
Ports — and the rule 4 min
Sensors go in ports 1, 2, 3, 4. Motors go in ports A, B, C, D. You cannot swap them. If you do, nothing warns you. The robot just will not work.
One more thing: the buttons have no port at all. They are built into the Brick. There is nothing to plug in, and nothing to get wrong. That is why they are an easy input.
Part
Port
Why this one
Large Motor (drives the crank)
A
A motor working on its own usually goes in A. Every program on this page says A.
Brick buttons
none
Part of the Brick. Nothing to plug in.
Check your own build now:
Motor cable in port A: a letter, not a number.
Turn the crank one full turn by hand. Do all six legs move?
Stand it on the table. Are all six feet touching? Or is it rocking on four?
Stand the model up. Can you still reach the Brick’s centre button? You will need it soon.
Connect the Brick 4 min
Two routes, and either is fine. USB is the reliable one and the one to fall back on when a room’s Bluetooth is busy; Bluetooth leaves the robot free to move, which some models need.
▶How to connect the BrickUSB and Bluetooth, step by step, with a photograph of every screen. Open it if you have not done this before — or if pairing is not working.Show meHide
USB — the reliable one
Switch the Brick on with the dark grey centre button.
Cable into the Brick’s PC port — the small square socket beside the numbered ports, not one of the numbered ones.
Other end into the computer.
Bluetooth — name it first
Do these in order. Naming the Brick after you go looking for it in the list is how groups end up driving each other’s robots.
Name your Brick. On the Brick: Settings (the spanner) → Brick Name. Type something nobody else will pick, then press the tick. Every Brick is called EV3 until somebody changes it.
Turn Bluetooth on. Settings → Bluetooth. Tick Bluetooth and Visibility. Leave iPhone/iPad/iPod unticked.
Connect from EV3 Classroom. Click the Brick icon at the top of the programming area, find your Brick by name, and click Connect.
Say yes on the Brick. It asks “Connect?” with the computer’s name — choose the tick, then accept the passkey, which is already 1234.
Where to read it. The name sits in the bar across the very top of the screen, on every screen — so you can check which Brick you are holding at any moment without going into a menu. This one is EV3VE. A Brick nobody has renamed says EV3.Step 3, and the reason step 1 exists. Three Bricks in range — read the name before you click Connect. Pairing with the wrong one is not an error: it works perfectly, on somebody else’s robot.
Step 2.Bluetooth switches the radio on; Visibility is what lets the computer find you. With Visibility off your Brick works perfectly and simply never appears in the list.Step 4. Look at the Brick. It asks whether to accept and names the computer. Choose the tick.Then the passkey, already 1234. Press the tick again and you are connected.
The two failures, every class, every time. The Brick has gone to sleep while you were building — press the centre button to wake it. Or you have paired with the group at the next table, which is why the name matters.
The long version, including Port View and how to read the port tiles, is in the Brick & Bluetooth guide.
Use Bluetooth today if you can. This robot walks away from where it started. A USB cable may stop it, or pull it to one side. That looks like a broken program, but it is not.
Confirm the connection 2 min
Check the Brick icon: connected, or not.
Check the port tiles. A motor on A, and nothing anywhere else.
Turn the crank by hand and watch the degrees counted number move.
Does the number stay still when the crank turns? Then stop here. The cable is in the wrong port. Or it is not pushed all the way in.
There is nothing to check for the buttons. That is what makes them easy. If the Brick is on, they work.
Change it and test 8 min
Make one change at a time. Guess what will happen before each run. Mark the start on the table. Then you can measure how far it really goes.
Change 5 rotations to 10. Guess if it walks exactly twice as far. Measure it. Often it does not, because the feet slip.
Raise the speed to 100 %. Guess first. Does a faster crank make a faster robot, or just more sliding?
Change the button from center to up. Run it and press the centre button. Nothing happens, but nothing is broken. You are pressing the wrong button!
Now move the wait until block below the motor block. Guess, then run. It walks first and waits after. That is no use to anyone! The wait only holds back the blocks that come after it.
Step 4 is like a mistake from Lesson 3. There, a speed block came after the movement it should change. Blocks cannot reach back. The order matters.
Does the robot shuffle on the spot instead of walking? Then the feet are slipping. Try a lower speed. Try a surface that is less smooth than a shiny table. And check that all six feet touch when it stands still.
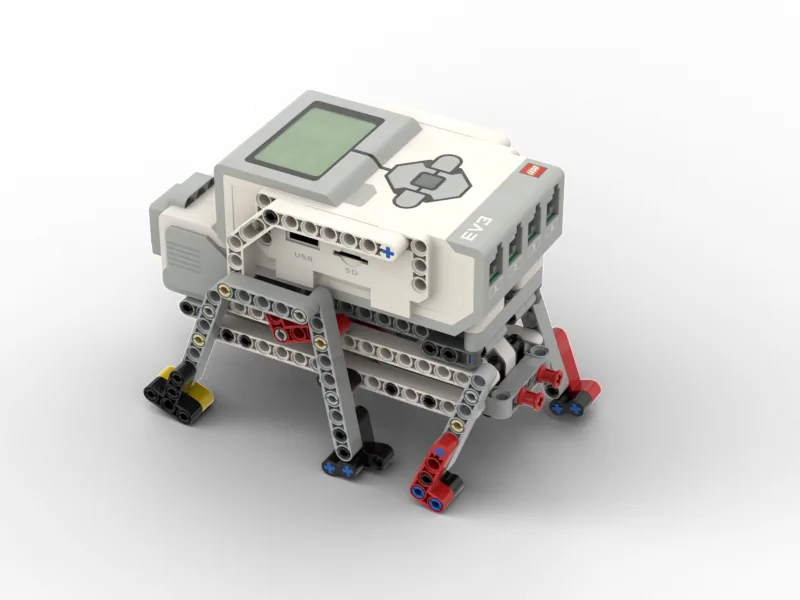
This is what you are building: the Hexapod Walking Robot.
Build it 15 min
Build the model before you read any further. Everything after this is about making it do something, and none of it will make much sense with nothing on the table in front of you.
Fullscreen it while you build — you can pause and scrub with the player's own controls.
Check the finished build against the picture before you switch anything on. A motor mounted the wrong way round is far easier to spot now than it is to debug later, when it looks like a program fault.
Make it move 10 min
Six blocks. The robot asks, waits, and then walks. It will wait all day if nobody presses anything.
when program starts :: events hat
write [PRESS CENTRE] at line (1) :: display
wait until <is [center v] button pressed? :: sensors>
clear display :: display
[A v] set speed to (50) % :: motors
[A v] run [clockwise v] for (5) [rotations v] :: motors
Ask, wait for the person, then turn the crank five times.
Walk it in the order the Brick runs it:
write PRESS CENTRE — a machine that is waiting should say so. A robot that just stands still looks broken.
wait until centre button pressed — everything stops here. The program is not slow or stuck. It is doing just what you asked.
clear display — the person has pressed the button. So take the message off the screen.
set speed to 50 % — nothing moves yet. Legs need a middle speed. Too fast, and the feet slide instead of gripping.
run for 5 rotations — five turns of the crank. That is five full steps. This block has its end built in. So the robot stops by itself.
What success looks like: the screen asks. The robot stands still for as long as you wait. When you press, it walks forward in a fairly straight line. Then it stops by itself.
Challenges 27 min
Work through them in order — each is harder than the last. The extra challenge comes after all three, and it is meant to make you plan before you build.
Challenge 1
Make the robot walk only when someone asks it to. Press the up button and it takes five strides. A stride is one full step. The screen must show one message while it walks. It must show a different one while it waits. A person across the room should be able to tell which it is doing.
Challenge 2
Give the robot two buttons that do different things. One button makes it walk forward. The other makes it walk backward. After each walk, it must be ready for a press again. Then a person can send it back and forth without restarting the program.
Challenge 3
Make the robot count its own strides on the screen as it walks: 1, 2, 3. It must stop by itself after eight. The number must go up with each step. It must not all show up at the end. Think about what must happen inside the part that repeats. What belongs outside it?
Extra challenge
A hexapod is a robot with six legs. It is built for ground that wheels cannot cross. Prove that yours is.
Set up a short course with an obstacle. An obstacle is a thing in the way. Pick one that a robot on wheels would fail on. It could be a ruler laid flat, a book cover, or a slope of stacked paper. Your robot must wait for a person to start it. Then it must cross the obstacle and stop by itself on the far side.
Plan on paper first. What does your robot need to climb, not shuffle? Not all of the answer is in the program. You choose the stride speed, how many strides, and where the feet grip.
You will be asked two questions when you show it. Why can six legs get across something four wheels cannot? And what is the biggest obstacle yours can cross? Measure it. Do not guess.