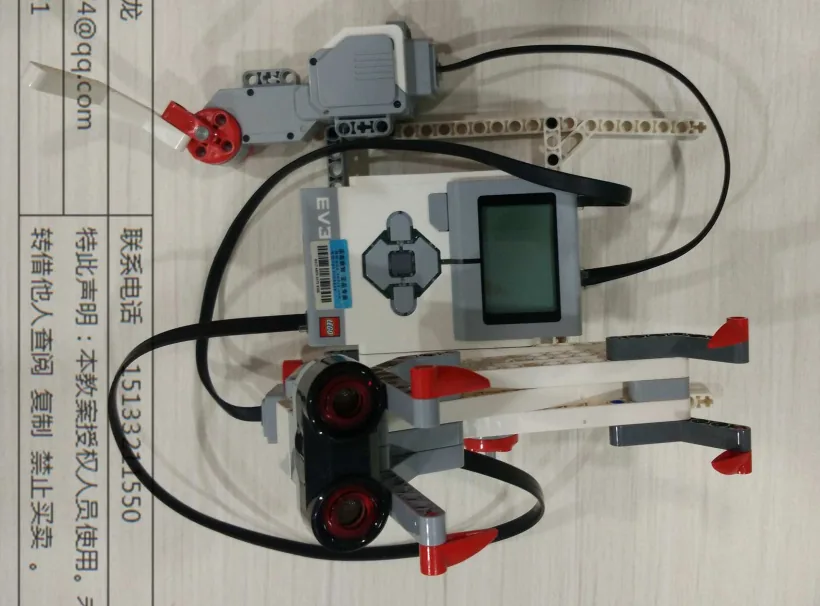
The Rattlesnake: a coiled machine with a scissor mechanism that strikes forwards, a tail that shakes, and — new today — an Ultrasonic Sensor watching the space in front of it.
Every sensor you have used answers a yes-or-no question. Is the button pressed? Yes or no. That is all a Touch Sensor can ever say.
This one answers a how much question. It reports a distance, in centimetres, as a number — and a number lets the machine behave differently depending on how close something is, which no yes-or-no sensor can do.
In the real world 5 min
Where you have seen it
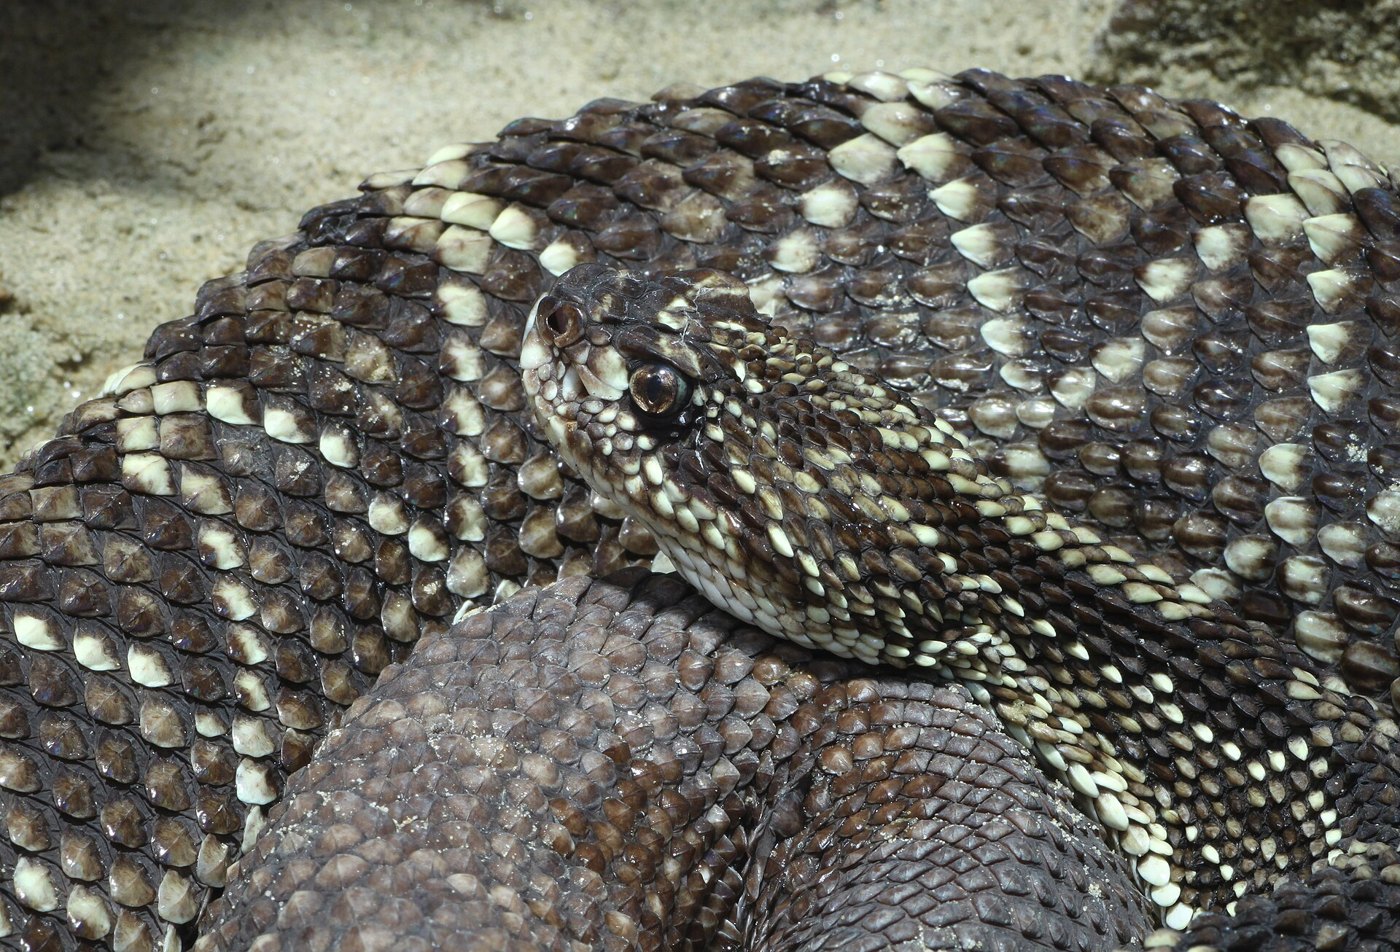
A rattlesnake does not chase. It coils, waits, and strikes only when something comes inside a distance it can reach — and it warns first, with the rattle, because a snake would far rather you left than fought.
A South American rattlesnake, Crotalus durissus, coiled. Photo: Holger Krisp / Wikimedia Commons (CC BY 3.0).
Why it is built that way
A strike costs the snake a lot and it can only reach about half its own body length. So the whole behaviour depends on judging distance: too far and the strike is wasted, too close and it has left the warning too late.
A real rattlesnake does that with heat — it has pits between its eyes and nostrils that sense the warmth of an animal. Your robot cannot sense heat. It does the same job with sound, the way a bat does: send out a click far too high for you to hear, listen for the echo, and time how long it took to come back.
Sound travels about 34 centimetres every millisecond. Time the echo and the distance falls out of the arithmetic. That is all the sensor is doing, thousands of times a second.
What would go wrong without it
A snake that struck at everything would exhaust itself in an afternoon. A snake that never struck would be eaten.
The useful behaviour is in between, and it needs a threshold — a distance at which the answer changes from “ignore” to “act”. You cannot have a threshold without a number to compare it against.
A yes-or-no sensor can tell you something is there. Only a measuring sensor can tell you whether it is close enough to matter.
The main concept — the Ultrasonic Sensor 6 min
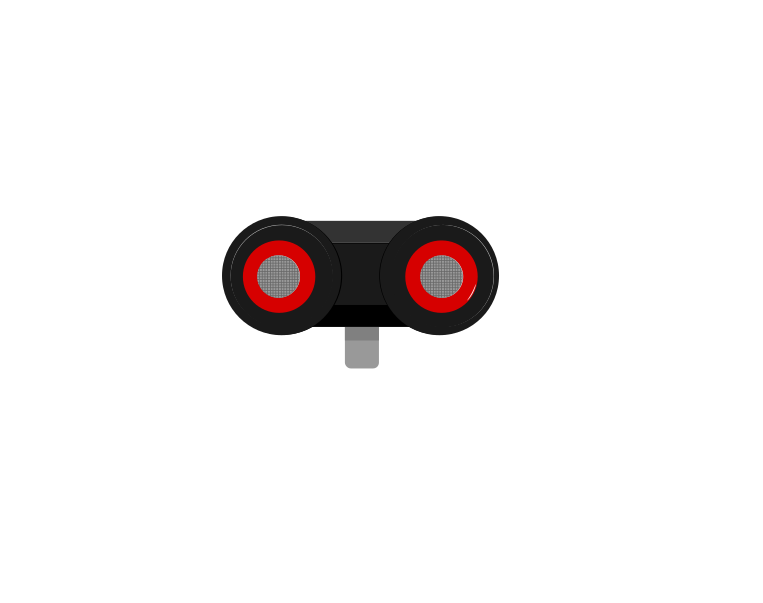
Two openings on the front: one sends a click, the other listens for the echo. Everything else is timing.
one sends, one listens
The Ultrasonic Sensor from the front. The two openings are not eyes — one is a speaker and one is a microphone, and the sensor works by talking to the world and listening for the reply.
Block
What it does
([4 v] distance in [cm v] :: sensors)
Reports the distance as a number. It fits anywhere a number fits — including a write block.
Holds the program until something comes closer than the threshold you set.
[4 v] when distance [< v] (15) [cm v] :: events hat
A hat, like Lesson 23’s. Its stack fires every time something comes inside the distance.
The dropdown between the port and the number is the comparison — < for closer than, > for further than. And the whole idea of the lesson lives in that one symbol and the number beside it: the threshold. Change the 15 and you change the snake’s temper.
when program starts
start moving straight: 0
4 wait until distance <15cm
stop moving
60cm · reading15cm · threshold
Nothing is close. The sensor reports about 60 cm and the program waits.The robot drives forward. The sensor is sending a burst of sound and timing its echo, over and over, and the number falls.The reading has dropped past the threshold. The condition is true, so the robot stops.Try another threshold. The program is identical — only that one number is different.Finished. The threshold is yours to choose — the sensor only supplies the number.
stopped
The black line on the bar is the threshold; the blue fill is the reading. The robot stops the instant the fill crosses the line.
Three things this sensor is honestly bad at, and you will meet all three today. Soft things — cloth, a jumper — swallow the echo and read as far away. Angled surfaces bounce the click off sideways so it never comes back. And below about 3 cm it cannot measure at all, because the echo returns before it has finished speaking.
It does not see. It shouts and listens, so anything that does not echo back is invisible to it.
▶The Ultrasonic Sensor, in fullDistance, thresholds, the blocks and the failure cases. Open it if any of that is not clear yet.Show meHide
ComponentSensing6 min
The Ultrasonic Sensor
The Ultrasonic Sensor measures distance. It sends out a burst of sound too high for people to hear, listens for the echo, and works out how far away the surface is from how long the echo took — exactly how a bat finds a moth, and how a submarine uses sonar.
front
side
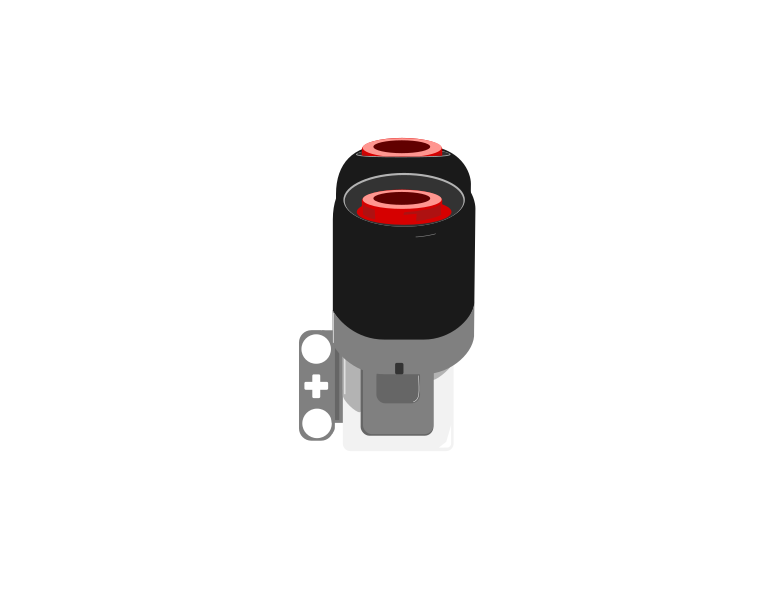
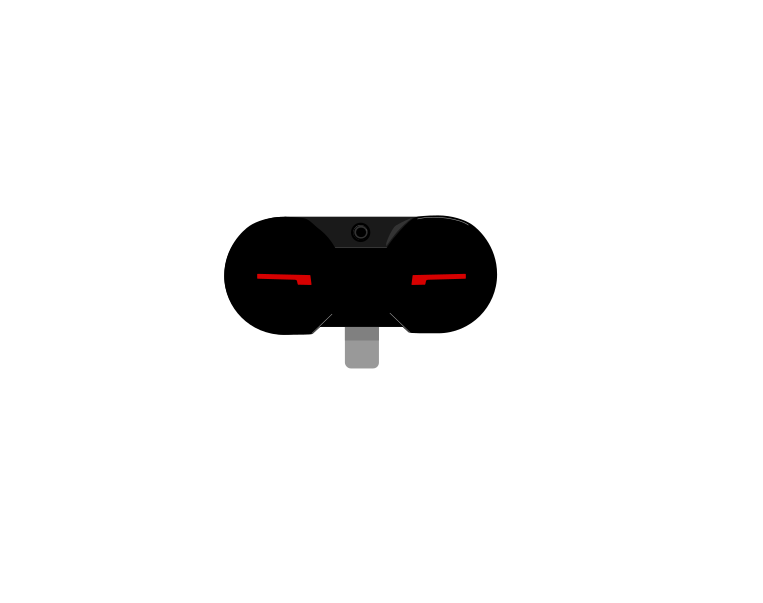
The two round openings on the front are the point of this sensor: one sends the burst of sound out, the other listens for the echo coming back.
Blocks reference
Block
What it does
([4 v] distance in [cm v] :: sensors)
Reports how far away the nearest thing in front of the sensor is, as a number in centimetres.
wait until <([4 v] distance in [cm v] :: sensors) < (15)>
Holds the program until something comes closer than 15 cm.
A number, not a yes or no
This is the important step up from the Touch Sensor. Touch gives you true or false; the Ultrasonic gives you a number, and the deciding is left to you. Pick a threshold below and watch where the robot ends up.
when program starts
start moving straight: 0
4 wait until distance <15cm
stop moving
60cm · reading15cm · threshold
Nothing is close. The sensor reports about 60 cm and the program waits.The robot drives forward. The sensor is sending a burst of sound and timing its echo, over and over, and the number falls.The reading has dropped past the threshold. The condition is true, so the robot stops.Try another threshold. The program is identical — only that one number is different.Finished. The threshold is yours to choose — the sensor only supplies the number.
stopped
The black line on the bar is the threshold; the blue fill is the reading. The robot stops the instant the fill crosses the line.
Three different robots, and only one number is different between them. That is what having a number rather than a yes-or-no buys you: the behaviour is tuned by editing one slot, not by rebuilding the program. It also means the sensor can never tell you it is “close” — close is a decision you make about a reading.
Why it matters
Car parking sensors, automatic doors at a shopping centre, and the sensor that stops a lift door closing on somebody all work this way. Reacting before contact is what makes a machine feel safe.
If your set has an Infrared Sensor instead
The Home/Retail EV3 set (31313) ships an Infrared Sensor and a Beacon in place of the Ultrasonic and Gyro sensors. The Infrared Sensor also measures distance, so the programs in this module work with it — but it reports a rough 0–100 proximity rather than real centimetres, and it is affected by sunlight and by dark surfaces in ways the Ultrasonic is not.
IR Sensor
Beacon
The Infrared Sensor and its Beacon, from the Home set. If your kit has these, expect proximity numbers rather than centimetres — and retune any threshold accordingly.
Say this back before moving on: “It sends a click and times the echo. The answer is a distance in centimetres.”
What’s in this build 4 min
Three parts with cables — and one of them is not in the catalogue’s parts list, which is worth knowing about.
Part
What it is doing here
EV3 Intelligent Brick
Runs the program and is the snake’s body.
Large Motor ×2
One drives the scissor mechanism that strikes; the other shakes the tail.
Ultrasonic Sensor
Faces forward, watching the strike zone. The catalogue’s parts column forgets it; the manual and the model do not.
Aim the sensor before anything else
This sensor only knows about what is directly in front of it, so where it points is what the snake can sense.
Look at the sensor face-on. Is it pointing straight forward, level, along the line the strike will travel?
Is anything of your own model in front of it? A beam, the striking arm, the tail. If the sensor can see part of the snake, it will read that distance for ever and nothing will ever trigger.
Put your hand slowly in front of it and imagine the cone of sound spreading out. It is wider than you think — roughly the spread of a torch beam.
Check the striking mechanism moves freely through its whole range by hand, and that it does not hit the sensor.
Ports — and the rule 4 min
Sensors go in ports 1, 2, 3, 4. Motors go in ports A, B, C, D. They are not interchangeable, and nothing will tell you politely if you swap them.
Today the course’s sensor table finally gets its fourth entry. Touch has lived on 1 since Lesson 13; the Ultrasonic Sensor’s home is port 4, and it has been reserved for it all along.
Part
Port
Why this one
Large Motor (the strike)
A
The main working motor.
Large Motor (the tail)
D
A second, separate job — so A and D, not B and C. B/C are for a synchronised pair, and these two do different things at different times.
Ultrasonic Sensor
4
Ultrasonic is always port 4 in this course: Touch 1, Gyro 2, Colour 3, Ultrasonic 4.
Check your own build now:
Strike motor in A, tail motor in D, sensor in 4. Two letters and a number.
Clear the space in front of the snake out to about half a metre.
Point it at a wall or a book, not into open room. Open air gives the sensor nothing to echo off and it will read a large or unstable number.
Agree with your group what will be used to trigger it — a hand at a safe distance, or better, a book on the table you can slide closer.
Connect the Brick 4 min
Two routes, and either is fine. USB is the reliable one and the one to fall back on when a room’s Bluetooth is busy; Bluetooth leaves the robot free to move, which some models need.
▶How to connect the BrickUSB and Bluetooth, step by step, with a photograph of every screen. Open it if you have not done this before — or if pairing is not working.Show meHide
USB — the reliable one
Switch the Brick on with the dark grey centre button.
Cable into the Brick’s PC port — the small square socket beside the numbered ports, not one of the numbered ones.
Other end into the computer.
Bluetooth — name it first
Do these in order. Naming the Brick after you go looking for it in the list is how groups end up driving each other’s robots.
Name your Brick. On the Brick: Settings (the spanner) → Brick Name. Type something nobody else will pick, then press the tick. Every Brick is called EV3 until somebody changes it.
Turn Bluetooth on. Settings → Bluetooth. Tick Bluetooth and Visibility. Leave iPhone/iPad/iPod unticked.
Connect from EV3 Classroom. Click the Brick icon at the top of the programming area, find your Brick by name, and click Connect.
Say yes on the Brick. It asks “Connect?” with the computer’s name — choose the tick, then accept the passkey, which is already 1234.
Where to read it. The name sits in the bar across the very top of the screen, on every screen — so you can check which Brick you are holding at any moment without going into a menu. This one is EV3VE. A Brick nobody has renamed says EV3.Step 3, and the reason step 1 exists. Three Bricks in range — read the name before you click Connect. Pairing with the wrong one is not an error: it works perfectly, on somebody else’s robot.
Step 2.Bluetooth switches the radio on; Visibility is what lets the computer find you. With Visibility off your Brick works perfectly and simply never appears in the list.Step 4. Look at the Brick. It asks whether to accept and names the computer. Choose the tick.Then the passkey, already 1234. Press the tick again and you are connected.
The two failures, every class, every time. The Brick has gone to sleep while you were building — press the centre button to wake it. Or you have paired with the group at the next table, which is why the name matters.
The long version, including Port View and how to read the port tiles, is in the Brick & Bluetooth guide.
Keep the cables out of the sensor’s view. A cable looped in front of the transducers is something for the click to bounce off, and the snake will read it as an object twenty centimetres away that never goes anywhere.
Confirm the connection 2 min
This is the most useful confirm step in the course so far, because the port tile shows a live number rather than a yes or no. Spend the full two minutes here.
Check the Brick icon, a motor on A and D, and an Ultrasonic Sensor on 4.
Watch the port 4 tile and move a book slowly towards the sensor. The number falls. Move it away and it climbs.
Hold the book at what looks like 20 cm and read the tile. Now measure it with a ruler. How close was your eye?
Now the interesting part. Point it at something soft — a jumper, a bag — and then at something hard and flat at the same distance. The numbers will not agree.
Turn the book to a steep angle. Watch the reading jump about or go large, because the click is bouncing away instead of back.
You have just seen this sensor lie, twice, before writing a single block. Remember what it was looking at each time.
Change it and test 8 min
One change at a time, and predict before each run. Most of today’s changes are to a single number.
Change the threshold to 50 cm. Predict how the snake’s temper changes. It now strikes at people walking past the table — jumpy, and mostly wasted.
Now 5 cm. You have to put your hand almost on it. Realistic for a shy animal, useless as a warning system.
Find the threshold you would actually choose, and say why in one sentence. There is no right answer, but there is a reasoned one.
Change the comparison from < to > and set it to 30. The snake now strikes when things go away. Nonsense as a snake, but it proves the dropdown is doing real work.
Put it back, then add a write ([4 v] distance in [cm v]) at line (1) just inside the loop. Now the model shows what it can see, and you can watch the number that the threshold is being compared against.
Step 5 is worth keeping for the rest of the course. When a sensor-based program misbehaves, put the reading on the screen. Nearly every ultrasonic problem turns out to be that the sensor was reading something you had not thought about.
When a program that uses a sensor does the wrong thing, look at what the sensor is actually reading before you touch the program.
This is what you are building: the Rattlesnake.
Build it 15 min
Build the model before you read any further. Everything after this is about making it do something, and none of it will make much sense with nothing on the table in front of you.
Use the viewer's own controls to zoom and turn pages. Fullscreen makes it big enough to build from.
Check the finished build against the picture before you switch anything on. A motor mounted the wrong way round is far easier to spot now than it is to debug later, when it looks like a program fault.
Challenges 27 min
Work through them in order — each is harder than the last. The extra challenge comes after all three, and it is meant to make you plan before you build.
Challenge 1
Put the sensor's reading on the screen and keep it there while the snake works. Then show three things at three known distances — one hard and flat, one soft, one at a steep angle — and report what the sensor said about each and what a ruler said.
Challenge 2
Give the snake two ranges. It should rattle a warning when something comes inside a far distance, and strike only when it comes inside a nearer one — so an approaching hand is warned before it is struck. Choose both distances and justify them.
Challenge 3
Find where the sensor stops being trustworthy. Test at 5 cm, 10, 20, 50, 100 and 200, comparing the reading with a tape measure each time. Report the range over which you would rely on it, and what happens outside that range.
Extra challenge
Build a guard that is right about when to act.
Your snake must sit armed and ignore normal activity around the table, warn when something genuinely approaches, and strike only if it keeps coming. It must not fire at somebody walking past, and it must not miss a hand that comes right up to it.
Plan on paper before you build. Write down what should happen at several distances — a metre, half a metre, twenty centimetres, five — and only then choose the thresholds that produce it.
Two questions when you demonstrate it. What can your sensor genuinely not see, and how did you find out? And why is a false alarm a worse fault in this machine than a missed strike?
Make it move 10 min
Seven blocks: wait for something to come close, rattle a warning, then strike and reset. Forever, because a snake does not stop after one.
when program starts :: events hat
[A v] set speed to (70) % :: motors
forever
  [4 v] wait until distance [< v] (20) [cm v] :: sensors
  play sound [Animals / Snake rattle v] until done :: sound
  [A v] run [clockwise v] for (1) [rotations v] :: motors
  [A v] run [counterclockwise v] for (1) [rotations v] :: motors
end
The warning comes before the strike — the Lesson 15 rule, on an animal that invented it.
Walk it in the order the Brick runs it:
set speed to 70 % — a setting. A strike should be quick.
forever — the snake stays armed.
wait until distance < 20 cm — the program sits here, checking the sensor over and over, until something comes inside twenty centimetres. This is the threshold.
play sound Snake rattle until done — the warning, and it finishes before anything moves.
run clockwise for 1 rotation — the strike.
run counterclockwise for 1 rotation — back to coiled, ready for the next one.
What success looks like: the snake ignores you at arm’s length, rattles as your hand comes inside about twenty centimetres, and strikes. Move away and it re-arms; come back and it does it again.
If it strikes continuously without stopping, something is permanently inside twenty centimetres — most likely part of your own model, or the table if the sensor is angled down. Check the port 4 reading with nothing in front of it.