Challenge 1
Check the Gyro with a protractor. Reset it. Turn the model till the screen says 90 degrees. Then measure the real angle. Tell us both numbers and the difference.
Quick Learn — the model, the instructions, the program and the challenges. The theory is in Full Lesson.
EV3 Robotics›Level 1 · Beginner›Lesson 43
Level 1 · Lesson 43 · EV3-L01-4360 minutes · Ages 7+ · Model: Gyro Magic Stick
The Gyro Magic Stick: a wand with a Gyro Sensor in it. A Large Motor moves when you turn the stick far enough. Twist the stick, and the machine reacts.
So far, every turn your robot measured came from inside it. The degree counter says how far a shaft turned. That is why the Rickshaw in Lesson 42 could say five rotations when its wheels were skidding!
The Gyro is different. It measures the whole model turning in the room. Not the motor. Not the wheels. The model itself.
There is a gyroscope in your phone. It tells the screen when to turn round. It tells a game when you tilt the phone. Every plane, ship and spacecraft has better ones. Up there, there is no road. You must know which way you are pointing.
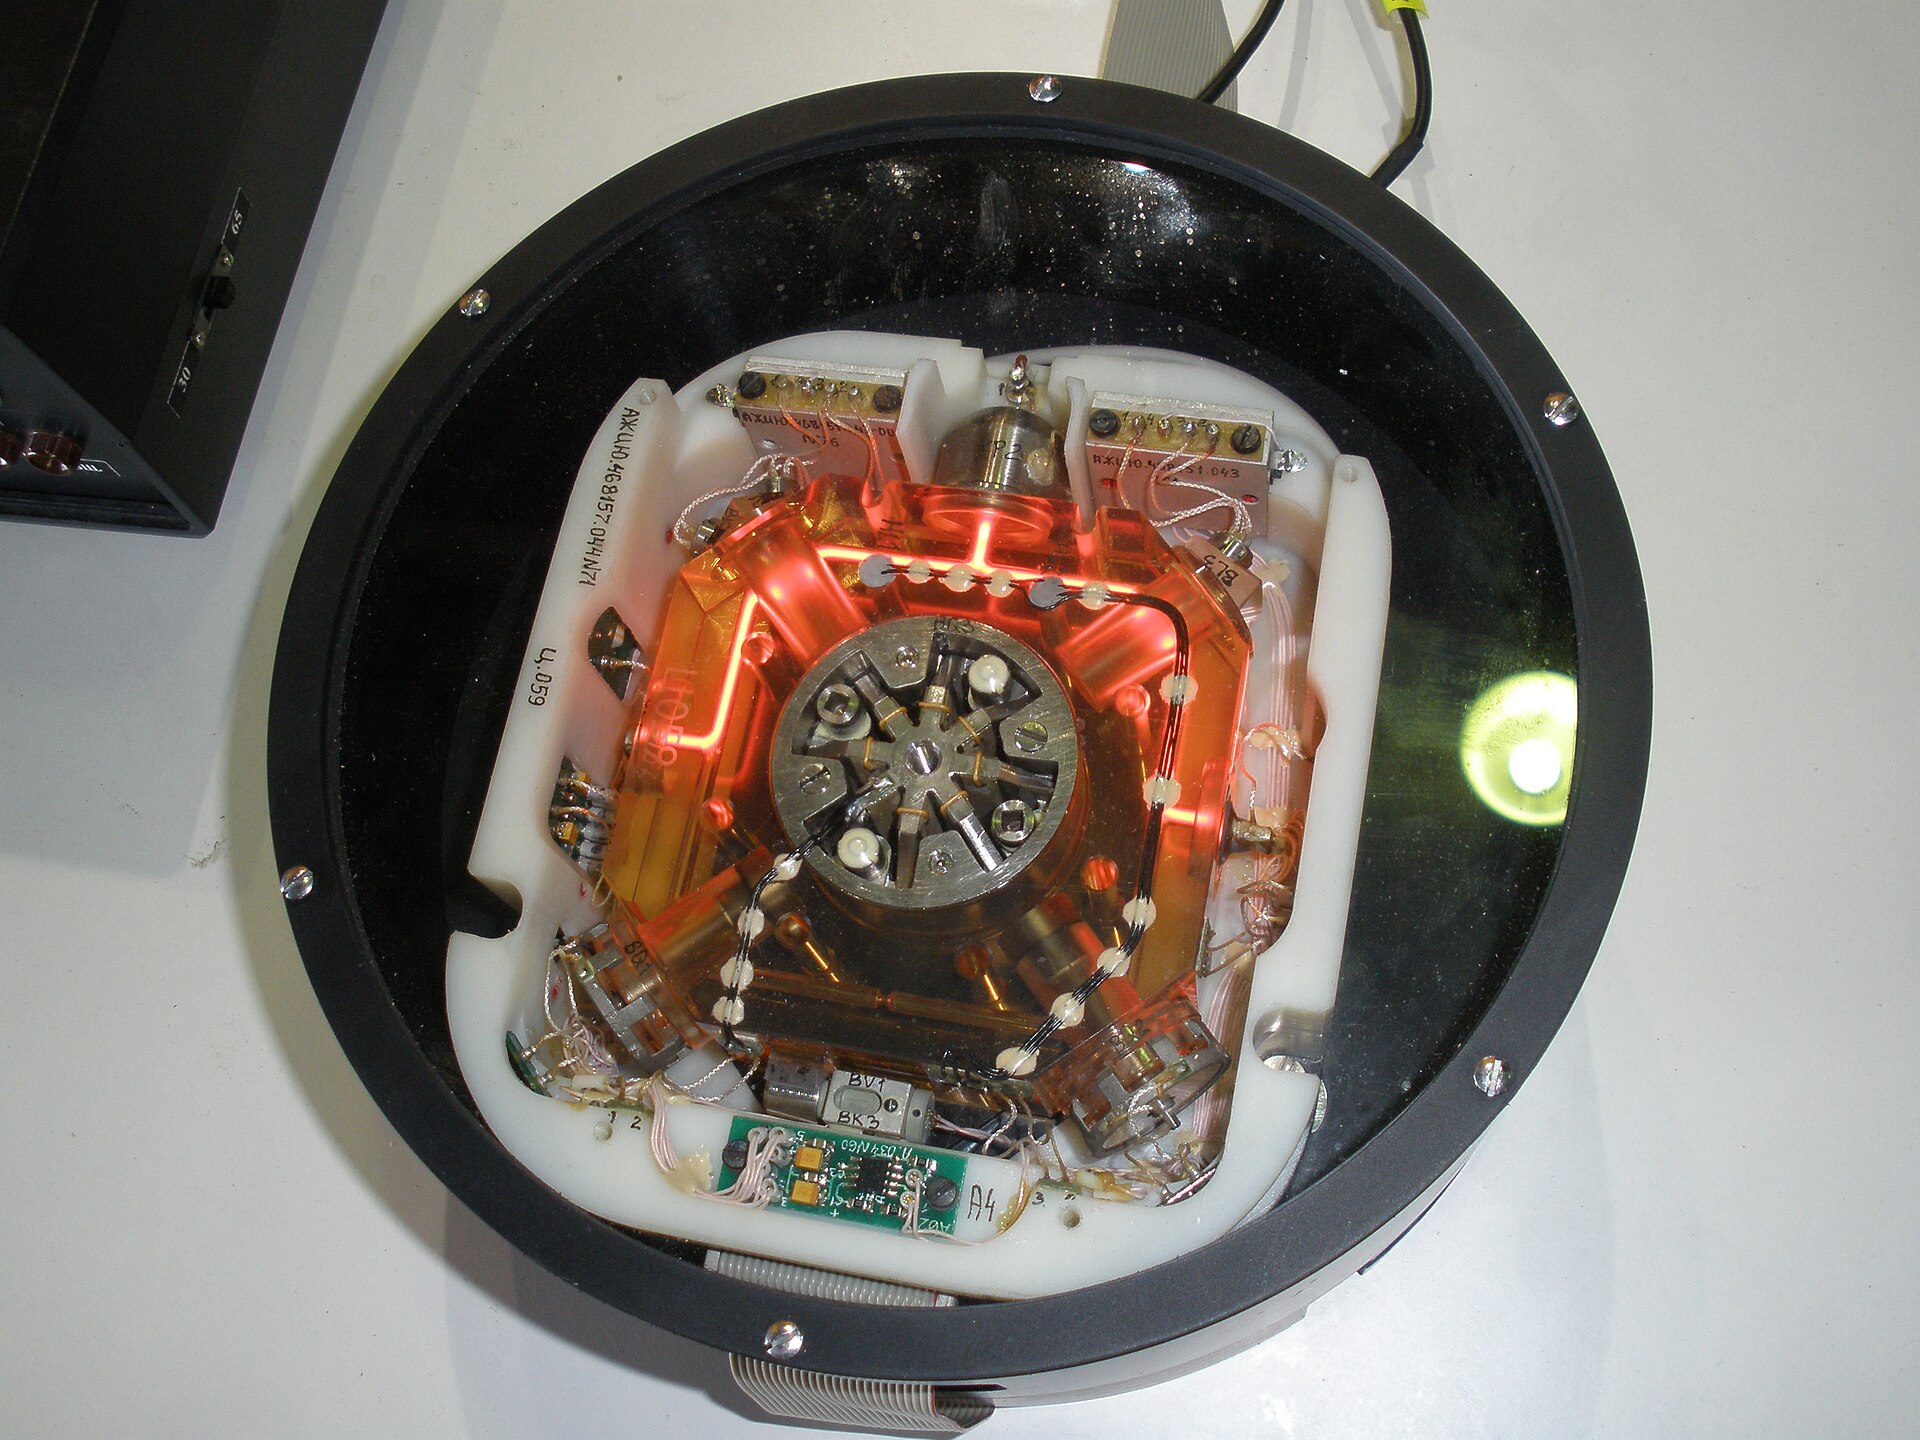
Old gyroscopes were spinning wheels. A heavy disc spins fast. It does not like being turned. So it keeps pointing the same way. The plane or ship moves round it. The one in the photo has no moving parts at all. It splits a laser beam in two. The two halves go round a loop, opposite ways. Turning makes a tiny change between them. The gyro measures it.
The one in your EV3 is a third kind. It is a shaking chip, smaller than your fingernail. All three do the same job. They measure turning without touching a thing. That is what matters. A wheel sensor needs the wheel to grip. A gyro needs nothing outside itself.
A plane inside a cloud cannot see the ground or the sky. Pilots without a gyro lose track of which way is up. It can take just a few minutes. They are not being careless. Your ears just cannot tell a turn from flying straight. Only the gyro knows.
The motor count tells you what you asked for. A gyro tells you what really happened.
The Gyro gives one number. It is how many degrees the sensor has turned. It counts from its last reset. Clockwise counts up. Anticlockwise counts down.
([2 v] angle) :: sensors
degrees counted. But it tells you something else.degrees counted | angle | |
|---|---|---|
| Measures | How far the motor shaft turned. | How far the whole model turned. |
| If the wheels slip | Still counts. So it is wrong about the robot. | Not changed. It does not care about wheels. |
| If you pick the robot up and turn it | Does not change at all. | Changes. It felt the turn. |
| Good for | How far the robot drove, or how far a part moved. | Which way the model is pointing. |
The third row is the quickest way to feel it. Pick the model up. Turn it a quarter turn in your hands. Put it down. The motor counter has no idea. The Gyro says 90.
| Block | What it does |
|---|---|
| ([2 v] angle) | Reports the angle now, in degrees. |
| [2 v] reset angle | Makes the way it points now count as zero. Each turn after is measured from here. |
| <[2 v] is angle [> v] (45) °?> | A six-sided block. It asks a question: is the angle more than 45? The answer is yes or no. A Switch uses the answer. |
The Gyro Sensor measures how far the robot has turned, in degrees. Wheels slip and floors vary, so counting wheel rotations is a poor way to turn accurately — the gyro measures the turn itself rather than inferring it.
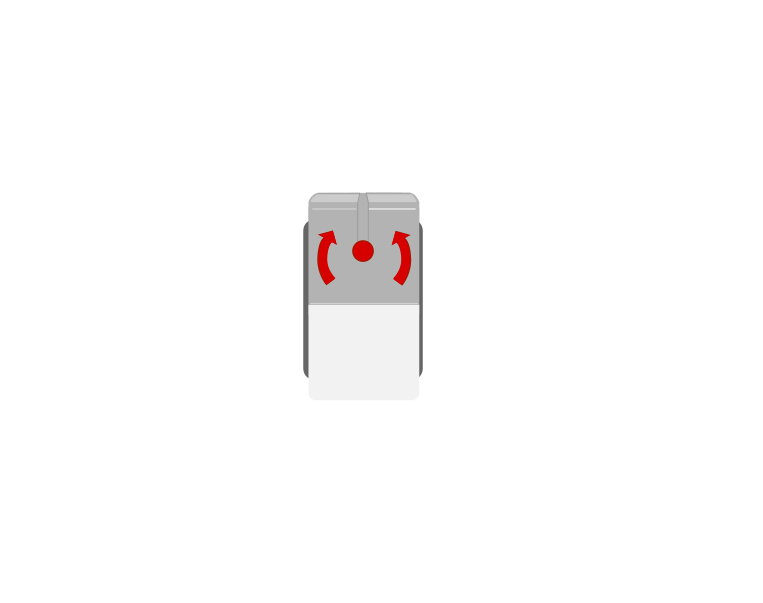 from above
 front
| Block | What it does |
|---|---|
([2 v] angle :: sensors) | Reports how far the robot has turned since the angle was last reset. |
[2 v] reset angle :: sensors | Sets the current heading as zero. |
The angle is measured from wherever it was last zeroed — not from where this turn started. Here are two robots given the same instruction, one with a reset block and one without.
reset first
no reset
Both programs are correct about what they asked for. Only the left one asked the question from a known starting point.
Both programs did exactly what they said. Both gyros stopped at 90. But the robot on the right had 34 degrees already on the clock, so it only turned 55 — and nothing about the program looks wrong. Watch the first step too: neither robot is moving and the reading is still climbing. That is drift, and it is why the reset belongs immediately before the turn.
Reset with the robot completely still, as late as you can.
when program starts :: events hat
[2 v] reset angle :: sensors
start moving [straight: 0] :: movement
wait until <([2 v] angle :: sensors) > (90)>
stop moving :: movement
That program is the obvious one to write, and it will not give you a 90 degree turn. The next section is why.
Asking to stop at 90 does not stop the robot at 90. Between the gyro reaching 90 and the wheels actually standing still there is a delay — the sensor has to be read, the next block has to run, and the motors have to physically brake. The robot is still turning through all of it, so it ends up past where you asked.
The fix is to ask for less than you want. Aim for a 90 degree turn by waiting for 86: the robot coasts the last few degrees on its own and settles at roughly 89 to 91.
ask for exactly 90
stop 4° early
The tolerance has to match the speed. At 50°/s the number that lands this turn on 90° is 86 — let it loop, and watch that number change when the speed does.
The size of that gap is not a fixed property of the robot — it is the delay multiplied by how fast you are turning. The delay stays about the same whatever you do, so a turn at double the speed carries you about double the distance past the mark.
| Turn speed | Carried past the stop | Wait for | Ends up at |
|---|---|---|---|
| slow | about 4° | 86 | about 90° |
| fast | about 10° | 80 | about 90° |
So the tolerance and the speed have to be chosen together. Turn faster and you must give up more; if you speed a turn up and forget to lower the number, the robot starts overshooting every corner and the program that worked last week no longer does.
when program starts :: events hat
[2 v] reset angle :: sensors
start moving [right: 30] :: movement
wait until <([2 v] angle :: sensors) > (86)>
stop moving :: movement
Find your own number rather than copying this one — it depends on your robot’s weight, its wheels and the speed you turn at. Run the turn, measure where it actually stops, and move the number by however far it missed. Two or three tries is usually enough.
The other half of the answer is to slow down. A slower turn overshoots less, so it needs less guessing and repeats more reliably — which is why a turn worth getting right is rarely worth rushing.
A gyro slowly loses its zero even when nothing is moving. Leave a robot sitting still for a minute and the angle may have wandered several degrees all by itself. That is drift, and it is a property of the hardware, not a bug in your program.
Two habits deal with it: reset the angle as late as possible before a turn, and keep the robot dead still while the reset happens. Resetting while the robot is rolling bakes the error in permanently.
Aircraft, ships and phones all use gyros to know their orientation — it is how a phone knows you have turned it sideways. A robot that can turn exactly 90 degrees on any surface is far more reliable than one that guesses with wheel rotations.
The Gyro does not know where it is. It knows how far it has turned. It counts from when it started.
It drifts, and you need to know that. Leave a Gyro totally still. Its number slowly creeps. A degree here, a degree there. It measures tiny amounts and adds them up. Over a few seconds, that does not matter. Over ten minutes, it does. Reset it at the start of anything that needs it.
Up to now a robot has been able to wait for a sensor. Deciding is different: the robot checks the sensor and does one thing or another depending on the answer — and then carries on either way.
| Block | What it does |
|---|---|
if <> then end | Runs the blocks inside only when the condition is true. Otherwise skips them. |
if <> then else end | Runs one set of blocks when true and a different set when false. |
A decision made once, at the start, is almost never what you want. Here are two robots with the identical if-else, testing the identical sensor against the identical number — one inside a loop and one not.
decision inside a loop
the same decision, once
A decision is only worth as much as the last time it was made. Inside a loop, that is a few milliseconds ago.
Nothing is wrong with the right-hand program’s decision. It asked the question, got a truthful answer, and acted on it correctly. It simply never asked again, and the world moved on. Decisions belong inside a loop, so the robot keeps re-deciding as things change.
when program starts :: events hat
forever
  if <([4 v] distance in [cm v] :: sensors) < (15)> then
    stop moving :: movement
  else
    start moving [straight: 0] :: movement
  end
endOnce there is more than one question, decisions can be arranged in four ways. They look nearly identical stacked up in the editor, which is exactly why they get muddled — the thing that differs is not what the blocks say, it is which routes through them exist.
One question sorts them almost completely:
| Are the questions… | Use | How many bodies can run |
|---|---|---|
| independent — any combination can be true | separate ifs | none, some, or all |
| one question, two answers | if / else | exactly one |
| the second only matters when the first is true | nested if | one, and only via the outer |
| mutually exclusive cases — exactly one should win | chained if / else | exactly one, the first that matches |
Each if is asked no matter what the others answered, so any number of them can fire on the same pass. That is the right shape when the conditions genuinely have nothing to do with each other.
forever
  if <[3 v] is ambient light intensity [< v] (20) %? :: sensors> then
    [A v] start motor [clockwise v] :: motors
  end
  if <[4 v] is distance [< v] (15) [cm v]? :: sensors> then
    [D v] start motor [clockwise v] :: motors
  end
endExactly one branch runs, every time. Reach for this whenever the robot must do something either way — and in preference to two ifs testing opposite conditions, which is the same idea written twice and can drift apart.
Putting one if inside another means the inner question is only ever asked when the outer one is true. Use it when the second question is meaningless otherwise: there is no point asking which side an obstacle is on when there is no obstacle.
if <[4 v] is distance [< v] (15) [cm v]? :: sensors> then
  if <([2 v] angle :: sensors) < (0)> then
    start moving [right: 50] :: movement
  end
end
When not to nest. If you only want “both true” and nothing happens at the outer level, an and says it in one block and reads better:
if <<[4 v] is distance [< v] (15) [cm v]? :: sensors> and <([2 v] angle :: sensors) < (0)>> then
  start moving [right: 50] :: movement
end
Nesting earns its place when something happens at the outer level too, or when there is an else at each level and the two mean different things.
This is the shape for a list of cases where exactly one should win: colour bands, distance bands, speed ranges. EV3 Classroom has no else-if block, so you build a chain by putting the next if inside the else of the last one.
And here is why it matters, because this is the single commonest bug in this whole module. Three bands written as three separate ifs are each perfectly correct, and together they are wrong: a reading of 20 is under 30 and under 60 and under 90, so all three run and the last one to run is the one that sticks.
three separate ifs
chained — if / else / if
↑ the rest is inside the else — never asked
Separate ifs are not wrong here so much as unguarded: nothing stops a second one matching. Chaining is what makes “the first one wins” true.
The rule to carry away: if the cases are meant to be exclusive, they must be made exclusive. Chaining does it by construction. Separate ifs only work if you are careful to write non-overlapping bands yourself — light < 30, 30 to 60, 60 and over — which is more to get right and easy to break later.
This is the point at which a machine stops following a script and starts responding. A thermostat, an automatic door, a robot vacuum — all of them are a decision inside a loop.
Say this back: “The Gyro measures the model, not the motor.”
| Part | What it is doing here |
|---|---|
| EV3 Intelligent Brick | Reads the Gyro many times a second. It runs the motor by what the Gyro says. |
| Gyro Sensor | Must be fixed on flat and firm. It only feels one kind of turn. Fixed on its side, it measures the wrong turn. |
| Large Motor | Moves when the reading says so. This is the “linking” part. A sensor sits at one end of the stick. A movement sits at the other. |
| The stick itself (not electronic) | Must be stiff. A Gyro on a bendy beam feels the beam bend. It feels the stick turn too. |
Sensors go in ports 1, 2, 3, 4. Motors go in ports A, B, C, D. You cannot swap them. If you do, nothing warns you. The robot just will not work.
| Part | Port | Why this one |
|---|---|---|
| Gyro Sensor | 2 | The Gyro always goes in port 2, in every lesson. Touch 1, Gyro 2, Colour 3, Ultrasonic 4. |
| Large Motor | A | One motor, run by what the Gyro says. |
Check your own build now:
Two routes, and either is fine. USB is the reliable one and the one to fall back on when a room’s Bluetooth is busy; Bluetooth leaves the robot free to move, which some models need.
Do these in order. Naming the Brick after you go looking for it in the list is how groups end up driving each other’s robots.
EV3 until somebody changes it.EV3.The two failures, every class, every time. The Brick has gone to sleep while you were building — press the centre button to wake it. Or you have paired with the group at the next table, which is why the name matters.
The long version, including Port View and how to read the port tiles, is in the Brick & Bluetooth guide.
Use Bluetooth. You will be waving this about. A cable pulls on the stick as you turn it. The Gyro will feel every tug.
Hold the model still each time the program resets. Check the number with a real protractor at least once. A sensor you never check is just a hope.
and block. It holds two questions, and says yes only when both say yes. Make it react only between 45 and 90. Past 45, but not past 90. Turn slowly all the way. Watch it switch on, then off again.reset angle out. Run the program and stop it. Turn the model a long way, then run it again. Now 45 is counted from wherever the model was left. That is the exact bug the reset stops.Step 5 is the one to remember. Nothing touched the model. But the number changed. That is not a fault in your build. This kind of sensor just does that. The fix is always the same. Reset it just before you need it. Never trust a gyro number from ten minutes ago.
A gyro is exact for seconds, but not for minutes. Reset it often. Then it is the best sensor in the box.
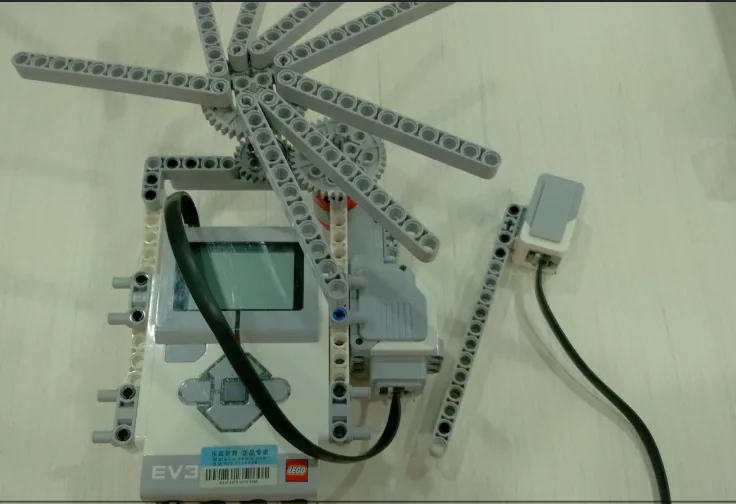
Build the model before you read any further. Everything after this is about making it do something, and none of it will make much sense with nothing on the table in front of you.
One page at a time — use Next and Previous, or the ← → keys. Fullscreen makes it big enough to build from.
Check the finished build against the picture before you switch anything on. A motor mounted the wrong way round is far easier to spot now than it is to debug later, when it looks like a program fault.
The stick tells you its angle. Turn it far enough, and the motor moves.
when program starts :: events hat
clear display :: display
[2 v] reset angle :: sensors
write [Angle:] at line (1) :: display
forever
  write ([2 v] angle) at line (2) :: display
  if <[2 v] is angle [> v] (45) °?> then
    write [TURNING] at line (4) :: display
    [A v] set speed to (60) % :: motors
    [A v] start motor [clockwise v] :: motors
  else
    write [STILL  ] at line (4) :: display
    [A v] stop motor :: motors
  end
endWhat success looks like: hold the stick still, and nothing happens. Turn it slowly, and watch the number climb. When it passes 45, the motor starts. Bring it back below 45, and the motor stops. The number on the screen should match what your eyes see.
Does the number climb on its own? Then the model is not still. Or something is shaking it. If it counts the wrong way, your Gyro is upside down. Flip it, or use a number below zero, like −45. Say which one you chose.
Work through them in order — each is harder than the last. The extra challenge comes after all three, and it is meant to make you plan before you build.
Check the Gyro with a protractor. Reset it. Turn the model till the screen says 90 degrees. Then measure the real angle. Tell us both numbers and the difference.
Make the model act in three bands. Under 30 degrees, it does nothing. Between 30 and 60, it does one thing. Past 60, it does something else. For the middle band, you will need the and block from this lesson.
Measure your own drift. Drift is when the number changes but nothing moved. Reset the Gyro. Leave the model quite still. Write down the reading after 30 seconds. Then after one minute. Then after three minutes. How long would you trust this sensor before a reset? Tell us.
Prove the Gyro beats counting rotations. When a robot turns by counting rotations, small errors add up. On a square lap, the error grows at each of the four corners. Your job is to show that a Gyro does not have that problem. Plan a fair test on paper first. Use the same model. Turn it the same amount each time. Turn once by counting motor rotations. Turn once by watching the Gyro. Start from the same place. Measure the same way. Before you start, decide how you will check where it ends up. Run each way at least five times. Write down the end angle every time. Then do it all again on a slippery floor, where the wheels can slip. Two questions when you show it. Which way gave the same result more often? Did the slippery floor change one more than the other? And the Gyro was good for angle but no use for distance. Say which way you would use for each job. Say why you would want both on a contest robot.