Challenge 1
Ten strikes, evenly spaced, then stop. Somebody listening from across the room should be able to count them without watching, and the machine must stop on its own with the hammer down. No forever loops.
Quick Learn — the model, the instructions, the program and the challenges. The theory is in Full Lesson.
EV3 Robotics›Level 2 · Intermediate›Lesson 7
Level 2 · Lesson 7 · EV3-L02-0760 minutes · Ages 9–16 · Model: Hammer Bot
The Hammer Bot: a motor turns a lumpy wheel called a cam, the cam lifts a hammer, the hammer falls. Over and over, at whatever rhythm you decide.
Look at what the motor is being asked to do. It can only spin. The hammer needs to go up and down. Nothing in a motor does up and down — and yet the hammer does, because of one oddly-shaped piece of plastic between them.
Your job today is to control the two halves of that spin separately: the half that lifts, and the half that lets go.
There is a cam in every petrol engine, and there are a lot of them. The camshaft is a bar with lumps along it, spinning beside the engine, and each lump pushes a valve open at exactly the right moment before letting it snap shut again.
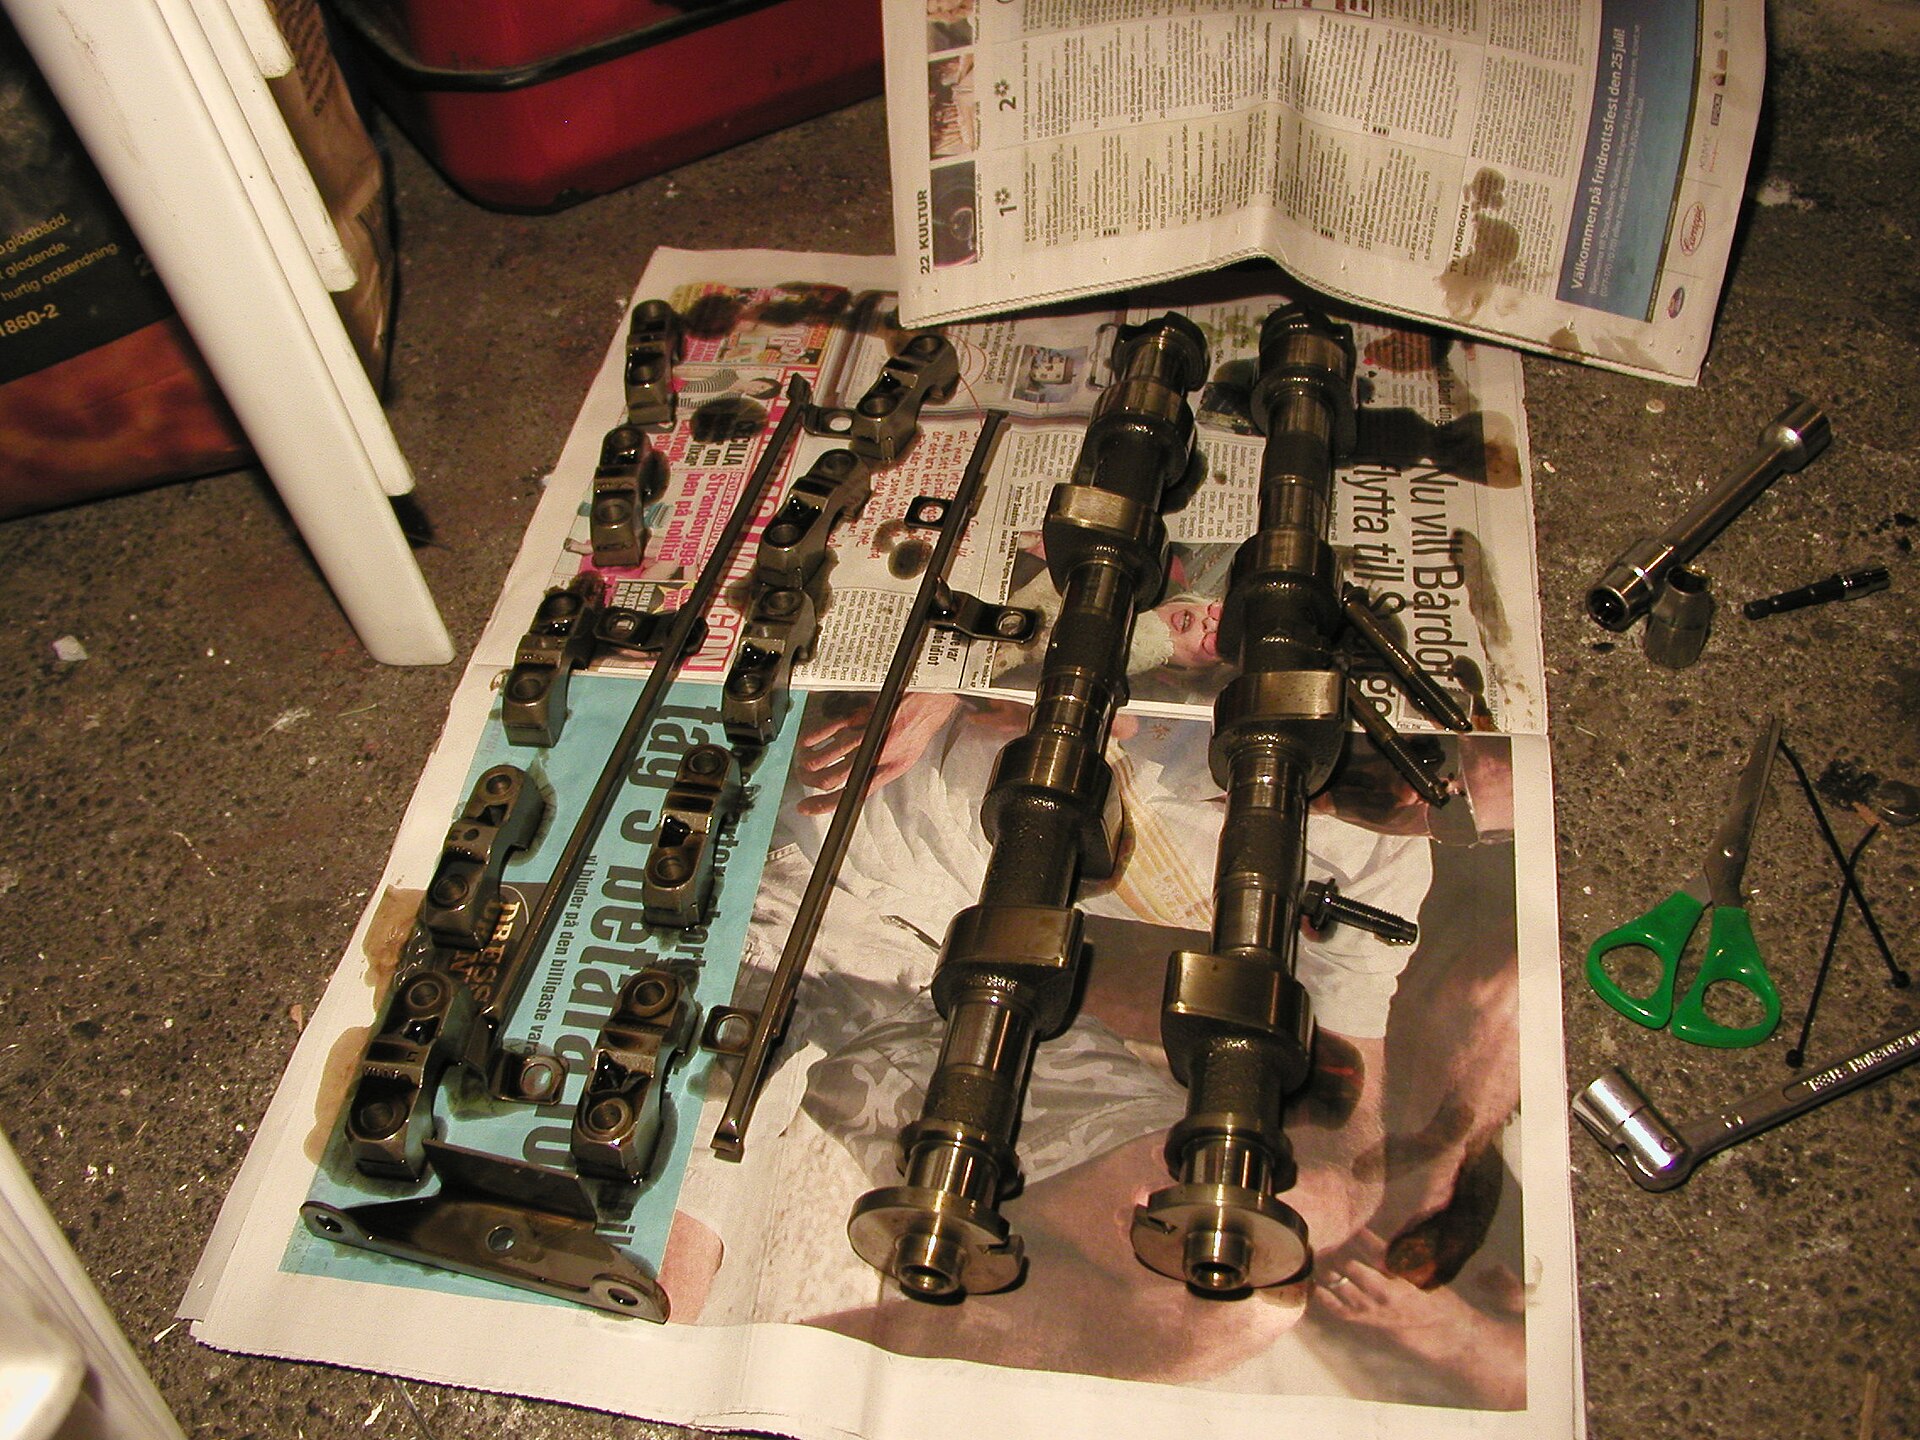
An engine has one thing spinning — the crankshaft — and a dozen things that need to move up and down in a strict order. A camshaft solves all of them at once. Every lobe is cut at a different angle around the shaft, so each valve opens at its own moment in the cycle.
That is why an engine is described in degrees. A mechanic does not say a valve opens “a bit before the top”; they say it opens at 12 degrees before top dead centre. The shape of the lobe decides how far the valve lifts, and its angle on the shaft decides when.
Get a camshaft a few degrees out of line and the engine either runs badly or destroys itself — a valve still open when the piston comes up gets hit by it. Whole engines are ruined by an angle being wrong by less than the width of a tooth.
A cam turns “going round” into “going up and down”, and the angle is when.
The cam does not do the same thing all the way round. For roughly half a revolution it is lifting the hammer. For the other half the hammer is coming back down.
| Where the cam is | What the hammer is doing | What you want the motor to do |
|---|---|---|
| 0° → 180° | Being lifted, against its own weight. | Go slowly. This is the hard half, and rushing it makes the model jump. |
| 180° → 360° | Falling, under gravity. | Get out of the way fast. The faster the cam clears, the harder the hammer lands. |
Two halves, two different speeds. To write that, you need to be able to say “half a turn” — and the unit for part of a turn is degrees.
[A v] run for (180) [degrees v] at (30) % speed :: motors
[A v] run for (180) [degrees v] at (100) % speed :: motors
| Degrees | Fraction of a turn | Looks like |
|---|---|---|
| 90 | a quarter | A right angle — pointing up, then pointing right. |
| 180 | a half | Straight up to straight down. Today’s number. |
| 270 | three quarters | All the way round bar a quarter. |
| 360 | the whole thing | Exactly one rotation — the same as 1 in the other unit. |
You could write 0.5 rotations instead of 180 degrees and the motor would do the same thing. Write degrees anyway. Angles are how mechanisms are described — by the person who designed the cam, by the mechanic setting the valves, and in every lesson from here to Level 4.
Everything so far has been relative: move 90 degrees from wherever you are now. Sometimes what you actually want is absolute: go to the 90-degree position, whatever position you happen to be in at the moment.
Both pointers below do the same job over and over: swing out a quarter turn, then come home. The only difference is the block that brings them back. Watch one trip and they look identical — so let it run for several.
relative — by an amount
absolute — to a place
Let it loop. Nothing about the left program is wrong — it is just that every trip starts from wherever the last one finished, so a small error is never corrected, only added to.
A pointer moved relatively slowly wanders: each movement starts from wherever the last one finished, so any small error is carried forward and added to. Each orange dash is a trip that called a slightly different place “home”. Nothing about that program is wrong — it is simply that a relative move has no idea where it is supposed to end up.
An absolute movement has no memory of the error. Told to go to position 0, it goes to position 0 — the same place every time, however wrong it was beforehand. That makes it the right tool for a home position: the known place a mechanism returns to before it starts work.
This is possible because an EV3 motor counts its own turning all the time. Its position can be read back, and can be reset to zero — which is how you tell the motor that here is what you mean by zero, usually at the start of a program with the mechanism held at its resting place.
A clock hand returns to twelve; a car’s steering returns to centre; a 3D printer homes its head before every print. All of them go to a position rather than moving by an amount.
Rotations for how far it travels. Degrees for what position it ends up in.
Machines repeat. A wiper sweeps, a conveyor runs, a ride goes round — and none of that should mean copying the same blocks over and over. A loop says “do this again” once.
| Block | What it does |
|---|---|
repeat (10) end | Runs the blocks inside a set number of times, then carries on below. |
forever end | Runs the blocks inside over and over, and never carries on below. |
repeat until <> end | Repeats until a condition becomes true — a loop with a sensor as its exit. |
Anything placed after a forever loop will never run. Not “runs late” — never. Both programs below end with the same block: set the status light green.
repeat (3)
forever
↑ this block never runs
Both programs contain the same green-light block. Let it run as long as you like — the right-hand ring will never turn green.
The repeat loop counts its three passes, stops, and moves on to the block underneath, so its light turns green. The forever loop reaches the bottom of its own blocks and jumps straight back to the top, so the block underneath is never reached — however long you leave it. If a program seems to stop half way through, look for a forever loop above the blocks that are not happening.
A program is a list, and the Brick works down it once. Every block runs, in order, and when the last one is done the program is over. That is fine for a list of instructions — drive, turn, beep, stop — because each is a thing you do once.
A sensor is not a thing you do once. Asking is 1 pressed? gives you an answer about this instant, and an instant later it may be wrong. Checking a sensor once tells you what the world was like at the moment the program started — which is almost never what you wanted to know.
So a program that has to react must ask again, and again, for as long as it is running. That is the whole job of the loop: not to repeat an action, but to keep the question being asked.
Wrap a sensor check and the motor it controls in a forever loop and you have built a closed-loop control system — the pattern behind every line follower, thermostat and cruise control:
It is called closed because the output feeds back round to the input: the motors move the robot, moving the robot changes what the sensor sees, and what the sensor sees changes the motors. Break the circle at any point and the robot stops responding.
when program starts :: events hat
forever
  if <[1 v] is pressed? :: sensors> then
    [A v] start motor [clockwise v] :: motors
  else
    [A v] stop motor :: motors
  end
end
Read it as a sentence and it is almost too simple to need explaining: for ever, if the button is pressed run the motor, otherwise stop it. The motor now follows the button for as long as the program is running.
This is the mistake nearly everybody makes first, and it is a hard one to spot because nothing about it looks wrong:
when program starts :: events hat
if <[1 v] is pressed? :: sensors> then
  [A v] start motor [clockwise v] :: motors
else
  [A v] stop motor :: motors
end
The logic is perfect. The ports are right. Nothing is misspelled. And the robot will ignore the button completely — because the Brick reaches that if/else a few milliseconds after you press Run, finds the button not pressed, takes the else branch, stops the motor, runs out of blocks and ends. By the time a finger arrives, there is no program left to notice it.
with forever — a closed loop
without it — the common mistake
↑ running — for the only time
Both programs contain exactly the same if/else. The only difference is the forever block around one of them.
Both programs contain exactly the same if/else. The counter is what gives it away: one keeps checking for as long as it runs, the other is stuck on the single check it made before anybody touched anything. A student who has seen this once stops writing it.
The tell on a real robot is a program that ends the instant you start it — the Brick returns to its menu almost immediately. If a sensor program finishes rather than waits, the loop is what is missing.
Say this back before moving on: “360 degrees is one whole turn.”
| Part | What it is doing here |
|---|---|
| EV3 Intelligent Brick | Counts the cam’s angle. It is also the heaviest thing on the model, and it is what stops the whole bot hopping across the desk when the hammer lands. |
| Large Motor — the cam | Turns the cam. It only ever spins one way; every up-and-down in this model is the cam’s shape, not the motor changing its mind. |
| The cam (not electronic) | The off-centre wheel or peg. Its shape decides how high the hammer lifts; the motor only decides how fast. |
| The hammer arm (not electronic) | Falls under its own weight. Nothing drives it down — which is why a heavier head hits harder. |
Before you write anything, turn the cam slowly with your fingers and watch the hammer.
Sensors go in ports 1, 2, 3, 4. Motors go in ports A, B, C, D. They are not interchangeable, and nothing will tell you politely if you swap them.
| Part | Port | Why this one |
|---|---|---|
| Cam motor (Large) | A | A job motor. It needs torque to lift the hammer against gravity, which is why it is the Large one. |
| Sensors | none | The Hammer Bot has no idea where its hammer is. Everything it does is counted, not sensed — which is exactly why the counting has to be right. |
Check your own build now:
Two routes, and either is fine. USB is the reliable one and the one to fall back on when a room’s Bluetooth is busy; Bluetooth leaves the robot free to move, which some models need.
Do these in order. Naming the Brick after you go looking for it in the list is how groups end up driving each other’s robots.
EV3 until somebody changes it.EV3.The two failures, every class, every time. The Brick has gone to sleep while you were building — press the centre button to wake it. Or you have paired with the group at the next table, which is why the name matters.
The long version, including Port View and how to read the port tiles, is in the Brick & Bluetooth guide.
USB is fine. The Hammer Bot stays put. Just keep the cable out of the hammer’s way — it will be struck ten times a run otherwise.
One change at a time. Listen rather than watch for this one — the rhythm and the loudness tell you more than the movement does.
Step 3 catches nearly everyone. Two blocks of 90 degrees is half a turn, so the cam only gets round once every two loops — ten loops give you five strikes, not ten. The loop count did not change; what one loop means did.
A loop repeats what you put in it, not what you meant to put in it.
Ten strikes, each one a slow lift and a fast drop, with a pause between so you can hear the rhythm.
when program starts :: events hat
repeat (10)
  [A v] run for (180) [degrees v] at (30) % speed :: motors
  [A v] run for (180) [degrees v] at (100) % speed :: motors
  wait (0.5) seconds
end
What success looks like: ten clear, evenly-spaced strikes, all sounding about the same. Then it stops on its own with the hammer down.
If the strikes get weaker as it goes, the cam is drifting: each pass is ending a few degrees off, and the error adds up over ten strikes. Turn the speed of the lift down and see if it improves — a motor asked to stop from full speed overshoots more than one stopping from a crawl.
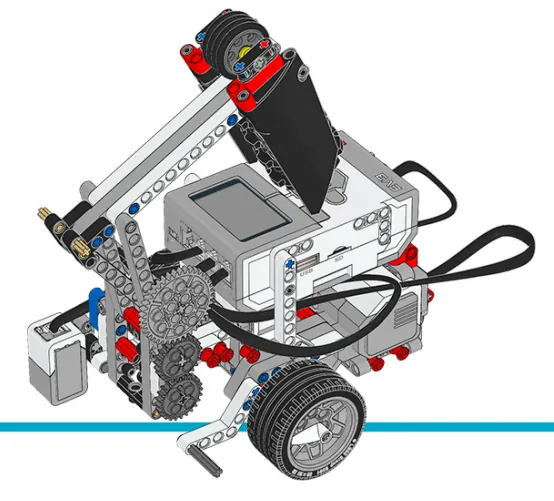
Build the model before you read any further. Everything after this is about making it do something, and none of it will make much sense with nothing on the table in front of you.
Use the viewer's own controls to zoom and turn pages. Fullscreen makes it big enough to build from.
Check the finished build against the picture before you switch anything on. A motor mounted the wrong way round is far easier to spot now than it is to debug later, when it looks like a program fault.
Work through them in order — each is harder than the last. The extra challenge comes after all three, and it is meant to make you plan before you build.
Ten strikes, evenly spaced, then stop. Somebody listening from across the room should be able to count them without watching, and the machine must stop on its own with the hammer down. No forever loops.
Give it a rhythm. Make one strike in every three land harder than the other two — a strong beat and two weak ones, repeating. The difference has to be audible, and the only thing you may change is how the cam moves.
Park it safely. After its last strike the hammer must finish RAISED and stay raised, so nothing is resting under it when the program ends. Getting there needs both the right number of degrees and the right stop setting — say which two blocks you used and why.
Build a machine that tests how hard things are. A hammer that always strikes the same way is a measuring instrument. Your job is to use it to put three materials in order of hardness — a lump of plasticine, a folded piece of paper, an eraser, or anything else your teacher approves. Plan the test before you run it. A fair test means every material gets the same strike, from the same height, the same number of times, in the same place. Decide what you are measuring — the depth of the dent, whether it springs back, how it sounds — and write it down first, because deciding afterwards is how you talk yourself into the answer you expected. Then run it and record what happened for each material. Two questions when you present it. What did you have to hold constant for the test to be fair, and which of those was hardest to hold constant? And a real hardness tester drops a weight rather than driving it with a motor — what does your cam do to the strike that a free-falling weight would not?