Challenge 1
Find the offset that walks best. The offset is the head start one side gets. Try a head start of 90, 180 and 270 degrees. Which one gave the steadiest walk on your build? Watch how high the body stays, not the legs.
Quick Learn — the model, the instructions, the program and the challenges. The theory is in Full Lesson.
EV3 Robotics›Level 2 · Intermediate›Lesson 9
Level 2 · Lesson 9 · EV3-L02-0960 minutes · Ages 8+ · Model: Dual Motor Hexapod
The Dual Motor Hexapod. It has six legs, three on each side. Each side has its own Large Motor.
Lesson 5 said two motors must stay in step. In Level 1, the Tricycle gave them different speeds to make a turn. This model needs a third thing. Nobody guesses it.
Same speed, same way, but always half a step apart. If you match them exactly, the hexapod lifts all six legs at once. Then it falls on its face.
Watch any insect walk. Ants, beetles and cockroaches all have six legs. They all walk the same way. It is one of the surest things in nature.

This way of walking is called the alternating tripod gait. A gait is a way of walking. A tripod is a stand with three legs. Alternating means taking turns. At every moment, three of the insect’s legs are on the ground. The other three swing forward. Which three are down? The front and back legs on one side. And the middle leg on the other side.
Three feet on the ground always make a steady stand. So an insect walking this way is always standing on a tripod. It never has to balance. It can stop in the middle of a step and it will not fall over.
The two sets of three take turns. When one set is down, the other is up. Half a step later, they swap. This gap is not a mistake in how the legs are made. The gap is what makes it work.
If the insect lifted all six legs at once, nothing would hold it up. Some other patterns leave only two legs down at one point. Two feet make a line, not a triangle. Anything balanced on a line falls off.
In step is not always right. Sometimes the gap between them is the whole idea.
Two motors can work together in three useful ways. You have met two of them.
| How they work together | Speeds | Starting points | Seen in |
|---|---|---|---|
| Matched | Same | Same | Lesson 5. The Stair Climber, going up straight. |
| Different speeds | Different | Does not matter | Level 1, Lesson 29. The Tricycle, turning. |
| Out of phase | Same | A gap | Today. Walking. |
The third row is the strange one. The two motors go at the same speed the whole time. They never go at different speeds. But they are always different, because one of them started later. Where each motor is in its turn is called its phase. When they are a step apart, we say they are out of phase.
You cannot tell a motor “be half a turn behind that one”. So you do it yourself, once, before the walking starts:
[B v] run for (180) [degrees v] at (30) % speed :: motors
[B v] start motor at (40) % speed :: motors
[C v] start motor at (40) % speed :: motors
After the first block, B is half a step ahead of C. Then both run at 40 for as long as you like. They go at the same speed, so the gap never closes. You set the phase once, at the start. Equal speeds keep it.
Half a step is not always 180 degrees. Say your legs take one full step in one motor turn. Then half a step is 180. Say they take two turns. Then half a step is 360. Turn the motor by hand and watch the legs before you pick the number.
The Movement blocks are made to keep two motors matched. That is their whole job. That is why Lesson 5 used them. A hexapod needs its two sides not matched, on purpose. So it uses two separate Motor blocks. Then you are in charge of how they work together.
A driving base has two Large Motors, one per wheel. You could drive them with two separate motor blocks — but they would never start at quite the same instant, and the robot would curve away. EV3 has a separate family of Movement blocks that treat the pair as a single driving base.
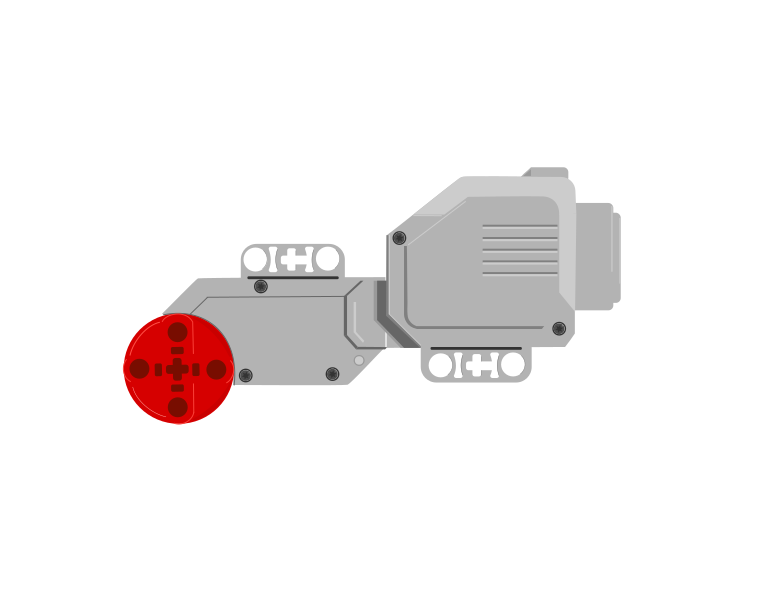 port Bport C
| Block | What it does |
|---|---|
set movement motors to [B v] and [C v] :: movement | Tells the Movement blocks which two ports are the driving wheels. Put it at the top of the program, before any movement. |
move [forward v] for (2) [rotations v] :: movement | Drives both wheels together, so the robot travels in a straight line. |
move for (1) [rotations v] at (75) (25) % speed :: movement | Drives the two wheels at different speeds, which makes the robot curve. |
set movement speed to (50) % :: movement | Sets how fast the driving base travels from now on. |
set movement motors to [B] and [C] is the block that decides which two motors every Movement block after it will drive. It does not look at the robot. It drives the two ports you name, whether or not there is a motor in them — so those two letters have to be the two sockets the cables are actually in.
This is the single commonest reason a driving base does nothing, and it is invisible in the program: every block is spelled correctly and the robot still will not go.
the same program on both robots
The yellow outline marks the two ports the block is driving. A robot only goes straight when both of them have a motor in them.
Both robots run the identical program. The left one has its motors in B and C, so both named ports have a motor and the robot drives straight. The right one is plugged into A and B: the block drives B, finds nothing in C, and never mentions the motor in A at all — so one wheel turns, one wheel sits there, and the robot swings round the dead one instead of driving.
If neither named port has a motor in it — cables in A and D, say, with the block still set to B and C — the robot does not move at all. The program runs happily to the end and the Brick reports nothing wrong, because as far as it is concerned it did exactly what it was told.
So before you look for a bug in the program, look at the cables: read the port letters off the Brick, then make the block say those two. B and C are only the usual choice, not a rule — if your build has the driving motors in A and D, set the block to A and D and everything works.
Everything a driving base can do comes from those two speed numbers. Try each button below and watch the trail the robot leaves.
The path is worked out from the two wheel speeds in the block, not drawn by hand — so changing the preset changes the numbers and the shape together.
Notice there is no steering block anywhere in that program, and no steering part anywhere on the robot. The turn is made entirely by driving the two wheels different amounts.
when program starts :: events hat
set movement motors to [B v] and [C v] :: movement
move [forward v] for (2) [rotations v] :: movement
move for (1) [rotations v] at (50) (-50) % speed :: movement
“Move forward 2 rotations” says nothing about the floor — it says how many times the wheels go round. How far the robot actually travels depends on how big the wheels are, and once round a standard EV3 driving wheel is about 17.5 cm.
Before doing any sums, get a feel for it. Drag the robot along and watch both scales at once — rotations on top, centimetres underneath, the same line. Land on the half marks: there is a number between 1 and 2, and it is 1.5.
Drag the robot, or use the arrow keys — it moves in half rotations. Rotations above the line, centimetres below.
1.5 — a half rotation past 1. Half a turn of the wheels is 8.75 cm, so halves matter.
35 ÷ 17.5 = 2. That is a number you can type straight into the block.
set movement motors to [B v] and [C v] :: movement
set movement speed to (30) % :: movement
move [forward v] for (2) [rotations v] :: movement
Steering at right 100 or left 100 drives the two wheels in opposite directions, so the base stops travelling and pivots where it stands. The angle it sweeps is a simple doubling of the rotations:
Half a rotation is the one worth remembering: a square corner, 90°.
| Rotations | The robot turns |
|---|---|
| 0.25 | 45° — half a corner |
| 0.5 | 90° — a square corner |
| 1 | 180° — turn round and face back |
| 2 | 360° — all the way round |
The one to memorise is 0.5 rotations = 90°. Everything else follows from doubling or halving it.
set movement speed to (20) % :: movement
move [right: 100] for (0.5) [rotations v] :: movement
Turn slowly. The wheels on a driving base are big and the robot carries a lot of weight, so at full speed it keeps going after the motors stop and lands past the angle you asked for. Somewhere between 15% and 30% speed is where turns become repeatable. A turn that overshoots is almost always a turn taken too fast, not a wrong number.
These figures belong to your robot. The distance depends on the wheels and the angle depends on how far apart they are, so a wider base needs a different number for 90°. Test it, measure what actually happened, and adjust — the same discipline as the Gyro Sensor tolerance.
Every wheeled vehicle steers this way — a tank, a digger, an office chair with two driven castors. Cars use a steering rack instead, but a robot that turns by driving its wheels at different speeds needs no steering mechanism at all.
Set the gap once. Then keep the speeds equal. Equal speeds keep the gap safe.
Everything an EV3 does begins with a motor turning. Before worrying about how far or how fast, there are only two things to say to a motor: start and stop. The blocks are the same whichever motor you use — only the port letter changes.
| Block | What it does |
|---|---|
[A v] start motor [clockwise v] :: motors | Starts the motor and immediately carries on to the next block. The motor keeps turning on its own. |
[A v] stop motor :: motors | Stops the motor. |
wait (2) seconds | Holds the program here, which is how you control how long a motor runs. |
Because start motor does not wait, a motor started on its own would run until the program ended. The pattern that gives a motor a length is three blocks:
when program starts :: events hat
[A v] start motor [clockwise v] :: motors
wait (2) seconds
[A v] stop motor :: motors
Read it aloud: start it, leave it two seconds, stop it. Change the wait and you change how far the motor gets.
The highlight below follows the block the Brick is running, and the shaft turns only while the program is between start motor and stop motor. Notice that the count keeps climbing all the way through the wait — the wait does not pause the motor, it pauses the program.
0.00rotations so farnoshaft turning
The count does not pause when the program does. A wait holds up the blocks, and the motor carries on turning underneath it.
This is the whole idea behind start motor: it hands the motor its instruction and moves on, leaving the motor running behind it. Nothing stops the shaft until a block tells it to.
The direction dropdown says clockwise or counterclockwise — but clockwise seen from where? Always from the axle end: look straight at the shaft coming towards you, and clockwise is the way a clock’s hands go.
Here the Medium Motor faces you, so its output axle points straight out of the page. This is the view to picture when you are choosing a direction.
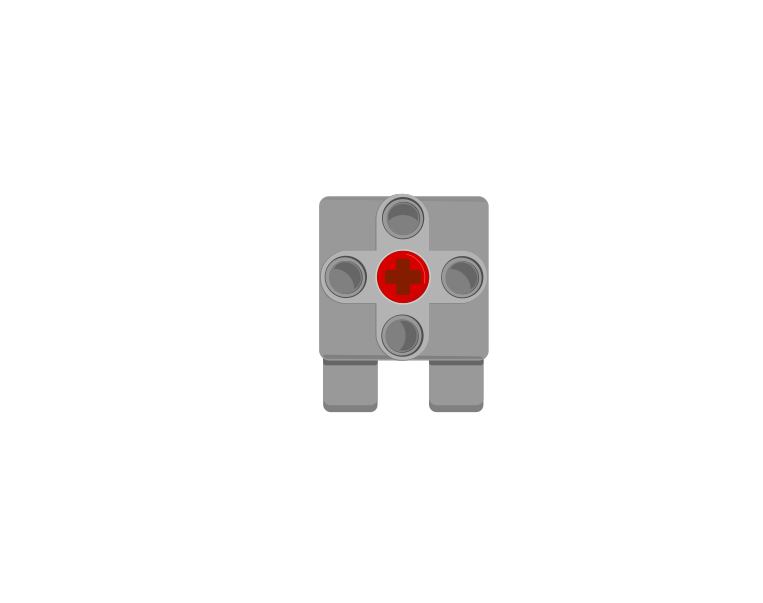
when program starts :: events hat
[A v] start motor [clockwise v] :: motors
wait (2) seconds
[A v] stop motor :: motors
A Medium Motor normally lives in port A or D.
The Large Motor is shown from the side, which is the face its axle comes out of — so once again you are looking straight down the shaft.
when program starts :: events hat
[B v] start motor [clockwise v] :: motors
wait (2) seconds
[B v] stop motor :: motors
A Large Motor normally lives in port B or C. Compare the two programs: they are the same three blocks, and only A has become B.
Medium · port ALarge · port BA fan, a conveyor belt or a spinning ride does not need to stop at an exact position — it just needs to run while something is happening. For those, timing the motor is simpler and perfectly good enough.
Say this back before you move on: “Same speed, different starting point.”
| Part | What it is doing here |
|---|---|
| EV3 Intelligent Brick | Sets the gap, then leaves the two motors alone. Its weight sits over the middle legs. They hold up most of the robot. |
| Large Motor ×2 — one per side | Ports B and C. Each one moves three legs through a set of joined parts. The two are not in step, on purpose. |
| The leg parts (not electronic) | On each side, the three legs are already out of step with each other. Your job is only the gap between the two sides. |
Sensors go in ports 1, 2, 3, 4. Motors go in ports A, B, C, D. You cannot swap them. If you do, nothing warns you. The robot just will not work.
| Part | Port | Why this one |
|---|---|---|
| Left legs (Large) | B | B is left. Today B is also the side that starts first. |
| Right legs (Large) | C | C is right. It starts from where it is. |
| Sensors | none | You set up the walk. The robot does not sense it. You will add a sensor in the challenges. |
Check your own build now:
Two routes, and either is fine. USB is the reliable one and the one to fall back on when a room’s Bluetooth is busy; Bluetooth leaves the robot free to move, which some models need.
Do these in order. Naming the Brick after you go looking for it in the list is how groups end up driving each other’s robots.
EV3 until somebody changes it.EV3.The two failures, every class, every time. The Brick has gone to sleep while you were building — press the centre button to wake it. Or you have paired with the group at the next table, which is why the name matters.
The long version, including Port View and how to read the port tiles, is in the Brick & Bluetooth guide.
Use Bluetooth. A model with six legs will find a cable on the floor and stand on it.
Before every run, set both sides to the same place by hand. Watch how high the body is. It is the best way to tell if the walk is working.
Think hard about step 4. The two speeds are only 5 apart. That is almost nothing. The walk lasts a few seconds, then falls apart. A small speed gap adds up, turn after turn. Soon the legs are far out of place. Small mistakes add up.
Only equal speeds keep the phase. Any difference at all will spoil it in the end.
Build the model before you read any further. Everything after this is about making it do something, and none of it will make much sense with nothing on the table in front of you.
One page at a time — use Next and Previous, or the ← → keys. Fullscreen makes it big enough to build from.
Check the finished build against the picture before you switch anything on. A motor mounted the wrong way round is far easier to spot now than it is to debug later, when it looks like a program fault.
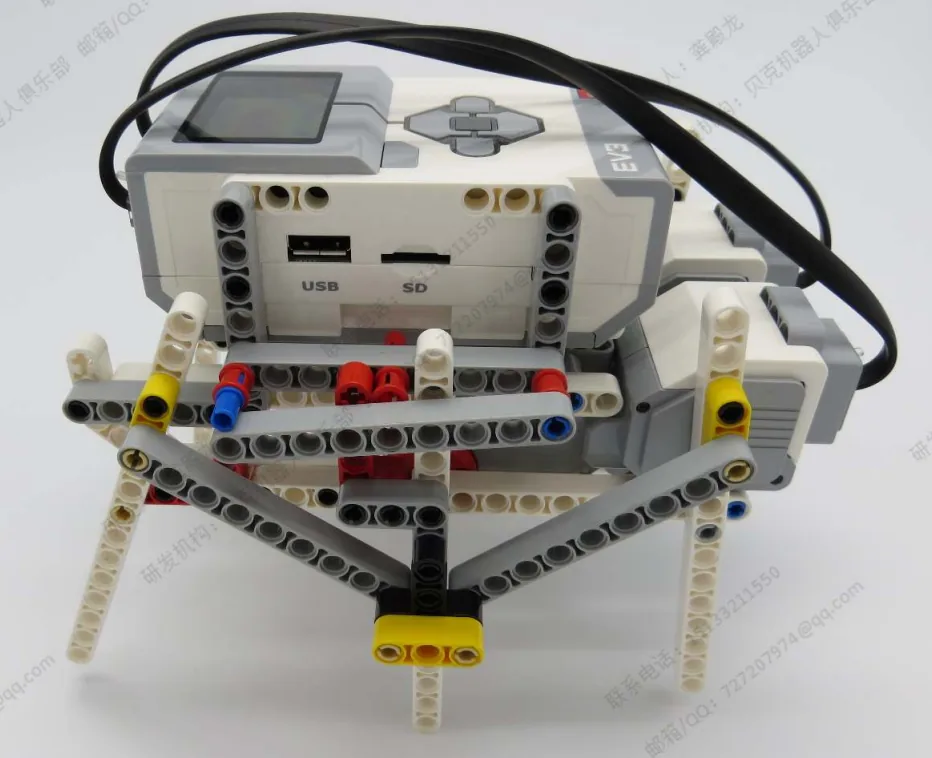
Give the left side a head start of half a step. Then run both at the same speed. The walk looks after itself.
when program starts :: events hat
clear display :: display
write [HEXAPOD] at line (1) :: display
write [Phase...] at line (3) :: display
[B v] run for (180) [degrees v] at (25) % speed :: motors
write [Walking ] at line (3) :: display
[B v] start motor at (40) % speed :: motors
[C v] start motor at (40) % speed :: motors
wait (8) seconds
[B v] stop motor :: motors
[C v] stop motor :: motors
write [Stopped ] at line (3) :: display
What success looks like: the hexapod walks smoothly. At every moment, you can see three legs down and three swinging. Watch it from the side, not from above. In a good walk, the body stays at the same height. That is because it is always standing on a tripod.
Does it wobble or drag its belly? Then the gap is wrong for your build. Try 90 degrees, and 270. One will look much better. That number belongs to your build.
Work through them in order — each is harder than the last. The extra challenge comes after all three, and it is meant to make you plan before you build.
Find the offset that walks best. The offset is the head start one side gets. Try a head start of 90, 180 and 270 degrees. Which one gave the steadiest walk on your build? Watch how high the body stays, not the legs.
Show what happens with no offset. Start both sides together and run it. Say just what goes wrong. Does it bounce, drag or fall? Then say why it matters to keep three legs down.
Break the walk with speed. Set one motor 5% faster than the other. Time how long the walk lasts before it falls apart. Then explain it. Why does a small difference in speed turn into a big difference in where the legs are?
Make the hexapod walk a set distance. It must still be walking well at the end. Mark a start and a finish about a metre apart. Your hexapod has to cross from one to the other. At the finish, its walk must look as good as it did at the start. Plan it first. Choose the offset from your own tests. Choose the speed. Guess how long the crossing will take. Then decide how you will judge "still walking well". Do this before the run. Make it something someone else could check. Run it at least three times. Each time, write down if the walk held. When you show it, answer two questions. Did the walk get worse over the distance? If so, what would you have to add to keep it together? And your offset is set once at the start. It is never checked again. What would the robot need so it could notice its walk had slipped, and fix it?