60 minutes · Ages 9–16 · Model: Amusement Park Rotating Car
What you are building 3 min
The Rotating Car: a fairground ride on a Medium Motor, spinning its cars round while the Brick screen works as the operator’s console.
A ride has a control panel. Not a list of messages scrolling past — a panel, where the ride name sits at the top, the lap count sits in the middle, and the status sits in the corner, each in its own place, all the time.
You cannot build that out of eight stacked lines. Today you get to put text wherever you want it.
In the real world 5 min
Where you have seen it
Every fairground ride has an operator standing at a console — a panel of lamps, counters and switches. At a night market or a theme park, that panel is how one person runs a machine carrying twenty people.
A Music Express ride at Carousel Gardens, New Orleans. Photo: Bart Everson / Wikimedia Commons (CC BY 2.0).
Why it is built that way
An operator has to take in the state of the ride at a glance, while looking somewhere else — because their eyes should be on the passengers, not on the panel.
That is only possible if every piece of information lives in a fixed place. The lap counter is always in the same spot, so it can be read with a flick of the eye. If the panel rearranged itself every few seconds, the operator would have to stop and read it properly every time — and a ride operator who is reading is not watching.
What would go wrong without it
A console that scrolls is a console nobody can use in a hurry. Look at it during an emergency and the thing you need has just moved up a line and off the top.
A display you have to read is worse than a display you can glance at.
The main concept — anywhere on the glass 6 min
The Brick screen is 178 pixels across and 128 down. Until now you have been using eight of those rows and ignoring the rest.
write [EV3] at x: (10) y: (20) with font [normal black v] :: display
Two numbers instead of a line number — and a font, which this form requires.
Block
Where the text goes
Good for
write [] at line (n)
One of eight rows, always starting at the left edge.
A running commentary — messages arriving one after another.
write [] at x: () y: () with font []
Any pixel on the screen, at the size you choose.
A panel — several things at once, each in its own fixed place.
Which way is up
So a console laid out top to bottom has y going up as you go down the panel:
Where you want it
x
y
Ride name, top left
5
5
Big lap number, middle
60
50
Status, near the bottom
5
100
The font is part of the layout
The font dropdown is not decoration — a large font makes the number an operator has to read from two metres away readable, and bigger text takes more room, so it changes what else fits. Choose the font when you choose the position, not afterwards.
ComponentOutput5 min
The Brick display
The Brick’s screen is a small black-and-white whiteboard. You can wipe it, draw one of the built-in pictures on it, or write your own words at a spot you choose. It is how the robot tells a person what it is doing.
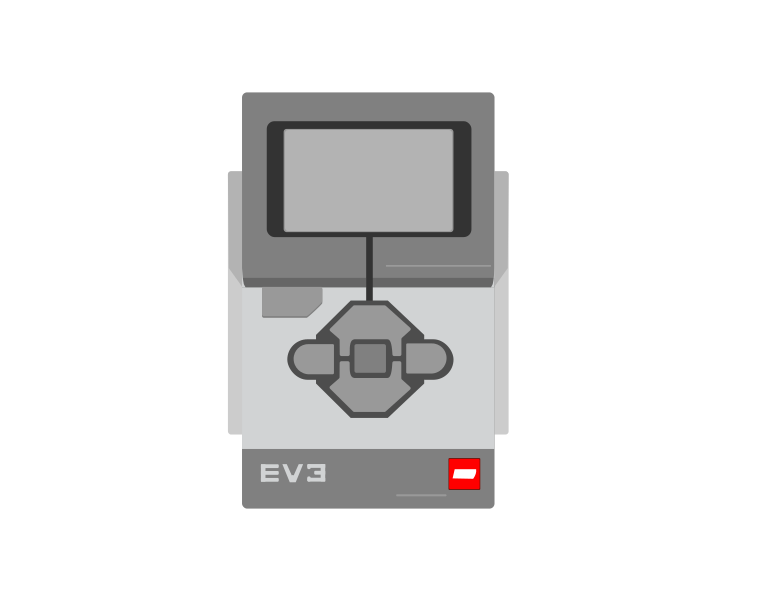
The screen sits above the buttons on the face of the Brick. It is small and black-and-white, so short messages work and long ones do not.
Blocks reference
Block
What it does
clear display :: display
Wipes the screen blank, ready for something new.
display [Eyes / Neutral v] :: display
Draws a built-in picture chosen from a list — eyes, faces, arrows, symbols.
display [Eyes / Neutral v] for (2) seconds :: display
Draws the picture, holds the program for that long, and then carries on. Handy when a face should be seen before anything else happens.
write [Hello] at line (1) :: display
Writes your own text on one of the screen’s eight lines.
write [Hello] at x: (10) y: (40) with font [normal black v] :: display
Writes text at an exact spot instead of a line, and lets you choose the size. Use it when a message has to line up with something else on the screen.
Clear it, or write on top of what is there
The screen has no memory of whose writing is whose. It keeps every mark until something wipes it — including the marks left by the last run. Watch the same program with and without its clear display block.
with clear display
when program starts
clear display
display Eyes / Neutral
write GATE OPEN at line 7
without it
display Eyes / Neutral
write GATE OPEN at line 7
1lines · cleared1lines · not cleared1run
Cleared: one message, readableNot cleared: 1 messages on line 7
Both Bricks still show whatever was left on the screen when the last run ended.The left program clears its screen. The right one has no clear block, so the old writing stays where it is.Both draw the eyes.Both write this run's message on line 7 — and on the right it lands on top of the message that was already there.Finished. The right-hand screen keeps everything it has ever been told to write.
drawing
Let it loop two or three times. The left screen still reads cleanly; the right one is the same program with one block missing.
Both Bricks are told exactly the same thing. The left one wipes the screen first, so line 7 holds one message and reads correctly. The right one never wipes, so each new message is drawn over the last and the words turn into a smudge. This is why a program that seems to display nonsense is usually displaying the truth — several times over.
Where the writing goes
There are two blocks for writing text, and they describe where in two completely different ways. Watch one message move around the screen under both of them.
clear display
write READY at line 1
write READY at x: – y: – with font normal black
the screen is 178 pixels across and 128 down
0x · across0y · down1line
write [READY] at line (1). Line 1 is the top of the screen, hard against the left edge.The same block, with line 4. Same words, three lines further down — the lines are evenly spaced, about ten pixels apart.Line 8 is as far as the line block goes, and that is only part of the way down. The bottom of the screen is out of its reach.So here is the other block: write [READY] at x: (0) y: (0). That has landed in exactly the same place as line 1 — because x: 0 y: 0 IS the top-left corner.x is how far across, from the left. x: 90 moves it towards the middle.y is how far DOWN, from the top. y: 110 is near the bottom — a bigger y means lower, and that is the one that catches everybody.Finished. Two blocks, two ways of saying where — and one of them can reach the whole screen.
line 1
The arrows are the two numbers. The one along the top is x; the one down the side is y, and it counts downwards from the top edge.
Writing on a line
write [EV3] at line (1) is the simple one. You give it a line number and it puts the text there, starting hard against the left edge — you do not choose how far across, only how far down.
Line 1 is the top. The numbers count downwards, so line 2 is below line 1, not above it.
There are eight of them, each about ten pixels lower than the last. That means all eight sit in the upper part of the screen and the line block cannot reach the bottom at all.
One message per line. Two messages sent to the same line land on top of each other and turn into a smudge — put them on different lines, or clear the screen in between.
For most robots this is all you need: a status word on line 1, a reading on line 3, a warning on line 5. Pick your lines at the start and keep each one for one job, the way you would keep one colour of status light for one meaning.
Writing at x and y
write [EV3] at x: () y: () with font [] treats the screen as a grid of pixels — 178 across and 128 down — and lets you put the text anywhere on it.
x is how far across, from the left edge. x: 0 is the far left; x: 177 is the far right. Bigger x moves right, which is what everybody expects.
y is how far down, from the top edge. y: 0 is the very top; y: 127 is the bottom. Bigger y means lower — this is the one that catches people out, because on a graph at school a bigger y means higher.
The corner is 0, 0. x: 0 y: 0 is the top-left, and it puts the text in exactly the same place as at line 1 — the two blocks are describing the same screen.
The pair of numbers is the top-left corner of the text, not its middle. The letters go down and to the right from the point you name.
The block ends with a font dropdown, and normal black is the usual choice. A larger font makes the writing easier to read from across the room but takes more room across the screen, so fewer characters fit before the text runs off the edge.
Which one to use
Use lines for ordinary status messages — quick to write, impossible to get wrong, and eight of them is plenty for one robot.
Use x and y when the position itself matters: putting a label and its number side by side, lining a heading up over a reading, filling the lower part of the screen, or moving something across the screen as a value changes.
Putting a number on the screen
The text slot of either block will take a reporter, so a sensor value can be shown directly: drop (4 distance in cm) into the slot and the screen shows the reading. That is the EV3’s version of a print statement, and it is the fastest way to find out what a robot actually thinks it is seeing.
A bare number on its own is hard to read, though. To show DIST: 23 rather than 23, use the operator block join [DIST: ] () to glue the label to the value, and put the join into the write block’s text slot.
when program starts :: events hat
clear display :: display
forever
  write (join [DIST: ] ([4 v] distance in [cm v] :: sensors)) at line (1) :: display
end
Note the forever: a value written once is a value from the start of the program. To watch a reading change, the write block has to be inside a loop.
Advanced — a dashboard, not a number
Once one value is on the screen the rest follows, and the useful trick throughout is join: it glues two pieces of text together and hands the result to the write block. Anything that reports a value can go in either slot — a variable, a sensor, or another join.
A variable with a label on it
Counting is the classic case. A variable counts how many times the Touch Sensor has been pressed, and a bare 5 on the screen tells nobody anything — PRESSED: 5 tells them everything:
when program starts :: events hat
clear display :: display
set [count v] to (0) :: variables
forever
  wait until <[1 v] is pressed? :: sensors>
  change [count v] by (1) :: variables
  write (join [PRESSED: ] (count)) at line (1) :: display
  wait until <not <[1 v] is pressed? :: sensors>>
end
The two wait until blocks are what make it count presses rather than counting as fast as the loop runs while your finger is down. That is the Touch Sensor’s own lesson, but it shows up here because a counter on the screen is where you first notice it going wrong.
Several sensors, one line each
Give every reading its own line and keep it. A line that changes meaning halfway through a program is unreadable at a glance, which is the only speed a screen on a moving robot gets read at.
when program starts :: events hat
clear display :: display
forever
  write (join [DIST: ] ([4 v] distance in [cm v] :: sensors)) at line (2) :: display
  write (join [DEG: ] ([A v] degrees counted :: sensors)) at line (5) :: display
end
degrees counted is worth putting on the screen the first time you use it — it is the fastest way to find out whether a motor is turning as far as you think it is, and it is the block behind every “why did it stop early” question.
Turning a number into a word
Sensors report numbers, and people read words. The Colour Sensor reports 5; the person watching wants RED. A chain of if … then … else blocks does the translation, and it is worth doing once into a variable rather than in every write block:
if <([3 v] color :: sensors) = (5)> then
  set [name v] to [RED] :: variables
else
  if <([3 v] color :: sensors) = (4)> then
    set [name v] to [YELLOW] :: variables
  else
    set [name v] to [OTHER] :: variables
  end
end
write (join [COLOR: ] (name)) at line (4) :: display
The same shape turns a distance into a warning. Here the screen carries the number and what the number means, which is what lets somebody across the room tell whether the robot is about to hit something:
if <([4 v] distance in [cm v] :: sensors) < (10)> then
  set [status v] to [TOO CLOSE!] :: variables
else
  if <([4 v] distance in [cm v] :: sensors) < (30)> then
    set [status v] to [OBSTACLE FOUND] :: variables
  else
    set [status v] to [NOTHING FOUND] :: variables
  end
end
write (status) at line (3) :: display
Drive all four of those at once below. The screen is the real thing — five write blocks, five lines, and every one of them a join.
Drive the sensors and read the screen. Every line is one write block with a join in its text slot.
24 cm
180°
Colour Sensor5 → RED
Touch Sensor3 presses
Line
What goes in the write block
On the screen now
1
join "PRESSED: " (count)
PRESSED: 3
2
join "DIST: " (4 distance in cm)
DIST: 24
3
(status) — set by the if chain
OBSTACLE FOUND
4
join "COLOR: " (name)
COLOR: RED
5
join "DEG: " (A degrees counted)
DEG: 180
Line 4 says COLOR: RED, but the sensor only ever said 5. The if chain in between is what turns a number into a word.
Advanced — stopping the screen from flickering
The moment a reading goes inside a loop, one of two things goes wrong, and which one depends on where the clear display block went.
Almost everybody tries clear inside the loop first. It gives the right text — and a screen that blinks several times a second, because between the clear and the write there is genuinely nothing on the screen and the loop goes round faster than your eye.
So the clear gets moved to the start of the program, the blinking stops, and the words go wrong. Writing text paints only the characters it has and leaves everything past them exactly where it was. Write RED over YELLOW and the LOW is still there: the screen says REDLOW. Go the other way — yellow first, then red — and it looks fine, which is why this bug takes so long to pin down.
when program starts :: events hat
clear display :: display
forever
  write (name) at line (3) :: display
end
YELLOWwhat the sensor says—what the screen says0characters left behind
never blankleftovers survive
The Colour Sensor reads a colour and the name goes on line 3, over and over, inside a forever loop.Rock steady, and wrong. Writing paints only the characters it has, so the tail of the longer word before it is still sitting there.Nothing is misspelled and nothing is broken. Every red character is the tail of a longer word that was never wiped — RED over YELLOW reads REDLOW.Finished. Three programs, one screen, and only one of them is both steady and right.
waiting
Watch the bottom three rows rather than the Brick. They are what the screen is actually doing: old characters, new characters, and whatever survives.
The fix is to make the new text at least as long as the old one, and join already does that: pad it with spaces. RED plus three spaces is six characters — exactly enough to paint over YELLOW. Nothing is left behind, and nothing is ever blank.
write (join (name) [ ]) at line (3) :: display
Pad to the length of the longest thing that line can ever show. Six characters covers RED, BLUE and GREEN but not NOTHING FOUND — count the longest message, and add spaces to match. The same applies to numbers: DIST: 5 after DIST: 40 leaves a stray 0 on the end, so a line that shows a two-digit reading needs a trailing space.
Use clear-inside-the-loop when the whole screen changes at once and a flicker does not matter; use the padding trick whenever a value is being watched.
Advanced — a whole list on the screen
Once several values need showing, the line number becomes a counter and the values come out of a list: write item 1 at line 1, item 2 at line 2, and so on inside a repeat. That needs the list blocks rather than the display blocks, so it lives with them — Lists covers building one and reading it back item by item, and the loop that walks it is the same loop that fills the screen.
Why it matters
Machines in the real world tell you what they are doing: a microwave counts down, a lift shows its floor, a car dashboard warns you. A robot that shows WAITING and then OPEN is far easier to understand — and far easier to debug — than one that moves silently.
Lines are for messages. Coordinates are for panels.
▶Reading the motor's own counterFrom Lesson 8 — the lap number on this console comes from the motor, not from a variable.Show meHide
ComponentSensing5 min
Reading a motor's position
Every EV3 motor contains a sensor that counts how far it has actually turned. That means a motor is not only an output — you can ask it where it is, and the answer describes what really happened rather than what you asked for.
The counting happens inside the motor housing, on this shaft. That is why the reading describes what the motor did — not necessarily what the robot did, if a wheel slipped.
Blocks reference
Block
What it does
([A v] degrees counted :: sensors)
Reports how far this motor has actually turned since the count was last reset, in degrees.
[A v] reset degrees counted :: motors
Sets the count back to zero, making right here the new reference point.
([A v] speed :: sensors)
Reports how fast the motor is turning right now, as a percentage. A motor that is being driven but reads zero is a motor that is stuck.
Asked for, versus achieved
Those two are not always the same. Here are two identical motors, running the same program, with only their mechanisms different.
Both motors are told to turn two rotations — 720 degrees. Both counters start at zero.Both turning. The counters climb together, and so far the two motors agree.The right-hand arm has run into the post and cannot go past it. The motor is still straining against it, the counter has stopped, and the program is still waiting on that block.The left motor finished at 720. The right is stuck at 284 — it never got past the post, and that gap is the only way the robot can tell.Finished on the left. The right-hand program is still waiting, and will wait for ever.
stopped
Nothing on the Brick announces a stall. The only evidence is that the counter stopped changing while the motor was still being told to turn.
Nothing on the Brick announces the jam. The motor is still being driven, the program is still sitting on the same block, and the only trace of the problem anywhere is a counter that has stopped climbing. Comparing what you asked for with what was counted is how a robot notices — which is the whole of stall detection.
Zero is wherever you say it is
When the Brick powers on, the count is simply whatever it happens to be. It is not a position on the machine — it becomes one only when you tie it to something physical.
That is what reset degrees counted is for, and it is not just a tidy-up block for the top of a program. Where you put it decides what zero means, so putting it part-way through — after the mechanism has been driven somewhere known — is the normal way to use it, not an abuse of it.
Find home first, then reset
A conveyor has no idea where it is. Give it a touch sensor at one end and it can find out: drive it until the sensor is pressed, and it is now at a place you can name. Only then reset the count, and that end becomes 0.
when program starts :: events hat
[A v] start motor [counterclockwise v] :: motors
[1 v] wait until [pressed v] :: sensors
[A v] stop motor :: motors
[A v] reset degrees counted :: motors
The order is the whole point. Reset before the sensor is pressed and you have zeroed a random spot; reset after it, and every later reading means “how far from home”. This is called homing, and it is why a printer rattles its head to one side when you switch it on.
Drive towards home gently. The mechanism is deliberately being run into its own end stop, so a slow speed saves the gears — and the touch sensor is what stops it, which means it stops in the same place every time regardless of where it started.
Putting zero somewhere more useful
Home is often a corner, and a corner is an awkward place to measure from. Say the conveyor carries a chute that dispenses bricks, and you would rather describe its position as left and right of the middle. Then home once, drive the known distance to the middle, and reset again there:
when program starts :: events hat
[A v] start motor [counterclockwise v] :: motors
[1 v] wait until [pressed v] :: sensors
[A v] stop motor :: motors
[A v] reset degrees counted :: motors
[A v] run [clockwise v] for (900) [degrees v] :: motors
[A v] reset degrees counted :: motors
Now the middle is 0. Moving right counts up, moving left counts down past zero into negative numbers — the count is perfectly happy to go negative — and “go back to the middle” becomes the simplest instruction in the program: drive until the count reaches 0.
Both resets earn their place. The first one turns a meaningless number into a distance from a real, repeatable place. The second one moves zero to where the maths is easiest. A reset in the middle of a program is only a mistake when the mechanism is somewhere you cannot name.
Turning turns into distance
Because the count is in degrees, and a wheel of known size travels a known distance per turn, the reading can be converted into how far the robot has actually driven. That is how a robot reports a distance in centimetres rather than in rotations — and it is why changing the wheels changes the answer.
Why it matters
This is how a printer knows the paper jammed, how a car window stops when it meets your hand, and how a robot arm knows it has reached its limit. A machine that can only give orders is fragile; one that can check what happened can recover.
Say this back before moving on: “Bigger y is further down.”
What’s in this build 4 min
Part
What it is doing here
EV3 Intelligent Brick
The ride’s control console. Today the screen is the deliverable, not a debugging aid.
Medium Motor — the turntable
Spins the ride. Medium because it needs to turn smoothly and steadily rather than forcefully — a fairground ride that jerks is a fairground ride nobody rides twice.
The Brick screen
178 × 128 pixels, black on grey. Small, and every pixel of it is yours.
The Brick speaker
The bell that tells passengers the ride is starting and ending.
Sketch the panel before you code it
Draw a rectangle on paper, 178 wide and 128 tall — a box roughly twice as wide as it is tall.
Mark the top-left corner 0,0 and put an arrow on the y axis pointing down. Do this now and you will not get it backwards later.
Write in where the ride name, the lap count and the status should go. Read the x and y off your sketch.
Check nothing overlaps. Two pieces of text at the same y will collide, and the screen will not warn you.
Ports — and the rule 4 min
Sensors go in ports 1, 2, 3, 4. Motors go in ports A, B, C, D. They are not interchangeable, and nothing will tell you politely if you swap them.
Part
Port
Why this one
Turntable (Medium Motor)
A
One job motor — and the source of the lap count on the console, so its port appears inside a reporter as well.
Sensors
none
The ride has no idea whether anyone is on it. The console reports what the machine is doing, not what the passengers are doing.
Check your own build now:
Motor in A.
Mount the Brick so the screen faces you, the operator, not the ride. It is a console; it is meant to be read.
Check the cars swing clear of everything through a full turn, including the cable.
Spin the ride by hand once and watch nothing catch.
Connect the Brick 4 min
Two routes, and either is fine. USB is the reliable one and the one to fall back on when a room’s Bluetooth is busy; Bluetooth leaves the robot free to move, which some models need.
▶How to connect the BrickUSB and Bluetooth, step by step, with a photograph of every screen. Open it if you have not done this before — or if pairing is not working.Show meHide
USB — the reliable one
Switch the Brick on with the dark grey centre button.
Cable into the Brick’s PC port — the small square socket beside the numbered ports, not one of the numbered ones.
Other end into the computer.
Bluetooth — name it first
Do these in order. Naming the Brick after you go looking for it in the list is how groups end up driving each other’s robots.
Name your Brick. On the Brick: Settings (the spanner) → Brick Name. Type something nobody else will pick, then press the tick. Every Brick is called EV3 until somebody changes it.
Turn Bluetooth on. Settings → Bluetooth. Tick Bluetooth and Visibility. Leave iPhone/iPad/iPod unticked.
Connect from EV3 Classroom. Click the Brick icon at the top of the programming area, find your Brick by name, and click Connect.
Say yes on the Brick. It asks “Connect?” with the computer’s name — choose the tick, then accept the passkey, which is already 1234.
Where to read it. The name sits in the bar across the very top of the screen, on every screen — so you can check which Brick you are holding at any moment without going into a menu. This one is EV3VE. A Brick nobody has renamed says EV3.Step 3, and the reason step 1 exists. Three Bricks in range — read the name before you click Connect. Pairing with the wrong one is not an error: it works perfectly, on somebody else’s robot.
Step 2.Bluetooth switches the radio on; Visibility is what lets the computer find you. With Visibility off your Brick works perfectly and simply never appears in the list.Step 4. Look at the Brick. It asks whether to accept and names the computer. Choose the tick.Then the passkey, already 1234. Press the tick again and you are connected.
The two failures, every class, every time. The Brick has gone to sleep while you were building — press the centre button to wake it. Or you have paired with the group at the next table, which is why the name matters.
The long version, including Port View and how to read the port tiles, is in the Brick & Bluetooth guide.
Bluetooth suits this one. You will be looking at the Brick’s screen rather than the laptop’s for most of the lesson, so the Brick wants to be somewhere you can see it.
Confirm the connection 2 min
Check the Brick icon: connected, or not.
One Medium Motor tile on A.
Turn the ride by hand and check tile A counts — that counter becomes the lap number on your console.
Look at the Brick’s screen now, before you run anything. Notice how much of it is empty. That is the space this lesson is about.
Change it and test 8 min
Change one coordinate at a time and predict where the text will land before you run it. Getting the prediction right is the skill; the program will tell you soon enough.
Change the title’s y from 5 to 120. Predict first: does it move up or down?
Change the counter’s font from large to normal. Same position, smaller text. Which is the better console, and for whom?
Put the counter at x: 0, y: 50 and then x: 150, y: 50. One of those runs off the edge of the screen. Find out which, and say what the screen does about it.
Write the status at y: 50, the same as the counter. Watch them collide. This is why you sketched the panel first.
Replace all four coordinate blocks with write [] at line () versions. Same information, stacked. Then say which version you would rather operate a ride from, and why.
Step 5 is the argument of the lesson, and it is not a foregone conclusion. Lines are quicker to write and perfectly good for a commentary. Coordinates cost you a sketch and buy you a panel. Knowing which job you have is the point.
Decide what the reader needs to see at a glance, then put it somewhere it will always be.
This is what you are building: the Amusement Park Rotating Car.
Build it 15 min
Build the model before you read any further. Everything after this is about making it do something, and none of it will make much sense with nothing on the table in front of you.
Use the viewer's own controls to zoom and turn pages. Fullscreen makes it big enough to build from.
Check the finished build against the picture before you switch anything on. A motor mounted the wrong way round is far easier to spot now than it is to debug later, when it looks like a program fault.
Make it move 10 min
A ride cycle with a proper console: name at the top, a big turn counter in the middle, status at the bottom.
when program starts :: events hat
clear display :: display
[A v] reset degrees counted :: motors
write [PASAR MALAM] at x: (5) y: (5) with font [normal black v] :: display
write [SEDIA] at x: (5) y: (100) with font [normal black v] :: display
play beep (60) for (0.5) seconds :: sound
wait (1) seconds
write [JALAN] at x: (5) y: (100) with font [normal black v] :: display
repeat (6)
  [A v] run for (360) [degrees v] at (30) % speed :: motors
  write ([A v] degrees counted) at x: (60) y: (50) with font [large black v] :: display
end
write [TAMAT] at x: (5) y: (100) with font [normal black v] :: display
play beep (50) for (0.8) seconds :: sound
Three areas of the screen, each updated by its own block, none of them scrolling.
The title at 5,5 — written once, at the top left, and never touched again for the whole ride.
The status at 5,100 — near the bottom. It gets rewritten three times (SEDIA, JALAN, TAMAT) and always at the same coordinates, so each new word lands exactly on top of the last.
The counter at 60,50 — the middle of the screen, in a large font, updated once per turn. This is the number the operator glances at.
run for 360 degrees at 30% — one full turn of the ride per pass, slow enough to be pleasant.
What success looks like: the title stays put, the big number in the middle climbs 360, 720, 1080…, and the word at the bottom changes as the ride starts and ends. Nothing ever scrolls, and you can read the ride’s state without waiting for anything.
If old text shows through the new, you are writing a shorter word on top of a longer one — TAMAT over JALAN leaves nothing behind, but a short word over a long one leaves its tail. Pad the short word with spaces, or clear the display and rewrite the whole panel.
Challenges 27 min
Work through them in order — each is harder than the last. The extra challenge comes after all three, and it is meant to make you plan before you build.
Challenge 1
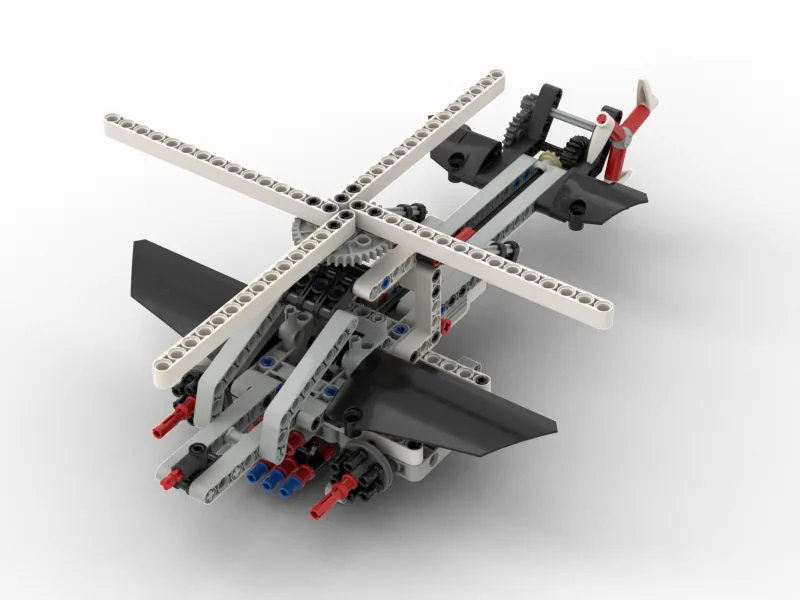
Make the Apache run a proper start-up and shutdown. The screen must say what the aircraft is doing at each stage, the rotors must spin up gently rather than jumping to full speed, and everything must come to a stop on its own. Somebody watching should be able to follow what is happening without being told.
Challenge 2
Fly a mission with three phases: idle, cruise, and full power. Each phase must run at a different speed, last a different length of time, and announce itself on the Brick screen. Write down the speed and the duration of each phase before you build it, then check that what the aircraft does matches your plan.
Challenge 3
Count the gearing yourself and prove it. Work out how many turns the tail rotor makes for every one turn of the main rotor, using nothing but the port A reading and your own eyes. Then use that number to run the aircraft for an exact number of main-rotor turns. Report the ratio and how you measured it.
Extra challenge
Build a start-up sequence a pilot could actually use.
A real aircraft is not switched on. It is brought to life in a fixed order, with a check at each stage, because doing it in the wrong order breaks things. Your job is to design that sequence for your Apache and make the Brick run it.
Plan on paper first. Decide what the stages are, what the screen says at each one, and how long each lasts. At least one stage must give a person time to do something — stand clear, confirm the rotor is free — and the aircraft must not move during it.
Then build in a shutdown that is not simply the reverse. Ask yourself what a rotor with momentum needs that a stationary one does not.
Two questions when you demonstrate it. Why did you put your stages in that order? And what would go wrong if somebody skipped one?