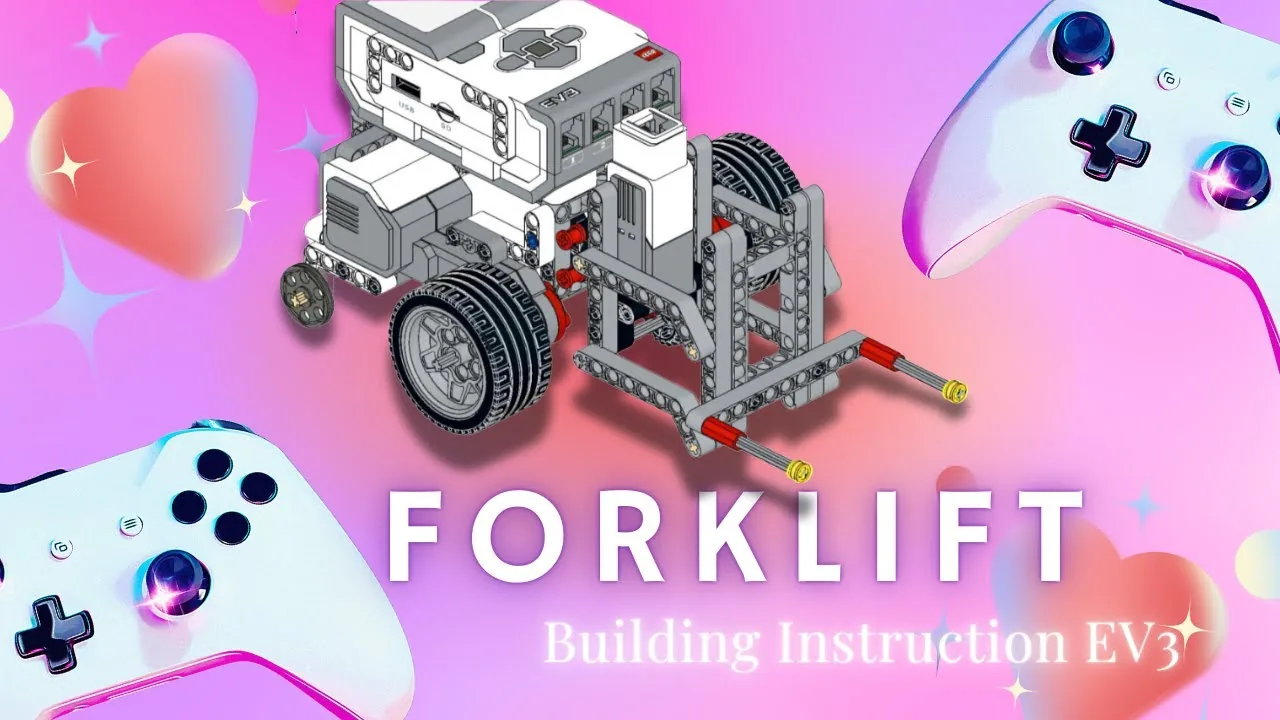
The Forklift: a driving base with a mast on the front, a Medium Motor to raise and lower the forks, and a Touch Sensor that knows when a pallet is actually on them.
Raising the forks is easy. Knowing when it is safe to raise them is the job — and it is not one question.
Is there a pallet on the forks? And is the mast still below its limit? Both have to be true. Either one on its own gives you a forklift that lifts thin air, or one that keeps winding when it has already run out of mast.
In the real world 5 min
Where you have seen it
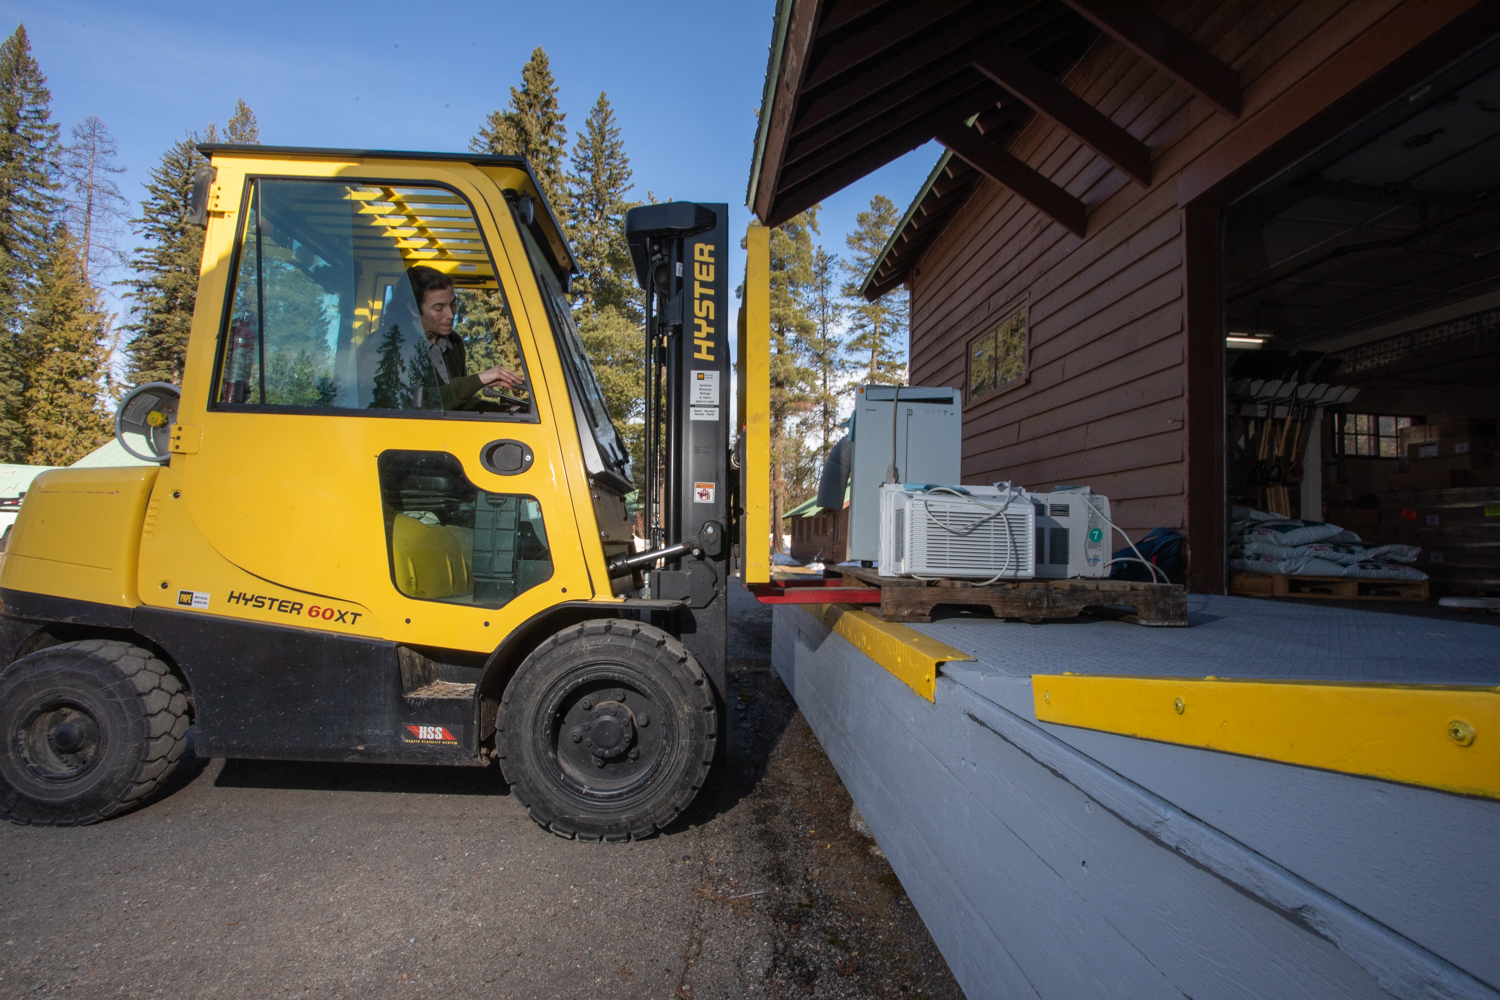
Forklifts are everywhere goods are moved — warehouses, ports, building sites, the back of every supermarket. A counterbalance forklift can pick up a tonne and a half on two steel forks and carry it at walking pace.
A forklift moving pallets at Glacier National Park. Photo: GlacierNPS / Wikimedia Commons (Public domain).
Why it is built that way
A forklift is a lever with a very heavy load on the short end, and it only stays upright because of a counterweight at the back. That balance has limits, so real forklifts are covered in interlocks — rules the machine enforces regardless of what the driver asks for.
The interesting ones are nearly always about two things at once. The mast will not tilt forward unless the load is low and the handbrake is off. The machine will not drive unless the operator is in the seat and the seatbelt is fastened. One condition is a preference. Two conditions is a rule.
What would go wrong without it
Check only whether a pallet is present and the machine will happily keep lifting after the mast has reached the top, straining the motor against a mechanical stop. Check only the height and it will lift nothing at all, wearing out the mechanism for no reason. Neither check is wrong; each is just incomplete.
Most real safety rules are two conditions joined by the word “and”.
The main concept — one question made of two 6 min
The green and block is a hexagon with two hexagonal holes in it. Put a condition in each hole and the whole thing is true only when both of them are.
<<[1 v] is pressed?> and <([D v] degrees counted) < (720)>> :: operators
A pallet is on the forks, and the mast is still below its limit. One hexagon, built from two.
Note the shapes again. Both halves are hexagons, and the result is a hexagon — which is why it drops into a Switch exactly like a simple condition. Nothing about the Switch changes. You have just made the question more precise.
Pallet on forks?
Below the limit?
and gives
Forklift does
yes
yes
true
Lifts. The only safe case.
yes
no
false
Waits. The mast is already up.
no
yes
false
Waits. Nothing to lift.
no
no
false
Waits.
Four rows, one true. That is what and is for: it is strict, and being strict is the point of an interlock.
Its two relatives
Block
True when
Reach for it when
<<> and <>>
Both halves are true.
Everything must be right before something happens. Safety rules.
<<> or <>>
Either half is true — or both.
Any one of several reasons is enough. Stop buttons, alarms.
<not <>>
The one inside is false.
Saying “while there is no pallet” without writing a backwards comparison.
Stop rules are usually or, not and. A machine should stop if the emergency button is pressed OR the load is too heavy OR the door is open — any one is enough. Notice that safety uses both words, for opposite jobs: and to permit, or to forbid.
ComponentControl5 min
Comparing and combining
A sensor that reports a number cannot be used to make a decision on its own — 23 is neither true nor false. An operator turns that number into an answer by comparing it with something.
Blocks reference
Block
What it does
<(x) > (50)>
True when the left value is bigger than the right.
<(x) < (50)>
True when it is smaller.
<<> and <>>
True only when both conditions are true.
<<> or <>>
True when at least one of them is.
Try it: which way round does it go?
Forget the symbols for a moment. A comparison is a question about position on a number line: is x to the left of the other number, or to the right? Left is smaller, right is bigger — and that is the whole of it.
Drag the orange x and the black marker, and change the comparison. The green stretch is every position of x that would make the answer true — so you can see where the answer flips before you get there. Turn not on and watch the green jump to the other side.
Drag either marker, or use the arrow keys.
-3 < 4true
is x to the LEFT of it?
< is true while x sits on the left. Slide x past the marker and it flips.
> is the same question the other way round — so exactly one of the two is true, unless the markers are on the same spot.
= is true for one single position out of twenty-one. Try landing on it. That is why a sensor is almost never compared with =: a reading passes straight through the exact number without ever being measured there.
not flips the answer, whatever it was. not (x < 4) covers everything x < 4 does not — including landing exactly on 4.
Try it: which numbers make it true?
The lab above asks one question at a time: is this x true? A robot never has just one x, though — a sensor reading slides up and down all the time, so what really matters is which stretch of the line makes the condition true. This one draws the whole answer at once.
Drag the circle to move the number you are comparing against, and change the comparison. Everything shaded green is a value of x that would make it true.
Drag the circle, or use the arrow keys. It moves in steps of 0.2.
x < 0.2x < 0.2
Every number to the left of 0.2 — but not 0.2 itself, so the circle is hollow.
Watch the circle, because it carries the part everyone gets wrong:
Hollow ○ — the boundary is not included. x < 0.2 shades everything left of 0.2 but leaves 0.2 itself out, because 0.2 is not less than 0.2.
Filled ● — the boundary is included. Choose = and nothing is shaded at all: one single number qualifies.
Now turn not on with x > 2 selected and watch two things happen together. The shading jumps to the other side, and the circle fills in — because “not greater than 2” means 2 or less, and 2 has to be part of it. That pairing is the whole reason a hollow circle is worth drawing.
Why a robot cares. Two conditions that look almost identical — light < 30 and not (light > 30) — differ by exactly one value, the reading of precisely 30. A robot sitting right on its threshold behaves differently under the two, and that is the sort of bug that only shows up occasionally and looks like a broken sensor.
Try it: and, or, not
These three join answers together rather than numbers. The trap is that English is looser than a program: “stop if it is close and the bumper is pressed” sounds like it covers both situations, when it covers neither on its own.
Flip the two conditions and watch the table. There are only four possible situations in total, and and and or differ on exactly two of them.
close: trueandbumper: falsefalse
close
bumper
and
or
true
true
true
true
true
false
false
true
false
true
false
true
false
false
false
false
and is fussy: it wants both. Three of the four rows are false.
and is true on one row out of four. It narrows — the robot acts less often, but more certainly.
or is true on three rows out of four. It widens — the robot acts more readily.
The two agree on the top and bottom rows and disagree in the middle. Whenever swapping one for the other seems to make no difference, you have only tried the rows where they agree.
Watch them decide
Two sensors are running below: an Ultrasonic reporting a number, and a Touch Sensor reporting true or false. Watch the comparison turn the number into an answer, and watch and and or disagree.
when program starts
forever
if distance < 15 and is pressed? then
stop moving
if distance < 15 or is pressed? then
play beep 60 for 0.2 seconds
Nothing is within 15 cm and the bumper is out. Both conditions are false.Something comes close. The comparison flips to true — the bumper has not been touched.It backs away, and instead the bumper is pressed. Now the other condition is the true one.Close AND pressed. Only now is «and» true — while «or» has been true ever since the first of them was.Finished. Four situations, and the two operators disagreed in three of them.
and false · or false
and was true in one row out of four. or was true in three. That is the whole difference, and it is why one of them makes a robot look broken.
The comparison is doing one job: it takes a reading that is neither true nor false and, by holding it against a number you chose, produces something a decision can use. The moment the blue fill crosses the black marker is the moment the answer changes.
Choosing the threshold
The number you compare against is a design decision, not a fact. “Close” for a parking sensor might be 15 cm; for a robot arm it might be 3. Pick it by measuring what the sensor actually reads in the situation you care about, then leave a margin.
Combining two conditions
and narrows: both must hold, so the robot acts less often but more certainly — stop only if something is close and the bumper is pressed. or widens: either will do, so the robot acts more readily — stop if something is close or the bumper is pressed.
In the four situations above, and was true in one of them and or in three. That is the practical difference: swapping one for the other does not adjust a robot slightly, it changes how often it reacts at all.
And is strict, or is generous. Pick the one that matches the sentence you would say out loud.
▶The SwitchWhere the combined condition goes — unchanged from Lessons 13 to 16.Show meHide
ComponentControl6 min
Making a decision
Up to now a robot has been able to wait for a sensor. Deciding is different: the robot checks the sensor and does one thing or another depending on the answer — and then carries on either way.
Blocks reference
Block
What it does
if <> then
end
Runs the blocks inside only when the condition is true. Otherwise skips them.
if <> then
else
end
Runs one set of blocks when true and a different set when false.
Deciding again and again
A decision made once, at the start, is almost never what you want. Here are two robots with the identical if-else, testing the identical sensor against the identical number — one inside a loop and one not.
decision inside a loop
forever
if distance < 15 then
stop moving
else · start moving
the same decision, once
if distance < 15 then
stop moving
else · start moving
247checks · in a loop1check · once only
Nothing is close, so both robots ask «is the wall within 15 cm?», both hear no, and both take the else branch and drive.The left robot is asking again, and again, and again. The right one asked once and has finished asking.Under 15 cm. The left robot's next check says stop, so it stops. The right robot has no next check.Same condition. Same sensor. Same number. Only the loop is different.Finished. One robot is parked; the other is against the wall.
wall far
A decision is only worth as much as the last time it was made. Inside a loop, that is a few milliseconds ago.
Nothing is wrong with the right-hand program’s decision. It asked the question, got a truthful answer, and acted on it correctly. It simply never asked again, and the world moved on. Decisions belong inside a loop, so the robot keeps re-deciding as things change.
when program starts :: events hat
forever
  if <([4 v] distance in [cm v] :: sensors) < (15)> then
    stop moving :: movement
  else
    start moving [straight: 0] :: movement
  end
end
Four shapes, and how to choose
Once there is more than one question, decisions can be arranged in four ways. They look nearly identical stacked up in the editor, which is exactly why they get muddled — the thing that differs is not what the blocks say, it is which routes through them exist.
One question sorts them almost completely:
Are the questions…
Use
How many bodies can run
independent — any combination can be true
separate ifs
none, some, or all
one question, two answers
if / else
exactly one
the second only matters when the first is true
nested if
one, and only via the outer
mutually exclusive cases — exactly one should win
chained if / else
exactly one, the first that matches
Separate ifs — independent questions
Each if is asked no matter what the others answered, so any number of them can fire on the same pass. That is the right shape when the conditions genuinely have nothing to do with each other.
Both questions are always asked, so one pass can turn on the lamp, the fan, both, or neither. Dark and hot are unrelated — there is no reason answering one should stop the other being asked.
forever
  if <[3 v] is ambient light intensity [< v] (20) %? :: sensors> then
    [A v] start motor [clockwise v] :: motors
  end
  if <[4 v] is distance [< v] (15) [cm v]? :: sensors> then
    [D v] start motor [clockwise v] :: motors
  end
end
if / else — one question, two answers
Exactly one branch runs, every time. Reach for this whenever the robot must do something either way — and in preference to two ifs testing opposite conditions, which is the same idea written twice and can drift apart.
There is no route through this that runs both boxes, and none that runs neither. That guarantee is the reason to prefer it over two opposite ifs.
Nested if — a follow-up question
Putting one if inside another means the inner question is only ever asked when the outer one is true. Use it when the second question is meaningless otherwise: there is no point asking which side an obstacle is on when there is no obstacle.
The inner question sits on the outer one's yes route, so it is only reached when something is close. If nothing is close, the robot never asks which side it is on — because there is nothing to have a side.
if <[4 v] is distance [< v] (15) [cm v]? :: sensors> then
  if <([2 v] angle :: sensors) < (0)> then
    start moving [right: 50] :: movement
  end
end
When not to nest. If you only want “both true” and nothing happens at the outer level, an and says it in one block and reads better:
if <<[4 v] is distance [< v] (15) [cm v]? :: sensors> and <([2 v] angle :: sensors) < (0)>> then
  start moving [right: 50] :: movement
end
Nesting earns its place when something happens at the outer level too, or when there is an else at each level and the two mean different things.
Chained if / else — one winner out of several
This is the shape for a list of cases where exactly one should win: colour bands, distance bands, speed ranges. EV3 Classroom has no else-if block, so you build a chain by putting the next if inside the else of the last one.
Each question is only reached down the previous one's no route. The first that matches acts, and everything below it is never even asked — which is what makes overlapping bands safe.
And here is why it matters, because this is the single commonest bug in this whole module. Three bands written as three separate ifs are each perfectly correct, and together they are wrong: a reading of 20 is under 30 and under 60 and under 90, so all three run and the last one to run is the one that sticks.
three separate ifs
if light < 30 then
stop
if light < 60 then
go slowly
if light < 90 then
go fast
chained — if / else / if
if light < 30 then
stop
else
if light < 60 then
go slowly
else
go fast
↑ the rest is inside the else — never asked
3bands matchedgo fastseparate ifs dostopchained does
Separate ifs: 3 matched, last one winsChained: first match wins, rest never asked
The sensor reads 20 — a dark surface. Both programs should stop.The three separate ifs each ask their own question. 20 is under 30, so it stops… then 20 is also under 60, so it goes slowly… then 20 is under 90 too, so it goes fast. All three ran, and the last one wins.The chained version asked the same first question, got `yes`, and stopped. The other two live inside its else, so they were never even asked.Slide the reading up to 75 and both agree again — because only one band matches. The bug only shows itself where the bands overlap, which is most of the range.Finished. Same three bands, same reading — two different answers, because one shape stops asking and the other does not.
reading 20
Separate ifs are not wrong here so much as unguarded: nothing stops a second one matching. Chaining is what makes “the first one wins” true.
The rule to carry away: if the cases are meant to be exclusive, they must be made exclusive. Chaining does it by construction. Separate ifs only work if you are careful to write non-overlapping bands yourself — light < 30, 30 to 60, 60 and over — which is more to get right and easy to break later.
Why it matters
This is the point at which a machine stops following a script and starts responding. A thermostat, an automatic door, a robot vacuum — all of them are a decision inside a loop.
Say this back before moving on: “And means both, every time.”
What’s in this build 4 min
Part
What it is doing here
EV3 Intelligent Brick
Sits at the back and acts as the counterweight, exactly as it does on a real forklift. Move it forward and the model tips under load.
Large Motor ×2 — the drive
Ports B and C, driven as a pair so the forklift approaches a pallet square rather than at an angle.
Medium Motor — the mast
Raises and lowers the forks. It must hold when it stops, or a lifted pallet comes straight back down.
Touch Sensor — the pallet detector
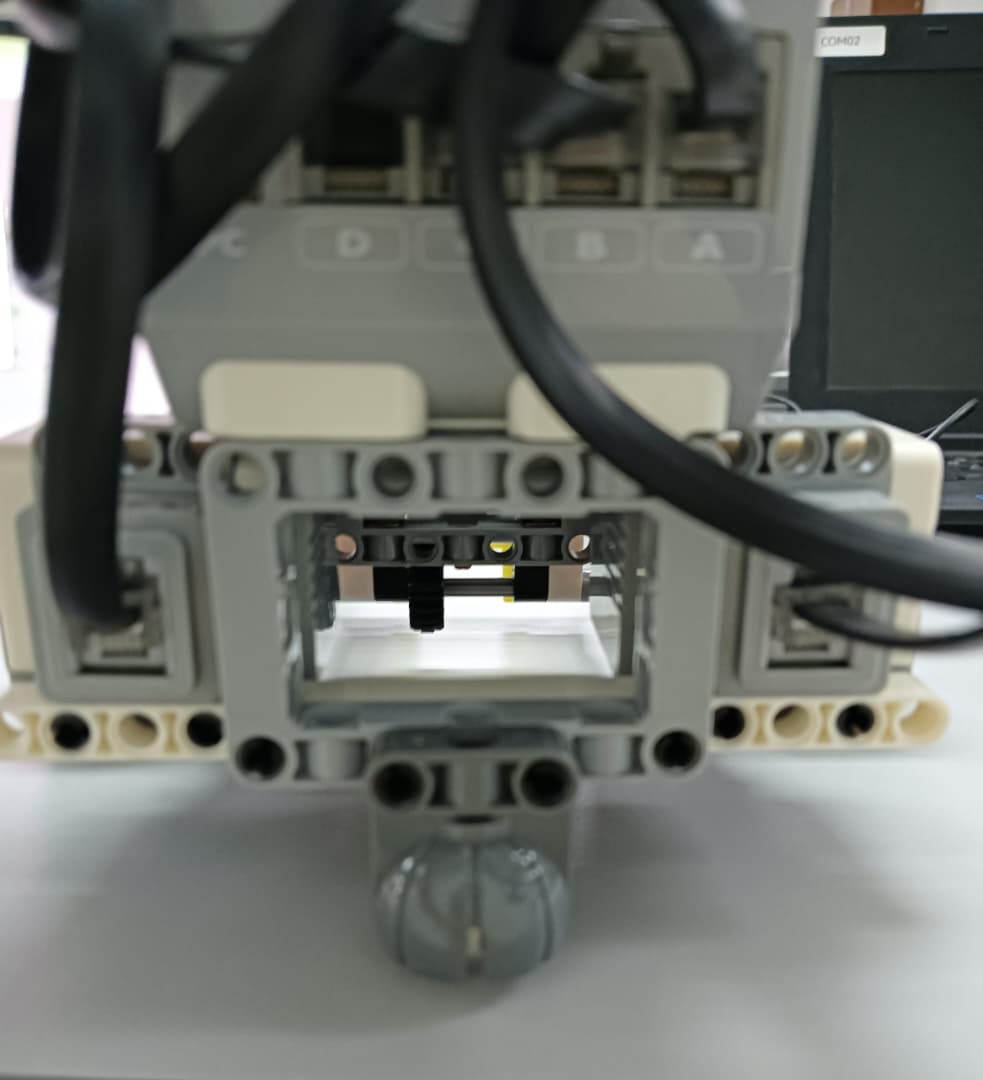
Mounted at the back of the forks so a pallet pushed fully on presses it. A pallet resting half on will not, which is correct behaviour rather than a fault.
The pallet (not electronic)
Build one you can pick up reliably. A pallet that snags is a pallet you cannot test with.
Find the mast’s top before you program it
Wind the mast up by hand until it will not go further. Do not force it.
Wind it back to the bottom, counting turns. Multiply by 360 — that is the highest number your limit should ever be.
Set your limit a little below that. A limit at the exact top means the motor strains against the stop on every run.
Push a pallet onto the forks and check the Touch Sensor clicks. Then pull it half off and check it releases.
Ports — and the rule 4 min
Sensors go in ports 1, 2, 3, 4. Motors go in ports A, B, C, D. They are not interchangeable, and nothing will tell you politely if you swap them.
Part
Port
Why this one
Left drive (Large)
B
B is left, as the Movement blocks assume.
Right drive (Large)
C
C is right.
Mast (Medium)
D
Off the movement pair — and its port appears inside the condition as well as in the lift blocks.
Touch Sensor
1
Touch is always port 1 in this course.
Check your own build now:
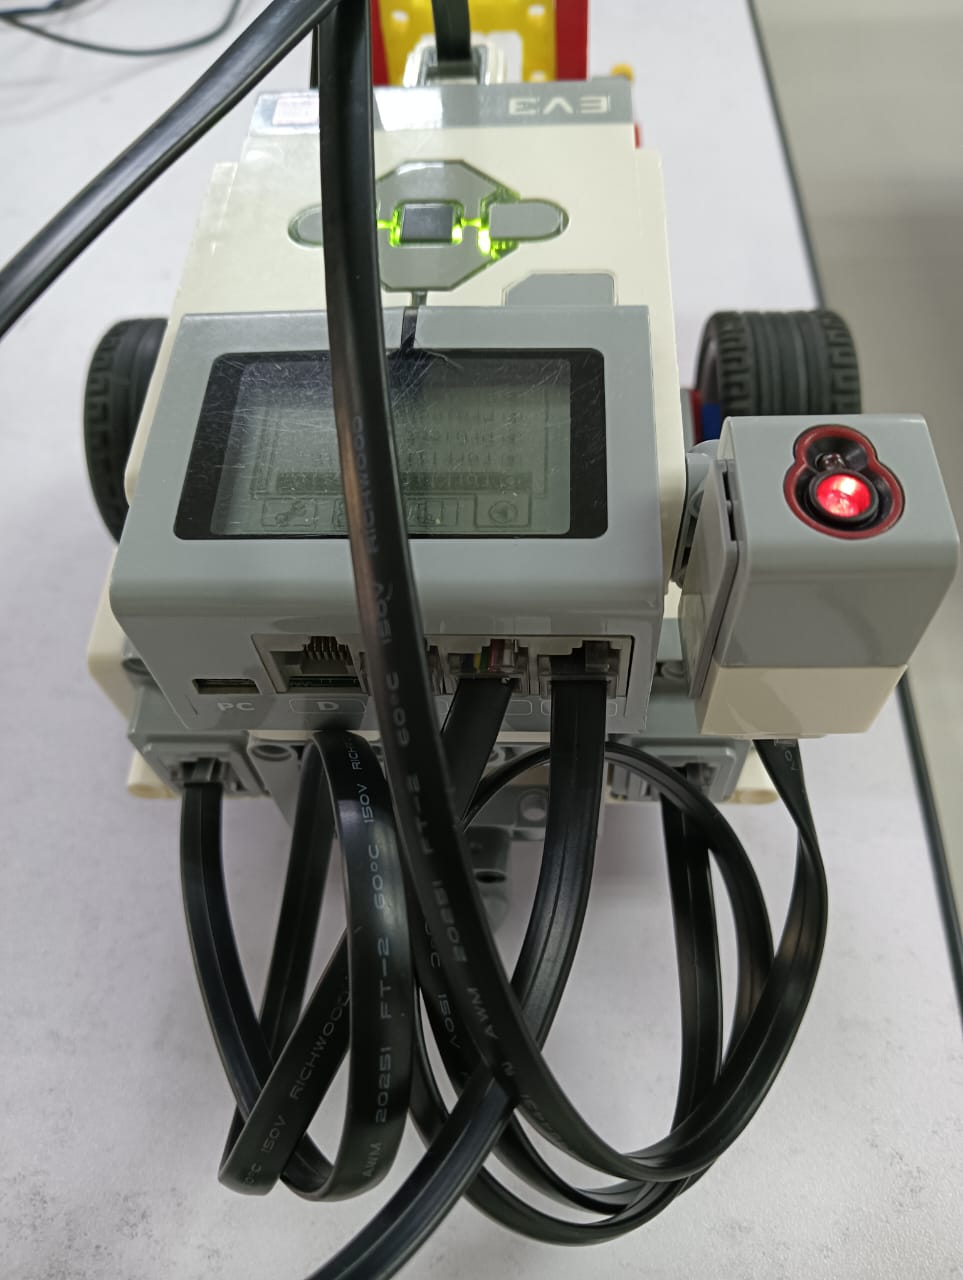
Standing behind the forklift, left drive in B, right in C, mast in D, Touch in 1.
Route the mast cable so it can travel the full height without pulling. A cable that goes tight at the top is a mechanical limit you did not design.
Wind the mast to the bottom before every run, so the count starts from a known place.
Connect the Brick 4 min
Two routes, and either is fine. USB is the reliable one and the one to fall back on when a room’s Bluetooth is busy; Bluetooth leaves the robot free to move, which some models need.
▶How to connect the BrickUSB and Bluetooth, step by step, with a photograph of every screen. Open it if you have not done this before — or if pairing is not working.Show meHide
USB — the reliable one
Switch the Brick on with the dark grey centre button.
Cable into the Brick’s PC port — the small square socket beside the numbered ports, not one of the numbered ones.
Other end into the computer.
Bluetooth — name it first
Do these in order. Naming the Brick after you go looking for it in the list is how groups end up driving each other’s robots.
Name your Brick. On the Brick: Settings (the spanner) → Brick Name. Type something nobody else will pick, then press the tick. Every Brick is called EV3 until somebody changes it.
Turn Bluetooth on. Settings → Bluetooth. Tick Bluetooth and Visibility. Leave iPhone/iPad/iPod unticked.
Connect from EV3 Classroom. Click the Brick icon at the top of the programming area, find your Brick by name, and click Connect.
Say yes on the Brick. It asks “Connect?” with the computer’s name — choose the tick, then accept the passkey, which is already 1234.
Where to read it. The name sits in the bar across the very top of the screen, on every screen — so you can check which Brick you are holding at any moment without going into a menu. This one is EV3VE. A Brick nobody has renamed says EV3.Step 3, and the reason step 1 exists. Three Bricks in range — read the name before you click Connect. Pairing with the wrong one is not an error: it works perfectly, on somebody else’s robot.
Step 2.Bluetooth switches the radio on; Visibility is what lets the computer find you. With Visibility off your Brick works perfectly and simply never appears in the list.Step 4. Look at the Brick. It asks whether to accept and names the computer. Choose the tick.Then the passkey, already 1234. Press the tick again and you are connected.
The two failures, every class, every time. The Brick has gone to sleep while you were building — press the centre button to wake it. Or you have paired with the group at the next table, which is why the name matters.
The long version, including Port View and how to read the port tiles, is in the Brick & Bluetooth guide.
Bluetooth. The forklift drives to the pallet, and a cable across the floor is the one thing on the test course you did not plan for.
Confirm the connection 2 min
Check the Brick icon: connected, or not.
Three motor tiles and one sensor tile — Large on B and C, Medium on D, Touch on 1.
Test both halves of your condition separately. Press the pallet sensor and watch its tile. Then wind the mast and watch D’s degrees. If either half is wrong, the and can never be true and the forklift will simply never lift.
Note the mast’s count at the bottom. It should be near zero after a reset.
Change it and test 8 min
Wind the mast back to the bottom before every run, and work through the four rows of the truth table rather than just the happy one.
Delete the height half, leaving only the pallet check. Hold the pallet on and let it run — the mast reaches the top and keeps straining. Stop it, and put the half back.
Delete the pallet half instead, leaving only the height check. Now it lifts nothing, eagerly. Neither half alone is the rule.
Change and to or. Predict what happens before you run it, then find out — this is the single most useful minute of the lesson.
Put and back and change the limit to 180. A much lower ceiling. Does it still stop cleanly?
Add a third condition with a second and: only lift when a pallet is on, the mast is below the limit, and the mast has moved at least a little already — > (0). Say what that changes and whether it is an improvement.
Step 3 is the one to talk about. With or the forklift lifts when there is a pallet or when it is below the limit — and since it starts below the limit, it lifts immediately with nothing on the forks, and carries on to the top. The same two checks, joined by a different word, produce a machine with no interlock at all.
Test a combined condition one half at a time. Together they only ever tell you yes or no, never which half was wrong.
Build it 15 min
Build the model before you read any further. Everything after this is about making it do something, and none of it will make much sense with nothing on the table in front of you.
Use the viewer's own controls to zoom and turn pages. Fullscreen makes it big enough to build from.
Check the finished build against the picture before you switch anything on. A motor mounted the wrong way round is far easier to spot now than it is to debug later, when it looks like a program fault.
This is what you are building: the EV3 Forklift Robot.
Fullscreen it while you build — you can pause and scrub with the player's own controls.
Challenges 27 min
Work through them in order — each is harder than the last. The extra challenge comes after all three, and it is meant to make you plan before you build.
Challenge 1
Press center button, then will
1. lift down and make sound "down"
2. move forward towards the object
3. lift up and make sound "up"
4. place it at target location, and make sound "okay-dokey"
5. moveback to another target location
Fullscreen it while you build — you can pause and scrub with the player's own controls.
Watch it done
Log in to ask for hints.
Challenge 2
Press center button, then will
1. lift down and make sound "down"
2. move forward towards the 1st object
3. lift up and make sound "up"
4. place it at 1st target location, and make sound "one"
5. move backward
Press up button, then will
1. lift down and make sound "down"
2. move forward towards the 2nd object
3. lift up and make sound "up"
4. place it at 2nd target location, and make sound "two"
5. move backward
Fullscreen it while you build — you can pause and scrub with the player's own controls.
Watch it done
Log in to ask for hints.
Challenge 3
Attach color sensor on the robot
1. When color sensor detect red and press center button, then will sound "Red" > will pick the object and place it at left side
2. When color sensor detect blue an press center button, then will sound "Blue" > will pick the object and place it at right side
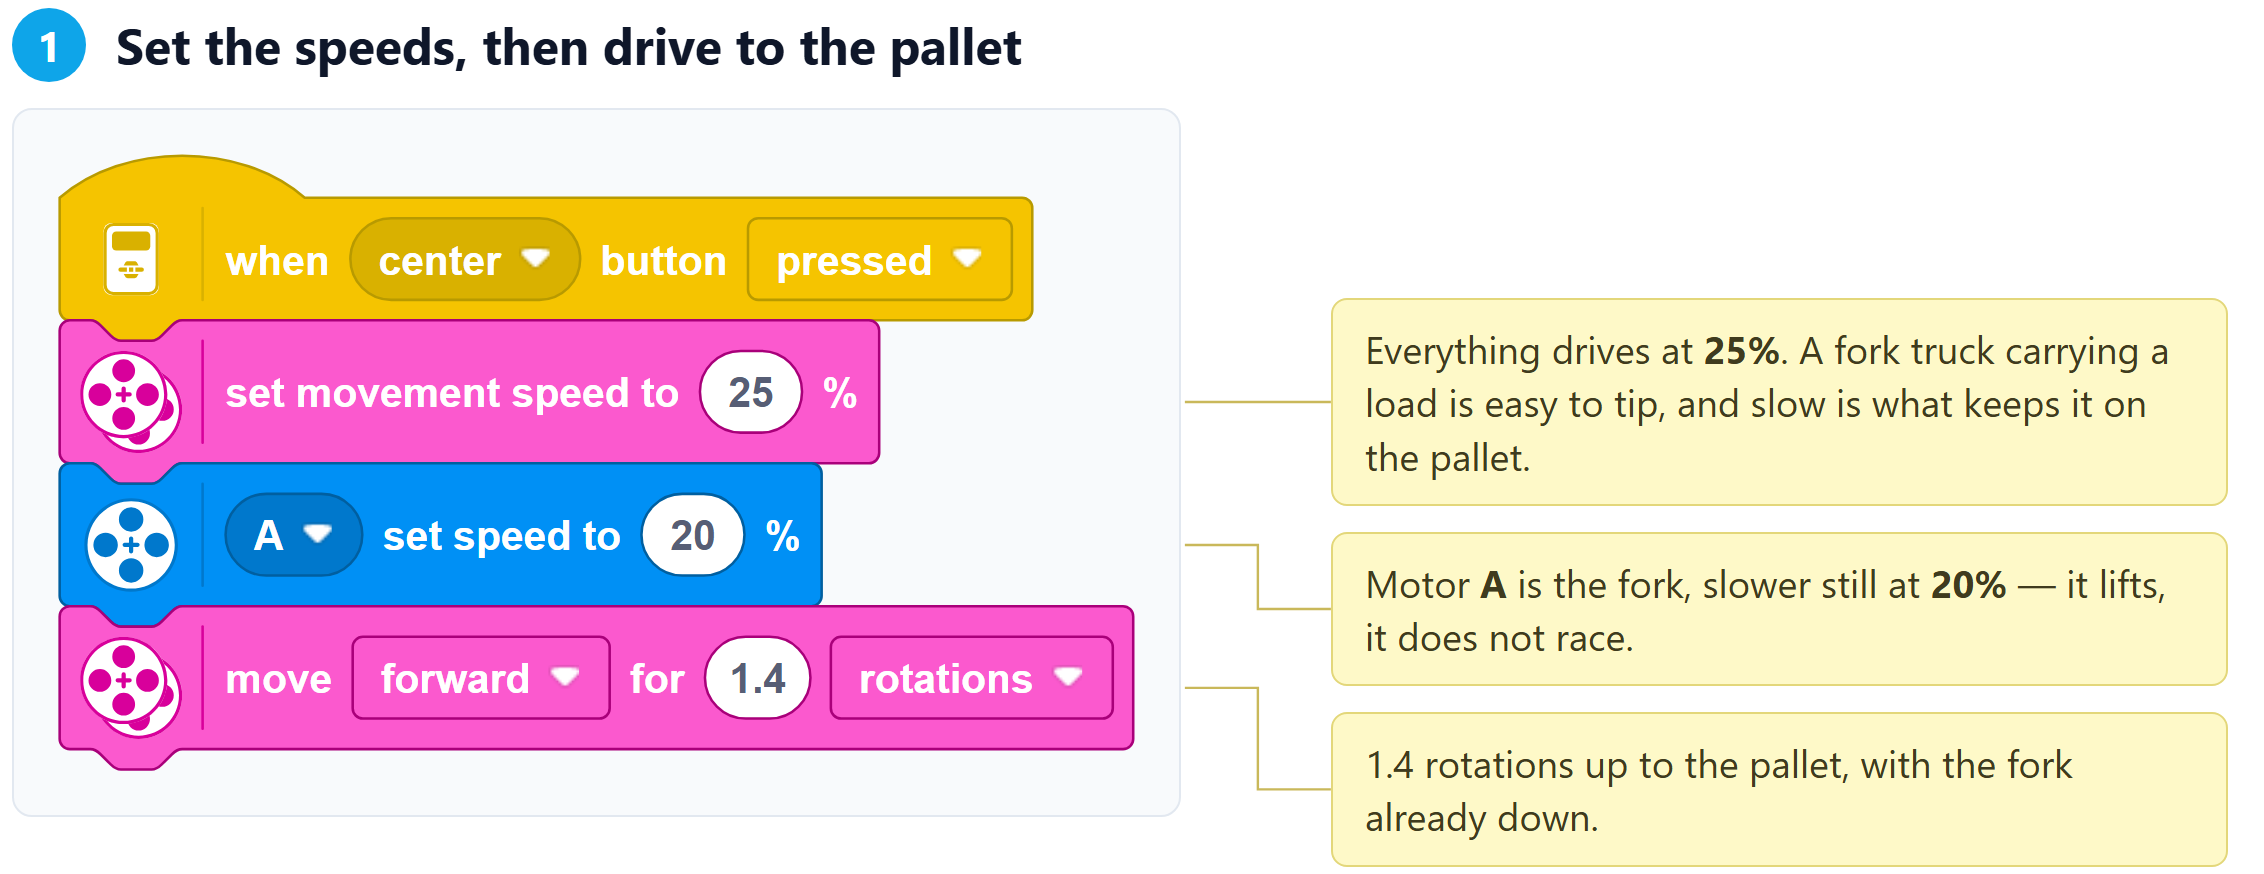
One press of Centre and the truck drives to the pallet, lifts, carries the load round a
turn, and sets it down. It is a whole pick-and-place, start to finish, with no sensors —
every distance is a measured number of wheel rotations.
⚠️ The program does more than the task says
The task describes three steps: lower the fork, drive to the object, lift. The file does
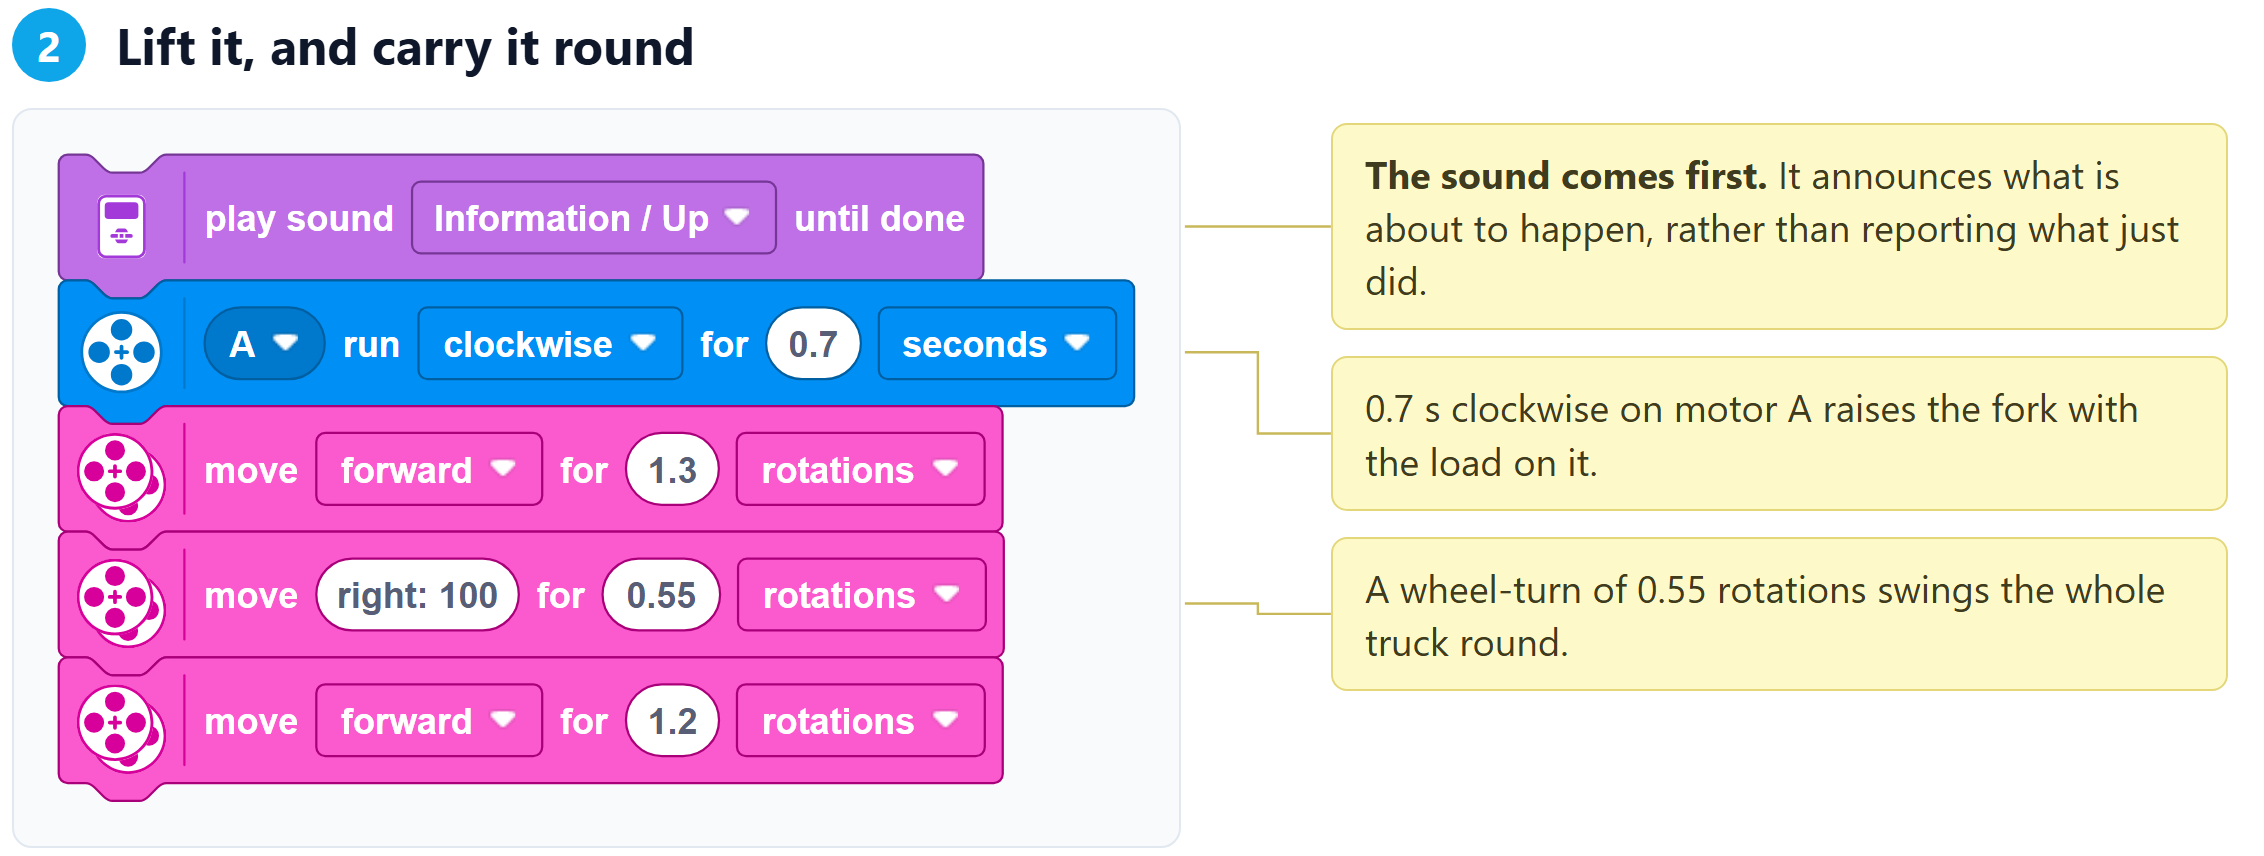
those and then keeps going — it carries the load 1.3 rotations, turns, drives 1.2 more and
lowers the fork to place it. There is also no "lower" at the start; the fork is assumed to
begin already down.
Neither is wrong. But a class given the task text and shown this file will find a mismatch,
so decide which one the lesson is teaching before the session.
Worth noticing
The sound comes before the movement, every time. "Up" plays, then the fork rises.
It announces what is about to happen rather than reporting what just did.
The fork is not symmetric: 0.7 s up, 0.3 s down. Gravity does half the work on the
way down, so it needs less than half the time to come back. Match the two and the fork
drives itself into the floor.
Everything is rotations, nothing is sensed. Move the pallet 5 cm and the program is
wrong. That is the honest limit of this lesson, and what Challenge 3 starts to fix.