Challenge 1
Spin the top and toggle the plate five times, with the screen showing ATAS or BAWAH correctly every single time.
Quick Learn — the model, the instructions, the program and the challenges. The theory is in Full Lesson.
EV3 Robotics›Level 2 · Intermediate›Lesson 43
Level 2 · Lesson 43 · EV3-L02-4360 minutes · Ages 9–16 · Model: Transmitting Gyro
The Transmitting Gyro: a spinning top held on a liftable plate. One motor spins the top up through a gear train; another raises and lowers the plate. One button controls the plate.
Raise the plate and the top spins in the air. Lower it and the top drops onto the table — still spinning, and it keeps spinning on its own for a surprisingly long time.
By the end of the lesson a single button will raise the plate on one press and lower it on the next — which sounds obvious, and is the first program in this course that has to remember something about itself.
A gyroscope toy is a heavy wheel in a frame. Spin it up with a string, balance the frame on a fingertip, and it refuses to fall over. Every child who meets one tries to push it down, and it pushes back sideways.
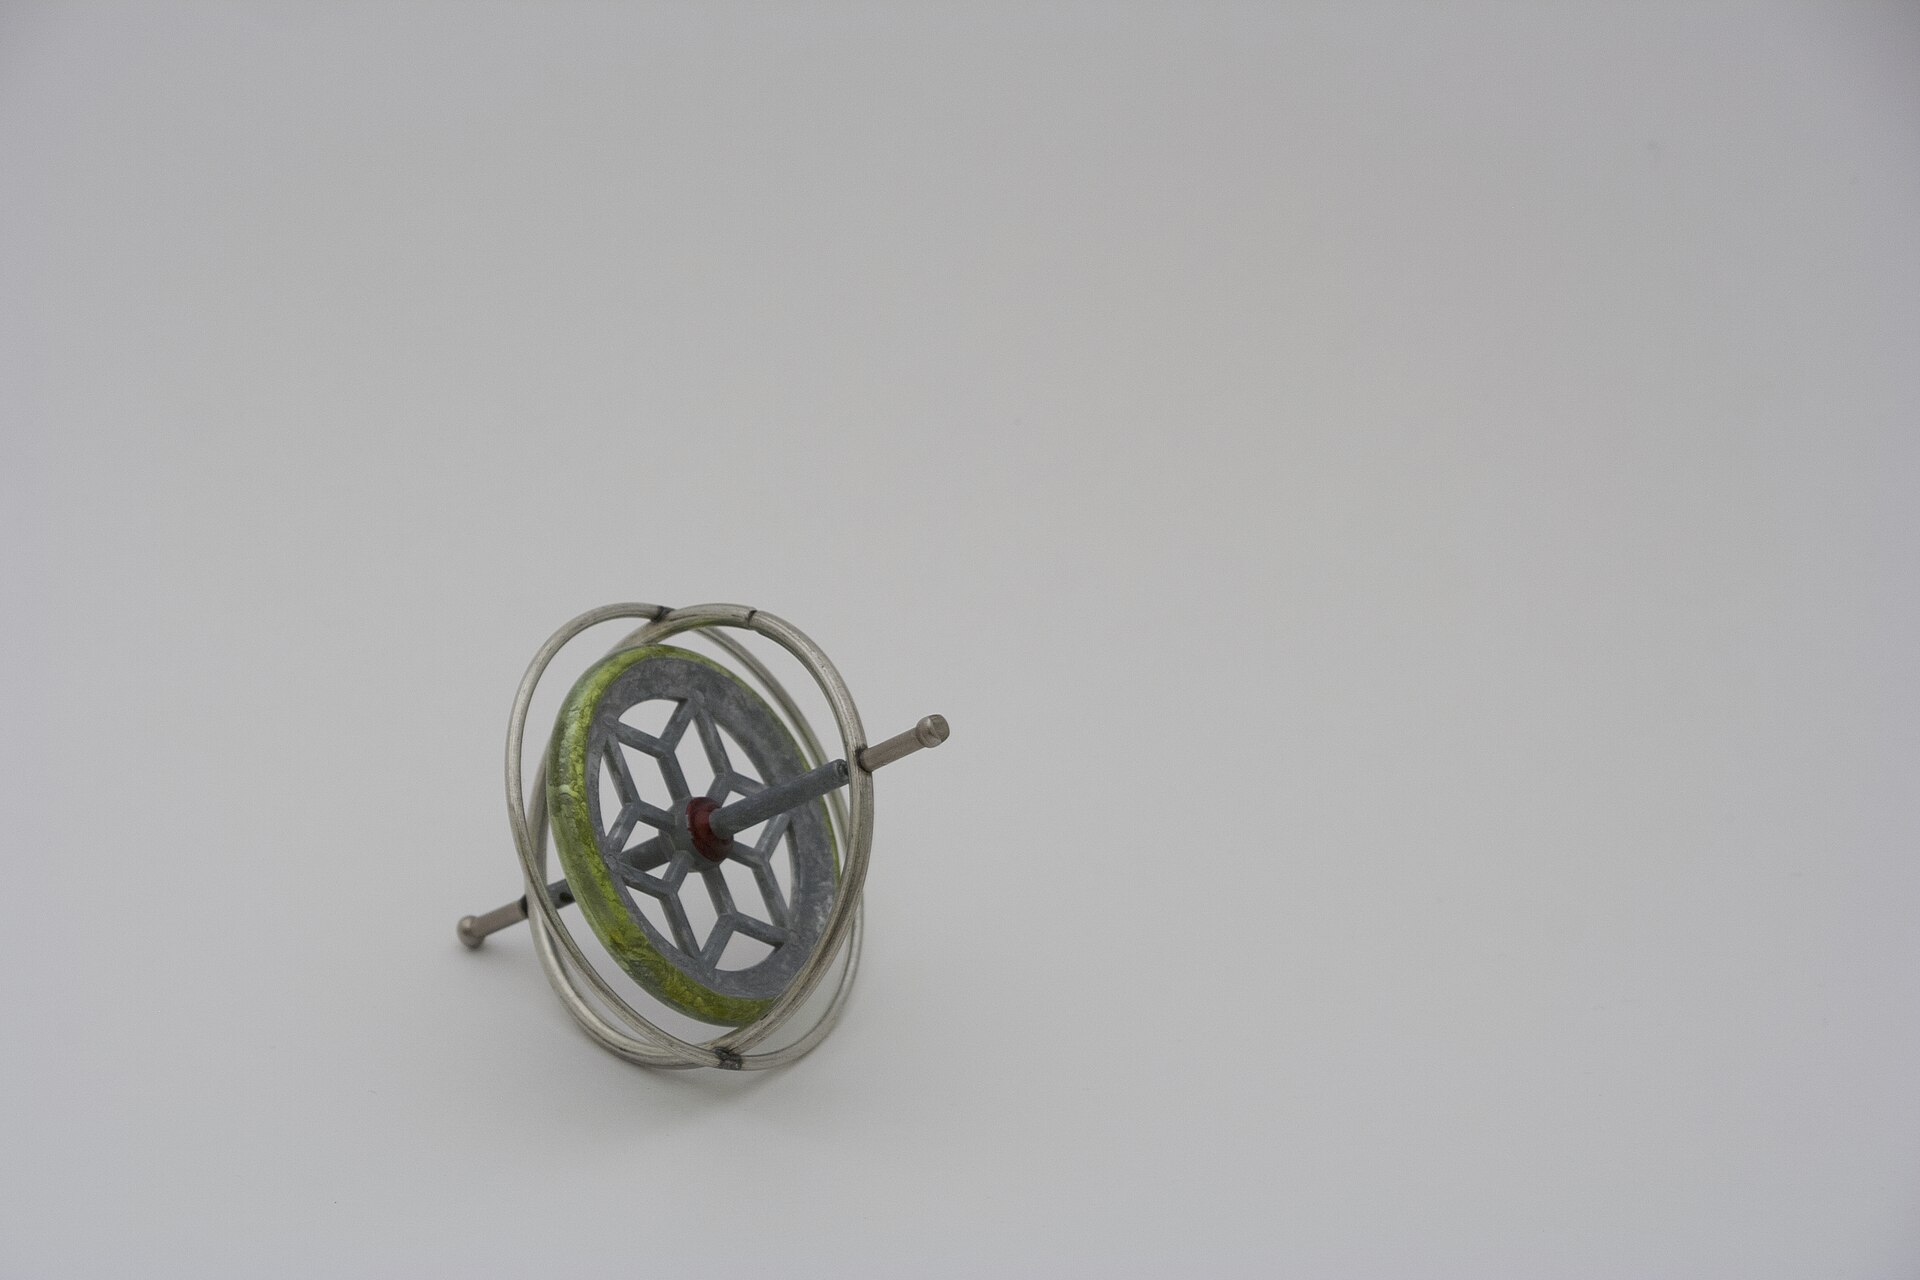
A spinning wheel has angular momentum, and momentum resists being changed. Push on the axle of a spinning gyroscope and it does not tip the way you pushed — it swings round at right angles instead. That sideways swing is called precession, and it is why the toy walks in a slow circle rather than falling.
The heavier the rim and the faster it spins, the harder it is to shift. That is why your model gears the spinner up: a Medium Motor turning a small gear driving a large one gives away force to buy speed — the trade you met in Lesson 24, used here in the opposite direction.
Ships use this. A gyrocompass finds true north with no magnet at all, because a spinning wheel that is free to move keeps pointing where it was pointed while the Earth turns beneath it.
Drop the top without spinning it and it falls over instantly. The spin is not decoration — it is the only thing holding the top upright, and the plate must not come down until the spinner has done its work.
Spin first, then release. The order is the trick, and a machine that forgets the order has no trick at all.
You have one button and two jobs. Press it once, the plate should go up. Press it again, the plate should go down. The press is identical both times — so the difference cannot come from the press.
Level 1 finished on the Mechanical Clamp, and it finished stuck. The clamp had no way to know whether its jaws were open or shut, so a single button could not close them and then open them. The lesson said plainly that the missing pieces were a Switch and a variable, and that both were coming.
You now have both. The Switch arrived in Lesson 13, the variable in Lesson 26. Put them together and the cliff disappears.
if <(naik) = (0)> then
  [D v] run [clockwise v] for (1) [rotations v] :: motors
  set [naik v] to (1)
else
  [D v] run [counterclockwise v] for (1) [rotations v] :: motors
  set [naik v] to (0)
end
Read it as three steps, in this order, and it will never confuse you again:
Step 3 is where every toggle goes wrong. Leave it out and the plate goes up on the first press and up again on the second, because the box still says 0. The machine did the right thing and then forgot it had.
Click a ballpoint pen: out. Click again: in. Same click, opposite results — and there is no computer in there at all. Inside is a little cam and a rotating collar that physically holds which state the pen is in.
That cam is a memory made of plastic, and it is doing exactly the job your variable does. Your model has no cam, so the memory has to live in a number instead. Both are memory; only one can be changed without a screwdriver.
Nothing forces it. You could use 1 and 2, or 7 and 99. Zero and one are the convention because there are exactly two states, and because it makes a third trick possible later: a state you can flip with arithmetic rather than a Switch.
Long before there were computers, people had exactly this problem. A shepherd counting sheep through a gate, a trader counting sacks of grain, a builder counting days — none of them can hold the number in their head while they get on with the work. So they scratched a mark on a wall, cut a notch in a stick, or wrote a number on a piece of paper. The number lived outside the person, in a place they had agreed on, and they could go back to it, read it, and change it.
Better still, once the number is written down somebody else can use it. Watch these two: one of them counts and writes, the other never sees a single animal and simply reads the wall.
Notice what never happens: Ben never asks Abby. He does not need to — the number is not in her head, it is on the wall, and the wall is there for anyone who needs it.
Neither Abby nor Ben is holding the number — the wall is. And notice what never happens: Ben does not ask Abby. He does not need to, because the count is not in her head. It is in a place they both agreed on, which is what makes it useful to more than one of them.
That is all a variable is. The robot cannot hold a number in its head either, so you give it a wall of its own, write a name at the top so everyone knows which wall is which — score, count, degree_turn — and the program can read what is on it and write something new. One part of the program writes; another part reads. Exactly Abby and Ben.
Say we are counting rotations of a motor. Before we start we write 0 on the paper. Every time the motor completes a turn we cross out what is there and write one more: 0 becomes 1, then 2, then 3. That is change — it has to read the old number to work out the new one.
set is the other thing you can do, and it is completely different: rub the whole paper out and write the number you want. It does not care what was there. Press the buttons and watch what happens to the crossings-out.
The paper starts blank, so we write 0 on it. That is what a variable is: a place to keep a number while the robot works.
| Block | What it does |
|---|---|
set [count v] to (0) | Puts a value in, replacing whatever was there. |
change [count v] by (1) | Adds to what is already there. |
(count) | Reports the current value, for use in a comparison or on the display. |
set replaces; change adds. Counting things needs change. Starting a count needs set. Both programs below have both blocks — the only difference is whether the set block is inside the loop or above it.
set before the loop
set inside it
Both programs contain both blocks. Only the position of set [count] to 0 is different.
The count on the right is not broken; it is being told to start again on every pass. Each time round the loop it is wiped back to zero and then changed by one, so the honest answer is always 1 — while the motor cheerfully turns four times. A counter stuck at 1 almost always means a set block that has slipped inside the loop.
EV3 Classroom tells you what a block does by its shape, and once you have noticed that, a whole set of questions answers itself:
So when a slot is oval, any oval fits it — and it does not matter in the least where that number came from. You can take the motor’s own A degrees counted and keep it in a variable you named degree_turn, then compare that with a number later. Pick an oval below and watch the same one drop into all three kinds of slot.
pick an oval
the same oval fits all three
Every one of those slots is oval-shaped, and A degrees counted is an oval — so it drops in. Nothing about where the number came from matters.
This is what makes a variable more than a counter. A sensor reading is true only at the instant you read it; copying it into a variable freezes it, so the robot can compare where it is now against where it was when something happened:
when program starts :: events hat
[A v] reset degrees counted :: motors
set [degree_turn v] to ([A v] degrees counted :: sensors)
start moving [right: 30] :: movement
wait until <(([A v] degrees counted :: sensors) - (degree_turn)) > (400)>
stop moving :: movement
Read the condition aloud: how far the motor has gone now, minus where it was when we started, is more than 400. Both are ovals, so both can go into a subtraction, and the subtraction is an oval too — which is why it can go into a comparison. Ovals nest inside ovals as deep as you need.
A variable keeps its value after the program ends. Run the program again without setting it back and the second run begins where the first left off — the count starts at 14, the robot thinks it has already done the job. Every variable a program changes must be set to its starting value at the top.
A variable is the difference between a machine that repeats a fixed routine and one that responds to how things have gone — counting parts, tracking a score, remembering where it started.
Up to now a robot has been able to wait for a sensor. Deciding is different: the robot checks the sensor and does one thing or another depending on the answer — and then carries on either way.
| Block | What it does |
|---|---|
if <> then end | Runs the blocks inside only when the condition is true. Otherwise skips them. |
if <> then else end | Runs one set of blocks when true and a different set when false. |
A decision made once, at the start, is almost never what you want. Here are two robots with the identical if-else, testing the identical sensor against the identical number — one inside a loop and one not.
decision inside a loop
the same decision, once
A decision is only worth as much as the last time it was made. Inside a loop, that is a few milliseconds ago.
Nothing is wrong with the right-hand program’s decision. It asked the question, got a truthful answer, and acted on it correctly. It simply never asked again, and the world moved on. Decisions belong inside a loop, so the robot keeps re-deciding as things change.
when program starts :: events hat
forever
  if <([4 v] distance in [cm v] :: sensors) < (15)> then
    stop moving :: movement
  else
    start moving [straight: 0] :: movement
  end
endOnce there is more than one question, decisions can be arranged in four ways. They look nearly identical stacked up in the editor, which is exactly why they get muddled — the thing that differs is not what the blocks say, it is which routes through them exist.
One question sorts them almost completely:
| Are the questions… | Use | How many bodies can run |
|---|---|---|
| independent — any combination can be true | separate ifs | none, some, or all |
| one question, two answers | if / else | exactly one |
| the second only matters when the first is true | nested if | one, and only via the outer |
| mutually exclusive cases — exactly one should win | chained if / else | exactly one, the first that matches |
Each if is asked no matter what the others answered, so any number of them can fire on the same pass. That is the right shape when the conditions genuinely have nothing to do with each other.
forever
  if <[3 v] is ambient light intensity [< v] (20) %? :: sensors> then
    [A v] start motor [clockwise v] :: motors
  end
  if <[4 v] is distance [< v] (15) [cm v]? :: sensors> then
    [D v] start motor [clockwise v] :: motors
  end
endExactly one branch runs, every time. Reach for this whenever the robot must do something either way — and in preference to two ifs testing opposite conditions, which is the same idea written twice and can drift apart.
Putting one if inside another means the inner question is only ever asked when the outer one is true. Use it when the second question is meaningless otherwise: there is no point asking which side an obstacle is on when there is no obstacle.
if <[4 v] is distance [< v] (15) [cm v]? :: sensors> then
  if <([2 v] angle :: sensors) < (0)> then
    start moving [right: 50] :: movement
  end
end
When not to nest. If you only want “both true” and nothing happens at the outer level, an and says it in one block and reads better:
if <<[4 v] is distance [< v] (15) [cm v]? :: sensors> and <([2 v] angle :: sensors) < (0)>> then
  start moving [right: 50] :: movement
end
Nesting earns its place when something happens at the outer level too, or when there is an else at each level and the two mean different things.
This is the shape for a list of cases where exactly one should win: colour bands, distance bands, speed ranges. EV3 Classroom has no else-if block, so you build a chain by putting the next if inside the else of the last one.
And here is why it matters, because this is the single commonest bug in this whole module. Three bands written as three separate ifs are each perfectly correct, and together they are wrong: a reading of 20 is under 30 and under 60 and under 90, so all three run and the last one to run is the one that sticks.
three separate ifs
chained — if / else / if
↑ the rest is inside the else — never asked
Separate ifs are not wrong here so much as unguarded: nothing stops a second one matching. Chaining is what makes “the first one wins” true.
The rule to carry away: if the cases are meant to be exclusive, they must be made exclusive. Chaining does it by construction. Separate ifs only work if you are careful to write non-overlapping bands yourself — light < 30, 30 to 60, 60 and over — which is more to get right and easy to break later.
This is the point at which a machine stops following a script and starts responding. A thermostat, an automatic door, a robot vacuum — all of them are a decision inside a loop.
Ask, act, record. A toggle that forgets to record is a button that only works once.
Up to now a robot has been able to wait for a sensor. Deciding is different: the robot checks the sensor and does one thing or another depending on the answer — and then carries on either way.
| Block | What it does |
|---|---|
if <> then end | Runs the blocks inside only when the condition is true. Otherwise skips them. |
if <> then else end | Runs one set of blocks when true and a different set when false. |
A decision made once, at the start, is almost never what you want. Here are two robots with the identical if-else, testing the identical sensor against the identical number — one inside a loop and one not.
decision inside a loop
the same decision, once
A decision is only worth as much as the last time it was made. Inside a loop, that is a few milliseconds ago.
Nothing is wrong with the right-hand program’s decision. It asked the question, got a truthful answer, and acted on it correctly. It simply never asked again, and the world moved on. Decisions belong inside a loop, so the robot keeps re-deciding as things change.
when program starts :: events hat
forever
  if <([4 v] distance in [cm v] :: sensors) < (15)> then
    stop moving :: movement
  else
    start moving [straight: 0] :: movement
  end
endOnce there is more than one question, decisions can be arranged in four ways. They look nearly identical stacked up in the editor, which is exactly why they get muddled — the thing that differs is not what the blocks say, it is which routes through them exist.
One question sorts them almost completely:
| Are the questions… | Use | How many bodies can run |
|---|---|---|
| independent — any combination can be true | separate ifs | none, some, or all |
| one question, two answers | if / else | exactly one |
| the second only matters when the first is true | nested if | one, and only via the outer |
| mutually exclusive cases — exactly one should win | chained if / else | exactly one, the first that matches |
Each if is asked no matter what the others answered, so any number of them can fire on the same pass. That is the right shape when the conditions genuinely have nothing to do with each other.
forever
  if <[3 v] is ambient light intensity [< v] (20) %? :: sensors> then
    [A v] start motor [clockwise v] :: motors
  end
  if <[4 v] is distance [< v] (15) [cm v]? :: sensors> then
    [D v] start motor [clockwise v] :: motors
  end
endExactly one branch runs, every time. Reach for this whenever the robot must do something either way — and in preference to two ifs testing opposite conditions, which is the same idea written twice and can drift apart.
Putting one if inside another means the inner question is only ever asked when the outer one is true. Use it when the second question is meaningless otherwise: there is no point asking which side an obstacle is on when there is no obstacle.
if <[4 v] is distance [< v] (15) [cm v]? :: sensors> then
  if <([2 v] angle :: sensors) < (0)> then
    start moving [right: 50] :: movement
  end
end
When not to nest. If you only want “both true” and nothing happens at the outer level, an and says it in one block and reads better:
if <<[4 v] is distance [< v] (15) [cm v]? :: sensors> and <([2 v] angle :: sensors) < (0)>> then
  start moving [right: 50] :: movement
end
Nesting earns its place when something happens at the outer level too, or when there is an else at each level and the two mean different things.
This is the shape for a list of cases where exactly one should win: colour bands, distance bands, speed ranges. EV3 Classroom has no else-if block, so you build a chain by putting the next if inside the else of the last one.
And here is why it matters, because this is the single commonest bug in this whole module. Three bands written as three separate ifs are each perfectly correct, and together they are wrong: a reading of 20 is under 30 and under 60 and under 90, so all three run and the last one to run is the one that sticks.
three separate ifs
chained — if / else / if
↑ the rest is inside the else — never asked
Separate ifs are not wrong here so much as unguarded: nothing stops a second one matching. Chaining is what makes “the first one wins” true.
The rule to carry away: if the cases are meant to be exclusive, they must be made exclusive. Chaining does it by construction. Separate ifs only work if you are careful to write non-overlapping bands yourself — light < 30, 30 to 60, 60 and over — which is more to get right and easy to break later.
This is the point at which a machine stops following a script and starts responding. A thermostat, an automatic door, a robot vacuum — all of them are a decision inside a loop.
Say this back before moving on: “The press is the same. The memory is what changed.”
Look at your model. Two motors are doing completely different jobs — can you tell which is which by looking? One is geared for speed, the other for control.
| Part | What it is doing here |
|---|---|
| EV3 Intelligent Brick | Runs the program and — today — is the only thing in the machine that knows whether the plate is up or down. |
| Medium Motor — the spinner | Drives the top through a gear train that gears up: small gear driving large, trading force for speed. Follow the gears with a finger and count the teeth. |
| Large Motor — the plate | Raises and lowers the plate the top sits on. It needs force, not speed — the opposite trade. |
| Touch Sensor — the control | One button, and the reason this lesson exists. There is no second button, and no “down” button. |
| The top and its axle (not electronic) | Heavy at the rim and light at the centre, which is what makes it hold its spin. A top with the weight near the middle stops almost at once. |
Sensors go in ports 1, 2, 3, 4. Motors go in ports A, B, C, D. They are not interchangeable, and nothing will tell you politely if you swap them.
| Part | Port | Why this one |
|---|---|---|
| Spinner motor | A | A motor with its own job. |
| Plate motor | D | A second motor with a separate job takes D, skipping B and C so nothing drives them as a pair. Same rule as Lesson 31. |
| Control button (Touch Sensor) | 1 | The Touch Sensor’s standing home. |
The manual agrees with every port on this page — “large motor D port, medium motor A port, button sensor port 1”. Build it from the manual and the programs below run unchanged. That is not true of every model in this level, so it is worth noticing when it is.
Check your own wiring now:
Two routes, and either is fine. USB is the reliable one and the one to fall back on when a room’s Bluetooth is busy; Bluetooth leaves the robot free to move, which some models need.
Do these in order. Naming the Brick after you go looking for it in the list is how groups end up driving each other’s robots.
EV3 until somebody changes it.EV3.The two failures, every class, every time. The Brick has gone to sleep while you were building — press the centre button to wake it. Or you have paired with the group at the next table, which is why the name matters.
The long version, including Port View and how to read the port tiles, is in the Brick & Bluetooth guide.
Keep the cable off the table under the plate. The top is released onto that surface and will travel across it as it precesses. A cable lying there is a wall.
Stuck? The long version, with a photograph of every screen, is in the Brick & Bluetooth guide.
One change at a time, and predict before each run. Two of these are meant to break.
set [naik] to (1) from the first branch. Press twice. The plate goes up, then up again. Now you have seen a machine act correctly and fail to remember it.run for (3) seconds instead of start motor. The top now spins up and stops. Lower the plate ten seconds later. How much spin is left?Step 5 is a real experiment with a real answer, and step 1 is the lesson. The machine did exactly what it was told, and it was still wrong, because being right the first time is not the same as knowing what you did.
A machine with no memory can only ever do one thing per button.
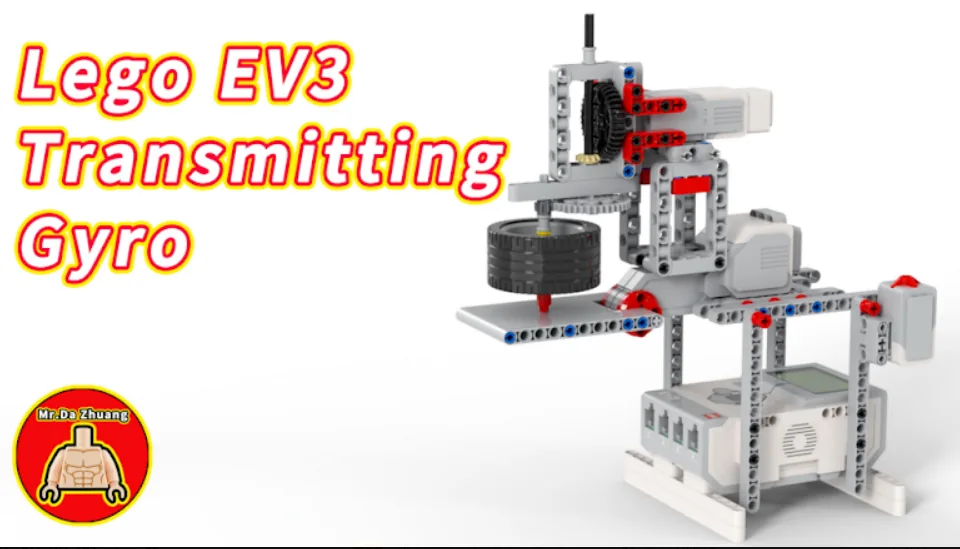
Build the model before you read any further. Everything after this is about making it do something, and none of it will make much sense with nothing on the table in front of you.
Use the viewer's own controls to zoom and turn pages. Fullscreen makes it big enough to build from.
The same build on Google Drive — sometimes a video, sometimes a scan:
Use the viewer's own controls to zoom and turn pages. Fullscreen makes it big enough to build from.
Check the finished build against the picture before you switch anything on. A motor mounted the wrong way round is far easier to spot now than it is to debug later, when it looks like a program fault.
Spin the top continuously, and let one button raise and lower the plate underneath it.
when program starts :: events hat
set [naik v] to (0)
clear display :: display
write [BAWAH] at line (1) :: display
[A v] start motor [clockwise v] :: motors
forever
  [1 v] wait until [pressed v] :: sensors
  [1 v] wait until [released v] :: sensors
  if <(naik) = (0)> then
    [D v] run [clockwise v] for (1) [rotations v] :: motors
    set [naik v] to (1)
    write [ATAS ] at line (1) :: display
  else
    [D v] run [counterclockwise v] for (1) [rotations v] :: motors
    set [naik v] to (0)
    write [BAWAH] at line (1) :: display
  end
endset [naik] to (0) matches the plate being down. ** The program cannot see the plate, so the starting value is a promise you make — and step 5 told you to keep it.start motor, not run for ** , on the spinner. It runs until stopped, so the top is still being driven while the plate moves. Lesson 7’s distinction, doing real work.ATAS — it overwrites the longer word underneath.What success looks like: the top spins up and keeps spinning. Press once: the plate lifts, the screen says ATAS. Press again: the plate lowers, the top touches down still spinning and walks slowly across the table. Press again and it lifts back off.
If the plate goes the same way twice, a
set [naik]is missing from one branch — the machine acted and forgot. If it judders on a press, the release wait is missing.
Work through them in order — each is harder than the last. The extra challenge comes after all three, and it is meant to make you plan before you build.
Spin the top and toggle the plate five times, with the screen showing ATAS or BAWAH correctly every single time.
Add a second toggle on the centre Brick button that starts and stops the spinner, with its own variable and its own line on the screen.
Make the plate refuse to lower unless the spinner has been running for at least three seconds — and say on the screen why it refused.
Run a full performance from one button press: spin up, hold, release the top, wait while it slows, lift it back up, and repeat three times before stopping. Measure how long each stage actually needs rather than guessing, and have the machine name the stage it is in as it goes.