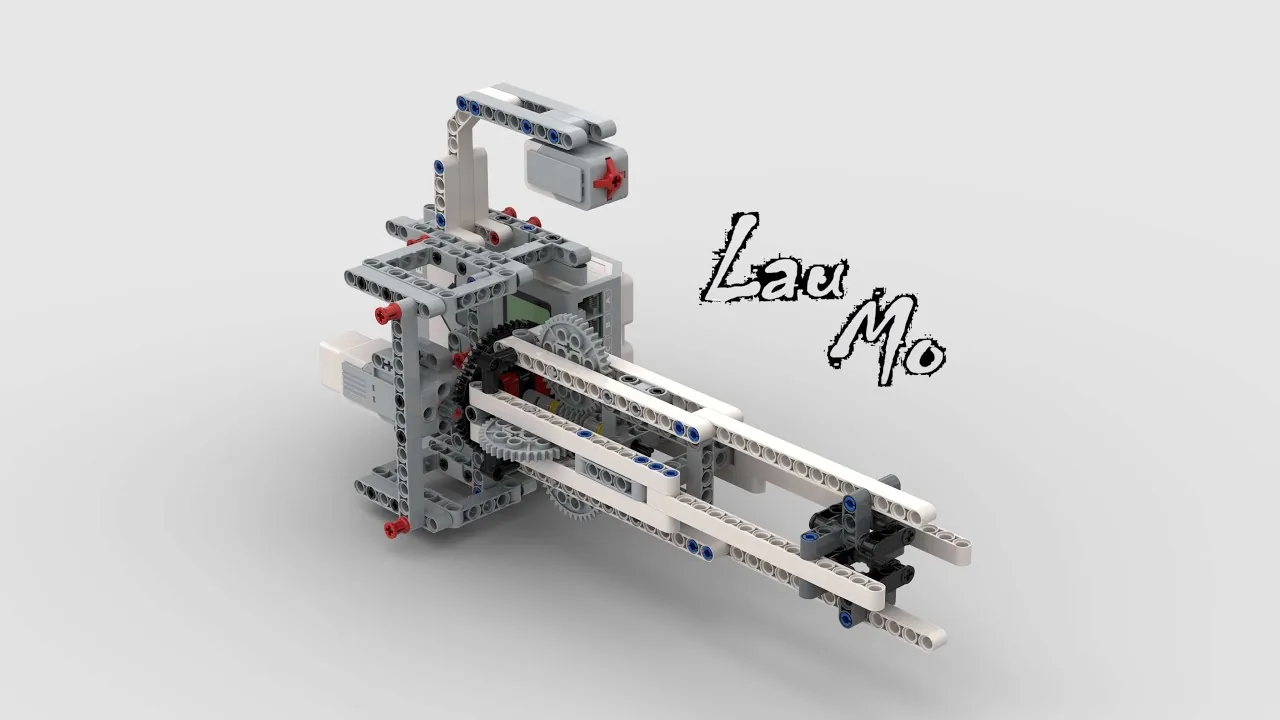
The M134 Minigun: a handheld model with a cluster of barrels that spin as one, a Large Motor buried in the body to spin them, and a trigger you pull with your finger.
It is held, not driven. There are no wheels and no mat. Everything this model does happens in your hands, which makes it the right model for a lesson about tidying up a program — you can pull the trigger twenty times in a minute and see instantly whether the behaviour is the same every time.
By the end of the lesson your program will contain a block that you invented, with a name you chose — and the main part of your program will be short enough to read out loud in one breath.
In the real world 5 min
Why anything has more than one barrel
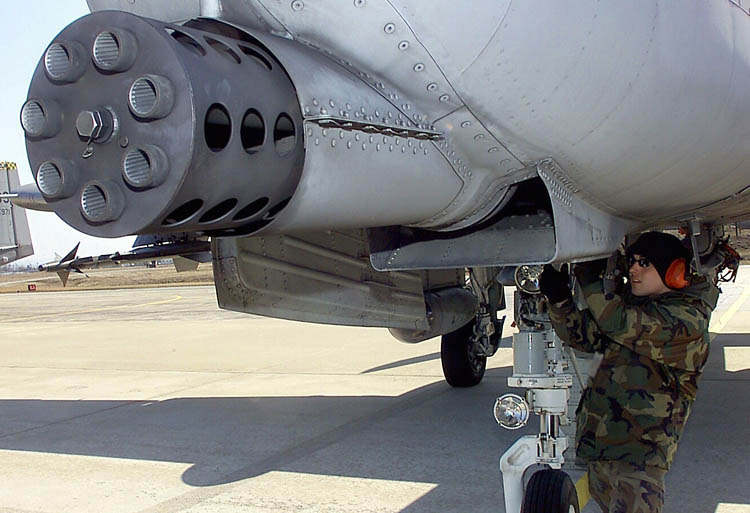
A rotary gun is an engineering answer to a heat problem, and the problem is worth understanding even if the machine is not. Fire repeatedly through one barrel and the barrel gets hot; hot metal wears and warps, and eventually the tube is scrap. Richard Gatling’s answer in 1861 was to stop asking one barrel to do all the work. Put six in a ring, spin the ring, and each barrel gets the other five barrels’ worth of time to cool down before its turn comes round again.
The idea long outlived the weapon. It is why a rotary tool changer on a CNC machine carries a carousel of cutters instead of one, why a rotary valve in a bottling plant fills twelve bottles on a turning table instead of one at a stop, and why a big printing press puts the impression on a rotating drum. In each case the same job comes round again and again, so it is given to a ring of identical parts that take turns.
Why it matters here
That is exactly the shape of today’s programming idea. A minigun does not have six different firing actions — it has one firing action that happens over and over, performed by whichever barrel is in position. Your program is about to be built the same way: one firing routine, given a name, used again and again.
When the same job keeps coming round, build it once and reuse it — in metal, and in your program.
The main concept — a name for a routine 6 min
Everything you have written for two whole levels has been instructions. Today you write a name. A My Block is a block you invent: you choose what it is called, you put a stack of blocks inside it, and from then on your program can say fire instead of spelling out five blocks.
The firing sequence, written out the Level 2 way
when [1 v] is [pressed v] :: sensors hat
play sound [Laser v] :: sound
set status light to [red v] :: display
[A v] start motor at (100) % speed :: motors
wait (1) seconds :: control
[A v] stop motor :: motors
set status light to [green v] :: display
Six blocks. Sound, light, spin up, hold, stop, light back. This is correct, and it is what you would have written last term.
The same thing, with a name
define fire
play sound [Laser v] :: sound
set status light to [red v] :: display
[A v] start motor at (100) % speed :: motors
wait (1) seconds :: control
[A v] stop motor :: motors
set status light to [green v] :: display
The definition. Made once, in the My Blocks category. Nothing runs here — this is where fire is explained to the Brick.
when [1 v] is [pressed v] :: sensors hat
fire :: custom
The program. Two blocks. You can read it aloud: “when the trigger is pressed, fire.”
What actually changed
Nothing the model does. Pull the trigger and both versions behave identically — the same sound, the same spin, the same second of hold. The Brick runs exactly the same six blocks either way.
What changed is who has to understand it. The first version tells you how the minigun fires. The second tells you what the minigun does, and keeps the how in a drawer you open only when you want to change it.
When you want to…
Without a My Block
With a My Block
Fire from a second trigger as well
Copy all six blocks. Now there are two copies.
Use fire again. Still one copy.
Make the burst longer
Change the wait in every copy. Miss one and the two triggers behave differently.
Change it once, inside the definition.
Work out what the program does
Read six blocks and infer.
Read the word.
The danger is the second copy, not the first. One copy of a sequence is fine. The trouble starts the moment there are two, because from then on every change has to be made in two places and nothing warns you when you only make it in one. That is not a beginner’s mistake — it is the commonest bug in professional software, and it has a name: duplication.
Making one, in EV3 Classroom
Scroll the block palette to the bottom and click My Blocks.
Click Make a Block.
Type the name. Use a verb: fire, spin up, reset. Not block1, and not motor stuff.
Click OK. A define hat appears on the canvas, and your new block appears in the palette.
Drag the six blocks underneath the define hat. They are now the inside of fire.
ComponentData6 min
My Blocks
A My Block is a block you make yourself. You take a group of blocks that do one job, give the group a name, and from then on that name is the block.
Blocks reference
Block
What it does
define grab
The head of a definition. Whatever is attached under it is what the block does. There is exactly one of these per My Block.
grab :: myblocks
Runs the definition. Use it as many times as you like.
define turn (degrees)
A definition with an input. degrees is a name for whatever number the caller types.
turn (90) :: myblocks
Runs it with 90 in place of that name.
Why bother
Copying blocks works perfectly — right up until the copied thing has to change. Here are two robots driving a square, one with a My Block and one with the blocks copied four times, and then somebody asks for a bigger square.
a My Block, used four times
define side
move forward for 2rotations
move right: 100 for 0.5rotations
repeat 4
side
the same thing copied
move forward for 2rotations
move right: 100 for 0.5rotations
move forward for 2rotations
move right: 100 for 0.5rotations
move forward for 2rotations
move right: 100 for 0.5rotations
move forward for 2rotations
move right: 100 for 0.5rotations
↑ the fourth copy still says 2
1place to edit · My Block4places to edit · copies
My Block: square closedCopies: one rotation adrift
Both robots drive a square: forward, turn, four times. The left uses a My Block called «side»; the right has the same two blocks copied four times.Now the square has to be bigger — 3 rotations a side instead of 2. The left program is edited in one place. The right has four places to edit, and the fourth is missed.Run them. Three of the right-hand robot's sides are the new length and the fourth is not.The left robot is back exactly where it started. The right one is a whole rotation adrift — and every block in its program is spelled correctly.Finished. One robot closed its square; the other is a rotation short.
before the change
The bug is not in any block. It is in the fact that the same idea was written down four times, and only three of them were updated.
The right-hand robot is not running a broken program. It is running four programs that were supposed to be identical, and three of them were updated. Nothing is misspelled, nothing reports an error, and the only evidence is a square that does not close.
The left-hand program is these two listings, and nothing else:
define side
move [forward v] for (3) [rotations v] :: movement
move [right: 100 v] for (0.5) [rotations v] :: movement
when program starts :: events hat
repeat (4)
  side :: myblocks
end
One place to fix. A turn defined once and used eleven times is corrected in one place. Copied eleven times, it is corrected in eleven — and one always gets missed.
Readable. A program that reads turn-right, drive-to-wall, grab explains itself. The same program written out in full does not.
Inputs make it general
A My Block can take a value. Turn-right is useful; turn (degrees) is far more useful, because one definition then serves every turn in the program. The value is given a name when the block is made, and that name is used inside the definition wherever the number belongs.
The name is the part that trips people up. Inside the definition, (cm) is not a variable you have to set anywhere — it is a hole, and it is filled in with whatever the caller typed, every time the block is called.
Example 1 — a block that thinks in centimetres
EV3 movement blocks count wheel turns, and nobody measures a table in wheel turns. One turn of a standard driving wheel carries the robot about 17.5 cm, so driving 50 cm means asking for 50 ÷ 17.5 rotations. Doing that sum in your head, at every movement block, all program long, is how mistakes get in.
Put the sum inside a My Block once and the whole program can be written in centimetres. Change the two numbers below and watch where they end up.
cm
These two numbers are the whole interface. Everything below is what the definition does with them.
what you write in the program
drive (50) cm at (75) % :: myblocks
↓
the definition — (cm) and (speed) are names, not values
define drive (cm) cm at (speed) %
set movement speed to (speed) % :: movement
move [forward v] for ((cm) / (17.5)) [rotations v] :: movement
↓
the same blocks, with your two numbers put in
set movement speed to (75) % :: movement
move [forward v] for ((50) / (17.5)) [rotations v] :: movement
The green division block is doing the only real work: the movement block underneath counts wheel turns, and you asked in centimetres. One turn of these wheels carries the robot 17.5 cm, so 50 cm is 50 ÷ 17.5 = 2.86 turns.
2.86rotations · what the block gets2whole turns15.0cm · the part turn75%speed
Set the distance to 17.5, 35 or 70 and the part turn disappears — those are whole numbers of wheel turns. Every other distance leaves a fraction, which is exactly why the division belongs inside the My Block and not in your head.
Two inputs, and the definition is three blocks. Note what has actually been gained: not fewer blocks — the same blocks run either way — but a program you can check against a ruler. drive (50) cm at (75) % is either right or wrong about the table, and you can tell which without running it.
Typing a fixed number inside the definition instead of using the input is the classic slip — the block then ignores whatever it is given and always drives the same distance:
define drive (cm) cm at (speed) %
set movement speed to (speed) % :: movement
move [forward v] for ((50) / (17.5)) [rotations v] :: movement
That block takes a distance and throws it away. It will pass every test you run at 50 cm.
Build a script and run it
Here are those two My Blocks and a 100 × 100 cm mat. Drag blocks into the script, set the numbers, and press Run — the base always starts in the left-hand corner facing up the mat. Say where you think it will finish before you press it; the ruler is there to settle the argument.
Two My Blocks, a 100 × 100 cm mat and a ruler. Drag blocks into the script — or press one to add it — set the numbers, then Run and see whether the base ends up where you said it would.
my blocks — drag or press
the script — 0 / 8 blocks
when program starts
Empty. Drag a block in from above, or press one.
10, 10cm · where it is0°heading0.0sthe whole run
Nothing to run yet. A square is four drives and four turns — try predicting the distance before you press Run.
Eight blocks is enough for a square with 40 cm sides, and not enough for anything you cannot picture. If a shape needs more than that, it wants a repeat (4) around it — which is the next thing a My Block usually grows into.
Example 2 — a block that thinks in degrees
The Gyro Sensor gives an accurate turn, and it costs five blocks every time: reset the angle, start turning, wait until the reading is a few degrees short of the target, stop. Those five blocks are about the sensor. What the program wants to say is turn 90.
The − 4 is the overshoot allowance from the Gyro Sensor module: the robot carries on turning for a moment after the motors are told to stop, so the block asks for less than it wants and lets it coast in. Written here, it is decided once. Written out at every corner, it is eleven chances to forget it.
Now the input earns its keep — because the shape a robot draws is decided entirely by that one number. A closed shape turns through 360° in total, so a shape with n corners turns 360 ÷ n at each one.
the whole program
when program starts :: events hat
repeat (4)
  move [forward v] for (2) [rotations v] :: movement
  turn (90) :: myblocks
end
what turn is, once
define turn (degrees)
[2 v] reset angle :: sensors
start moving [right: 30] :: movement
wait until <([2 v] angle :: sensors) > ((degrees) - (4))>
stop moving :: movement
90°the input0 / 4corners turned360°turned in total
1 block in the program5 gyro blocks, written once
A square has 4 corners, so each turn is 360 ÷ 4 = 90°. That number is the only thing being changed.Drive a side, call turn (90), repeat. The five gyro blocks run inside the My Block every time, and none of them are in the program.Closed, back on the start mark. Every corner was measured by the gyro — nothing here counted wheel turns to get an angle.Finished. Three shapes, one definition — the only edit was the number in the call.
parked
Nothing in the program mentions the gyro. It is all inside turn, which is the point: the sensor is an implementation detail of turning, and the program should be about the shape.
Same definition, same drive block, same length of side. The only edit between a triangle and a pentagon is turn (120) :: myblocks becoming turn (72) :: myblocks. That is what a well-chosen input does: it turns a program that draws one shape into a program that draws shapes.
The same block also turns left, if you let it. Give the definition an if … then … else and a negative input means anticlockwise:
define turn (degrees)
[2 v] reset angle :: sensors
if <(degrees) > (0)> then
  start moving [right: 30 v] :: movement
  wait until <([2 v] angle :: sensors) > ((degrees) - (4))>
else
  start moving [left: 30 v] :: movement
  wait until <([2 v] angle :: sensors) < ((degrees) + (4))>
end
stop moving :: movement
One block, two directions, and every program that uses it gets the left turn for free the moment this definition is edited.
When to make one
The signal is repetition: the same sequence appearing in more than one place. That is the moment to name it. Making a My Block for something used once adds a layer without adding clarity.
The second signal is a unit. If the blocks convert between what you think in (centimetres, degrees, seconds) and what the hardware counts (rotations, sensor readings), that conversion is worth a name — it is the thing you will otherwise get wrong.
ComponentSensing5 min
The Touch Sensor
The Touch Sensor is the simplest input the EV3 has: a button that is either pressed or not. That sounds trivial, but it is how a robot knows it has hit a wall, reached the end of a track, or been told to start by a person.
released
pressed
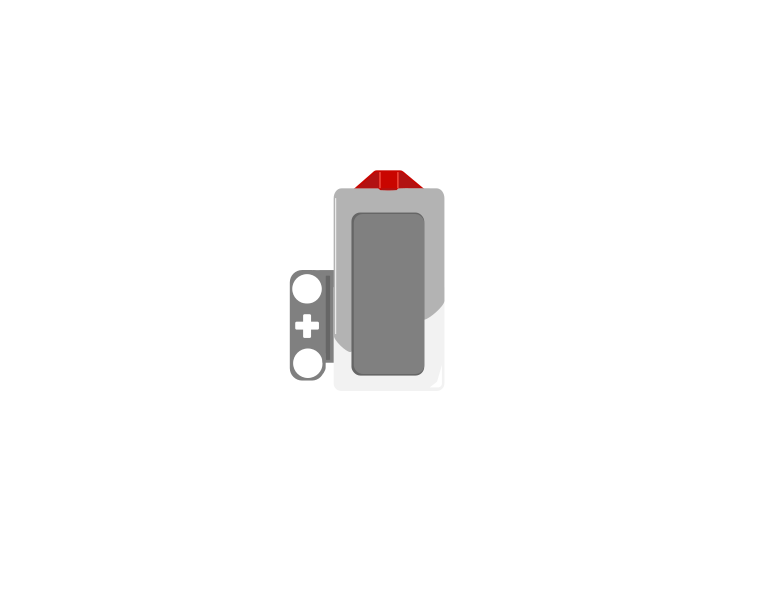
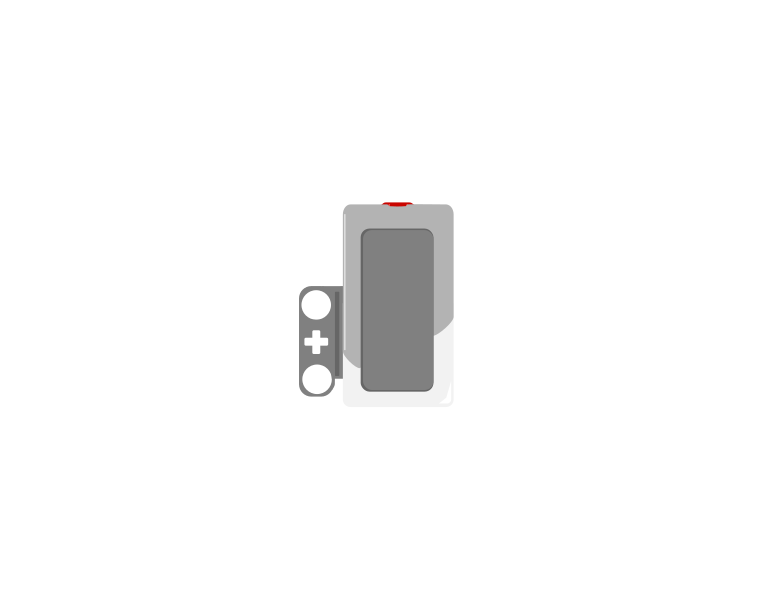
The red button out, and the same sensor with it pushed in. These two states are the entire output of this sensor — there is nothing in between.
Blocks reference
Block
What it does
wait until <[1 v] is pressed? :: sensors>
Holds the program here until somebody presses the sensor.
<[1 v] is pressed? :: sensors>
Reports true or false. Drop it into a condition to make a decision rather than a wait.
[1 v] when [bumped v] :: events hat
Starts a whole stack of its own. The dropdown chooses the moment: pressed, released or bumped.
Three different events
A button is not only “pressed”. One press is three things: the moment it goes down, the time it stays down, and the moment it comes back up. Watch what a single press does to three programs at once.
when program starts
forever
if 1 is pressed? then
change count by 1
versus two hat blocks
1 when pressed
1 when bumped
0is pressed? in a loop0when pressed0when bumped
In a loop: 0 answers from one pressBumped: exactly one
Nobody is touching the sensor. All three programs are watching it.A finger presses the button. Watch the red button go in — a couple of millimetres is the sensor's entire movement.The finger is still down. The loop checking «is pressed?» has already run hundreds of times, and every one of them counted.The finger lifts. Only now does «bumped» count, because bumped means pressed AND released.One press. Three completely different answers.Finished. The same press, counted three ways.
released
The middle counter is the one that surprises people. Nothing is wrong with it — a loop really does check that fast, and every check really is a separate answer.
Nothing there is broken. A loop really does get round hundreds of times a second, and each time it asks is pressed? the honest answer is still yes — so if that loop plays a sound or counts something, it does it hundreds of times from one finger. The two hat blocks each fire once, and they fire at different moments: pressed the instant the button goes down, bumped only when it comes back up.
The three options, and what each is for:
Pressed — the button is down right now. Good for “hold to run”.
Released — it is up again. Good for acting when somebody lets go.
Bumped — pressed and released. This is what you want for “click to start”, because it will not fire repeatedly while a finger stays down.
The classic bumper
when program starts :: events hat
set movement motors to [B v] and [C v] :: movement
start moving [straight: 0] :: movement
wait until <[1 v] is pressed? :: sensors>
stop moving :: movement
The robot drives until something presses the sensor. Note that the movement is started unmeasured on purpose — the sensor decides when to stop, not a distance.
Why it matters
Touch sensors are everywhere in machines you cannot see into: a lift knows the doors are shut, a printer knows the lid is closed, a washing machine will not spin until it is latched. They are safety devices as much as inputs.
A My Block turns a stack of instructions into a word — and words are what you can build with.
▶Naming things wellWhy 'fire' beats 'block1', and how to tell a good name from a bad one.Show meHide
A good block name says what happens, not how. Test it like this: read your main program out loud. If it sounds like a description of the machine, the names are right.
fire — good. It is a thing the minigun does.
spin motor A and wait — poor. That is the how, and if you later change which motor it uses the name becomes a lie.
block1 — useless. It tells the next reader nothing, and the next reader is usually you, next week.
A name that has stopped being true is worse than no name at all, because it is trusted. If you change what a block does, change what it is called.
Say this back before moving on: “A My Block is a stack of blocks with a name on the front.”
What’s in this build 4 min
Put the model down and look at it. Which electronic parts can you find? There are three, and one of them you will feel before you see it.
Part
What it is doing here
EV3 Intelligent Brick
The body of the gun, and the heaviest thing in your hands. It runs the program and its status light is part of the effect.
Large Motor — in the body, driving the barrels
Spins the whole barrel cluster through a gear train. Large rather than Medium because a ring of barrels has real rotational inertia: it takes torque to get it moving and it keeps turning after the motor stops.
Touch Sensor — the trigger
The only input. Note where it is: under your index finger, exactly where a trigger belongs. A control you can reach without looking is a design decision, not an accident.
The barrel cluster and gear train (not electronic)
Turns one motor shaft into six barrels going round together. Spin it by hand before you power it — if it is stiff or catches, the motor will struggle and every burst will sound different.
Check the spin by hand first. A barrel cluster that binds will make the Large Motor stall, and a stalled motor draws current and gets warm without doing anything. If it does not coast freely for a turn or so after you flick it, something is rubbing — find it now, not after three failed programs.
Ports — and the rule 4 min
Sensors go in ports 1, 2, 3, 4. Motors go in ports A, B, C, D. They are not interchangeable, and nothing will tell you politely if you swap them.
Part
Port
Why this one
Barrel cluster (Large)
A
The model’s only motor, so it takes the first motor port. Every program on this page says [A v].
Trigger (Touch Sensor)
1
The model’s only sensor. Keeping the trigger on 1 across the Level 3 handheld models means a program written for one nearly runs on the next.
Check your own build now:
Motor in A, trigger in 1.
Route the cables before you pick the model up. This one is held, so the cables move with your hands — a cable stretched across the trigger will unplug itself mid-burst, and an unplugged Touch Sensor reads as not pressed.
Flick the barrel cluster by hand. It should coast round freely for a turn or so. If it binds, find what is rubbing now, not after three failed programs.
Press the trigger with your finger and listen for the click. A trigger that does not quite reach the sensor will look like a broken program.
Connect the Brick 4 min
Two routes, and either is fine. USB is the reliable one and the one to fall back on when a room’s Bluetooth is busy; Bluetooth leaves the robot free to move, which some models need.
▶How to connect the BrickUSB and Bluetooth, step by step, with a photograph of every screen. Open it if you have not done this before — or if pairing is not working.Show meHide
USB — the reliable one
Switch the Brick on with the dark grey centre button.
Cable into the Brick’s PC port — the small square socket beside the numbered ports, not one of the numbered ones.
Other end into the computer.
Bluetooth — name it first
Do these in order. Naming the Brick after you go looking for it in the list is how groups end up driving each other’s robots.
Name your Brick. On the Brick: Settings (the spanner) → Brick Name. Type something nobody else will pick, then press the tick. Every Brick is called EV3 until somebody changes it.
Turn Bluetooth on. Settings → Bluetooth. Tick Bluetooth and Visibility. Leave iPhone/iPad/iPod unticked.
Connect from EV3 Classroom. Click the Brick icon at the top of the programming area, find your Brick by name, and click Connect.
Say yes on the Brick. It asks “Connect?” with the computer’s name — choose the tick, then accept the passkey, which is already 1234.
Where to read it. The name sits in the bar across the very top of the screen, on every screen — so you can check which Brick you are holding at any moment without going into a menu. This one is EV3VE. A Brick nobody has renamed says EV3.Step 3, and the reason step 1 exists. Three Bricks in range — read the name before you click Connect. Pairing with the wrong one is not an error: it works perfectly, on somebody else’s robot.
Step 2.Bluetooth switches the radio on; Visibility is what lets the computer find you. With Visibility off your Brick works perfectly and simply never appears in the list.Step 4. Look at the Brick. It asks whether to accept and names the computer. Choose the tick.Then the passkey, already 1234. Press the tick again and you are connected.
The two failures, every class, every time. The Brick has gone to sleep while you were building — press the centre button to wake it. Or you have paired with the group at the next table, which is why the name matters.
The long version, including Port View and how to read the port tiles, is in the Brick & Bluetooth guide.
Bluetooth suits this model. The minigun is picked up, aimed and swung about, and a USB cable turns that into a tethered experience — it also drags on the trigger cable, which is the one you least want disturbed. Fall back to USB if the room’s Bluetooth is busy.
Confirm the connection 2 min
Check the Brick icon: connected, or not.
One motor tile — A. If you see none, the motor cable is in a numbered port.
One sensor tile — 1, reading a Touch Sensor.
Pull the trigger and watch tile 1 change. Do it three times. If the tile only changes when you press the sensor directly with a finger, the trigger linkage is not reaching it — fix the model, not the program.
Stuck? The long version, with a photograph of every screen, is in the Brick & Bluetooth guide.
Change it and test 8 min
One change at a time. Predict, then run, then look. A student who predicts and turns out to be wrong has learned something; a student who only watches has merely seen something.
Change wait (1) seconds to (3) inside the definition. Predict the burst length first. Then ask the real question: how many blocks did you have to edit?
Drop start motor at (100) % to (30) %. Does the cluster get up to speed within the burst at all? A heavy ring at low power may never really spin before it is told to stop.
Delete [A v] stop motor, run, then put it back. What ends the burst now? Nothing does. This is the difference between a routine that cleans up after itself and one that leaves a mess for whatever runs next.
Rename the block. Change fire to spin and read your main program aloud again. Does it still sound like a description of the machine? Names are part of the program.
Call it twice. Put a second fire under the first. You get a double burst — from one definition, with nothing copied.
Notice what you did not have to do. Every change above was made in exactly one place. Keep that feeling — it is what you buy each time you make a My Block.
A My Block turns a stack of instructions into a word — and words are what you build with.
Where this goes 3 min
Level 2 ended stuck on exactly this. The Forklift with Pulley ran the same five blocks four times over and had no way to give that sequence a name — that lesson said so on purpose, and left you feeling the gap.
You have just been handed the missing thing. Everything in Level 3 gets shorter from here:
Next lesson, your My Block takes an input, so one block can fire a short burst or a long one.
Lesson 3, one stack starts another with a broadcast — a name for a moment, rather than for a routine.
Lesson 8, a list remembers a run of numbers. Lists tangle fast without names and stay readable with them.
You did not teach the minigun anything new today. You taught the program to explain itself.
Make it move 10 min
Build it in two goes. First get the firing sequence working with no My Block at all — you cannot name a routine you have not got working. Then give it the name.
Step 1 — get it firing
when [1 v] is [pressed v] :: sensors hat
play sound [Laser v] :: sound
set status light to [red v] :: display
[A v] start motor at (100) % speed :: motors
wait (1) seconds :: control
[A v] stop motor :: motors
set status light to [green v] :: display
Six blocks: sound, red light, spin up, hold for a second, stop, light back to green. Do not go on until this works.
Step 2 — give it a name
My Blocks → Make a Block. Name it fire. Click OK.
A define fire hat appears on the canvas. Drag it somewhere clear.
Detach the six blocks from under the when pressed hat — grab play sound and the five below it come with it — and drop them under define fire.
Your when pressed hat is now empty. Drag the new fire block out of the palette and clip it underneath.
define fire
play sound [Laser v] :: sound
set status light to [red v] :: display
[A v] start motor at (100) % speed :: motors
wait (1) seconds :: control
[A v] stop motor :: motors
set status light to [green v] :: display
The **definition** — the drawer with the how in it. Nothing runs here until something calls it.
when [1 v] is [pressed v] :: sensors hat
fire :: custom
The **program** — two blocks, and you can read it aloud: “when the trigger is pressed, fire.”
The behaviour must not change. Pull the trigger and you should get exactly what you got in step 1 — same sound, same spin, same second of hold. The Brick runs the same six blocks either way.
What changed is who has to understand it. Step 1 tells you how the minigun fires. Step 2 tells you what it does, and keeps the how in a drawer you open only when you want to change it.
One definition, as many calls as you like. That is the whole bargain, and the challenges are where you collect on it.
What success looks like: a two-block main program, a define fire hat with six blocks under it, and a minigun that behaves precisely as it did before you tidied it up.
If nothing happens now, you left the blocks behind. The commonest slip is clipping fire into place but never moving the six blocks into the definition — so fire is defined as nothing at all, and nothing is exactly what it does. Look at your define fire hat: is there a stack under it?
This is what you are building: the M134 Minigun (handheld).
Build it 15 min
Build the model before you read any further. Everything after this is about making it do something, and none of it will make much sense with nothing on the table in front of you.
Use the viewer's own controls to zoom and turn pages. Fullscreen makes it big enough to build from.
Check the finished build against the picture before you switch anything on. A motor mounted the wrong way round is far easier to spot now than it is to debug later, when it looks like a program fault.
Challenges 27 min
Work through them in order — each is harder than the last. The extra challenge comes after all three, and it is meant to make you plan before you build.
Challenge 1
Give the minigun a reload.
Make a second My Block called "reload". Inside it: two beeps, the status light orange for two seconds, then back to green.
Now call it straight after "fire", so the minigun reloads itself every time you pull the trigger.
Your main program should still be short enough to read aloud: "when the trigger is pressed, fire, reload."
Challenge 2
One pull, three bursts.
Pulling the trigger once must now fire three bursts with a reload between each.
Use a repeat loop and the two My Blocks you already have. Do not copy the firing blocks — if you find yourself pasting, stop and look at what you already named.
The rule: everything below the "when trigger pressed" hat must fit in three blocks.
Challenge 3
Make it overheat.
A real minigun cannot fire for ever. After three bursts yours must refuse: instead of firing, it shows a warning on the screen, sets the status light red and plays a different sound for five seconds — then it is ready again.
You will need a variable to count the bursts, and it is worth making a My Block called "cool down" for the refusing part.
Work out the approach before you build it. Where does the count go up? Where does it get checked? Where does it go back to zero?
Extra challenge
Programme a full firing drill, and keep it readable.
Pressing the Brick centre button runs the whole drill by itself: three short bursts, a reload, two long bursts, a reload, and one final long burst. The screen counts the rounds remaining down from 12 to 0 as it goes, and the status light changes as the ammunition runs low.
Two rules, and they are the mission:
1. The firing sequence may appear in your program ONCE. Everything else calls it.
2. Someone who has never seen your program must be able to read the main stack and say what the drill does, without opening a single My Block.
Plan it on paper first. Decide what your named blocks are and what each one is responsible for BEFORE you drag anything. If you get stuck on the two burst lengths, that is the right thing to get stuck on — it is what the next lesson is about.