Basic
Follow the black line from the start box to Home. Stop fully inside Home.
Quick Learn — the model, the instructions, the program and the challenges. The theory is in Full Lesson.
EV3 Robotics›Level 3 · Advanced›Lesson 36
Level 3 · Lesson 2 · EV3-L03-0260 minutes · Ages 11+ · Model: Football Robot
The Football Robot is a driving base with a kicker. The kicker is a sprung arm on its own motor. It snaps forward to strike the ball instead of just pushing it.
It drives, it turns, and it kicks. That is three jobs with three separate controls. And for the first time in this course, there is an opponent on the other side of the pitch doing the same thing.
By the end of the lesson your robot will be playable. It will also have a full-time whistle that stops everything at once. That turns out to be the hard part.
RoboCup is a world championship of robot football, held every year since 1997. Its goal is to beat the human World Cup winners by 2050. That sounds silly until you watch a match.
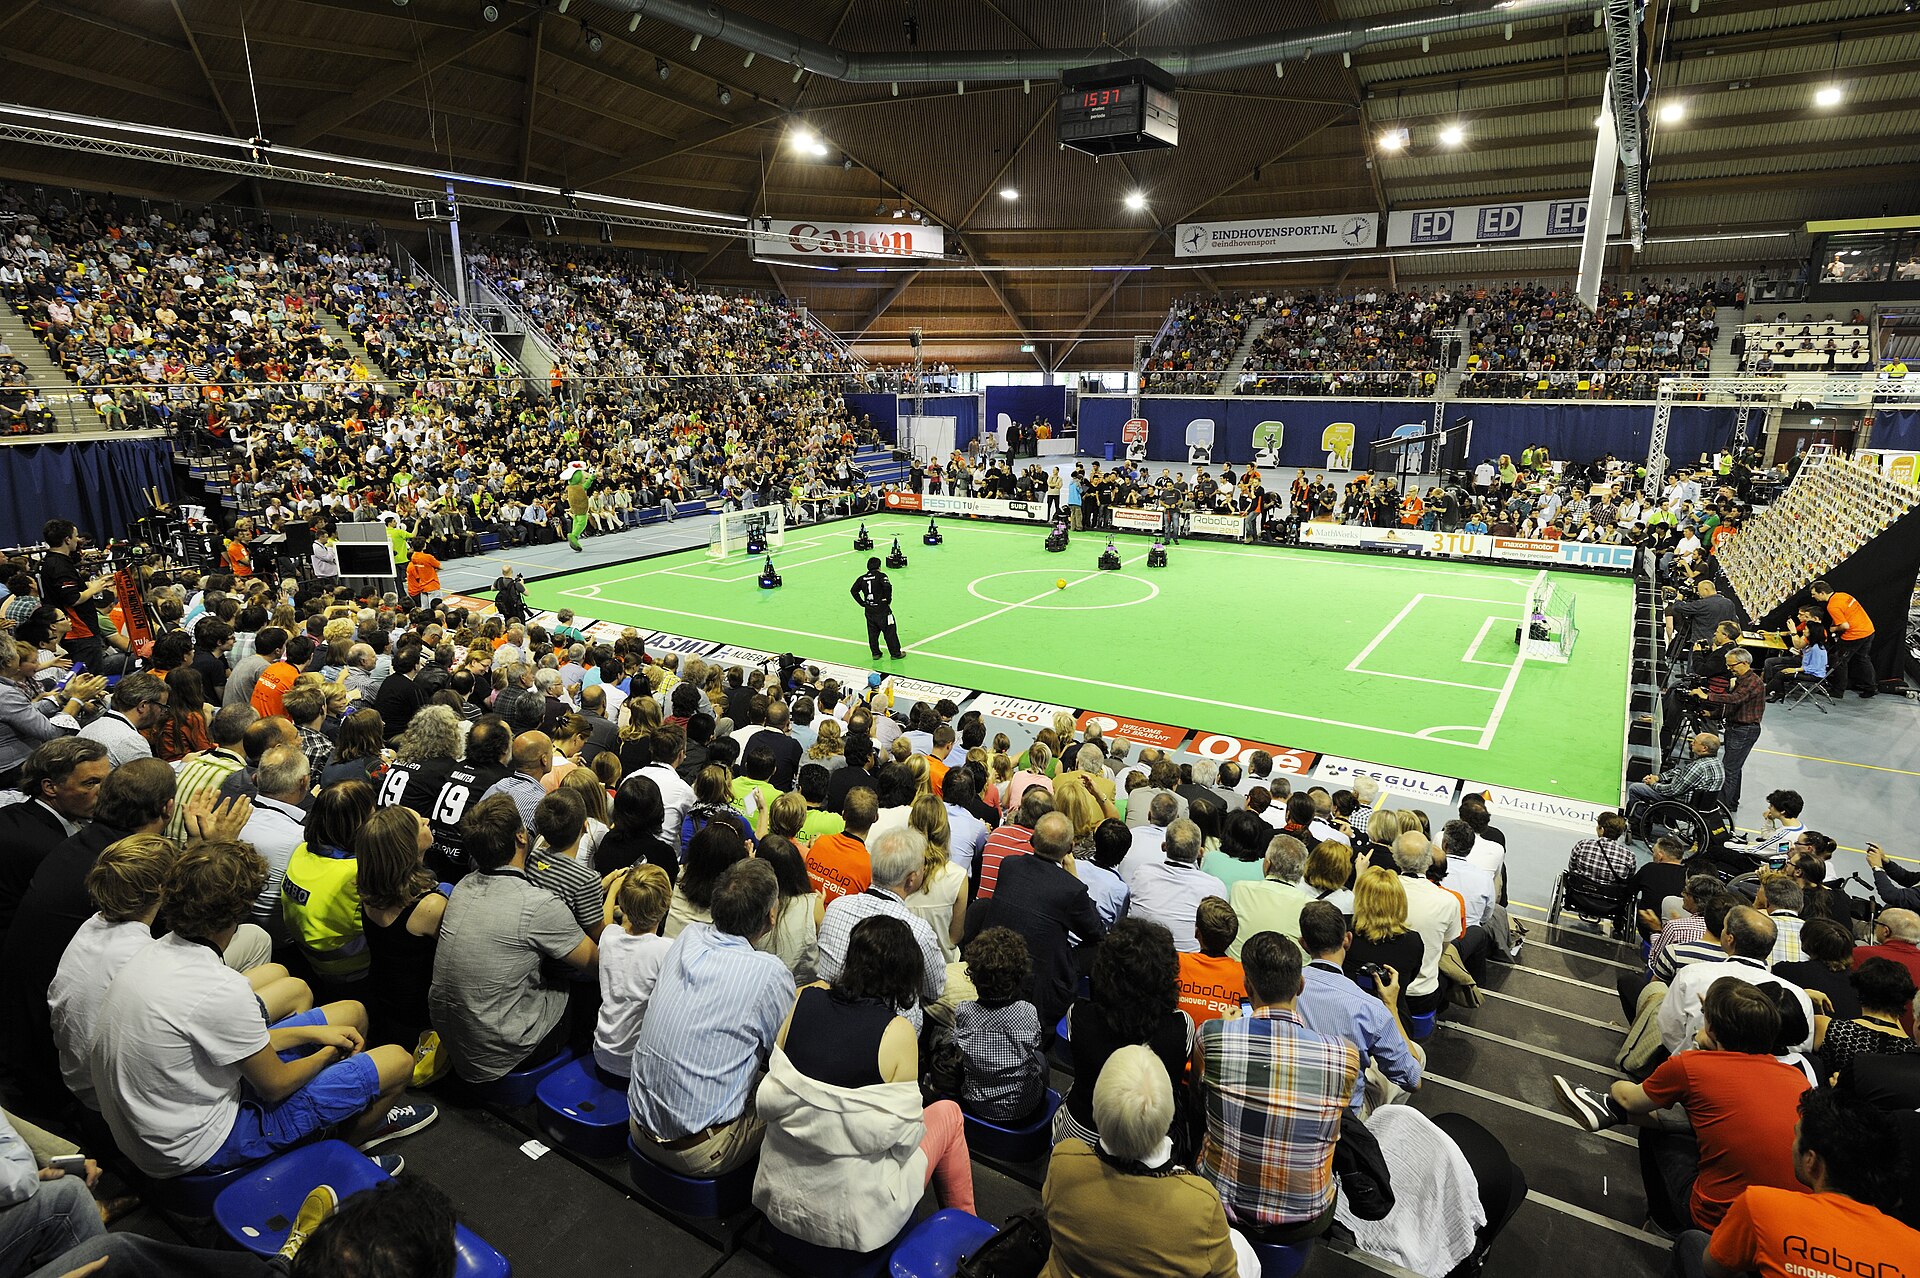
Scientists chose football on purpose as a research problem. It makes everything hard at once. The robot must see, decide and move in real time, which means as things happen. An opponent is trying to make its plan fail. You cannot solve it by being careful and slow.
Look at the kickers. Nearly every competition robot pushes the ball with a spring, not a motor. A motor can only push as fast as it turns. A spring stores energy slowly and gives it all back in a hundredth of a second. It is the same trick as Level 1’s Elastic Car, aimed at a ball.
Now the part that matters today. Every RoboCup match is stopped by a referee, not by a robot. When the whistle goes, every robot on the pitch must stop straight away. It stops wherever it is, whatever it was doing. A robot that keeps playing after full time is dangerous, and it is disqualified.
Anything that can be started by several things at once needs one thing that can stop it all.
In Level 2, the Drawing Machine (Lesson 38) showed you that several stacks run at the same time. The Crane (Lesson 25) used stacks as a control panel. Neither lesson answered an obvious question: how does a program with five stacks in it ever stop?
Pressing the stop button on the Brick works, but it is not the answer. It stops everything outside the program too, so nothing can happen afterwards. A referee’s whistle is followed by handshakes.
when [down v] button [pressed v] :: events hat
stop other stacks
stop moving :: movement
[A v] stop motor :: motors
play sound [Communication / Goodbye v] until done :: sound
stop other stacks stops the others. It does not stop the stack it is in. That is the whole reason it is useful — the referee is not sent off by their own whistle. The blocks after it still run, so this is where you put the tidying up.
| Block | What it stops | Use it when |
|---|---|---|
stop other stacks | every stack except this one | one stack has to take charge and then do something about it |
stop [and exit program v] | everything, including this stack. Nothing after it ever runs | the program is genuinely finished |
stop moving :: movement | the motors, and nothing else. The program carries on | you want the wheels still and the thinking running |
Stopping a stack does not stop a motor. This is the trap. Say a stack is killed halfway through a start moving [straight: 0]. The wheels keep turning for ever. The block that would have stopped them was in the stack you just killed. That is why the whistle stack stops the motors itself, on the next two lines.
You could set playing to 0 and wrap every stack in if <(playing) = (1)>. It works — and every stack has to remember to check, on every pass, for ever. Miss one and that stack plays on after full time.
stop other stacks does not ask the stacks to cooperate. They are stopped whether they were paying attention or not — which is precisely what you want from a whistle.
A program does not have to be one long column of blocks. Several stacks can run at the same time, each doing its own job — one driving, one watching a sensor, one keeping the display up to date.
Give each stack its own hat block. Every stack beginning with when program starts starts at the same instant — not one after another — and from then on they run alongside each other.
Nor is it limited to two. Below, three stacks run together: a Medium Motor turning an attachment, the status light flashing, and the drive base rolling. Watch the arrows at the top — they all begin at once, and no stack waits for any other.
when program starts :: events hat
[A v] start motor [clockwise v] :: motors

when program starts :: events hat
forever
  set status light to [green v] :: display
  wait (0.5) seconds
  set status light to [red v] :: display
  wait (0.5) seconds
end

when program starts :: events hat
start moving [straight: 0] :: movement
Written down they have to go one under another, because a page is a column — but that is an accident of paper. On the Brick they sit side by side, and nothing in the first stack happens before anything in the third.
Parallel stacks go wrong when two of them try to control the same thing. Use the switch below to take the wheels away from the third stack and point it at motor A, which the first stack is already driving.
the program starts — all of these begin here
stack 1 · Medium Motor
stack 2 · status light
stack 3 · drive base
Every stack is highlighted at the same moment on purpose — that is what running in parallel looks like. The switch above changes only what the third stack controls.
With one owner each, all three stacks are highlighted at the same instant and all three jobs get done. With two owners, motor A is handed contradictory orders hundreds of times a second and shivers instead of turning — and notice the second cost, which is easy to miss: the wheels now have nobody driving them. A stack that goes to fight over someone else’s motor has abandoned its own job. Nothing reports an error either way; as far as the Brick is concerned every stack is working perfectly. The same happens to a display line or a variable that two stacks both write to.
The discipline is simple: give each stack sole ownership of what it controls. One stack owns the motors, another owns the screen, another watches the sensors and tells the others what it found — which is what broadcasting is for.
The Brick has five buttons of its own — up, down, left, right and centre. They need no sensor, no cable and no port, which makes them the easiest way to let a person tell the robot to do something.
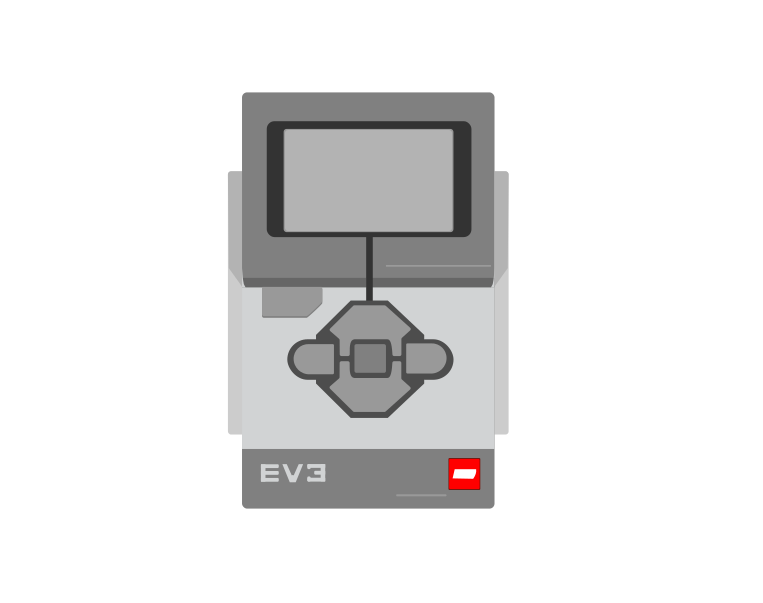
| Block | What it does |
|---|---|
when [center v] button [pressed v] :: events hat | Starts a whole stack when that button is pressed. |
wait until <is [center v] button pressed? :: sensors> | Holds an existing program until the button is pressed. |
A program sitting on a wait block looks exactly like a program that has crashed. Watch one wait — including through two presses of the wrong button.
the other way to do it
A program parked on a wait block looks identical to a crashed one. This is why the status light or a line on the screen is worth setting before you wait.
The wait is watching one button. Up and right change the (button) reading, and the program does not care. That reading is a number rather than a name: 0 for nothing, then 1 left, 2 centre, 3 right, 4 up, 5 down.
Nearly every machine has a start button that is deliberately separate from switching the power on. A robot that begins moving the instant it is powered up is hard to set down and hard to test — one that waits for a press can be positioned first.
One stack can stop the rest. It must then stop the motors itself, because the blocks that would have done it are gone.
A program does not have to be one long column of blocks. Several stacks can run at the same time, each doing its own job — one driving, one watching a sensor, one keeping the display up to date.
Give each stack its own hat block. Every stack beginning with when program starts starts at the same instant — not one after another — and from then on they run alongside each other.
Nor is it limited to two. Below, three stacks run together: a Medium Motor turning an attachment, the status light flashing, and the drive base rolling. Watch the arrows at the top — they all begin at once, and no stack waits for any other.
when program starts :: events hat
[A v] start motor [clockwise v] :: motors

when program starts :: events hat
forever
  set status light to [green v] :: display
  wait (0.5) seconds
  set status light to [red v] :: display
  wait (0.5) seconds
end

when program starts :: events hat
start moving [straight: 0] :: movement
Written down they have to go one under another, because a page is a column — but that is an accident of paper. On the Brick they sit side by side, and nothing in the first stack happens before anything in the third.
Parallel stacks go wrong when two of them try to control the same thing. Use the switch below to take the wheels away from the third stack and point it at motor A, which the first stack is already driving.
the program starts — all of these begin here
stack 1 · Medium Motor
stack 2 · status light
stack 3 · drive base
Every stack is highlighted at the same moment on purpose — that is what running in parallel looks like. The switch above changes only what the third stack controls.
With one owner each, all three stacks are highlighted at the same instant and all three jobs get done. With two owners, motor A is handed contradictory orders hundreds of times a second and shivers instead of turning — and notice the second cost, which is easy to miss: the wheels now have nobody driving them. A stack that goes to fight over someone else’s motor has abandoned its own job. Nothing reports an error either way; as far as the Brick is concerned every stack is working perfectly. The same happens to a display line or a variable that two stacks both write to.
The discipline is simple: give each stack sole ownership of what it controls. One stack owns the motors, another owns the screen, another watches the sensors and tells the others what it found — which is what broadcasting is for.
Say this back before moving on: “The whistle stops the players, then clears the pitch.”
Look at your robot. Three motors, doing two completely different kinds of job — which is which?
| Part | What it is doing here |
|---|---|
| EV3 Intelligent Brick | The robot, and the game controller. Its five buttons are the whole handset — four to play with and one to end the match. |
| Large Motor ×2 — the drive | A matched pair, one per wheel. They do one job together, so they live on the Movement blocks’ ports. |
| Medium Motor — the kicker | Its own job, its own port. It must be fast rather than strong: a kick that arrives slowly is a push. |
| The kicker arm and its spring (not electronic) | Stores the motor’s effort and releases it all at once. Take the band off and try a kick — the difference is the whole point of a sprung kicker. |
Sensors go in ports 1, 2, 3, 4. Motors go in ports A, B, C, D. You cannot swap them. If you do, nothing warns you. The robot just will not work.
| Part | Port | Why this one |
|---|---|---|
| Left wheel | B | The pair. Two motors, one job — driving. |
| Right wheel | C | The other half of the pair. |
| Kicker | A | A separate job gets a separate port, well away from B and C so it can never be driven as part of the pair. |
| Sensors | none | A person is the sensor today. Adding one is what the challenges are for. |
The manual never says which port anything goes in. It ends at the last building step with no cables drawn. So the ports above are this course’s rules, not the manual’s. Nothing in your build goes against them.
Check your own wiring now:
Two routes, and either is fine. USB is the reliable one and the one to fall back on when a room’s Bluetooth is busy; Bluetooth leaves the robot free to move, which some models need.
Do these in order. Naming the Brick after you go looking for it in the list is how groups end up driving each other’s robots.
EV3 until somebody changes it.EV3.The two failures, every class, every time. The Brick has gone to sleep while you were building — press the centre button to wake it. Or you have paired with the group at the next table, which is why the name matters.
The long version, including Port View and how to read the port tiles, is in the Brick & Bluetooth guide.
Bluetooth, and this time it is not optional. The Brick is the handset and you will be holding it, moving round the pitch, playing against somebody else. A cable makes the game unplayable and the laptop unsafe.
Stuck? The long version, with a photograph of every screen, is in the Brick & Bluetooth guide.
One change at a time, and actually play a match after each. This is a game: the test is whether it is playable and whether it is fair.
stop moving from the whistle stack. Drive forward and blow the whistle mid-move. The robot never stops. Now you have met the trap rather than read about it.stop other stacks for stop [and exit program v]. The robot stops — and the TIME UP message never appears, because that stack died too.set movement speed from 50 to 80, then to 25. One number, whole different game. Which is more fun, and which is easier to score with?goals, and a stack on the up button of a second Brick, or on a Touch Sensor a referee holds. Show it with write (goals) at line (3).Step 6 is the one to notice. The whistle stack did not need a button. It needed a reason. A timer, a sensor or a score reaching ten could all decide the game is over. Any of them can hold the whistle. The four playing stacks do not change by a single block.
Stopping a stack is not stopping a motor. Say both, every time.
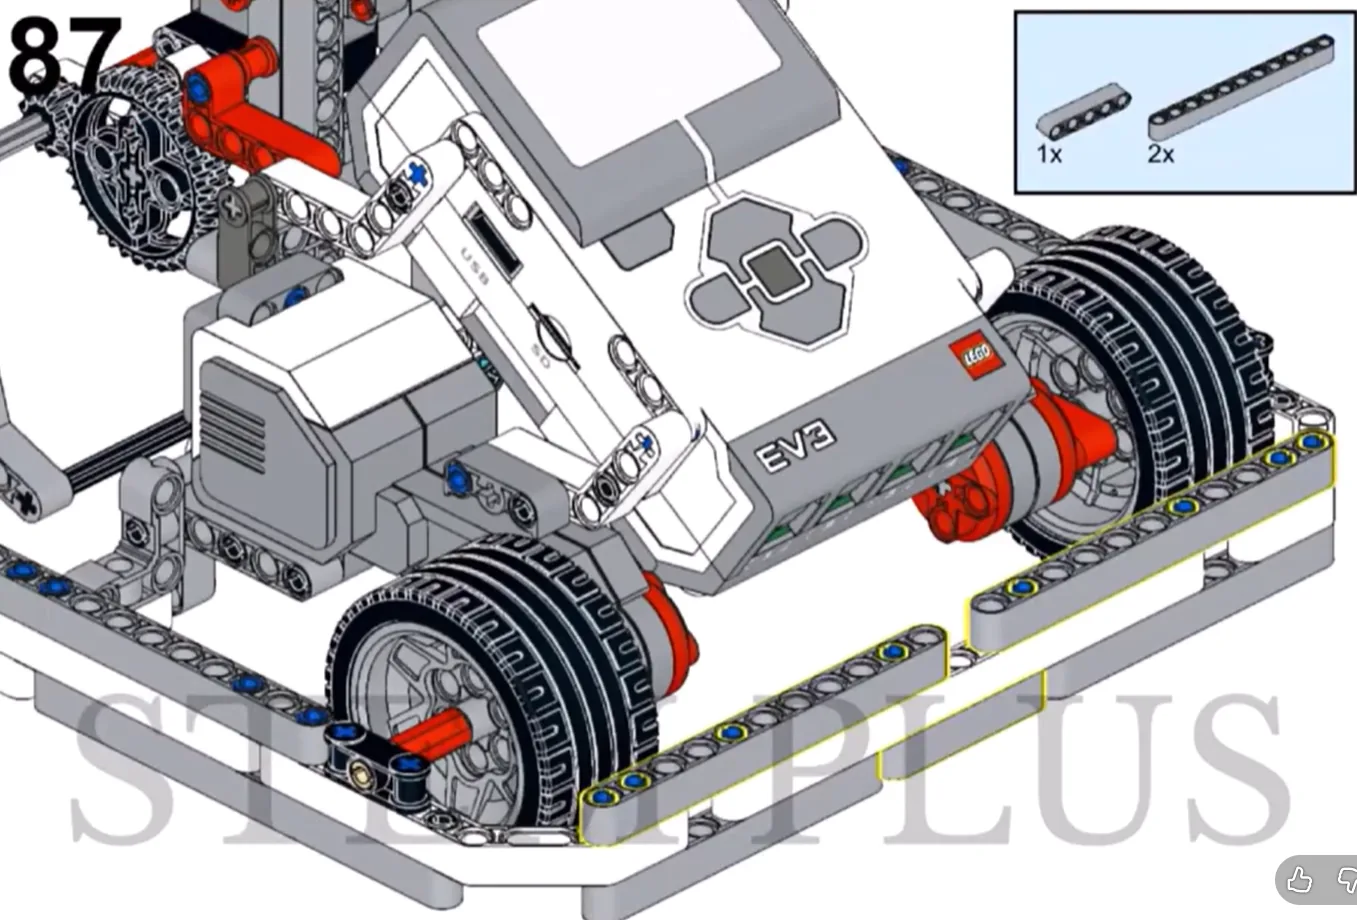
Build the model before you read any further. Everything after this is about making it do something, and none of it will make much sense with nothing on the table in front of you.
One page at a time — use Next and Previous, or the ← → keys. Fullscreen makes it big enough to build from.
The same build on Google Drive — sometimes a video, sometimes a scan:
Fullscreen it while you build — you can pause and scrub with the player's own controls.
Check the finished build against the picture before you switch anything on. A motor mounted the wrong way round is far easier to spot now than it is to debug later, when it looks like a program fault.
Six stacks: one to set up, four to play with, one to end the match. Each control owns one thing.
when program starts :: events hat
set movement motors to [B v] and [C v] :: movement
set movement speed to (50) % :: movement
clear display :: display
write [MATCH  ] at line (1) :: display

when [up v] button [pressed v] :: events hat
move [forward v] for (0.5) [rotations v] :: movement

when [left v] button [pressed v] :: events hat
move [straight: -60] for (0.3) [rotations v] :: movement

when [right v] button [pressed v] :: events hat
move [straight: 60] for (0.3) [rotations v] :: movement

when [center v] button [pressed v] :: events hat
[A v] run [clockwise v] for (0.4) [rotations v] at (100) % speed :: motors
[A v] run [counterclockwise v] for (0.4) [rotations v] at (40) % speed :: motors

when [down v] button [pressed v] :: events hat
stop other stacks
stop moving :: movement
[A v] stop motor :: motors
clear display :: display
write [TIME UP] at line (1) :: display
play sound [Communication / Goodbye v] until done :: sound
set movement speed. One number sets every movement after it, so the whole robot is tuned in one place.What success looks like: two people can play a real game. Press down and both robots stop mid-move, and the screens say TIME UP. Nothing twitches afterwards, not even a robot that was halfway through a turn.
If a wheel keeps turning after the whistle, you have found the trap. The stack was stopped and the motor was not. Add the stop to the whistle stack.
This model drives, so its challenges are run on a mat. Mats differ between branches — check you are looking at the one in your room.
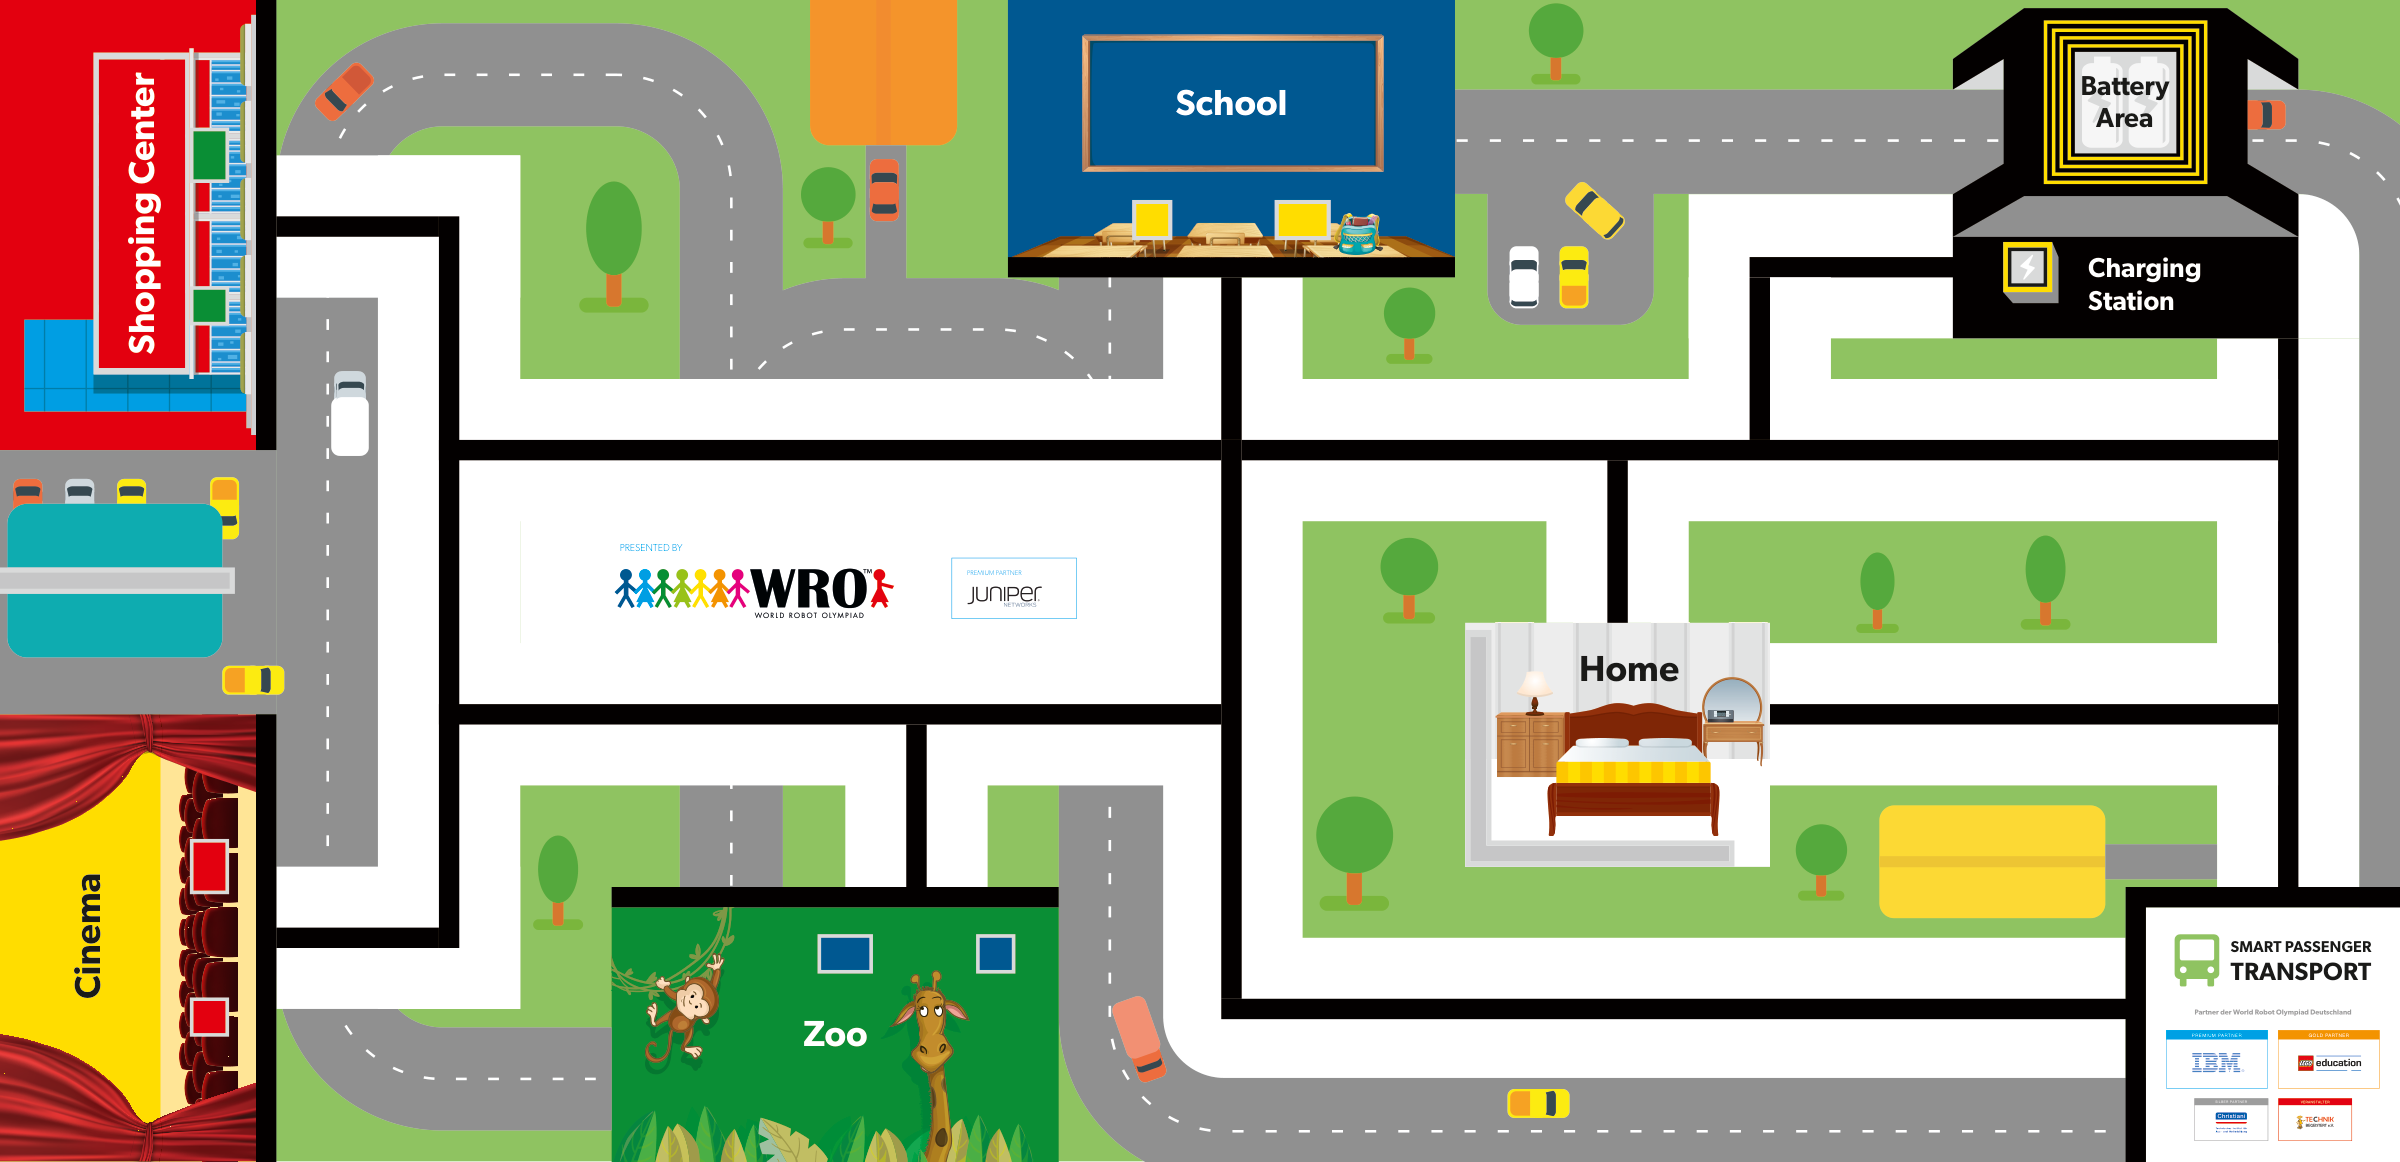
WRO 2019 RoboMission Elementary — Smart Passenger Transport · official WRO game mat, 2362 × 1143 mm
The challenges name these places rather than distances, so the same challenge works on any mat:
Written for the WRO 2019 RoboMission Elementary mat. Each one is a single program run that starts in the ✕ box.
Follow the black line from the start box to Home. Stop fully inside Home.
In one program run, follow the black line to Home, then on to School.
In one run, go to Home, then School, then the Zoo. Stay on the black line all the way.
In one run, go to Home, School and the Zoo, then the Shopping Center. Stay on the black line all the way.
In one run, charge at the Battery Area first. Then go to the Shopping Center, the Cinema, and finish at Home. Stay on the black line all the way.
Work through them in order — each is harder than the last. The extra challenge comes after all three, and it is meant to make you plan before you build.
Play a two-minute match against a friend. Both robots must stop straight away when the referee presses down.
Add a full-time whistle that blows by itself after two minutes. It must do exactly the same tidying up as the one the referee blows.
Add a scoreboard that the referee controls. End the match early when one side gets three goals.
Run a knock-out cup for four teams. The referee must do everything from the Brick. Your program must let them start a match and stop it. They must be able to add goals. They must end the match early or on time, and reset for the next one. The screen must always show what is happening. Test it by giving it to a referee who has never seen your program.