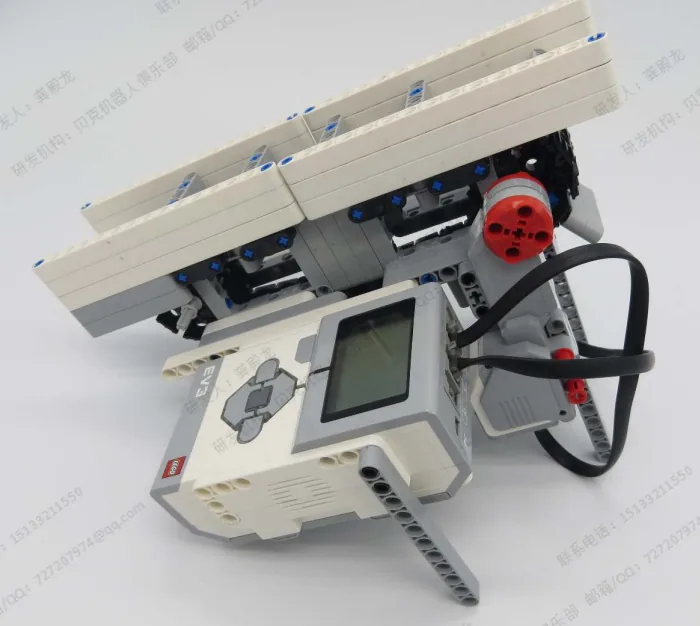
The Water Conveyor: a chain of scoops that lifts water — or in your case, small parts — from a low tank to a high one, driven by two Large Motors that must turn as one.
It is the first model in Level 3 with more than one thing happening at once. The belt runs. A trip switch watches the hopper. A distance sensor watches the tank filling. None of those three should have to wait for the others.
By the end of the lesson one part of your program will announce that something happened, and two other parts will react to it — without any of them checking the sensor themselves.
In the real world 5 min
Where you have seen it
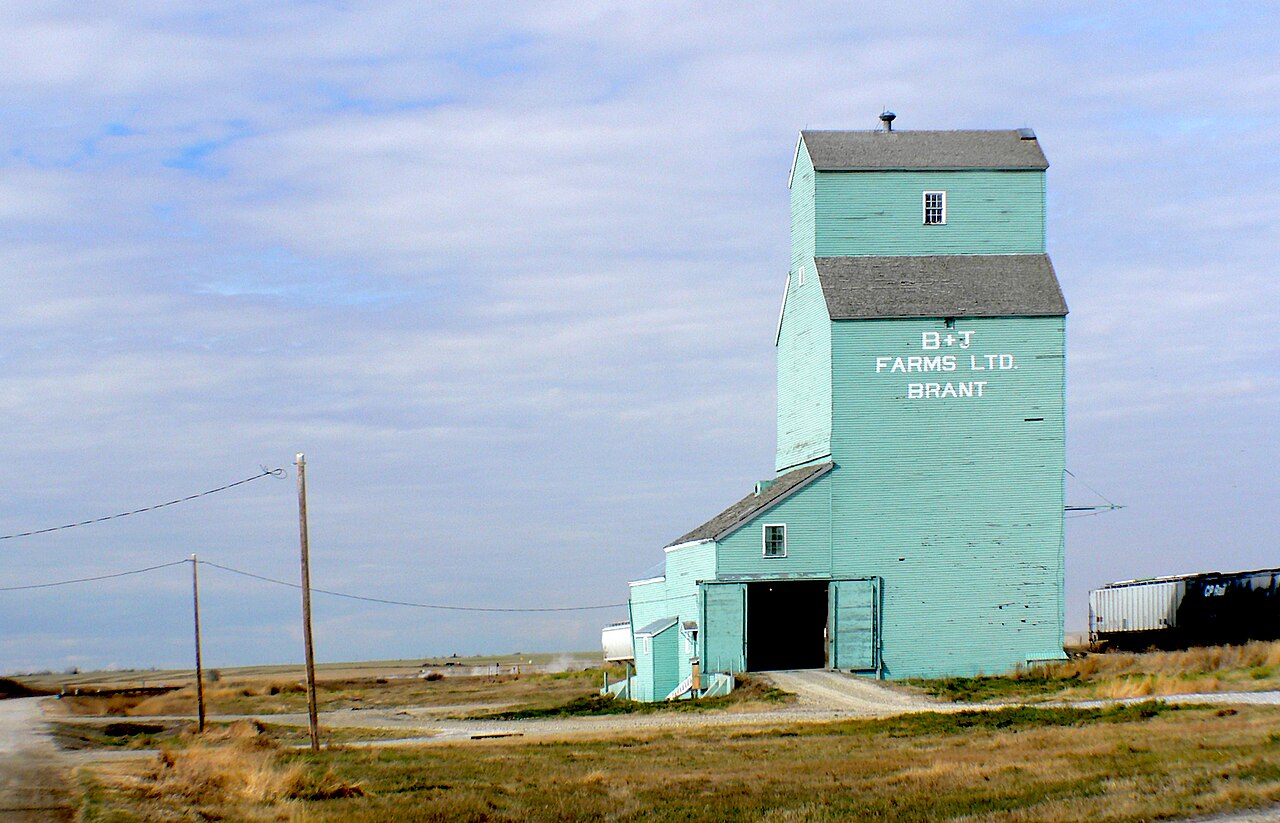
A bucket-chain conveyor is one of the oldest machines still in daily use. The Egyptians moved irrigation water with one; a modern grain elevator, a cement works and a flood-defence pumping station all use the same idea — a loop of scoops on a belt, picking up at the bottom, tipping out at the top.
Grain elevators. Alberta. (8096388453). Photo: Bernard Spragg. NZ from Christchurch, New Zealand / Wikimedia Commons (CC0).
What has changed is what surrounds it. A modern installation has a level probe in the upper tank, a trip on the hopper, an overload sensor on the drive and an alarm in a control room. The belt does not know about any of them. It is simply told to start, and told to stop.
Why it is built that way
Because a plant is not one machine — it is a lot of machines that need to agree about when things happen. In an industrial control system the level probe does not reach into the motor and switch it off. It raises a signal — “tank full” — and everything that cares about a full tank does its own thing: the belt stops, the alarm sounds, the log records it.
The signal has a name, and the name is the interface. The probe does not know who is listening, and it does not need to. You can add a fourth thing that reacts to a full tank without touching the probe at all.
What would go wrong without it
If every part had to watch the probe itself, you would have four copies of the same watching, drifting apart over the years — and the day the probe moved to a different terminal, four separate things would need fixing, and someone would miss one.
Announce the moment once. Let everyone who cares listen for it.
The main concept — a name for a moment 6 min
A broadcast is a message with a name. One stack sends it; every stack with a matching when I receive hat starts running. The sender does not know who is listening, and does not wait.
What you had before, and why it strains
when program starts :: events hat
forever
  wait until <[1 v] is pressed? :: sensors>
  [A v] start motor at (40) % speed :: motors
end

when program starts :: events hat
forever
  wait until <[1 v] is pressed? :: sensors>
  play sound [Boing v] :: sound
end
Two parallel stacks from Level 2, both watching the same switch. It works — and there are now two copies of “how we detect a trip”.
The duplication is in the detecting, not the doing. The day the trip becomes an Ultrasonic Sensor instead of a switch, you edit both stacks. Miss one and half the machine reacts to the old sensor.
The fix: one watcher, two listeners
when program starts :: events hat
forever
  wait until <[1 v] is pressed? :: sensors>
  broadcast [load arrived v] :: events
  wait until <not <[1 v] is pressed? :: sensors>> :: control
end

when I receive [load arrived v] :: events hat
[A v] start motor at (40) % speed :: motors

when I receive [load arrived v] :: events hat
play sound [Boing v] :: sound
One stack decides what “a load arrived” means. Two stacks react. Adding a third costs one hat block and changes nothing else.
My Block (Lesson 1)
Broadcast (today)
Names a…
routine — a thing to do
moment — a thing that happened
How many can respond?
One definition
Any number of listeners, including none
Does the caller wait?
Yes — the program continues after the block has finished.
No. It shouts and carries straight on.
Use it when…
the same job is needed in several places
one event should set several unrelated things going
Notice the second wait until in the watcher. Without it, a switch held down for half a second broadcasts dozens of times. Waiting for the release means one press makes one announcement — this is Level 2’s edge detection (Lesson 38), earning its keep.
ComponentData5 min
Broadcasting a message
A broadcast lets one stack tell another to start. The sender does not need to know who is listening — it announces, and any stack waiting for that message runs.
Blocks reference
Block
What it does
broadcast [message1 v] :: events
Sends the message and carries straight on.
broadcast [message1 v] and wait :: events
Sends the message and holds until every stack that received it has finished.
when I receive [message1 v] :: events hat
Starts this stack whenever that message is sent.
Broadcast, or broadcast and wait?
Both send the same message to the same stack. The difference is what the sender does next — which is invisible in a listing, because the two blocks sit in exactly the same place. Use the switch to try each one.
the sensor stack
when program starts
4 wait until distance <15cm
broadcast obstacle-found
write SEEN IT at line 1
the motor stack
when I receive obstacle-found
stop moving
play sound Communication / Uh-oh until done
broadcast: sender carries onuse when they are independent
One stack watches the sensor. The other is waiting to be told something.An obstacle. The sensor stack broadcasts «obstacle-found».The receiver starts stopping the motors — and the sender has already moved on to its own next block without waiting.Both stacks ran at once. The sender never found out when the receiver finished.Finished. Both stacks ran at once, and neither waited for the other.
watching
The sender never names the receiver — it announces, and whoever is listening runs. That is what lets the motors keep exactly one owner.
Plain broadcast is the right choice when the two jobs are genuinely independent: announce it and get on with your own work. broadcast and wait is the right choice when what comes next depends on the receiver having finished — do not start reversing until the stack that stops the motors has actually stopped them.
What it is really for
Broadcasting splits a program into parts that each do one job. A stack that watches the sensors can announce obstacle; the stack that owns the motors reacts. Neither needs to contain the other’s code, and the motors still have exactly one owner.
Here is a driving base doing exactly that. Three stacks are running: one sets the wheels going, one does nothing but read the Ultrasonic Sensor, and one owns every movement from then on. Follow the distance rather than the wheels — and notice what it is still doing while the message is crossing.
the driving stack — sets it going, then it is done
when program starts
start moving straight: 0
the watching stack — no motor block in it at all
when program starts
forever
4 wait until distance <15cm
broadcast obstacle-found
4 wait until distance >25cm
the motor stack — owns every movement after the start
when I receive obstacle-found
stop moving
move right: 100 for 0.5rotations
start moving straight: 0
34cm · reading0cm · crept after the broadcast0°heading
the watcher owns no motor blockthe motor stack reads no sensor
Three stacks start together. One sets the wheels going, one watches the sensor, and one is waiting to be told something.The robot drives. The watcher is only reading the sensor — there is no motor block anywhere in it.Under 15 cm, so the watcher broadcasts «obstacle-found» — and the wheels are still turning. Watch the distance keep falling.Now the motor stack receives the message and runs its first block. Only at this point does anything stop.The same stack turns the base 90° to the right, away from the wall.…and sets it driving again. The watcher never named this stack, and never waited for it.Finished. The eyes and the wheels were never in the same stack — the message is the only thing joining them.
wheels turning
Watch the distance at the moment the message is sent. It keeps falling, because a broadcast starts another stack — it does not stop this one.
The watching stack contains no motor block anywhere, and the motor stack never reads the sensor. That is the whole trick: each stack is short enough to hold in your head, and the message is the only join between them. Splitting it this way also means the base can be made to dodge left instead of right by editing four blocks in one place, without going anywhere near the sensor.
Watch the gap in the middle of the run. broadcast does not mean stop — the wheels keep turning right through it, and the base creeps another 3 cm closer before the receiving stack gets as far as its stop moving block. If a robot must halt on the spot, that gap is why it will not.
The sender has no idea who is listening
Any number of stacks can listen to the same message, so one announcement can set several things going at once — stop the motors, sound an alarm and turn the light red. And nothing in the sending block says which of those will happen. Press one and find out.
Press a broadcast block. Nothing in it says what will happen — the stack that receives it decides.
0rotations · Motor A0times written0beeps0stacks running now
when I receive turn-arm
A run clockwise for 1rotations
when I receive show-text
clear display
write HELLO EV3 at line 4
when I receive beep
play beep 60 for 0.5 seconds
Nothing has been sent yet. Press one of the three yellow blocks above.
Three messages, three receivers, one Brick. The blocks you press are identical apart from the name in the dropdown — so whatever happens next was decided entirely by the when I receive stack at the other end. Press all three quickly: nothing queues, because three separate stacks run at the same time. Press the same one twice while it is still going and its stack starts again from the top.
Name them properly
A message called message1 tells a reader nothing. One called obstacle-found explains the whole design at a glance. Names matter more here than almost anywhere else, because the sender and the receiver may be far apart on screen.
ComponentControl5 min
Two things at once
A program does not have to be one long column of blocks. Several stacks can run at the same time, each doing its own job — one driving, one watching a sensor, one keeping the display up to date.
How it is done
Give each stack its own hat block. Every stack beginning with when program starts starts at the same instant — not one after another — and from then on they run alongside each other.
Nor is it limited to two. Below, three stacks run together: a Medium Motor turning an attachment, the status light flashing, and the drive base rolling. Watch the arrows at the top — they all begin at once, and no stack waits for any other.
when program starts :: events hat
[A v] start motor [clockwise v] :: motors

when program starts :: events hat
forever
  set status light to [green v] :: display
  wait (0.5) seconds
  set status light to [red v] :: display
  wait (0.5) seconds
end

when program starts :: events hat
start moving [straight: 0] :: movement
Written down they have to go one under another, because a page is a column — but that is an accident of paper. On the Brick they sit side by side, and nothing in the first stack happens before anything in the third.
The rule: one owner per thing
Parallel stacks go wrong when two of them try to control the same thing. Use the switch below to take the wheels away from the third stack and point it at motor A, which the first stack is already driving.
the program starts — all of these begin here
stack 1 · Medium Motor
when program starts
A start motor clockwise
stack 2 · status light
when program starts
forever
set status light to green
wait 0.5 seconds
set status light to red
wait 0.5 seconds
stack 3 · drive base
when program starts
start moving straight: 0
One stack, one jobAll three at once
Three stacks, each with its own hat block. All three start the moment the program starts — none of them waits for the others.All three are running in the same instant: the Medium Motor is turning, the light is flashing, and the drive base is rolling.Each stack owns one thing and never touches another stack's job. That is the rule that makes this work.Finished. All three jobs ran the whole time, and none got in another's way.
three stacks, three jobs
Every stack is highlighted at the same moment on purpose — that is what running in parallel looks like. The switch above changes only what the third stack controls.
With one owner each, all three stacks are highlighted at the same instant and all three jobs get done. With two owners, motor A is handed contradictory orders hundreds of times a second and shivers instead of turning — and notice the second cost, which is easy to miss: the wheels now have nobody driving them. A stack that goes to fight over someone else’s motor has abandoned its own job. Nothing reports an error either way; as far as the Brick is concerned every stack is working perfectly. The same happens to a display line or a variable that two stacks both write to.
The discipline is simple: give each stack sole ownership of what it controls. One stack owns the motors, another owns the screen, another watches the sensors and tells the others what it found — which is what broadcasting is for.
A broadcast separates deciding that something happened from reacting to it — and lets you change either one alone.
▶Parallel stacksFrom Level 2, Lesson 1 — several stacks running at once, and why the Brick only looks between blocks.Show meHide
ComponentControl5 min
Two things at once
A program does not have to be one long column of blocks. Several stacks can run at the same time, each doing its own job — one driving, one watching a sensor, one keeping the display up to date.
How it is done
Give each stack its own hat block. Every stack beginning with when program starts starts at the same instant — not one after another — and from then on they run alongside each other.
Nor is it limited to two. Below, three stacks run together: a Medium Motor turning an attachment, the status light flashing, and the drive base rolling. Watch the arrows at the top — they all begin at once, and no stack waits for any other.
when program starts :: events hat
[A v] start motor [clockwise v] :: motors

when program starts :: events hat
forever
  set status light to [green v] :: display
  wait (0.5) seconds
  set status light to [red v] :: display
  wait (0.5) seconds
end

when program starts :: events hat
start moving [straight: 0] :: movement
Written down they have to go one under another, because a page is a column — but that is an accident of paper. On the Brick they sit side by side, and nothing in the first stack happens before anything in the third.
The rule: one owner per thing
Parallel stacks go wrong when two of them try to control the same thing. Use the switch below to take the wheels away from the third stack and point it at motor A, which the first stack is already driving.
the program starts — all of these begin here
stack 1 · Medium Motor
when program starts
A start motor clockwise
stack 2 · status light
when program starts
forever
set status light to green
wait 0.5 seconds
set status light to red
wait 0.5 seconds
stack 3 · drive base
when program starts
start moving straight: 0
One stack, one jobAll three at once
Three stacks, each with its own hat block. All three start the moment the program starts — none of them waits for the others.All three are running in the same instant: the Medium Motor is turning, the light is flashing, and the drive base is rolling.Each stack owns one thing and never touches another stack's job. That is the rule that makes this work.Finished. All three jobs ran the whole time, and none got in another's way.
three stacks, three jobs
Every stack is highlighted at the same moment on purpose — that is what running in parallel looks like. The switch above changes only what the third stack controls.
With one owner each, all three stacks are highlighted at the same instant and all three jobs get done. With two owners, motor A is handed contradictory orders hundreds of times a second and shivers instead of turning — and notice the second cost, which is easy to miss: the wheels now have nobody driving them. A stack that goes to fight over someone else’s motor has abandoned its own job. Nothing reports an error either way; as far as the Brick is concerned every stack is working perfectly. The same happens to a display line or a variable that two stacks both write to.
The discipline is simple: give each stack sole ownership of what it controls. One stack owns the motors, another owns the screen, another watches the sensors and tells the others what it found — which is what broadcasting is for.
Say this back before moving on: “One shouts. Anyone who cares listens.”
What’s in this build 4 min
Find the four electronic parts, and work out which two are watching rather than doing.
Part
What it is doing here
EV3 Intelligent Brick
The control room. It runs three stacks at once today.
Large Motor ×2 — the belt
A synchronised pair, as in Level 2 Lesson 6. A conveyor driven from both ends at slightly different speeds will fight itself and shed the belt.
Touch Sensor — the hopper trip
Says a load has arrived at the bottom. It decides — it does not drive anything directly.
Ultrasonic Sensor — the level check
Watches how full the top tank is by measuring the distance down to what is in it. Closer means fuller.
The scoop chain (not electronic)
Run it round by hand a full lap. A scoop that catches on the frame will stall a motor mid-broadcast, which looks like a program fault and is not one.
Ports — and the rule 4 min
Sensors go in ports 1, 2, 3, 4. Motors go in ports A, B, C, D. They are not interchangeable, and nothing will tell you politely if you swap them.
Part
Port
Why this one
Belt drive (Large)
A and D
The outer motor ports, because the two ends of the conveyor are far apart and the cables have to reach.
Hopper trip (Touch)
1
Touch stays on 1 across the whole course.
Level check (Ultrasonic)
4
Ultrasonic stays on 4, as it did in Level 2 — so a distance program moves between models unedited.
Check your own build now:
Belt motors in A and D, trip in 1, level sensor in 4.
Check both belt motors turn the same way. Turn one by hand and watch the other. If the chain tightens on one side and slackens on the other, one motor is mounted mirrored — reverse it in the program, not by force.
Point the Ultrasonic Sensor down into the top tank, not across it. It measures to the nearest thing in front of it, and a tank wall is nearer than the contents.
Press the hopper trip by hand and listen for the click.
Connect the Brick 4 min
Two routes, and either is fine. USB is the reliable one and the one to fall back on when a room’s Bluetooth is busy; Bluetooth leaves the robot free to move, which some models need.
▶How to connect the BrickUSB and Bluetooth, step by step, with a photograph of every screen. Open it if you have not done this before — or if pairing is not working.Show meHide
USB — the reliable one
Switch the Brick on with the dark grey centre button.
Cable into the Brick’s PC port — the small square socket beside the numbered ports, not one of the numbered ones.
Other end into the computer.
Bluetooth — name it first
Do these in order. Naming the Brick after you go looking for it in the list is how groups end up driving each other’s robots.
Name your Brick. On the Brick: Settings (the spanner) → Brick Name. Type something nobody else will pick, then press the tick. Every Brick is called EV3 until somebody changes it.
Turn Bluetooth on. Settings → Bluetooth. Tick Bluetooth and Visibility. Leave iPhone/iPad/iPod unticked.
Connect from EV3 Classroom. Click the Brick icon at the top of the programming area, find your Brick by name, and click Connect.
Say yes on the Brick. It asks “Connect?” with the computer’s name — choose the tick, then accept the passkey, which is already 1234.
Where to read it. The name sits in the bar across the very top of the screen, on every screen — so you can check which Brick you are holding at any moment without going into a menu. This one is EV3VE. A Brick nobody has renamed says EV3.Step 3, and the reason step 1 exists. Three Bricks in range — read the name before you click Connect. Pairing with the wrong one is not an error: it works perfectly, on somebody else’s robot.
Step 2.Bluetooth switches the radio on; Visibility is what lets the computer find you. With Visibility off your Brick works perfectly and simply never appears in the list.Step 4. Look at the Brick. It asks whether to accept and names the computer. Choose the tick.Then the passkey, already 1234. Press the tick again and you are connected.
The two failures, every class, every time. The Brick has gone to sleep while you were building — press the centre button to wake it. Or you have paired with the group at the next table, which is why the name matters.
The long version, including Port View and how to read the port tiles, is in the Brick & Bluetooth guide.
USB is the sensible choice here. The conveyor stays put on the table, and today you will download many small changes in quick succession — three stacks means three things to get wrong, and a cable downloads faster than a pairing.
Confirm the connection 2 min
Check the Brick icon: connected, or not.
Two motor tiles — A and D.
Two sensor tiles — 1 (Touch) and 4 (Ultrasonic, in centimetres).
Put your hand under the Ultrasonic Sensor and watch tile 4 fall. Note the number with the tank empty and the number with your hand where a full load would be — you will need both in a moment.
Stuck? The long version, with a photograph of every screen, is in the Brick & Bluetooth guide.
Change it and test 8 min
One change at a time. Predict, then run, then look.
Add a fourth stack with the same when I receive [load arrived] hat that writes the time on line 5. Notice what you did not have to edit to add it.
Delete the sound stack entirely. The conveyor is unaffected. A listener that stops existing is not an error — the shout simply goes unheard by that one.
Broadcast a name nobody listens for. Change load arrived in the watcher to banana. Nothing happens, and nothing errors. This is worth seeing once: a misspelled broadcast fails silently.
Move the trip check into the belt stack instead. Now try to add the sound back. You need a second copy of the check — which is exactly the problem broadcasts remove.
Hold the trip down for three seconds. With the wait-for-release in place you get one lift. Take it out and watch what a bouncing switch does.
Adding a reaction should cost one hat block. If it costs you a copy of the detecting, the announcement is in the wrong place.
Where this goes 3 min
There is something a broadcast deliberately does not do: it does not wait.
Your watcher shouts load arrived and immediately goes back round its loop to watch for the next press — even though the belt is still running. Most of the time that is exactly right. Sometimes it is precisely wrong: if the next step must not begin until the belt has finished, a shout that carries on regardless will start it too early.
There is a second block, broadcast … and wait, that holds the sender until every listener has finished. Choosing between them is the whole of the next lesson, and choosing wrongly is one of the harder bugs to see.
Lesson 1 named a routine. Lesson 2 gave the name a slot. Today named a moment. Tomorrow: does the announcer wait?
Make it move 10 min
Three stacks. One watches the hopper and announces; one runs the belt; one keeps the screen honest.
when program starts :: events hat
clear display :: display
write [READY] at line (1) :: display
forever
  wait until <[1 v] is pressed? :: sensors>
  broadcast [load arrived v] :: events
  wait until <not <[1 v] is pressed? :: sensors>> :: control
end

when I receive [load arrived v] :: events hat
write [LIFTING] at line (1) :: display
[A v] start motor at (40) % speed :: motors
[D v] start motor at (40) % speed :: motors
wait until <([4 v] distance in cm) < (10)> :: control
[A v] stop motor :: motors
[D v] stop motor :: motors
write [TANK FULL] at line (1) :: display

when I receive [load arrived v] :: events hat
play sound [Communication / Hello v] :: sound
set status light to [orange v] :: display
One announcement, two reactions. The belt stack and the sound stack know nothing about each other or about the switch.
Only the first stack touches the Touch Sensor. That is the whole point. Swap the trip for a different sensor tomorrow and you edit one stack.
The two motors start separately, not as a movement pair, because a conveyor is not steering — it is two ends of one loop.
** wait until distance < 10 is the level probe. ** Use the two numbers you noted a moment ago and pick something between them.
The third stack proves the point. It reacts to the same moment and has nothing to do with the belt. Delete it and the conveyor still works.
What success looks like: press the trip once — a sound plays, the light goes orange, the belt runs, and it stops by itself when the top tank fills.
If the belt restarts by itself, your watcher is broadcasting continuously because you left out the wait-for-release. One press should make exactly one announcement.
Build it 15 min
Build the model before you read any further. Everything after this is about making it do something, and none of it will make much sense with nothing on the table in front of you.
Use the viewer's own controls to zoom and turn pages. Fullscreen makes it big enough to build from.
Check the finished build against the picture before you switch anything on. A motor mounted the wrong way round is far easier to spot now than it is to debug later, when it looks like a program fault.
This is what you are building: the Water Conveyor.
Challenges 27 min
Work through them in order — each is harder than the last. The extra challenge comes after all three, and it is meant to make you plan before you build.
Challenge 1
Add a third listener.
Write a new stack with a "when I receive load arrived" hat that shows the word LOADING on line 3 and turns the status light orange.
Count how many existing stacks you had to edit to add it. The answer should be zero.
Challenge 2
Add a second announcement.
When the top tank fills, broadcast "tank full" instead of just stopping the belt. Then write two listeners for it: one stops the belt, one plays an alarm and writes TANK FULL.
Now the belt stack no longer decides anything — it only reacts. Every decision in your program lives in exactly one place.
Challenge 3
Two different trips, one announcement.
Add a second way for a load to arrive: as well as the Touch Sensor, the Ultrasonic Sensor seeing something within 8 cm should also count.
Both must broadcast the SAME message, and everything downstream must be untouched. This is the test of whether your announcement is in the right place.
Extra challenge
Run the conveyor as a plant, not a machine.
Build a program with these separate concerns, each in its own stack, and no stack allowed to check a sensor that is not its own business:
- a watcher for the hopper trip
- a watcher for the tank level
- the belt, which only reacts to messages
- a display that always shows what the plant is doing
- an alarm that reacts to anything abnormal
Then prove it: swap the hopper trip from the Touch Sensor to the Ultrasonic Sensor by editing exactly ONE stack. If you have to edit two, the design is wrong and it is worth finding out why before you rebuild it.