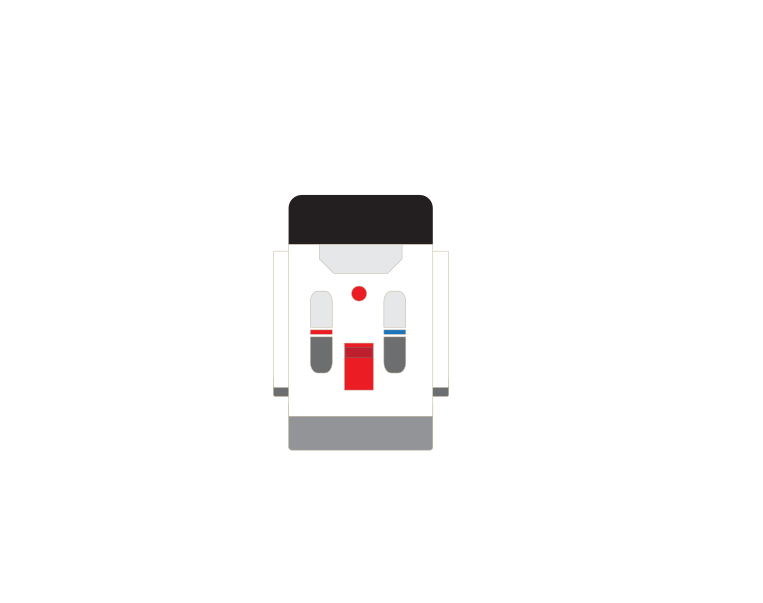
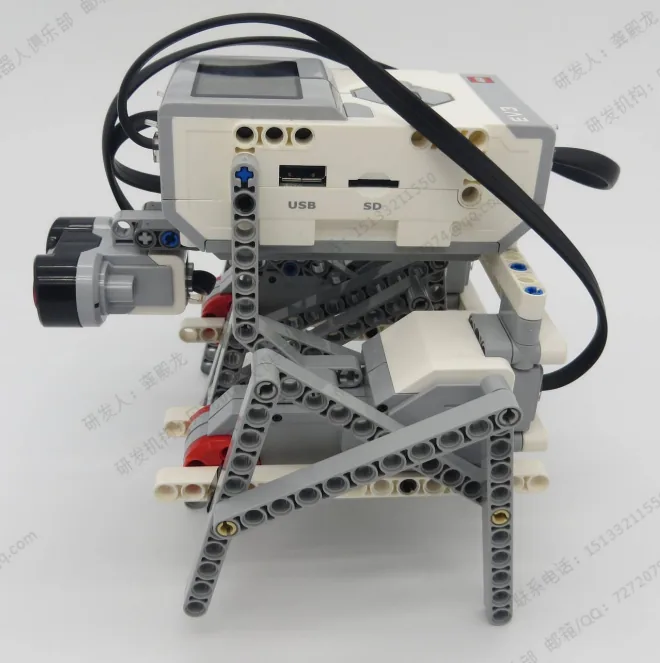
The Link Robot: an arm made of linked bars that fold and unfold, mounted on a base that turns. Its reach and its rotation are two separate motors, and they share the same air.
That sharing is the lesson. Extend the arm while the base is swinging and the linkage sweeps through space it does not own. Nothing in the program stops that happening — only the order of things does.
By the end of the lesson you will have two announcements in the same program that behave completely differently — one that waits and one that does not — and you will be able to say why each is the right one where it sits.
In the real world 5 min
Where you have seen it
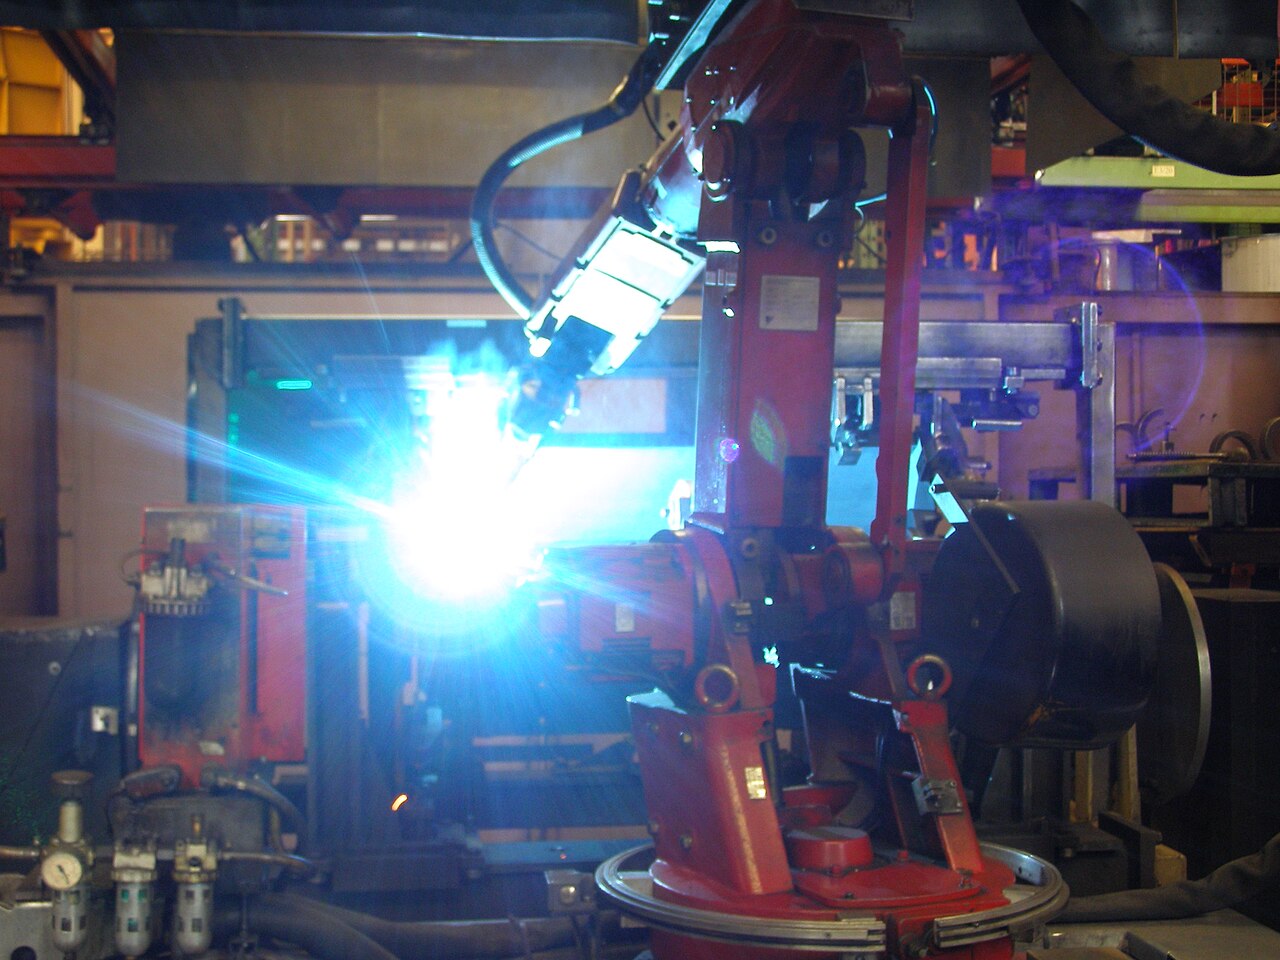
A linkage is how a machine turns one motor’s simple turning into a complicated path. A digger’s boom, a scissor lift, the arm of a desk lamp, the wipers on a bus, the pantograph on a train roof — all of them are bars pinned together so that a short push at one end draws a long, curved sweep at the other.
On an assembly line the arms work in a cell, and a cell has an ordering problem: the welder must not swing in while the loader is still reaching out. The two are physically capable of occupying the same cubic metre, and the only thing stopping them is the sequence.
Why it is built that way
Industrial cells solve this with interlocks and handshakes. A robot does not simply announce “I have started retracting” and let the next machine guess. It reports when it is done and clear, and the next move does not begin until that report arrives.
That is a different kind of message from an alarm. An alarm is shouted at everyone and the shouter carries on. A handshake is waited for. Both exist in the same plant, doing different jobs, and confusing them is how cells crash into themselves.
What would go wrong without it
A machine that starts its next move on time rather than on completion works perfectly right up until something is slightly slow — a cold motor, a heavier part, a tight joint — and then two tonnes of steel arrive somewhere already occupied.
“It has begun” and “it has finished” are different messages. Machines that confuse them break themselves.
The main concept — two kinds of announcement 6 min
EV3 Classroom has two broadcast blocks and they look almost identical. The difference is one word, and it changes everything about what happens next.
Block
What the sender does
Use it when
broadcast [x]
Shouts and carries straight on to its next block, while the listeners run alongside.
The reaction is independent — a sound, a light, a log line. Nothing later depends on it having finished.
broadcast [x] and wait
Shouts and stops until every listener has run to the end of its stack.
The next thing must not begin until this one is done — a stage of a sequence, a move that must complete.
The same program, both ways
when program starts :: events hat
broadcast [extend v] :: events
broadcast [swing v] :: events
Without waiting. Both start at once. The arm extends while the base swings — and the linkage sweeps through the space it is still unfolding into.
when program starts :: events hat
broadcast [extend v] and wait :: events
broadcast [swing v] and wait :: events
With waiting. Extend fully. Only then swing. Two stages, in order, with no timing guess anywhere.
Why this beats a wait block
You could get the same effect with wait (3) seconds between the two, and Level 2 would have done exactly that. It works until the motor is slower one day — a low battery, a stiff joint, a heavier load — and then three seconds is not enough and the arms meet.
and wait waits for the actual finish, not for a length of time you hoped would cover it. This is the same argument as Level 2’s repeat untilversus a counted loop: let the machine tell you it is done.
The trap worth naming
and wait waits for all listeners. If three stacks answer to extend and one of them contains a forever loop, the sender waits for ever — the program freezes and nothing on screen explains why.
ComponentData5 min
Broadcasting a message
A broadcast lets one stack tell another to start. The sender does not need to know who is listening — it announces, and any stack waiting for that message runs.
Blocks reference
Block
What it does
broadcast [message1 v] :: events
Sends the message and carries straight on.
broadcast [message1 v] and wait :: events
Sends the message and holds until every stack that received it has finished.
when I receive [message1 v] :: events hat
Starts this stack whenever that message is sent.
Broadcast, or broadcast and wait?
Both send the same message to the same stack. The difference is what the sender does next — which is invisible in a listing, because the two blocks sit in exactly the same place. Use the switch to try each one.
the sensor stack
when program starts
4 wait until distance <15cm
broadcast obstacle-found
write SEEN IT at line 1
the motor stack
when I receive obstacle-found
stop moving
play sound Communication / Uh-oh until done
broadcast: sender carries onuse when they are independent
One stack watches the sensor. The other is waiting to be told something.An obstacle. The sensor stack broadcasts «obstacle-found».The receiver starts stopping the motors — and the sender has already moved on to its own next block without waiting.Both stacks ran at once. The sender never found out when the receiver finished.Finished. Both stacks ran at once, and neither waited for the other.
watching
The sender never names the receiver — it announces, and whoever is listening runs. That is what lets the motors keep exactly one owner.
Plain broadcast is the right choice when the two jobs are genuinely independent: announce it and get on with your own work. broadcast and wait is the right choice when what comes next depends on the receiver having finished — do not start reversing until the stack that stops the motors has actually stopped them.
What it is really for
Broadcasting splits a program into parts that each do one job. A stack that watches the sensors can announce obstacle; the stack that owns the motors reacts. Neither needs to contain the other’s code, and the motors still have exactly one owner.
Here is a driving base doing exactly that. Three stacks are running: one sets the wheels going, one does nothing but read the Ultrasonic Sensor, and one owns every movement from then on. Follow the distance rather than the wheels — and notice what it is still doing while the message is crossing.
the driving stack — sets it going, then it is done
when program starts
start moving straight: 0
the watching stack — no motor block in it at all
when program starts
forever
4 wait until distance <15cm
broadcast obstacle-found
4 wait until distance >25cm
the motor stack — owns every movement after the start
when I receive obstacle-found
stop moving
move right: 100 for 0.5rotations
start moving straight: 0
34cm · reading0cm · crept after the broadcast0°heading
the watcher owns no motor blockthe motor stack reads no sensor
Three stacks start together. One sets the wheels going, one watches the sensor, and one is waiting to be told something.The robot drives. The watcher is only reading the sensor — there is no motor block anywhere in it.Under 15 cm, so the watcher broadcasts «obstacle-found» — and the wheels are still turning. Watch the distance keep falling.Now the motor stack receives the message and runs its first block. Only at this point does anything stop.The same stack turns the base 90° to the right, away from the wall.…and sets it driving again. The watcher never named this stack, and never waited for it.Finished. The eyes and the wheels were never in the same stack — the message is the only thing joining them.
wheels turning
Watch the distance at the moment the message is sent. It keeps falling, because a broadcast starts another stack — it does not stop this one.
The watching stack contains no motor block anywhere, and the motor stack never reads the sensor. That is the whole trick: each stack is short enough to hold in your head, and the message is the only join between them. Splitting it this way also means the base can be made to dodge left instead of right by editing four blocks in one place, without going anywhere near the sensor.
Watch the gap in the middle of the run. broadcast does not mean stop — the wheels keep turning right through it, and the base creeps another 3 cm closer before the receiving stack gets as far as its stop moving block. If a robot must halt on the spot, that gap is why it will not.
The sender has no idea who is listening
Any number of stacks can listen to the same message, so one announcement can set several things going at once — stop the motors, sound an alarm and turn the light red. And nothing in the sending block says which of those will happen. Press one and find out.
Press a broadcast block. Nothing in it says what will happen — the stack that receives it decides.
0rotations · Motor A0times written0beeps0stacks running now
when I receive turn-arm
A run clockwise for 1rotations
when I receive show-text
clear display
write HELLO EV3 at line 4
when I receive beep
play beep 60 for 0.5 seconds
Nothing has been sent yet. Press one of the three yellow blocks above.
Three messages, three receivers, one Brick. The blocks you press are identical apart from the name in the dropdown — so whatever happens next was decided entirely by the when I receive stack at the other end. Press all three quickly: nothing queues, because three separate stacks run at the same time. Press the same one twice while it is still going and its stack starts again from the top.
Name them properly
A message called message1 tells a reader nothing. One called obstacle-found explains the whole design at a glance. Names matter more here than almost anywhere else, because the sender and the receiver may be far apart on screen.
ComponentSensing6 min
The Ultrasonic Sensor
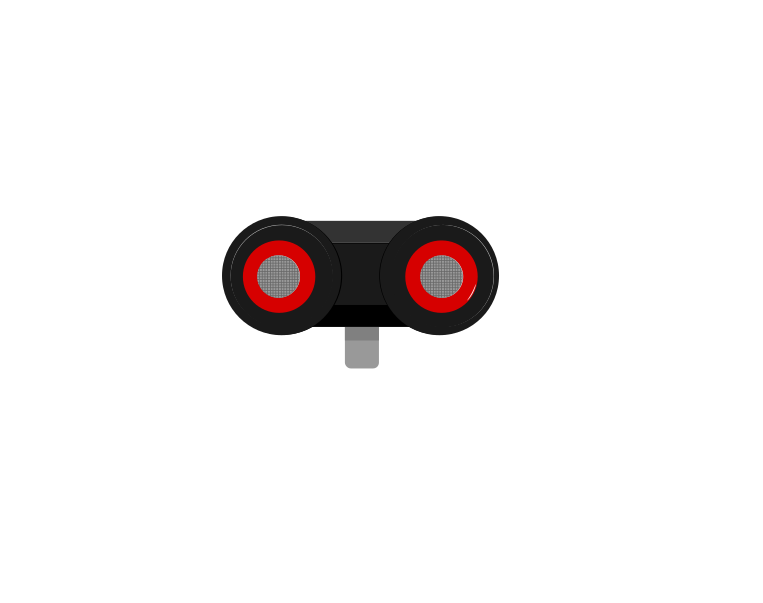
The Ultrasonic Sensor measures distance. It sends out a burst of sound too high for people to hear, listens for the echo, and works out how far away the surface is from how long the echo took — exactly how a bat finds a moth, and how a submarine uses sonar.
front
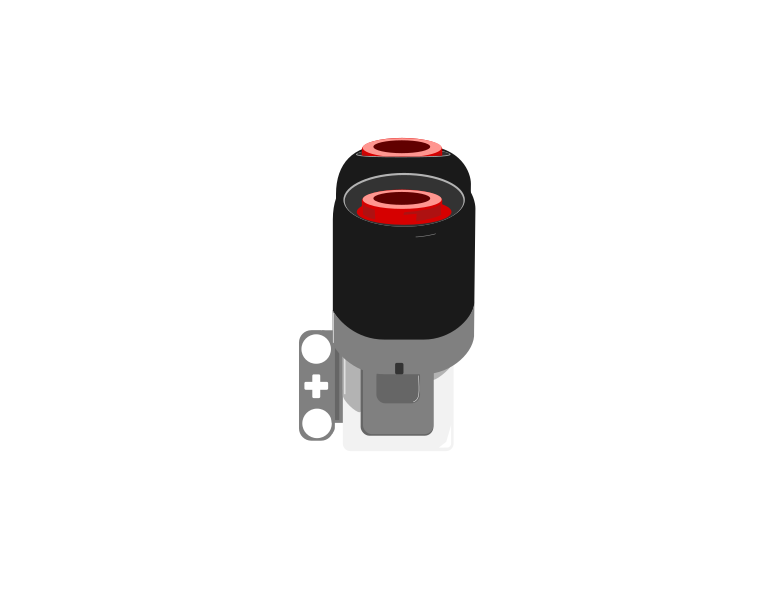
side
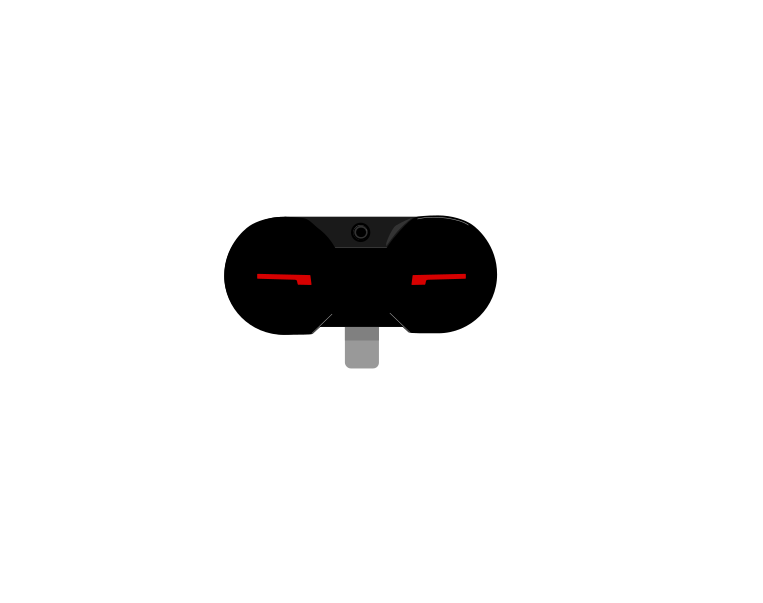
The two round openings on the front are the point of this sensor: one sends the burst of sound out, the other listens for the echo coming back.
Blocks reference
Block
What it does
([4 v] distance in [cm v] :: sensors)
Reports how far away the nearest thing in front of the sensor is, as a number in centimetres.
wait until <([4 v] distance in [cm v] :: sensors) < (15)>
Holds the program until something comes closer than 15 cm.
A number, not a yes or no
This is the important step up from the Touch Sensor. Touch gives you true or false; the Ultrasonic gives you a number, and the deciding is left to you. Pick a threshold below and watch where the robot ends up.
when program starts
start moving straight: 0
4 wait until distance <15cm
stop moving
60cm · reading15cm · threshold
Nothing is close. The sensor reports about 60 cm and the program waits.The robot drives forward. The sensor is sending a burst of sound and timing its echo, over and over, and the number falls.The reading has dropped past the threshold. The condition is true, so the robot stops.Try another threshold. The program is identical — only that one number is different.Finished. The threshold is yours to choose — the sensor only supplies the number.
stopped
The black line on the bar is the threshold; the blue fill is the reading. The robot stops the instant the fill crosses the line.
Three different robots, and only one number is different between them. That is what having a number rather than a yes-or-no buys you: the behaviour is tuned by editing one slot, not by rebuilding the program. It also means the sensor can never tell you it is “close” — close is a decision you make about a reading.
Why it matters
Car parking sensors, automatic doors at a shopping centre, and the sensor that stops a lift door closing on somebody all work this way. Reacting before contact is what makes a machine feel safe.
If your set has an Infrared Sensor instead
The Home/Retail EV3 set (31313) ships an Infrared Sensor and a Beacon in place of the Ultrasonic and Gyro sensors. The Infrared Sensor also measures distance, so the programs in this module work with it — but it reports a rough 0–100 proximity rather than real centimetres, and it is affected by sunlight and by dark surfaces in ways the Ultrasonic is not.
IR Sensor
Beacon
The Infrared Sensor and its Beacon, from the Home set. If your kit has these, expect proximity numbers rather than centimetres — and retune any threshold accordingly.
Ask one question: must the next thing wait for this? If yes, use and wait. If no, do not.
▶BroadcastsFrom last lesson — a name for a moment, and any number of listeners.Show meHide
ComponentData5 min
Broadcasting a message
A broadcast lets one stack tell another to start. The sender does not need to know who is listening — it announces, and any stack waiting for that message runs.
Blocks reference
Block
What it does
broadcast [message1 v] :: events
Sends the message and carries straight on.
broadcast [message1 v] and wait :: events
Sends the message and holds until every stack that received it has finished.
when I receive [message1 v] :: events hat
Starts this stack whenever that message is sent.
Broadcast, or broadcast and wait?
Both send the same message to the same stack. The difference is what the sender does next — which is invisible in a listing, because the two blocks sit in exactly the same place. Use the switch to try each one.
the sensor stack
when program starts
4 wait until distance <15cm
broadcast obstacle-found
write SEEN IT at line 1
the motor stack
when I receive obstacle-found
stop moving
play sound Communication / Uh-oh until done
broadcast: sender carries onuse when they are independent
One stack watches the sensor. The other is waiting to be told something.An obstacle. The sensor stack broadcasts «obstacle-found».The receiver starts stopping the motors — and the sender has already moved on to its own next block without waiting.Both stacks ran at once. The sender never found out when the receiver finished.Finished. Both stacks ran at once, and neither waited for the other.
watching
The sender never names the receiver — it announces, and whoever is listening runs. That is what lets the motors keep exactly one owner.
Plain broadcast is the right choice when the two jobs are genuinely independent: announce it and get on with your own work. broadcast and wait is the right choice when what comes next depends on the receiver having finished — do not start reversing until the stack that stops the motors has actually stopped them.
What it is really for
Broadcasting splits a program into parts that each do one job. A stack that watches the sensors can announce obstacle; the stack that owns the motors reacts. Neither needs to contain the other’s code, and the motors still have exactly one owner.
Here is a driving base doing exactly that. Three stacks are running: one sets the wheels going, one does nothing but read the Ultrasonic Sensor, and one owns every movement from then on. Follow the distance rather than the wheels — and notice what it is still doing while the message is crossing.
the driving stack — sets it going, then it is done
when program starts
start moving straight: 0
the watching stack — no motor block in it at all
when program starts
forever
4 wait until distance <15cm
broadcast obstacle-found
4 wait until distance >25cm
the motor stack — owns every movement after the start
when I receive obstacle-found
stop moving
move right: 100 for 0.5rotations
start moving straight: 0
34cm · reading0cm · crept after the broadcast0°heading
the watcher owns no motor blockthe motor stack reads no sensor
Three stacks start together. One sets the wheels going, one watches the sensor, and one is waiting to be told something.The robot drives. The watcher is only reading the sensor — there is no motor block anywhere in it.Under 15 cm, so the watcher broadcasts «obstacle-found» — and the wheels are still turning. Watch the distance keep falling.Now the motor stack receives the message and runs its first block. Only at this point does anything stop.The same stack turns the base 90° to the right, away from the wall.…and sets it driving again. The watcher never named this stack, and never waited for it.Finished. The eyes and the wheels were never in the same stack — the message is the only thing joining them.
wheels turning
Watch the distance at the moment the message is sent. It keeps falling, because a broadcast starts another stack — it does not stop this one.
The watching stack contains no motor block anywhere, and the motor stack never reads the sensor. That is the whole trick: each stack is short enough to hold in your head, and the message is the only join between them. Splitting it this way also means the base can be made to dodge left instead of right by editing four blocks in one place, without going anywhere near the sensor.
Watch the gap in the middle of the run. broadcast does not mean stop — the wheels keep turning right through it, and the base creeps another 3 cm closer before the receiving stack gets as far as its stop moving block. If a robot must halt on the spot, that gap is why it will not.
The sender has no idea who is listening
Any number of stacks can listen to the same message, so one announcement can set several things going at once — stop the motors, sound an alarm and turn the light red. And nothing in the sending block says which of those will happen. Press one and find out.
Press a broadcast block. Nothing in it says what will happen — the stack that receives it decides.
0rotations · Motor A0times written0beeps0stacks running now
when I receive turn-arm
A run clockwise for 1rotations
when I receive show-text
clear display
write HELLO EV3 at line 4
when I receive beep
play beep 60 for 0.5 seconds
Nothing has been sent yet. Press one of the three yellow blocks above.
Three messages, three receivers, one Brick. The blocks you press are identical apart from the name in the dropdown — so whatever happens next was decided entirely by the when I receive stack at the other end. Press all three quickly: nothing queues, because three separate stacks run at the same time. Press the same one twice while it is still going and its stack starts again from the top.
Name them properly
A message called message1 tells a reader nothing. One called obstacle-found explains the whole design at a glance. Names matter more here than almost anywhere else, because the sender and the receiver may be far apart on screen.
Say this back before moving on: “Shout and carry on, or shout and wait — which does the next move need?”
What’s in this build 4 min
Work the linkage by hand through its whole range before you read on. Watch where the far end goes — that curved path is what the ordering problem is about.
Part
What it is doing here
EV3 Intelligent Brick
The base and the ballast. A tall linkage on a light base tips over when the arm is out — the Brick is what stops that.
Large Motor — the linkage
Folds and unfolds the bars. Large because a linkage near full extension has terrible leverage and needs torque exactly when it has least.
Large Motor — the base
Swings the whole arm round. This is the motor that can put the arm somewhere it should not be.
Ultrasonic Sensor — on the arm
Looks along the reach. It tells you whether there is something in front of the arm before the arm goes there.
The bars and pins (not electronic)
Every pin adds slack. Fold and unfold three times and watch whether the tip returns to the same place — that slack is why the arm needs end stops rather than counted degrees.
Find the collision by hand, now. Extend the arm halfway and swing the base slowly. Is there a position where the linkage hits the body? Note it. That is the thing your ordering has to avoid, and it is much better to discover it with your hands than at 60% speed.
Ports — and the rule 4 min
Sensors go in ports 1, 2, 3, 4. Motors go in ports A, B, C, D. They are not interchangeable, and nothing will tell you politely if you swap them.
Part
Port
Why this one
Linkage (Large)
A
The reach. First motor port, as always for the main actuator.
Base rotation (Large)
B
The swing. Keeping reach on A and swing on B means the two broadcasts read consistently.
Reach check (Ultrasonic)
4
Ultrasonic stays on 4 across the course.
Check your own build now:
Linkage in A, base in B, Ultrasonic in 4.
Route the arm cable with slack at the shoulder. It has to survive the base swinging through its full arc — a cable that goes taut mid-swing will either unplug or drag the arm off line.
Fold the arm fully in. Every program below starts from folded.
Check the Ultrasonic Sensor points along the reach, not down at the table.
Connect the Brick 4 min
Two routes, and either is fine. USB is the reliable one and the one to fall back on when a room’s Bluetooth is busy; Bluetooth leaves the robot free to move, which some models need.
▶How to connect the BrickUSB and Bluetooth, step by step, with a photograph of every screen. Open it if you have not done this before — or if pairing is not working.Show meHide
USB — the reliable one
Switch the Brick on with the dark grey centre button.
Cable into the Brick’s PC port — the small square socket beside the numbered ports, not one of the numbered ones.
Other end into the computer.
Bluetooth — name it first
Do these in order. Naming the Brick after you go looking for it in the list is how groups end up driving each other’s robots.
Name your Brick. On the Brick: Settings (the spanner) → Brick Name. Type something nobody else will pick, then press the tick. Every Brick is called EV3 until somebody changes it.
Turn Bluetooth on. Settings → Bluetooth. Tick Bluetooth and Visibility. Leave iPhone/iPad/iPod unticked.
Connect from EV3 Classroom. Click the Brick icon at the top of the programming area, find your Brick by name, and click Connect.
Say yes on the Brick. It asks “Connect?” with the computer’s name — choose the tick, then accept the passkey, which is already 1234.
Where to read it. The name sits in the bar across the very top of the screen, on every screen — so you can check which Brick you are holding at any moment without going into a menu. This one is EV3VE. A Brick nobody has renamed says EV3.Step 3, and the reason step 1 exists. Three Bricks in range — read the name before you click Connect. Pairing with the wrong one is not an error: it works perfectly, on somebody else’s robot.
Step 2.Bluetooth switches the radio on; Visibility is what lets the computer find you. With Visibility off your Brick works perfectly and simply never appears in the list.Step 4. Look at the Brick. It asks whether to accept and names the computer. Choose the tick.Then the passkey, already 1234. Press the tick again and you are connected.
The two failures, every class, every time. The Brick has gone to sleep while you were building — press the centre button to wake it. Or you have paired with the group at the next table, which is why the name matters.
The long version, including Port View and how to read the port tiles, is in the Brick & Bluetooth guide.
Watch the cable if you use USB. The base swings through a wide arc, and a USB lead across that arc becomes one more thing for the linkage to catch on. Bluetooth is tidier here even though the model does not travel.
Confirm the connection 2 min
Check the Brick icon: connected, or not.
Two motor tiles — A and B.
One sensor tile — 4, in centimetres.
Fold and unfold the arm by hand and watch tile A. Note the degrees from fully folded to fully extended. That number is your arm’s travel, and you are about to program with it.
Stuck? The long version, with a photograph of every screen, is in the Brick & Bluetooth guide.
Change it and test 8 min
One change at a time. Predict, then run, then look.
Take the and wait off the swing only. Predict which two moves now overlap. Then run it and watch.
Replace one and wait with wait (2) seconds. It works. Now drop the motor speed to 10% and run it again — the timing guess is exposed, and this is exactly how the bug reaches a real machine.
Add a second listener to extend that plays a sound lasting four seconds. The sender now waits for the sound too, because and wait waits for all listeners. Time it.
Put and wait on the lamp and watch the program hang on line 2. Then undo it. Seeing the freeze once is worth more than being warned about it.
Use the Ultrasonic Sensor as a guard. Put wait until distance > 15 at the top of the swing listener, then hold your hand in the arm’s path. The sequence pauses until the way is clear — and the sender waits with it, because that is what and wait means.
A stage waits. A background job does not. Getting that backwards either freezes the program or breaks the model.
Where this goes 3 min
Four lessons in, you can name routines, give those names inputs, name moments, and order them. Everything so far has been about organising a program you already knew how to write.
The next lesson changes subject. Every movement you have written has been open-loop: run 180 degrees, and hope 180 degrees was right. The arm you just built proves the limit — all those pins have slack, so “180 degrees at the motor” is not the same place twice.
A closed loop measures where it actually is, compares that with where it should be, and corrects — over and over, while it moves. That is the next lesson, and it is the biggest idea in Level 3.
You have finished learning how to say things clearly. Now you start learning how to be right.
Build it 15 min
Build the model before you read any further. Everything after this is about making it do something, and none of it will make much sense with nothing on the table in front of you.
Use the viewer's own controls to zoom and turn pages. Fullscreen makes it big enough to build from.
Check the finished build against the picture before you switch anything on. A motor mounted the wrong way round is far easier to spot now than it is to debug later, when it looks like a program fault.
Make it move 10 min
Build the wrong one first, on purpose. You need to see the collision to understand why the fix is a fix.
Step 1 — no waiting
when program starts :: events hat
broadcast [extend v] :: events
broadcast [swing v] :: events

when I receive [extend v] :: events hat
[A v] run [clockwise v] for (180) [degrees v] at (30) % speed :: motors

when I receive [swing v] :: events hat
[B v] run [clockwise v] for (90) [degrees v] at (30) % speed :: motors
Run it at **low speed**, with a hand ready. Both moves start together and the arm unfolds through its own swing.
Keep the speeds at 30% for this one. You are deliberately running a program that makes the model do something it should not, and a slow collision is a demonstration while a fast one is a repair job.
Step 2 — the fix, one word
when program starts :: events hat
broadcast [extend v] and wait :: events
broadcast [swing v] and wait :: events
broadcast [retract v] and wait :: events
play sound [Communication / Goodbye v] until done :: sound

when I receive [extend v] :: events hat
[A v] run [clockwise v] for (180) [degrees v] at (30) % speed :: motors

when I receive [swing v] :: events hat
[B v] run [clockwise v] for (90) [degrees v] at (30) % speed :: motors

when I receive [retract v] :: events hat
[A v] run [counterclockwise v] for (180) [degrees v] at (30) % speed :: motors
Three stages in order, each waiting for the last to finish. No timing guesses anywhere in the program.
Step 3 — one that must not wait
```ev3blocks The blinking lamp runs for the whole sequence. It must be a plain broadcast — it never finishes, so and wait here would freeze the program on line 2.
when program starts :: events hat
broadcast [status lamp v] :: events
broadcast [extend v] and wait :: events
broadcast [swing v] and wait :: events
broadcast [retract v] and wait :: events
when I receive [status lamp v] :: events hat
forever
set status light to [orange v] :: display
wait (0.4) seconds :: control
set status light to [green v] :: display
wait (0.4) seconds :: control
end
**What success looks like:** the lamp starts blinking, then the arm extends fully, then the base swings, then the arm retracts, then it says goodbye — with the lamp blinking throughout.

> **If the program does nothing at all after the lamp starts**, you used `and wait` on the lamp. It contains a `forever`, so it never finishes, so the sender waits for ever. This is the classic bug and it looks like a crash.
This is what you are building: the Link Robot.
Challenges 27 min
Work through them in order — each is harder than the last. The extra challenge comes after all three, and it is meant to make you plan before you build.
Challenge 1
Add a fourth stage.
After the arm retracts, make the base swing back to where it started, so the robot ends exactly as it began.
Use another broadcast and wait. Check it really does return to the start — run it three times without touching the model and see whether it drifts.
Challenge 2
Add a background job that must not be waited for.
Write a stack that beeps softly every two seconds, for ever, and start it with a plain broadcast at the top of the program.
Then try changing that one to broadcast and wait. Predict what happens before you run it. Undo it once you have seen it.
Challenge 3
Make the sequence refuse to run into something.
Put a guard at the top of the swing listener: it must not begin until the Ultrasonic Sensor reads more than 15 cm.
Hold your hand in the arm's path when the sequence reaches that stage. The whole sequence should pause — not just the swing — and continue when you move away. Explain to a partner why the sender waits too.
Extra challenge
Programme a full pick-and-place cycle from one button press.
The robot must: extend to the pick position, close on the object, retract, swing to the drop position, extend, release, retract, and swing home. Eight stages, and no two may overlap.
Two rules:
1. Every stage is its own listener with its own name, and the main program is nothing but a list of announcements. Someone must be able to read the main stack and know the whole cycle.
2. A status lamp must blink for the entire cycle and stop when it finishes — which means exactly one of your announcements is NOT an "and wait", and you must be able to say which and why.
Work out the order on paper before you build. Then test it with the arm deliberately slowed to 15% speed: a correct sequence does not care how slow the motors are.