The Jazz Drum: a kick beater on a Large Motor, a hi-hat on a Medium Motor, and three different ways for a player to tell it what to do — a foot pedal, a coloured stick, and a shake of the whole kit.
Three inputs is not three times one input. It is eight combinations, and most of the interesting ones are about two things being true at once — or one being true while another is deliberately not.
By the end of the lesson your kit will play different things for pedal-alone, stick-alone, and pedal-and-stick-together — from a program you can still read.
In the real world 5 min
Where you have seen it
A drum kit exists because one player has four limbs and needed a way to be a whole percussion section. Before the 1900s a band had separate players for bass drum, snare and cymbals. The bass drum pedal — patented by William Ludwig in 1909 — freed a foot, and the kit as we know it followed.
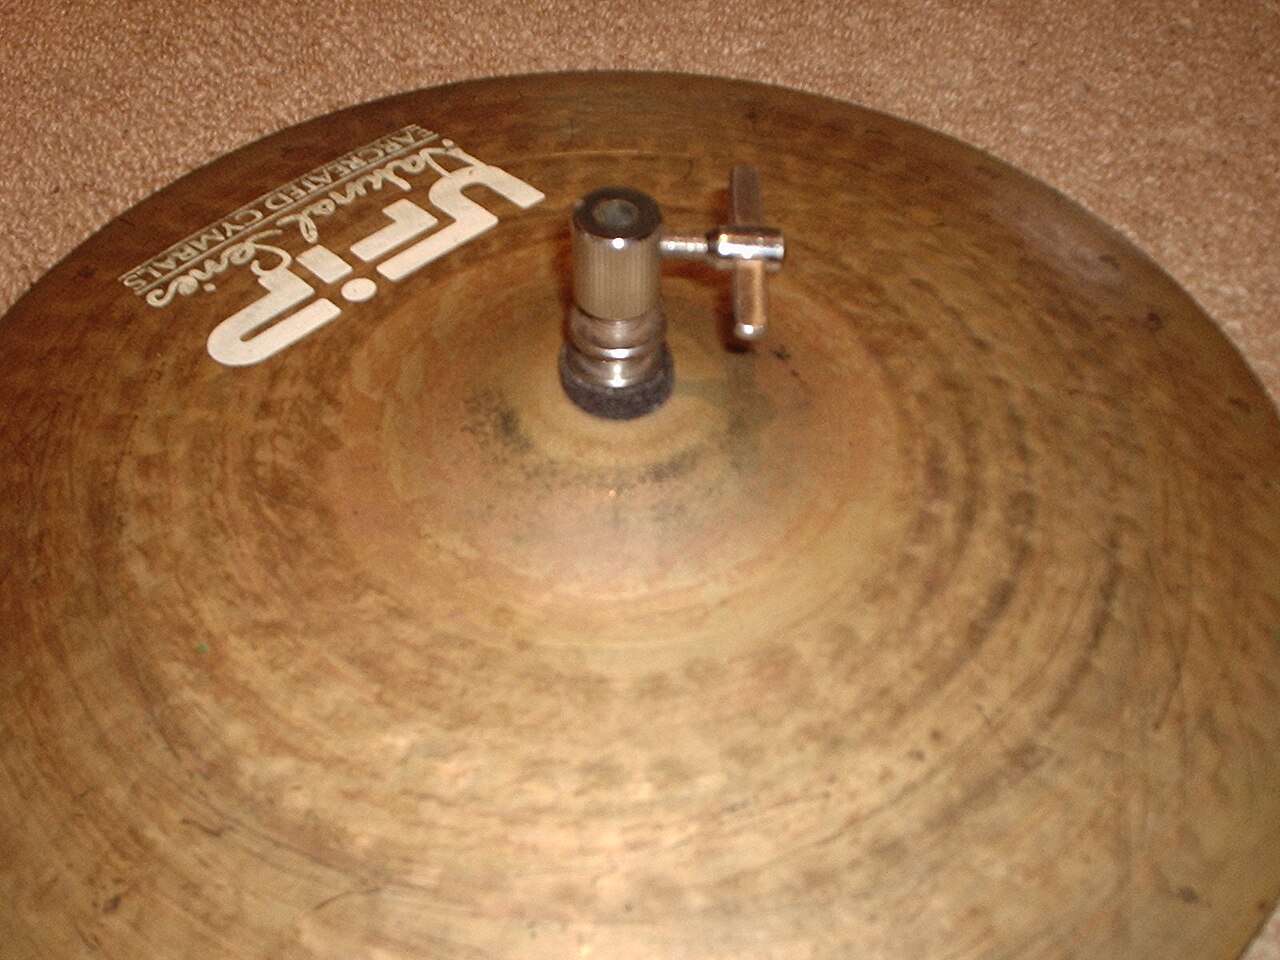
Hi-hat clutch on a cymbal. Photo: Andrewa / Wikimedia Commons (CC BY-SA 3.0).
What makes a drummer sound like a drummer is not the individual hits. It is the combinations: kick and hi-hat together, snare on its own, kick while the hi-hat is closed, kick while it is open. The same few surfaces produce a huge vocabulary because of what happens at the same time.
Why it is built that way
A hi-hat is the clearest case. It has a pedal that decides whether the cymbals are closed or open, and a stick that strikes them. Struck closed, it is a tight tick. Struck open, it is a wash. The pedal makes no sound of its own — it changes the meaning of a different action.
That is exactly and. “Stick hits” and “pedal down” is one sound. “Stick hits” andnot “pedal down” is another.
What would go wrong without it
An instrument that could only respond to one control at a time would have as many sounds as it had controls. Every richer instrument in the world — a piano’s sustain pedal, a guitar’s fretting hand, a trumpet’s three valves making seven notes — gets its range from combinations, not from more buttons.
Three switches are not three choices. They are eight, and naming them is how you stay in control of that.
The main concept — combining conditions 6 min
A condition is not a question you ask once. It is a value — true or false — and like any value it can be combined, named and reused.
Block
True when
On the kit
<A> and <B>
Both are true.
Stick hits and pedal is down → tight tick.
<A> or <B>
At least one is true — including both.
Pedal or shake → kick drum either way.
not <A>
A is false.
Stick hits and not pedal → open wash.
or includes both, and this catches people out. “Tea or coffee?” in English means one or the other. In programming, or is true when both are true as well. If you genuinely want exactly-one, you have to say so: <A or B> and not <A and B>.
Why not just nest Switches?
if <[1 v] is pressed? :: sensors> then
  if <([3 v] color) = [red v] :: sensors> then
    play sound [Tick v] :: sound
  else
    play sound [Kick v] :: sound
  end
else
  if <([3 v] color) = [red v] :: sensors> then
    play sound [Wash v] :: sound
  end
end
Two sensors, four cases, and already a staircase. Add the Gyro and it is eight branches deep — correct, and unreadable.
set [pedal v] to <[1 v] is pressed? :: sensors> :: variables
set [stick v] to <([3 v] color) = [red v] :: sensors> :: variables

if <(pedal) and (stick)> then
  play sound [Tick v] :: sound
end
if <(stick) and <not (pedal)>> then
  play sound [Wash v] :: sound
end
if <(pedal) and <not (stick)>> then
  play sound [Kick v] :: sound
end
The same behaviour, flat instead of nested. Each line reads as a sentence a drummer would recognise.
Name the conditions once, at the top. Everything below then talks about pedal and stick rather than about ports and colours — and when the stick becomes a blue one tomorrow, you change one line.
ComponentControl5 min
Comparing and combining
A sensor that reports a number cannot be used to make a decision on its own — 23 is neither true nor false. An operator turns that number into an answer by comparing it with something.
Blocks reference
Block
What it does
<(x) > (50)>
True when the left value is bigger than the right.
<(x) < (50)>
True when it is smaller.
<<> and <>>
True only when both conditions are true.
<<> or <>>
True when at least one of them is.
Try it: which way round does it go?
Forget the symbols for a moment. A comparison is a question about position on a number line: is x to the left of the other number, or to the right? Left is smaller, right is bigger — and that is the whole of it.
Drag the orange x and the black marker, and change the comparison. The green stretch is every position of x that would make the answer true — so you can see where the answer flips before you get there. Turn not on and watch the green jump to the other side.
Drag either marker, or use the arrow keys.
-3 < 4true
is x to the LEFT of it?
< is true while x sits on the left. Slide x past the marker and it flips.
> is the same question the other way round — so exactly one of the two is true, unless the markers are on the same spot.
= is true for one single position out of twenty-one. Try landing on it. That is why a sensor is almost never compared with =: a reading passes straight through the exact number without ever being measured there.
not flips the answer, whatever it was. not (x < 4) covers everything x < 4 does not — including landing exactly on 4.
Try it: which numbers make it true?
The lab above asks one question at a time: is this x true? A robot never has just one x, though — a sensor reading slides up and down all the time, so what really matters is which stretch of the line makes the condition true. This one draws the whole answer at once.
Drag the circle to move the number you are comparing against, and change the comparison. Everything shaded green is a value of x that would make it true.
Drag the circle, or use the arrow keys. It moves in steps of 0.2.
x < 0.2x < 0.2
Every number to the left of 0.2 — but not 0.2 itself, so the circle is hollow.
Watch the circle, because it carries the part everyone gets wrong:
Hollow ○ — the boundary is not included. x < 0.2 shades everything left of 0.2 but leaves 0.2 itself out, because 0.2 is not less than 0.2.
Filled ● — the boundary is included. Choose = and nothing is shaded at all: one single number qualifies.
Now turn not on with x > 2 selected and watch two things happen together. The shading jumps to the other side, and the circle fills in — because “not greater than 2” means 2 or less, and 2 has to be part of it. That pairing is the whole reason a hollow circle is worth drawing.
Why a robot cares. Two conditions that look almost identical — light < 30 and not (light > 30) — differ by exactly one value, the reading of precisely 30. A robot sitting right on its threshold behaves differently under the two, and that is the sort of bug that only shows up occasionally and looks like a broken sensor.
Try it: and, or, not
These three join answers together rather than numbers. The trap is that English is looser than a program: “stop if it is close and the bumper is pressed” sounds like it covers both situations, when it covers neither on its own.
Flip the two conditions and watch the table. There are only four possible situations in total, and and and or differ on exactly two of them.
close: trueandbumper: falsefalse
close
bumper
and
or
true
true
true
true
true
false
false
true
false
true
false
true
false
false
false
false
and is fussy: it wants both. Three of the four rows are false.
and is true on one row out of four. It narrows — the robot acts less often, but more certainly.
or is true on three rows out of four. It widens — the robot acts more readily.
The two agree on the top and bottom rows and disagree in the middle. Whenever swapping one for the other seems to make no difference, you have only tried the rows where they agree.
Watch them decide
Two sensors are running below: an Ultrasonic reporting a number, and a Touch Sensor reporting true or false. Watch the comparison turn the number into an answer, and watch and and or disagree.
when program starts
forever
if distance < 15 and is pressed? then
stop moving
if distance < 15 or is pressed? then
play beep 60 for 0.2 seconds
Nothing is within 15 cm and the bumper is out. Both conditions are false.Something comes close. The comparison flips to true — the bumper has not been touched.It backs away, and instead the bumper is pressed. Now the other condition is the true one.Close AND pressed. Only now is «and» true — while «or» has been true ever since the first of them was.Finished. Four situations, and the two operators disagreed in three of them.
and false · or false
and was true in one row out of four. or was true in three. That is the whole difference, and it is why one of them makes a robot look broken.
The comparison is doing one job: it takes a reading that is neither true nor false and, by holding it against a number you chose, produces something a decision can use. The moment the blue fill crosses the black marker is the moment the answer changes.
Choosing the threshold
The number you compare against is a design decision, not a fact. “Close” for a parking sensor might be 15 cm; for a robot arm it might be 3. Pick it by measuring what the sensor actually reads in the situation you care about, then leave a margin.
Combining two conditions
and narrows: both must hold, so the robot acts less often but more certainly — stop only if something is close and the bumper is pressed. or widens: either will do, so the robot acts more readily — stop if something is close or the bumper is pressed.
In the four situations above, and was true in one of them and or in three. That is the practical difference: swapping one for the other does not adjust a robot slightly, it changes how often it reacts at all.
ComponentControl6 min
Making a decision
Up to now a robot has been able to wait for a sensor. Deciding is different: the robot checks the sensor and does one thing or another depending on the answer — and then carries on either way.
Blocks reference
Block
What it does
if <> then
end
Runs the blocks inside only when the condition is true. Otherwise skips them.
if <> then
else
end
Runs one set of blocks when true and a different set when false.
Deciding again and again
A decision made once, at the start, is almost never what you want. Here are two robots with the identical if-else, testing the identical sensor against the identical number — one inside a loop and one not.
decision inside a loop
forever
if distance < 15 then
stop moving
else · start moving
the same decision, once
if distance < 15 then
stop moving
else · start moving
247checks · in a loop1check · once only
Nothing is close, so both robots ask «is the wall within 15 cm?», both hear no, and both take the else branch and drive.The left robot is asking again, and again, and again. The right one asked once and has finished asking.Under 15 cm. The left robot's next check says stop, so it stops. The right robot has no next check.Same condition. Same sensor. Same number. Only the loop is different.Finished. One robot is parked; the other is against the wall.
wall far
A decision is only worth as much as the last time it was made. Inside a loop, that is a few milliseconds ago.
Nothing is wrong with the right-hand program’s decision. It asked the question, got a truthful answer, and acted on it correctly. It simply never asked again, and the world moved on. Decisions belong inside a loop, so the robot keeps re-deciding as things change.
when program starts :: events hat
forever
  if <([4 v] distance in [cm v] :: sensors) < (15)> then
    stop moving :: movement
  else
    start moving [straight: 0] :: movement
  end
end
Four shapes, and how to choose
Once there is more than one question, decisions can be arranged in four ways. They look nearly identical stacked up in the editor, which is exactly why they get muddled — the thing that differs is not what the blocks say, it is which routes through them exist.
One question sorts them almost completely:
Are the questions…
Use
How many bodies can run
independent — any combination can be true
separate ifs
none, some, or all
one question, two answers
if / else
exactly one
the second only matters when the first is true
nested if
one, and only via the outer
mutually exclusive cases — exactly one should win
chained if / else
exactly one, the first that matches
Separate ifs — independent questions
Each if is asked no matter what the others answered, so any number of them can fire on the same pass. That is the right shape when the conditions genuinely have nothing to do with each other.
Both questions are always asked, so one pass can turn on the lamp, the fan, both, or neither. Dark and hot are unrelated — there is no reason answering one should stop the other being asked.
forever
  if <[3 v] is ambient light intensity [< v] (20) %? :: sensors> then
    [A v] start motor [clockwise v] :: motors
  end
  if <[4 v] is distance [< v] (15) [cm v]? :: sensors> then
    [D v] start motor [clockwise v] :: motors
  end
end
if / else — one question, two answers
Exactly one branch runs, every time. Reach for this whenever the robot must do something either way — and in preference to two ifs testing opposite conditions, which is the same idea written twice and can drift apart.
There is no route through this that runs both boxes, and none that runs neither. That guarantee is the reason to prefer it over two opposite ifs.
Nested if — a follow-up question
Putting one if inside another means the inner question is only ever asked when the outer one is true. Use it when the second question is meaningless otherwise: there is no point asking which side an obstacle is on when there is no obstacle.
The inner question sits on the outer one's yes route, so it is only reached when something is close. If nothing is close, the robot never asks which side it is on — because there is nothing to have a side.
if <[4 v] is distance [< v] (15) [cm v]? :: sensors> then
  if <([2 v] angle :: sensors) < (0)> then
    start moving [right: 50] :: movement
  end
end
When not to nest. If you only want “both true” and nothing happens at the outer level, an and says it in one block and reads better:
if <<[4 v] is distance [< v] (15) [cm v]? :: sensors> and <([2 v] angle :: sensors) < (0)>> then
  start moving [right: 50] :: movement
end
Nesting earns its place when something happens at the outer level too, or when there is an else at each level and the two mean different things.
Chained if / else — one winner out of several
This is the shape for a list of cases where exactly one should win: colour bands, distance bands, speed ranges. EV3 Classroom has no else-if block, so you build a chain by putting the next if inside the else of the last one.
Each question is only reached down the previous one's no route. The first that matches acts, and everything below it is never even asked — which is what makes overlapping bands safe.
And here is why it matters, because this is the single commonest bug in this whole module. Three bands written as three separate ifs are each perfectly correct, and together they are wrong: a reading of 20 is under 30 and under 60 and under 90, so all three run and the last one to run is the one that sticks.
three separate ifs
if light < 30 then
stop
if light < 60 then
go slowly
if light < 90 then
go fast
chained — if / else / if
if light < 30 then
stop
else
if light < 60 then
go slowly
else
go fast
↑ the rest is inside the else — never asked
3bands matchedgo fastseparate ifs dostopchained does
Separate ifs: 3 matched, last one winsChained: first match wins, rest never asked
The sensor reads 20 — a dark surface. Both programs should stop.The three separate ifs each ask their own question. 20 is under 30, so it stops… then 20 is also under 60, so it goes slowly… then 20 is under 90 too, so it goes fast. All three ran, and the last one wins.The chained version asked the same first question, got `yes`, and stopped. The other two live inside its else, so they were never even asked.Slide the reading up to 75 and both agree again — because only one band matches. The bug only shows itself where the bands overlap, which is most of the range.Finished. Same three bands, same reading — two different answers, because one shape stops asking and the other does not.
reading 20
Separate ifs are not wrong here so much as unguarded: nothing stops a second one matching. Chaining is what makes “the first one wins” true.
The rule to carry away: if the cases are meant to be exclusive, they must be made exclusive. Chaining does it by construction. Separate ifs only work if you are careful to write non-overlapping bands yourself — light < 30, 30 to 60, 60 and over — which is more to get right and easy to break later.
Why it matters
This is the point at which a machine stops following a script and starts responding. A thermostat, an automatic door, a robot vacuum — all of them are a decision inside a loop.
ComponentSensing6 min
The Colour Sensor
The Colour Sensor looks down at a surface and can answer three quite different questions: what colour is this?, how bright is this? and how light is the room? Choosing the wrong one is the usual reason a line-following robot refuses to work.
front
side
The sensor has its own lamp beside its detector. That is why it must sit close to the surface and at a steady height — lifting it changes the reading even though the surface has not changed.
Blocks reference
Block
What it does
([3 v] color :: sensors)
Reports which colour it sees, from a short list — red, blue, green, black, white and a few more.
([3 v] reflected light intensity :: sensors)
Reports how bright the surface is, as a number from 0 (black) to 100 (white).
<[3 v] is color [red v]? :: sensors>
Reports true or false for one particular colour.
([3 v] ambient light intensity :: sensors)
Reports how much light is falling on the sensor, 0 to 100, with its own lamp switched off.
Which colour, exactly?
The sensor does not describe a colour — it picks one from a list of eight, and that list is the whole of what it can ever say:
Reports
Means
0
no colour — too far away, or too dark to call
1 · 2 · 3
black, blue, green
4 · 5 · 6
yellow, red, white
7
brown
Anything you put under it is forced into one of those eight. There is no orange and no purple: an orange brick comes back as red or as yellow, and often as red one moment and yellow the next as the robot creeps along. Light blue and grey are the other classic pair to avoid — grey is neither black nor white, so it flips between them.
This is why colour mode is a good fit for a task you control and a bad fit for one you do not. Sorting the LEGO bricks that come in the set works, because they are made in exactly these colours. Reading a printed sheet, a coloured tile from another set, or anything pastel is asking the sensor to answer a question it does not have a word for.
Two practical points follow from how it decides. It shines its own lamp and looks at how much red, green and blue comes back, so it must be close — about half a centimetre, and no more than a centimetre. Lift it and the answer decays to 0. And because it takes those three readings before it can answer, colour mode is the slowest thing this sensor does; a robot driving quickly can pass right over a small patch without ever reporting it.
When a colour must be recognised reliably, test it. Drive the robot slowly over the real surface with color shown on the screen and watch what it actually says — including what it says at the edges between two colours, which is where the wrong answers live.
Colour, or brightness?
Both questions are asked of the same surface at the same moment. Watch the two answers travel across a strip of colours and then over the edge of a black line.
when program starts
forever
write 3 color at line 1
write 3 reflected light intensity at line 3
colour: 2 possible answers herereflected light: every value from 88 down to 8
The sensor sits a few millimetres above the surface, with its own lamp shining down.It travels across the coloured patches. One read-out names what it sees; the other says how much light came back.Now the edge of a black line. The name only ever says white or black — but the number slides all the way down, and every value in between means something.Names for sorting. Numbers for following.Finished. Same sensor, same surface, two very different kinds of answer.
reflected light 88
Watch the two read-outs over the last third of the strip. One of them changes once. The other changes the whole way across.
Over the patches, both read-outs are useful. Over the edge of the line they part company: the colour name has only two answers to give and jumps between them, while the number slides smoothly from 88 down to 8. Every value in that slide tells you how far onto the line the sensor is — which is information the name simply does not carry.
Use colour when the answer really is a name — sorting red bricks from blue ones, stopping on a green square.
Use reflected light when the answer is a matter of degree — following the edge of a black line, where the useful readings are all the greys between black and white.
A line follower built on colour names only knows “black” or “not black”, so it can only lurch. Built on reflected light it can tell how far onto the line it has drifted, which is what makes smooth following possible.
The third mode: ambient light
The first two modes both switch the sensor’s own lamp on and measure what bounces back off the surface. Ambient light intensity does the opposite: the lamp goes off, and the sensor simply reports how much light is arriving from wherever — 0 in the dark, up to 100 in bright light.
Mode
Own lamp
Measures
Points
colour
on
which of eight colours the surface is
at the surface, very close
reflected light
on
how much of its own light comes back
at the surface, very close
ambient light
off
how bright the surroundings are
wherever you want to measure
That makes it the only one of the three that is not really about the floor. A number between 0 and 100 means very little on its own, so watch the same sensor sit through five different rooms — nothing underneath it changes at any point.
the sensor’s own lamp is off — it is measuring the room
Start in the dark — a hand over the lens, or the lights off. Almost no light reaches the sensor, and it reports 0.Curtains drawn with one small lamp on. Enough to see by, and the sensor climbs to about 12.An ordinary classroom with the lights on sits somewhere around 38 — the middle of the scale, not the top of it.Move it beside a bright window and the same sensor, in the same room, reads about 72.A torch pointed straight into it pushes the reading to nearly 100 — which is how a light can be used as a signal to a robot.Finished. Same sensor, same floor underneath it — the only thing that changed was the room.
ambient 0
Nothing under the sensor changed at any point in this run. Ambient light is the one mode that is not asking about the surface at all.
Those are the shape of the scale rather than exact figures, but the shape is the useful part: a lit room is nowhere near 100, and the top of the range is reserved for a light pointed straight at the sensor. Cover it with your hand and the number drops to near zero — which is the easiest way to check the sensor is doing what you think.
Point it at the ceiling and it tells you whether the room lights are on; point it forwards and a torch will spike the reading, which is a way of signalling to a robot without touching it.
Do not reach for it as a substitute for reflected light. Room light falling on a black line and on white paper is almost the same, so ambient mode can barely tell them apart — the reason reflected light works is precisely that the sensor brings its own light and measures how much of it survives.
It is also the mode most at the mercy of the room. A reading taken by a window in the morning will not match the same spot in the afternoon, so anything built on ambient light needs measuring on the day, in the place, with the lights as they will be.
Light and height matter
Even the two lamp-on modes are affected by room lighting — a reading taken by a sunny window differs from one taken in a corner. The sensor must also sit close to the surface and at a constant height, because lifting it changes the reading even though the surface has not changed.
A condition is a value. Give it a name, then combine the names — not the sensors.
▶The Colour SensorFrom Level 2 — reading a colour by name, and why ambient light matters.Show meHide
ComponentSensing6 min
The Colour Sensor
The Colour Sensor looks down at a surface and can answer three quite different questions: what colour is this?, how bright is this? and how light is the room? Choosing the wrong one is the usual reason a line-following robot refuses to work.
front
side
The sensor has its own lamp beside its detector. That is why it must sit close to the surface and at a steady height — lifting it changes the reading even though the surface has not changed.
Blocks reference
Block
What it does
([3 v] color :: sensors)
Reports which colour it sees, from a short list — red, blue, green, black, white and a few more.
([3 v] reflected light intensity :: sensors)
Reports how bright the surface is, as a number from 0 (black) to 100 (white).
<[3 v] is color [red v]? :: sensors>
Reports true or false for one particular colour.
([3 v] ambient light intensity :: sensors)
Reports how much light is falling on the sensor, 0 to 100, with its own lamp switched off.
Which colour, exactly?
The sensor does not describe a colour — it picks one from a list of eight, and that list is the whole of what it can ever say:
Reports
Means
0
no colour — too far away, or too dark to call
1 · 2 · 3
black, blue, green
4 · 5 · 6
yellow, red, white
7
brown
Anything you put under it is forced into one of those eight. There is no orange and no purple: an orange brick comes back as red or as yellow, and often as red one moment and yellow the next as the robot creeps along. Light blue and grey are the other classic pair to avoid — grey is neither black nor white, so it flips between them.
This is why colour mode is a good fit for a task you control and a bad fit for one you do not. Sorting the LEGO bricks that come in the set works, because they are made in exactly these colours. Reading a printed sheet, a coloured tile from another set, or anything pastel is asking the sensor to answer a question it does not have a word for.
Two practical points follow from how it decides. It shines its own lamp and looks at how much red, green and blue comes back, so it must be close — about half a centimetre, and no more than a centimetre. Lift it and the answer decays to 0. And because it takes those three readings before it can answer, colour mode is the slowest thing this sensor does; a robot driving quickly can pass right over a small patch without ever reporting it.
When a colour must be recognised reliably, test it. Drive the robot slowly over the real surface with color shown on the screen and watch what it actually says — including what it says at the edges between two colours, which is where the wrong answers live.
Colour, or brightness?
Both questions are asked of the same surface at the same moment. Watch the two answers travel across a strip of colours and then over the edge of a black line.
when program starts
forever
write 3 color at line 1
write 3 reflected light intensity at line 3
colour: 2 possible answers herereflected light: every value from 88 down to 8
The sensor sits a few millimetres above the surface, with its own lamp shining down.It travels across the coloured patches. One read-out names what it sees; the other says how much light came back.Now the edge of a black line. The name only ever says white or black — but the number slides all the way down, and every value in between means something.Names for sorting. Numbers for following.Finished. Same sensor, same surface, two very different kinds of answer.
reflected light 88
Watch the two read-outs over the last third of the strip. One of them changes once. The other changes the whole way across.
Over the patches, both read-outs are useful. Over the edge of the line they part company: the colour name has only two answers to give and jumps between them, while the number slides smoothly from 88 down to 8. Every value in that slide tells you how far onto the line the sensor is — which is information the name simply does not carry.
Use colour when the answer really is a name — sorting red bricks from blue ones, stopping on a green square.
Use reflected light when the answer is a matter of degree — following the edge of a black line, where the useful readings are all the greys between black and white.
A line follower built on colour names only knows “black” or “not black”, so it can only lurch. Built on reflected light it can tell how far onto the line it has drifted, which is what makes smooth following possible.
The third mode: ambient light
The first two modes both switch the sensor’s own lamp on and measure what bounces back off the surface. Ambient light intensity does the opposite: the lamp goes off, and the sensor simply reports how much light is arriving from wherever — 0 in the dark, up to 100 in bright light.
Mode
Own lamp
Measures
Points
colour
on
which of eight colours the surface is
at the surface, very close
reflected light
on
how much of its own light comes back
at the surface, very close
ambient light
off
how bright the surroundings are
wherever you want to measure
That makes it the only one of the three that is not really about the floor. A number between 0 and 100 means very little on its own, so watch the same sensor sit through five different rooms — nothing underneath it changes at any point.
the sensor’s own lamp is off — it is measuring the room
Start in the dark — a hand over the lens, or the lights off. Almost no light reaches the sensor, and it reports 0.Curtains drawn with one small lamp on. Enough to see by, and the sensor climbs to about 12.An ordinary classroom with the lights on sits somewhere around 38 — the middle of the scale, not the top of it.Move it beside a bright window and the same sensor, in the same room, reads about 72.A torch pointed straight into it pushes the reading to nearly 100 — which is how a light can be used as a signal to a robot.Finished. Same sensor, same floor underneath it — the only thing that changed was the room.
ambient 0
Nothing under the sensor changed at any point in this run. Ambient light is the one mode that is not asking about the surface at all.
Those are the shape of the scale rather than exact figures, but the shape is the useful part: a lit room is nowhere near 100, and the top of the range is reserved for a light pointed straight at the sensor. Cover it with your hand and the number drops to near zero — which is the easiest way to check the sensor is doing what you think.
Point it at the ceiling and it tells you whether the room lights are on; point it forwards and a torch will spike the reading, which is a way of signalling to a robot without touching it.
Do not reach for it as a substitute for reflected light. Room light falling on a black line and on white paper is almost the same, so ambient mode can barely tell them apart — the reason reflected light works is precisely that the sensor brings its own light and measures how much of it survives.
It is also the mode most at the mercy of the room. A reading taken by a window in the morning will not match the same spot in the afternoon, so anything built on ambient light needs measuring on the day, in the place, with the lights as they will be.
Light and height matter
Even the two lamp-on modes are affected by room lighting — a reading taken by a sunny window differs from one taken in a corner. The sensor must also sit close to the surface and at a constant height, because lifting it changes the reading even though the surface has not changed.
Say this back before moving on: “Both, either, or the opposite of.”
What’s in this build 4 min
Five electronic parts — the most of any model so far. Find all five, and say which are inputs and which are outputs.
Part
What it is doing here
EV3 Intelligent Brick
The kit’s body — and its speaker, which is doing most of the audible work today.
Large Motor — the kick beater
Swings the beater at the drum head. Large because a beater has to arrive with some force to make a sound worth hearing.
Medium Motor — the hi-hat
Opens and closes the cymbals. Fast and light, which is what Medium is for.
Touch Sensor — the pedal
The foot control. Note it is played with a finger here but stands for a foot — it is the condition that changes what other actions mean.
Colour Sensor — the stick
Sees a coloured tip brought close. Different colours can be different strokes.
Gyro Sensor — the shake
Feels the whole kit being moved. The third input, and the one that makes eight combinations rather than four.
The Colour Sensor is fussy about distance and light. Hold the coloured tip about a centimetre away, and check it reads the same colour under the room lights you actually have. A sensor that reports “black” for everything is usually too far away.
Ports — and the rule 4 min
Sensors go in ports 1, 2, 3, 4. Motors go in ports A, B, C, D. They are not interchangeable, and nothing will tell you politely if you swap them.
Part
Port
Why this one
Kick beater (Large)
A
The main actuator, as always.
Hi-hat (Medium)
B
The second motor.
Pedal (Touch)
1
Touch stays on 1.
Shake (Gyro)
2
Gyro stays on 2.
Stick (Colour)
3
Colour stays on 3 — which is why this course never leaves port 3 free by accident.
Check your own build now:
Four cables into 1, 2, 3 and two into A, B. This is the fullest Brick you have wired — count them before you power up.
Keep the kit still while the program starts. The Gyro zeroes itself at that instant.
Check the beater can swing without hitting the hi-hat frame.
Bring the coloured stick tip to the Colour Sensor and confirm on the Brick screen that it reports the colour you expect.
Connect the Brick 4 min
Two routes, and either is fine. USB is the reliable one and the one to fall back on when a room’s Bluetooth is busy; Bluetooth leaves the robot free to move, which some models need.
▶How to connect the BrickUSB and Bluetooth, step by step, with a photograph of every screen. Open it if you have not done this before — or if pairing is not working.Show meHide
USB — the reliable one
Switch the Brick on with the dark grey centre button.
Cable into the Brick’s PC port — the small square socket beside the numbered ports, not one of the numbered ones.
Other end into the computer.
Bluetooth — name it first
Do these in order. Naming the Brick after you go looking for it in the list is how groups end up driving each other’s robots.
Name your Brick. On the Brick: Settings (the spanner) → Brick Name. Type something nobody else will pick, then press the tick. Every Brick is called EV3 until somebody changes it.
Turn Bluetooth on. Settings → Bluetooth. Tick Bluetooth and Visibility. Leave iPhone/iPad/iPod unticked.
Connect from EV3 Classroom. Click the Brick icon at the top of the programming area, find your Brick by name, and click Connect.
Say yes on the Brick. It asks “Connect?” with the computer’s name — choose the tick, then accept the passkey, which is already 1234.
Where to read it. The name sits in the bar across the very top of the screen, on every screen — so you can check which Brick you are holding at any moment without going into a menu. This one is EV3VE. A Brick nobody has renamed says EV3.Step 3, and the reason step 1 exists. Three Bricks in range — read the name before you click Connect. Pairing with the wrong one is not an error: it works perfectly, on somebody else’s robot.
Step 2.Bluetooth switches the radio on; Visibility is what lets the computer find you. With Visibility off your Brick works perfectly and simply never appears in the list.Step 4. Look at the Brick. It asks whether to accept and names the computer. Choose the tick.Then the passkey, already 1234. Press the tick again and you are connected.
The two failures, every class, every time. The Brick has gone to sleep while you were building — press the centre button to wake it. Or you have paired with the group at the next table, which is why the name matters.
The long version, including Port View and how to read the port tiles, is in the Brick & Bluetooth guide.
Bluetooth, if the room allows it. The last challenge asks you to shake the whole kit, and a USB cable turns a shake into a tug on the port. If Bluetooth is busy, use USB and simply leave the shake tests until you can free the cable.
Confirm the connection 2 min
Check the Brick icon: connected, or not.
Two motor tiles — A and B.
Three sensor tiles — 1, 2 and 3. If you have two, one cable is in the wrong socket or not fully home.
Exercise all three inputs and watch their tiles. Press the pedal. Show the stick. Tilt the kit. Three tiles, three responses — confirm each before writing a program that combines them.
Stuck? The long version, with a photograph of every screen, is in the Brick & Bluetooth guide.
Change it and test 8 min
One change at a time. Predict, then run, then look.
Change the first and to or. Predict which combinations now fire it. Then check against the paper table — or includes both.
Remove one not. Two rules now fire together for one action. Hear the mess, then put it back.
Add the Gyro as a third named condition:set [shake] to ([2] rate > 100). You now have eight combinations from three lines. Try writing that as nested Switches and stop when you see how deep it goes.
Make a rule that needs exactly one of pedal or stick, not both. This is the one that catches everybody: <pedal or stick> and not <pedal and stick>.
Rename stick to c and read the program again. Same behaviour, no longer comprehensible — which is the same lesson names taught you in Lesson 1, now applied to conditions.
Write the combinations on paper first. A truth table is faster than guessing, and it is what professionals do.
Where this goes 3 min
Your kit reacts to what is true right now. It has no idea what you did a moment ago.
Try to make the hi-hat stay open after one press of the pedal, until the pedal is pressed again. You cannot — not with conditions alone, because the pedal being down tells you nothing about whether it was down last time.
A machine that behaves differently depending on what happened before is in a state, and it needs a variable to remember which one. That is the next lesson, and it is how one button ends up controlling four different behaviours.
Conditions tell a machine about now. States let it remember.
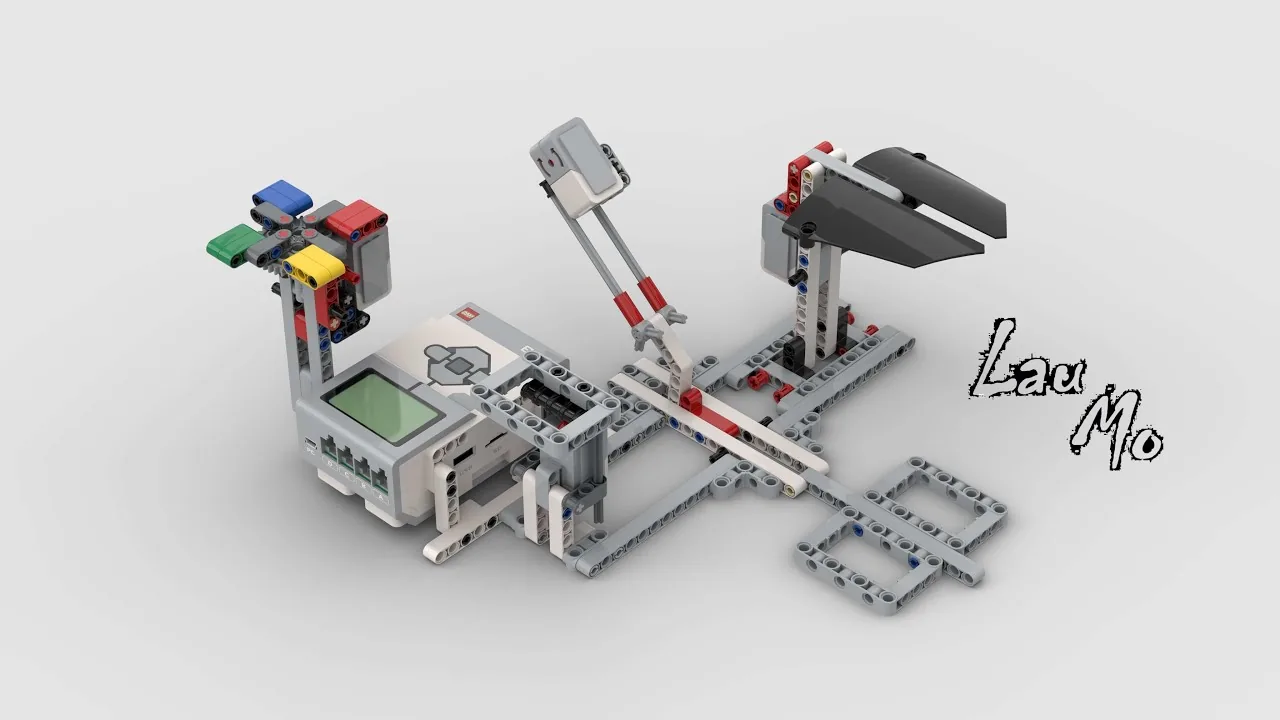
This is what you are building: the EV3 Musical Instrument Jazz Drum.
Build it 15 min
Build the model before you read any further. Everything after this is about making it do something, and none of it will make much sense with nothing on the table in front of you.
Use the viewer's own controls to zoom and turn pages. Fullscreen makes it big enough to build from.
Check the finished build against the picture before you switch anything on. A motor mounted the wrong way round is far easier to spot now than it is to debug later, when it looks like a program fault.
Make it move 10 min
Two inputs first, so you can hear the four combinations. The Gyro comes in during the challenges.
when program starts :: events hat
clear display :: display
forever
  set [pedal v] to <[1 v] is pressed? :: sensors> :: variables
  set [stick v] to <([3 v] color) = [red v] :: sensors> :: variables

  if <(pedal) and (stick)> then
    play sound [Mechanical / Tick Tock v] :: sound
    write [TIGHT] at line (1) :: display
  end

  if <(stick) and <not (pedal)>> then
    play sound [Mechanical / Air Release v] :: sound
    write [OPEN] at line (1) :: display
  end

  if <(pedal) and <not (stick)>> then
    [A v] run [clockwise v] for (40) [degrees v] at (80) % speed :: motors
    [A v] run [counterclockwise v] for (40) [degrees v] at (60) % speed :: motors
    write [KICK] at line (1) :: display
  end
end
Four cases, three of which do something. Pedal alone kicks; stick alone washes; both together ticks; neither is silence.
The two conditions are read once, at the top of the loop. Every test below uses the same two answers, so nothing can change half-way through a round and give you a contradictory pair.
The three tests are flat, not nested. Read them as a list of rules. A drummer could check them.
** not is doing real work. ** Without it, “stick alone” would also fire when the pedal was down, and you would hear two sounds at once.
The fourth case is silence and needs no code — which is itself worth noticing. Not every combination has to do something.
What success looks like: three distinguishable sounds for three distinguishable actions, and quiet when you do nothing.
If you get two sounds at once, one of your nots is missing. Write the four combinations on paper — pedal yes/no against stick yes/no — and tick which of your three rules fires for each. Exactly one should.
Challenges 27 min
Work through them in order — each is harder than the last. The extra challenge comes after all three, and it is meant to make you plan before you build.
Challenge 1
Add the third input.
Make a named condition called "shake" that is true when the Gyro rate goes above 100, then give it its own sound.
You now have three named conditions at the top of your loop and three rules below. Read them aloud — they should still make sense.
Challenge 2
Find the combination nobody has used.
With three inputs there are eight combinations. Write them all out on paper: pedal yes/no, stick yes/no, shake yes/no.
Now pick a combination your program ignores and give it something dramatic — all three at once should do something no single input does. Tick off which of your rules fires for each of the eight rows and make sure exactly one does.
Challenge 3
Exactly one, not both.
Build a rule that fires only when the pedal OR the stick is used, but NOT when both are.
The obvious "or" will not do it — you need to exclude the both case explicitly. Once it works, explain to a partner why plain "or" was not enough, using the word "inclusive".
Extra challenge
Design a playable four-sound kit and write down its rules first.
Before you touch a block, write a table: eight rows for the eight combinations of your three inputs, and what each one should do. Some rows should be deliberately silent — a kit that makes a noise for everything is unplayable.
Then build it, with these two rules:
1. Every condition is named once at the top of the loop. No rule below may read a sensor directly.
2. Exactly one rule fires for any combination. If two fire together you will hear it, and your table will tell you which row is wrong.
Finally, hand your kit to someone who has not seen the table and ask them to work out the rules by playing it. If they can, you have designed an instrument. If they cannot, the combinations are not distinguishable enough — and that is a design problem, not a programming one.