Challenge 1
Change one thing in the bottom layer. Make the arm travel further in "arm down" — and note that both "pick up" and "put down" change with it, from one edit. Count the places you did not have to visit.
Quick Learn — the model, the instructions, the program and the challenges. The theory is in Full Lesson.
EV3 Robotics›Level 3 · Advanced›Lesson 16
Level 3 · Lesson 16 · EV3-L03-1660 minutes · Ages 9–16 · Model: Mobile Robotic Arm
The Mobile Robotic Arm: a driving base carrying a shoulder that raises and lowers, and a gripper that opens and closes — four motors, and the most capable machine you have built.
Four motors is where flat programs stop working. A pick-and-place run is twenty blocks, and written as twenty blocks it becomes something nobody can read, including the person who wrote it yesterday.
By the end of the lesson your main program will be four lines long — and every one of them will be a block you built out of other blocks you built.
A warehouse picking robot does one job — take that item off that shelf and put it in that tote — thousands of times a day. Underneath, that one job is navigation, arm positioning, gripper selection, weight sensing and a check that it actually picked something up.
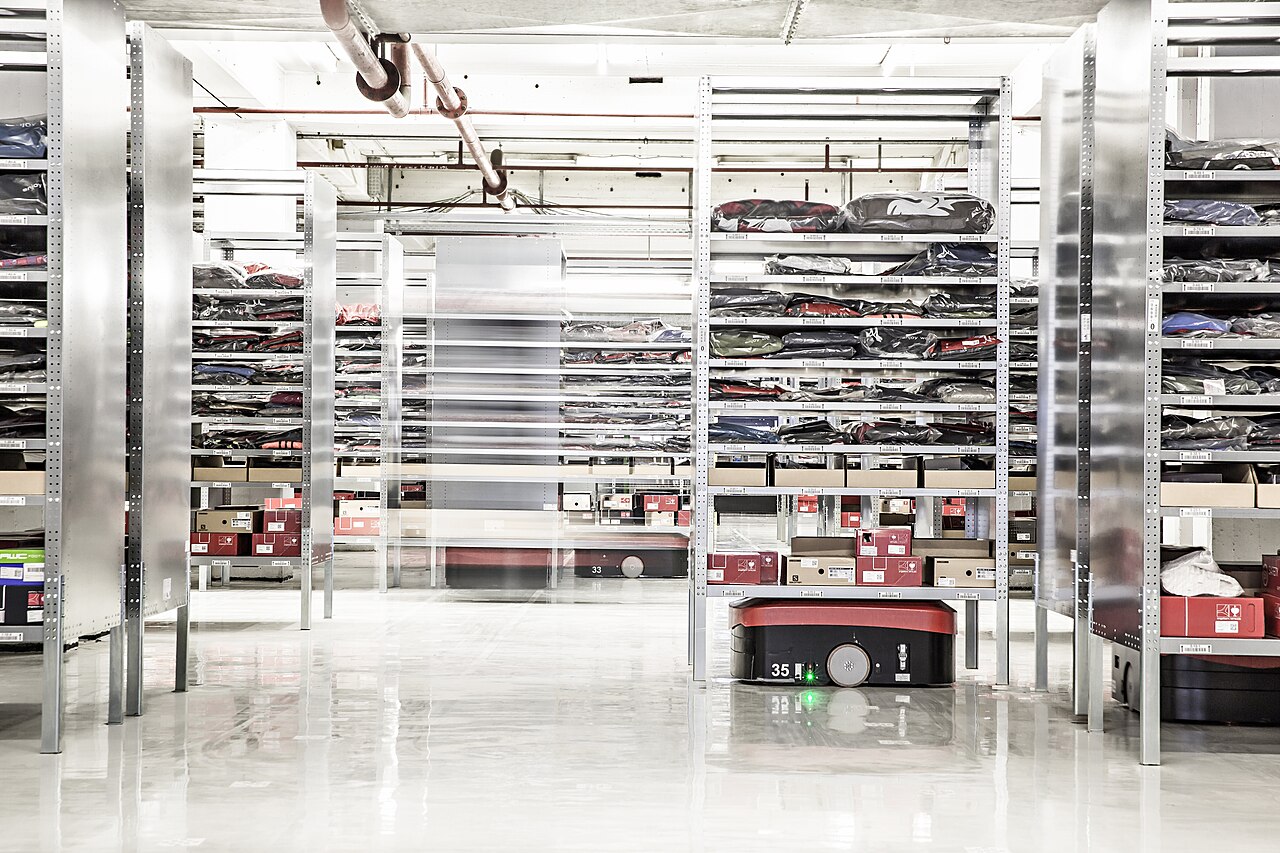
Nobody writes those out in sequence. The system has layers: a picking layer that says pick item, a motion layer that knows how to get an arm somewhere, and a driver layer that knows how to run a joint. Each layer speaks only to the one below it.
Because a machine of any size cannot be understood all at once, and it does not need to be. Someone improving how the gripper closes should not have to understand the picking strategy, and someone changing the strategy should not have to know about the gripper.
Layers are how a big system stays understandable by ordinary people. The same idea builds cars, aircraft and every piece of software on your phone.
A single flat program of two hundred steps has no safe place to change anything. Every edit risks something distant, so nobody edits confidently, so the machine stops improving. That is not a hypothetical — it is the usual fate of programs that grow without structure.
Build the small things properly, then build with them. That is the only way anything large gets made.
A My Block can call another My Block. That one sentence is all there is to it, and it changes what size of program you can hold in your head.
| Layer | Blocks | Knows about |
|---|---|---|
| Bottom — parts | open grip, close grip, arm up, arm down | Motors and ports. Nothing else. |
| Middle — actions | pick up, put down | The bottom layer only. Never mentions a port. |
| Top — the job | fetch and deliver, and the main program | The middle layer only. |
define open grip
[D v] run [counterclockwise v] for (90) [degrees v] at (40) % speed :: motors

define close grip
[D v] run [clockwise v] until <[1 v] is pressed? :: sensors> at (30) % speed :: motors

define arm down
[A v] run [counterclockwise v] for (120) [degrees v] at (30) % speed :: motors

define arm up
[A v] run [clockwise v] for (120) [degrees v] at (30) % speed :: motors
define pick up
open grip :: custom
arm down :: custom
close grip :: custom
arm up :: custom

define put down
arm down :: custom
open grip :: custom
arm up :: custom
when program starts :: events hat
move [forward v] for (3) [rotations v] at (40) % speed :: movement
pick up :: custom
move [backward v] for (3) [rotations v] at (40) % speed :: movement
put down :: custom
Every block must leave the machine in a known state — the same one, every time. pick up must always end with the arm up and the grip closed. If it sometimes ends with the arm down, then anything calling it has to check, and the moment a caller has to check, the layer has stopped being useful.
The second rule: one job each. A block called close grip that also raises the arm is a lie, and it will be found out the first time somebody wants to close the grip without raising the arm.
Three layers is usually right for a machine this size. Two is often not enough; five means you have made a layer for its own sake. The test is whether each layer reads naturally aloud — if a layer’s blocks do not form a sentence, it is not a real layer.
A My Block is a block you make yourself. You take a group of blocks that do one job, give the group a name, and from then on that name is the block.
| Block | What it does |
|---|---|
define grab | The head of a definition. Whatever is attached under it is what the block does. There is exactly one of these per My Block. |
grab :: myblocks | Runs the definition. Use it as many times as you like. |
define turn (degrees) | A definition with an input. degrees is a name for whatever number the caller types. |
turn (90) :: myblocks | Runs it with 90 in place of that name. |
Copying blocks works perfectly — right up until the copied thing has to change. Here are two robots driving a square, one with a My Block and one with the blocks copied four times, and then somebody asks for a bigger square.
a My Block, used four times
the same thing copied
↑ the fourth copy still says 2
The bug is not in any block. It is in the fact that the same idea was written down four times, and only three of them were updated.
The right-hand robot is not running a broken program. It is running four programs that were supposed to be identical, and three of them were updated. Nothing is misspelled, nothing reports an error, and the only evidence is a square that does not close.
The left-hand program is these two listings, and nothing else:
define side
move [forward v] for (3) [rotations v] :: movement
move [right: 100 v] for (0.5) [rotations v] :: movement
when program starts :: events hat
repeat (4)
  side :: myblocks
end
A My Block can take a value. Turn-right is useful; turn (degrees) is far more useful, because one definition then serves every turn in the program. The value is given a name when the block is made, and that name is used inside the definition wherever the number belongs.
The name is the part that trips people up. Inside the definition, (cm) is not a variable you have to set anywhere — it is a hole, and it is filled in with whatever the caller typed, every time the block is called.
EV3 movement blocks count wheel turns, and nobody measures a table in wheel turns. One turn of a standard driving wheel carries the robot about 17.5 cm, so driving 50 cm means asking for 50 ÷ 17.5 rotations. Doing that sum in your head, at every movement block, all program long, is how mistakes get in.
Put the sum inside a My Block once and the whole program can be written in centimetres. Change the two numbers below and watch where they end up.
These two numbers are the whole interface. Everything below is what the definition does with them.
what you write in the program
drive (50) cm at (75) % :: myblocks
the definition — (cm) and (speed) are names, not values
define drive (cm) cm at (speed) %
set movement speed to (speed) % :: movement
move [forward v] for ((cm) / (17.5)) [rotations v] :: movement
the same blocks, with your two numbers put in
set movement speed to (75) % :: movement
move [forward v] for ((50) / (17.5)) [rotations v] :: movement
The green division block is doing the only real work: the movement block underneath counts wheel turns, and you asked in centimetres. One turn of these wheels carries the robot 17.5 cm, so 50 cm is 50 ÷ 17.5 = 2.86 turns.
Set the distance to 17.5, 35 or 70 and the part turn disappears — those are whole numbers of wheel turns. Every other distance leaves a fraction, which is exactly why the division belongs inside the My Block and not in your head.
Two inputs, and the definition is three blocks. Note what has actually been gained: not fewer blocks — the same blocks run either way — but a program you can check against a ruler. drive (50) cm at (75) % is either right or wrong about the table, and you can tell which without running it.
Typing a fixed number inside the definition instead of using the input is the classic slip — the block then ignores whatever it is given and always drives the same distance:
define drive (cm) cm at (speed) %
set movement speed to (speed) % :: movement
move [forward v] for ((50) / (17.5)) [rotations v] :: movement
That block takes a distance and throws it away. It will pass every test you run at 50 cm.
Here are those two My Blocks and a 100 × 100 cm mat. Drag blocks into the script, set the numbers, and press Run — the base always starts in the left-hand corner facing up the mat. Say where you think it will finish before you press it; the ruler is there to settle the argument.
Two My Blocks, a 100 × 100 cm mat and a ruler. Drag blocks into the script — or press one to add it — set the numbers, then Run and see whether the base ends up where you said it would.
my blocks — drag or press
the script — 0 / 8 blocks
Empty. Drag a block in from above, or press one.
Nothing to run yet. A square is four drives and four turns — try predicting the distance before you press Run.
Eight blocks is enough for a square with 40 cm sides, and not enough for anything you cannot picture. If a shape needs more than that, it wants a repeat (4) around it — which is the next thing a My Block usually grows into.
The Gyro Sensor gives an accurate turn, and it costs five blocks every time: reset the angle, start turning, wait until the reading is a few degrees short of the target, stop. Those five blocks are about the sensor. What the program wants to say is turn 90.
define turn (degrees)
[2 v] reset angle :: sensors
start moving [right: 30 v] :: movement
wait until <([2 v] angle :: sensors) > ((degrees) - (4))>
stop moving :: movement
The − 4 is the overshoot allowance from the Gyro Sensor module: the robot carries on turning for a moment after the motors are told to stop, so the block asks for less than it wants and lets it coast in. Written here, it is decided once. Written out at every corner, it is eleven chances to forget it.
Now the input earns its keep — because the shape a robot draws is decided entirely by that one number. A closed shape turns through 360° in total, so a shape with n corners turns 360 ÷ n at each one.
the whole program
when program starts :: events hat
repeat (4)
  move [forward v] for (2) [rotations v] :: movement
  turn (90) :: myblocks
end
what turn is, once
define turn (degrees)
[2 v] reset angle :: sensors
start moving [right: 30] :: movement
wait until <([2 v] angle :: sensors) > ((degrees) - (4))>
stop moving :: movement
Nothing in the program mentions the gyro. It is all inside turn, which is the point: the sensor is an implementation detail of turning, and the program should be about the shape.
Same definition, same drive block, same length of side. The only edit between a triangle and a pentagon is turn (120) :: myblocks becoming turn (72) :: myblocks. That is what a well-chosen input does: it turns a program that draws one shape into a program that draws shapes.
The same block also turns left, if you let it. Give the definition an if … then … else and a negative input means anticlockwise:
define turn (degrees)
[2 v] reset angle :: sensors
if <(degrees) > (0)> then
  start moving [right: 30 v] :: movement
  wait until <([2 v] angle :: sensors) > ((degrees) - (4))>
else
  start moving [left: 30 v] :: movement
  wait until <([2 v] angle :: sensors) < ((degrees) + (4))>
end
stop moving :: movement
One block, two directions, and every program that uses it gets the left turn for free the moment this definition is edited.
The signal is repetition: the same sequence appearing in more than one place. That is the moment to name it. Making a My Block for something used once adds a layer without adding clarity.
The second signal is a unit. If the blocks convert between what you think in (centimetres, degrees, seconds) and what the hardware counts (rotations, sensor readings), that conversion is worth a name — it is the thing you will otherwise get wrong.
The Touch Sensor is the simplest input the EV3 has: a button that is either pressed or not. That sounds trivial, but it is how a robot knows it has hit a wall, reached the end of a track, or been told to start by a person.
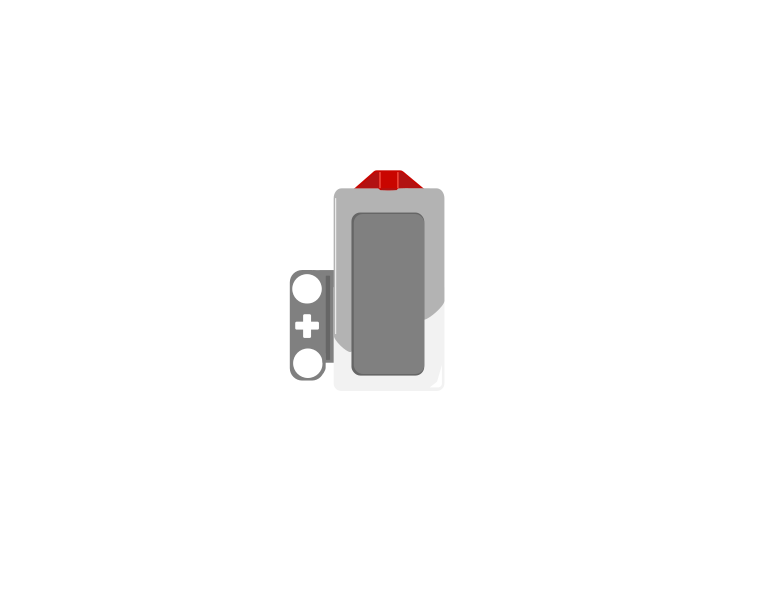 released
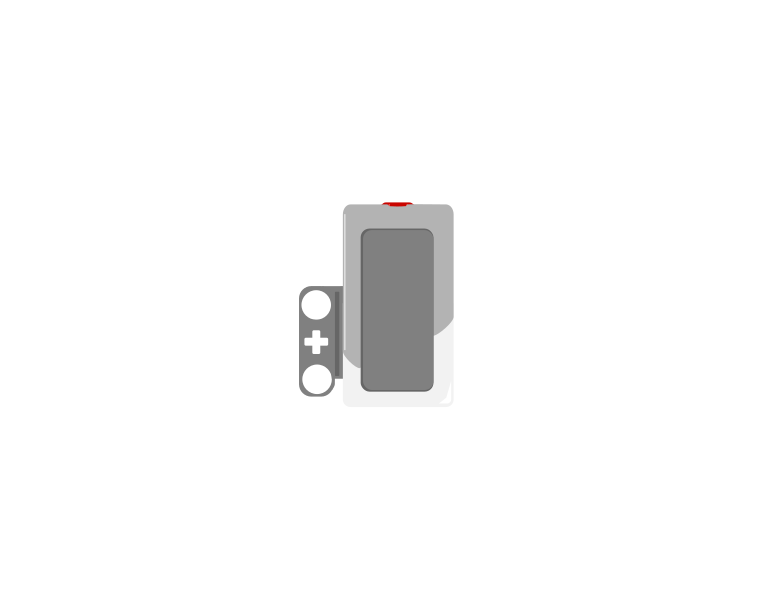 pressed
| Block | What it does |
|---|---|
wait until <[1 v] is pressed? :: sensors> | Holds the program here until somebody presses the sensor. |
<[1 v] is pressed? :: sensors> | Reports true or false. Drop it into a condition to make a decision rather than a wait. |
[1 v] when [bumped v] :: events hat | Starts a whole stack of its own. The dropdown chooses the moment: pressed, released or bumped. |
A button is not only “pressed”. One press is three things: the moment it goes down, the time it stays down, and the moment it comes back up. Watch what a single press does to three programs at once.
versus two hat blocks
The middle counter is the one that surprises people. Nothing is wrong with it — a loop really does check that fast, and every check really is a separate answer.
Nothing there is broken. A loop really does get round hundreds of times a second, and each time it asks is pressed? the honest answer is still yes — so if that loop plays a sound or counts something, it does it hundreds of times from one finger. The two hat blocks each fire once, and they fire at different moments: pressed the instant the button goes down, bumped only when it comes back up.
The three options, and what each is for:
when program starts :: events hat
set movement motors to [B v] and [C v] :: movement
start moving [straight: 0] :: movement
wait until <[1 v] is pressed? :: sensors>
stop moving :: movement
The robot drives until something presses the sensor. Note that the movement is started unmeasured on purpose — the sensor decides when to stop, not a distance.
Touch sensors are everywhere in machines you cannot see into: a lift knows the doors are shut, a printer knows the lid is closed, a washing machine will not spin until it is latched. They are safety devices as much as inputs.
Each block does one job, leaves the machine tidy, and is built only from the layer below it.
A My Block is a block you make yourself. You take a group of blocks that do one job, give the group a name, and from then on that name is the block.
| Block | What it does |
|---|---|
define grab | The head of a definition. Whatever is attached under it is what the block does. There is exactly one of these per My Block. |
grab :: myblocks | Runs the definition. Use it as many times as you like. |
define turn (degrees) | A definition with an input. degrees is a name for whatever number the caller types. |
turn (90) :: myblocks | Runs it with 90 in place of that name. |
Copying blocks works perfectly — right up until the copied thing has to change. Here are two robots driving a square, one with a My Block and one with the blocks copied four times, and then somebody asks for a bigger square.
a My Block, used four times
the same thing copied
↑ the fourth copy still says 2
The bug is not in any block. It is in the fact that the same idea was written down four times, and only three of them were updated.
The right-hand robot is not running a broken program. It is running four programs that were supposed to be identical, and three of them were updated. Nothing is misspelled, nothing reports an error, and the only evidence is a square that does not close.
The left-hand program is these two listings, and nothing else:
define side
move [forward v] for (3) [rotations v] :: movement
move [right: 100 v] for (0.5) [rotations v] :: movement
when program starts :: events hat
repeat (4)
  side :: myblocks
end
A My Block can take a value. Turn-right is useful; turn (degrees) is far more useful, because one definition then serves every turn in the program. The value is given a name when the block is made, and that name is used inside the definition wherever the number belongs.
The name is the part that trips people up. Inside the definition, (cm) is not a variable you have to set anywhere — it is a hole, and it is filled in with whatever the caller typed, every time the block is called.
EV3 movement blocks count wheel turns, and nobody measures a table in wheel turns. One turn of a standard driving wheel carries the robot about 17.5 cm, so driving 50 cm means asking for 50 ÷ 17.5 rotations. Doing that sum in your head, at every movement block, all program long, is how mistakes get in.
Put the sum inside a My Block once and the whole program can be written in centimetres. Change the two numbers below and watch where they end up.
These two numbers are the whole interface. Everything below is what the definition does with them.
what you write in the program
drive (50) cm at (75) % :: myblocks
the definition — (cm) and (speed) are names, not values
define drive (cm) cm at (speed) %
set movement speed to (speed) % :: movement
move [forward v] for ((cm) / (17.5)) [rotations v] :: movement
the same blocks, with your two numbers put in
set movement speed to (75) % :: movement
move [forward v] for ((50) / (17.5)) [rotations v] :: movement
The green division block is doing the only real work: the movement block underneath counts wheel turns, and you asked in centimetres. One turn of these wheels carries the robot 17.5 cm, so 50 cm is 50 ÷ 17.5 = 2.86 turns.
Set the distance to 17.5, 35 or 70 and the part turn disappears — those are whole numbers of wheel turns. Every other distance leaves a fraction, which is exactly why the division belongs inside the My Block and not in your head.
Two inputs, and the definition is three blocks. Note what has actually been gained: not fewer blocks — the same blocks run either way — but a program you can check against a ruler. drive (50) cm at (75) % is either right or wrong about the table, and you can tell which without running it.
Typing a fixed number inside the definition instead of using the input is the classic slip — the block then ignores whatever it is given and always drives the same distance:
define drive (cm) cm at (speed) %
set movement speed to (speed) % :: movement
move [forward v] for ((50) / (17.5)) [rotations v] :: movement
That block takes a distance and throws it away. It will pass every test you run at 50 cm.
Here are those two My Blocks and a 100 × 100 cm mat. Drag blocks into the script, set the numbers, and press Run — the base always starts in the left-hand corner facing up the mat. Say where you think it will finish before you press it; the ruler is there to settle the argument.
Two My Blocks, a 100 × 100 cm mat and a ruler. Drag blocks into the script — or press one to add it — set the numbers, then Run and see whether the base ends up where you said it would.
my blocks — drag or press
the script — 0 / 8 blocks
Empty. Drag a block in from above, or press one.
Nothing to run yet. A square is four drives and four turns — try predicting the distance before you press Run.
Eight blocks is enough for a square with 40 cm sides, and not enough for anything you cannot picture. If a shape needs more than that, it wants a repeat (4) around it — which is the next thing a My Block usually grows into.
The Gyro Sensor gives an accurate turn, and it costs five blocks every time: reset the angle, start turning, wait until the reading is a few degrees short of the target, stop. Those five blocks are about the sensor. What the program wants to say is turn 90.
define turn (degrees)
[2 v] reset angle :: sensors
start moving [right: 30 v] :: movement
wait until <([2 v] angle :: sensors) > ((degrees) - (4))>
stop moving :: movement
The − 4 is the overshoot allowance from the Gyro Sensor module: the robot carries on turning for a moment after the motors are told to stop, so the block asks for less than it wants and lets it coast in. Written here, it is decided once. Written out at every corner, it is eleven chances to forget it.
Now the input earns its keep — because the shape a robot draws is decided entirely by that one number. A closed shape turns through 360° in total, so a shape with n corners turns 360 ÷ n at each one.
the whole program
when program starts :: events hat
repeat (4)
  move [forward v] for (2) [rotations v] :: movement
  turn (90) :: myblocks
end
what turn is, once
define turn (degrees)
[2 v] reset angle :: sensors
start moving [right: 30] :: movement
wait until <([2 v] angle :: sensors) > ((degrees) - (4))>
stop moving :: movement
Nothing in the program mentions the gyro. It is all inside turn, which is the point: the sensor is an implementation detail of turning, and the program should be about the shape.
Same definition, same drive block, same length of side. The only edit between a triangle and a pentagon is turn (120) :: myblocks becoming turn (72) :: myblocks. That is what a well-chosen input does: it turns a program that draws one shape into a program that draws shapes.
The same block also turns left, if you let it. Give the definition an if … then … else and a negative input means anticlockwise:
define turn (degrees)
[2 v] reset angle :: sensors
if <(degrees) > (0)> then
  start moving [right: 30 v] :: movement
  wait until <([2 v] angle :: sensors) > ((degrees) - (4))>
else
  start moving [left: 30 v] :: movement
  wait until <([2 v] angle :: sensors) < ((degrees) + (4))>
end
stop moving :: movement
One block, two directions, and every program that uses it gets the left turn for free the moment this definition is edited.
The signal is repetition: the same sequence appearing in more than one place. That is the moment to name it. Making a My Block for something used once adds a layer without adding clarity.
The second signal is a unit. If the blocks convert between what you think in (centimetres, degrees, seconds) and what the hardware counts (rotations, sensor readings), that conversion is worth a name — it is the thing you will otherwise get wrong.
Say this back before moving on: “Small blocks that work, then bigger blocks made of them.”
Five electronic parts — the most in the course. Find them all, then work the gripper by hand and find the switch that tells it when it has closed.
| Part | What it is doing here |
|---|---|
| EV3 Intelligent Brick | The base, and the counterweight for an arm that reaches out in front. |
| Large Motor ×2 — the drive | A movement pair. The arm has to arrive in the same place every time. |
| Large Motor — the shoulder | Raises and lowers the arm. Large because it lifts the arm, the gripper and whatever is in it, at the worst possible leverage. |
| Medium Motor — the gripper | Opens and closes. Medium because gripping is quick and precise rather than heavy. |
| Touch Sensor — inside the gripper | Closes when something is properly held. This is what lets close grip end in a known state rather than a hoped-for one. |
Four motors is all four ports. There is no spare, so a motor in the wrong port cannot simply be moved elsewhere — check them against the table below before you power up, because unplugging to swap with the arm raised is how models get dropped.
Sensors go in ports 1, 2, 3, 4. Motors go in ports A, B, C, D. They are not interchangeable, and nothing will tell you politely if you swap them.
| Part | Port | Why this one |
|---|---|---|
| Shoulder (Large) | A | The arm, on the first motor port as always. |
| Left drive (Large) | B | The movement pair. |
| Right drive (Large) | C | The other half. |
| Gripper (Medium) | D | The last port, and the only one left. |
| Grip switch (Touch) | 1 | Touch stays on 1 across the course. |
Check your own build now:
Two routes, and either is fine. USB is the reliable one and the one to fall back on when a room’s Bluetooth is busy; Bluetooth leaves the robot free to move, which some models need.
Do these in order. Naming the Brick after you go looking for it in the list is how groups end up driving each other’s robots.
EV3 until somebody changes it.EV3.The two failures, every class, every time. The Brick has gone to sleep while you were building — press the centre button to wake it. Or you have paired with the group at the next table, which is why the name matters.
The long version, including Port View and how to read the port tiles, is in the Brick & Bluetooth guide.
Bluetooth — the arm drives and reaches. With four motor cables already on the Brick, a USB lead is one more thing to catch on the shoulder as it swings.
Stuck? The long version, with a photograph of every screen, is in the Brick & Bluetooth guide.
One change at a time. Predict, then run, then look.
arm down from 120 to 150. One edit, in the bottom layer, and both pick up and put down change. Count how many places you did not have to visit.arm up from the end of pick up. It still “works” — and then the next thing that calls it drives away with the arm down. This is why blocks must leave the machine tidy.arm to carry — a middle height for driving with a load. Then use it inside pick up. New capability, added at the bottom, available everywhere above.fetch and deliver (distance) so the same job works at different ranges. Lesson 2 meeting Lesson 16.fetch and deliver two times in the main program. If your blocks leave the machine tidy, this simply works — and if it does not, you have found the block that lies about its finishing state.Test the bottom layer until it is boring. Everything above it is then easy.
Four lessons of structure — fusion, filtering, stored routines, layered blocks. The next two are about arithmetic on values, which is the part of robotics that looks like maths and pays for itself immediately.
Your arm moves to fixed positions: 120 degrees, 3 rotations. A machine that has to aim cannot work that way — the angle depends on where the target is, and that is not known when the program is written.
Turning “the target is 40 cm away” into “elevate the barrel 25 degrees” is a mapping between two ranges, and it is one formula you will use for the rest of your robotics life.
You can now build a machine that is organised. Next it learns to work things out.
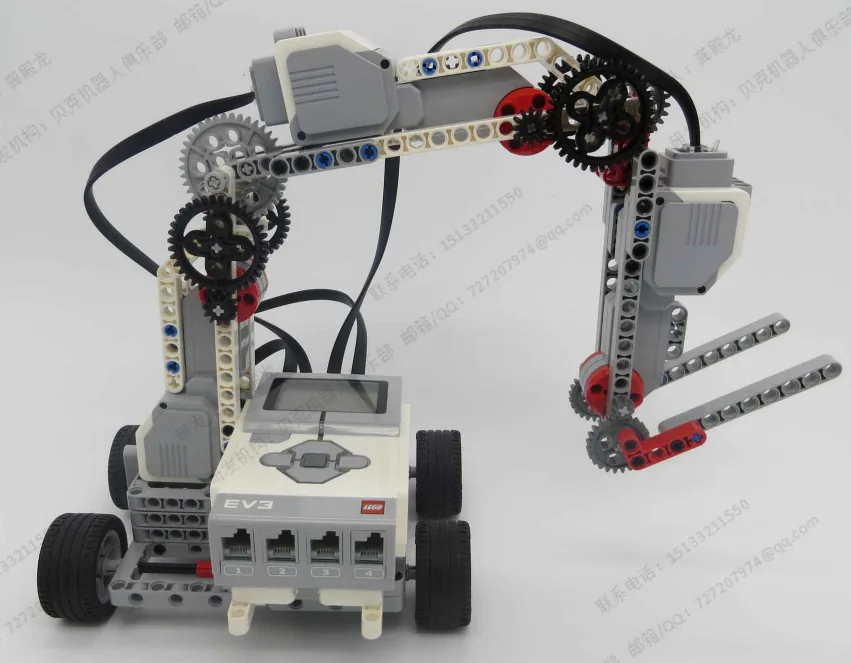
Build the model before you read any further. Everything after this is about making it do something, and none of it will make much sense with nothing on the table in front of you.
Use the viewer's own controls to zoom and turn pages. Fullscreen makes it big enough to build from.
Check the finished build against the picture before you switch anything on. A motor mounted the wrong way round is far easier to spot now than it is to debug later, when it looks like a program fault.
Build the bottom layer and test each block on its own before you build anything on top of it. A layer built on an untested layer is a debugging nightmare.
```ev3blocks Test each by calling it alone from a when program starts. Do not go on until all four work every time.
define open grip
[D v] run [counterclockwise v] for (90) [degrees v] at (40) % speed :: motors
define close grip [D v] start motor at (30) % speed :: motors wait until <[1 v] is pressed? :: sensors> [D v] stop motor :: motors
define arm down [A v] run [counterclockwise v] for (120) [degrees v] at (30) % speed :: motors
define arm up [A v] run [clockwise v] for (120) [degrees v] at (30) % speed :: motors
> ** `close grip` ends when the switch says so, not after a fixed amount. ** That is what makes its finishing state *known* — Lesson 29 of Level 2, earning its keep in a completely different setting.

### Step 2 — the middle layer

```ev3blocks No port appears here. If you find yourself typing `[D v]` in this layer, the block you need does not exist in the layer below yet.
define pick up
open grip :: custom
arm down :: custom
close grip :: custom
arm up :: custom

define put down
arm down :: custom
open grip :: custom
arm up :: custom
define fetch and deliver
move [forward v] for (3) [rotations v] at (40) % speed :: movement
pick up :: custom
move [backward v] for (3) [rotations v] at (40) % speed :: movement
turn [right v] for (0.5) [rotations v] at (30) % speed :: movement
put down :: custom

when program starts :: events hat
set movement motors to [B v] and [C v] :: movement
write [READY] at line (1) :: display
fetch and deliver :: custom
play sound [Communication / Goodbye v] until done :: sound
pick up almost automatically. Four untested ones make a broken pick up with four possible causes.fetch and deliver: does it mention a port? It should not.What success looks like: the arm drives forward, picks an object up, reverses, turns and puts it down — from a program you can read in one breath.
If
pick upmisses the object, the fault is almost always in one parts block, not in the composition. Test the four separately again — that is what the layering is for.
Work through them in order — each is harder than the last. The extra challenge comes after all three, and it is meant to make you plan before you build.
Change one thing in the bottom layer. Make the arm travel further in "arm down" — and note that both "pick up" and "put down" change with it, from one edit. Count the places you did not have to visit.
Add a carry height. Add a bottom-layer block "arm to carry" — a middle position for driving with a load — and use it at the end of "pick up". New capability added at the bottom, immediately available to everything above.
Break a layer deliberately, then explain it. Remove "arm up" from the end of "pick up". The block still appears to work. Now call "pick up" followed by a drive. Watch what happens, then write one sentence on why every block must leave the machine in the same state it promises.
Sort three objects into two places, with a main program of five lines or fewer. The arm must collect three objects from a pick-up area and place them in one of two drop-off areas depending on something you can detect — size, colour, or where they were. Three rules, and they are the mission: 1. Three layers. The bottom layer is the only place a motor port appears. The middle layer never mentions a port. The top layer only calls the middle. 2. Every block does one job and leaves the arm up and the gripper open. Prove it by calling your top-level block twice in a row — if it works, your blocks are honest. 3. Somebody who has not seen your program must be able to read the main stack and describe what the machine does. Build and test the bottom layer completely before writing a single middle-layer block. That discipline is the actual skill this lesson teaches, and skipping it is how a four-motor machine becomes undebuggable.