Challenge 1
Teach it three positions in a row. Move it, press, move it, press, move it, press. Each new teaching replaces the last. Say out loud what you would need in order to keep all three.
Quick Learn — the model, the instructions, the program and the challenges. The theory is in Full Lesson.
EV3 Robotics›Level 3 · Advanced›Lesson 26
Level 3 · Lesson 26 · EV3-L03-2660 minutes · Ages 9–16 · Model: EV3 Phone Stand Holder
The Phone Stand: a cradle on an arm that raises and lowers, and a head that tilts — two motors, and a phone that has to end up at the angle you find comfortable.
There is no correct angle. It depends on your desk, your chair, your height and what you are doing. Nothing the programmer knows can supply it, which is why this model cannot be finished by typing a number.
By the end of the lesson you will move the stand where you want it, press a button, and it will remember — and return there afterwards, however far it has been moved in between.
An Anglepoise lamp holds any position you put it in. Its springs balance the weight of the arm at every angle, so the lamp neither falls nor springs back — George Carwardine designed it in 1932 from vehicle-suspension springs, and the point was that a person could put the light exactly where they wanted it without adjusting a single knob.
A car seat with memory does the same thing electrically. You adjust it until you are comfortable, press 1, and from then on the seat can return there. The car has no idea what a comfortable seat is — it only knows the numbers you put it at.
Because the manufacturer cannot know the answer. There is no correct seat position, mirror angle or lamp height — there is only the position this particular person wants, and the only way to find it is to let them set it.
So the machine provides a way to be told: put it where you want, press the button, and the machine records where it is. That is a genuinely different relationship from being programmed.
A stand with a typed angle works for the person who typed it and nobody else. Rebuild it slightly and it works for nobody — which is precisely where your lift was left at the end of the last lesson.
When only the user knows the right answer, build a way for them to tell you.
A motor’s encoder has been an output check all course — how far did it go? Today it is an input: wherever the user has put the arm, the encoder already knows, and all the machine has to do is write it down.
// TEACH
wait until <[1 v] is pressed? :: sensors>
set [taught height v] to ([B v] degrees counted) :: variables
set [taught tilt v] to ([A v] degrees counted) :: variables
play sound [Mechanical / Blip 4 v] :: sound
// GO BACK
set [error v] to ((taught height) - ([B v] degrees counted)) :: variables
if <([abs v] of (error)) > (10)> then
  [B v] start motor at ((error) * (0.5)) % speed :: motors
else
  [B v] stop motor :: motors
end
| Method | How | Watch out for |
|---|---|---|
| By hand | Motors off. The user physically moves the arm; the encoder follows. | The motor must be off, not holding position — a motor holding will fight the user, and forcing it can strip the gearing. |
| By buttons | Brick Up and Down drive the motor while held; the user watches and stops where they like. | Slower, but works on a geared model too stiff to move by hand — which most are. |
A taught position lives only as long as the program runs. Press stop and the variable is gone; the next run starts knowing nothing. That is a real limitation of the Brick, and the honest answer is to make teaching so quick that re-teaching is no hardship — which is also why a car seat has a button rather than a menu.
| Calibration (Lesson 12) | Teaching (today) | |
|---|---|---|
| Measures | The world — how bright is this room? | The user — where do you want it? |
| Right answer | Exists, and the machine can find it alone. | Does not exist without a person. |
| Replaces | A typed threshold. | A typed position. |
Every EV3 motor contains a sensor that counts how far it has actually turned. That means a motor is not only an output — you can ask it where it is, and the answer describes what really happened rather than what you asked for.
| Block | What it does |
|---|---|
([A v] degrees counted :: sensors) | Reports how far this motor has actually turned since the count was last reset, in degrees. |
[A v] reset degrees counted :: motors | Sets the count back to zero, making right here the new reference point. |
([A v] speed :: sensors) | Reports how fast the motor is turning right now, as a percentage. A motor that is being driven but reads zero is a motor that is stuck. |
Those two are not always the same. Here are two identical motors, running the same program, with only their mechanisms different.
the same program, on two identical motors
Nothing on the Brick announces a stall. The only evidence is that the counter stopped changing while the motor was still being told to turn.
Nothing on the Brick announces the jam. The motor is still being driven, the program is still sitting on the same block, and the only trace of the problem anywhere is a counter that has stopped climbing. Comparing what you asked for with what was counted is how a robot notices — which is the whole of stall detection.
When the Brick powers on, the count is simply whatever it happens to be. It is not a position on the machine — it becomes one only when you tie it to something physical.
That is what reset degrees counted is for, and it is not just a tidy-up block for the top of a program. Where you put it decides what zero means, so putting it part-way through — after the mechanism has been driven somewhere known — is the normal way to use it, not an abuse of it.
A conveyor has no idea where it is. Give it a touch sensor at one end and it can find out: drive it until the sensor is pressed, and it is now at a place you can name. Only then reset the count, and that end becomes 0.
when program starts :: events hat
[A v] start motor [counterclockwise v] :: motors
[1 v] wait until [pressed v] :: sensors
[A v] stop motor :: motors
[A v] reset degrees counted :: motors
The order is the whole point. Reset before the sensor is pressed and you have zeroed a random spot; reset after it, and every later reading means “how far from home”. This is called homing, and it is why a printer rattles its head to one side when you switch it on.
Drive towards home gently. The mechanism is deliberately being run into its own end stop, so a slow speed saves the gears — and the touch sensor is what stops it, which means it stops in the same place every time regardless of where it started.
Home is often a corner, and a corner is an awkward place to measure from. Say the conveyor carries a chute that dispenses bricks, and you would rather describe its position as left and right of the middle. Then home once, drive the known distance to the middle, and reset again there:
when program starts :: events hat
[A v] start motor [counterclockwise v] :: motors
[1 v] wait until [pressed v] :: sensors
[A v] stop motor :: motors
[A v] reset degrees counted :: motors
[A v] run [clockwise v] for (900) [degrees v] :: motors
[A v] reset degrees counted :: motors
Now the middle is 0. Moving right counts up, moving left counts down past zero into negative numbers — the count is perfectly happy to go negative — and “go back to the middle” becomes the simplest instruction in the program: drive until the count reaches 0.
Both resets earn their place. The first one turns a meaningless number into a distance from a real, repeatable place. The second one moves zero to where the maths is easiest. A reset in the middle of a program is only a mistake when the mechanism is somewhere you cannot name.
Because the count is in degrees, and a wheel of known size travels a known distance per turn, the reading can be converted into how far the robot has actually driven. That is how a robot reports a distance in centimetres rather than in rotations — and it is why changing the wheels changes the answer.
This is how a printer knows the paper jammed, how a car window stops when it meets your hand, and how a robot arm knows it has reached its limit. A machine that can only give orders is fragile; one that can check what happened can recover.
Long before there were computers, people had exactly this problem. A shepherd counting sheep through a gate, a trader counting sacks of grain, a builder counting days — none of them can hold the number in their head while they get on with the work. So they scratched a mark on a wall, cut a notch in a stick, or wrote a number on a piece of paper. The number lived outside the person, in a place they had agreed on, and they could go back to it, read it, and change it.
Better still, once the number is written down somebody else can use it. Watch these two: one of them counts and writes, the other never sees a single animal and simply reads the wall.
Notice what never happens: Ben never asks Abby. He does not need to — the number is not in her head, it is on the wall, and the wall is there for anyone who needs it.
Neither Abby nor Ben is holding the number — the wall is. And notice what never happens: Ben does not ask Abby. He does not need to, because the count is not in her head. It is in a place they both agreed on, which is what makes it useful to more than one of them.
That is all a variable is. The robot cannot hold a number in its head either, so you give it a wall of its own, write a name at the top so everyone knows which wall is which — score, count, degree_turn — and the program can read what is on it and write something new. One part of the program writes; another part reads. Exactly Abby and Ben.
Say we are counting rotations of a motor. Before we start we write 0 on the paper. Every time the motor completes a turn we cross out what is there and write one more: 0 becomes 1, then 2, then 3. That is change — it has to read the old number to work out the new one.
set is the other thing you can do, and it is completely different: rub the whole paper out and write the number you want. It does not care what was there. Press the buttons and watch what happens to the crossings-out.
The paper starts blank, so we write 0 on it. That is what a variable is: a place to keep a number while the robot works.
| Block | What it does |
|---|---|
set [count v] to (0) | Puts a value in, replacing whatever was there. |
change [count v] by (1) | Adds to what is already there. |
(count) | Reports the current value, for use in a comparison or on the display. |
set replaces; change adds. Counting things needs change. Starting a count needs set. Both programs below have both blocks — the only difference is whether the set block is inside the loop or above it.
set before the loop
set inside it
Both programs contain both blocks. Only the position of set [count] to 0 is different.
The count on the right is not broken; it is being told to start again on every pass. Each time round the loop it is wiped back to zero and then changed by one, so the honest answer is always 1 — while the motor cheerfully turns four times. A counter stuck at 1 almost always means a set block that has slipped inside the loop.
EV3 Classroom tells you what a block does by its shape, and once you have noticed that, a whole set of questions answers itself:
So when a slot is oval, any oval fits it — and it does not matter in the least where that number came from. You can take the motor’s own A degrees counted and keep it in a variable you named degree_turn, then compare that with a number later. Pick an oval below and watch the same one drop into all three kinds of slot.
pick an oval
the same oval fits all three
Every one of those slots is oval-shaped, and A degrees counted is an oval — so it drops in. Nothing about where the number came from matters.
This is what makes a variable more than a counter. A sensor reading is true only at the instant you read it; copying it into a variable freezes it, so the robot can compare where it is now against where it was when something happened:
when program starts :: events hat
[A v] reset degrees counted :: motors
set [degree_turn v] to ([A v] degrees counted :: sensors)
start moving [right: 30] :: movement
wait until <(([A v] degrees counted :: sensors) - (degree_turn)) > (400)>
stop moving :: movement
Read the condition aloud: how far the motor has gone now, minus where it was when we started, is more than 400. Both are ovals, so both can go into a subtraction, and the subtraction is an oval too — which is why it can go into a comparison. Ovals nest inside ovals as deep as you need.
A variable keeps its value after the program ends. Run the program again without setting it back and the second run begins where the first left off — the count starts at 14, the robot thinks it has already done the job. Every variable a program changes must be set to its starting value at the top.
A variable is the difference between a machine that repeats a fixed routine and one that responds to how things have gone — counting parts, tracking a score, remembering where it started.
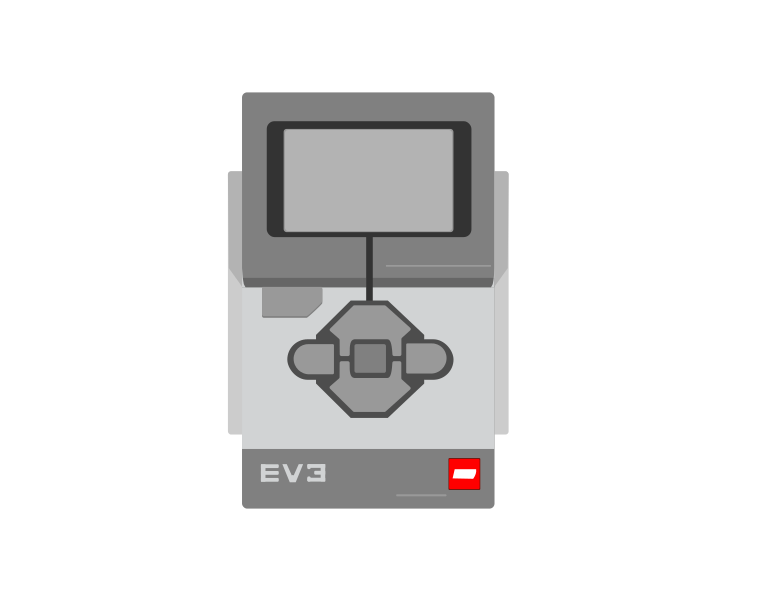
The Brick has five buttons of its own — up, down, left, right and centre. They need no sensor, no cable and no port, which makes them the easiest way to let a person tell the robot to do something.
| Block | What it does |
|---|---|
when [center v] button [pressed v] :: events hat | Starts a whole stack when that button is pressed. |
wait until <is [center v] button pressed? :: sensors> | Holds an existing program until the button is pressed. |
A program sitting on a wait block looks exactly like a program that has crashed. Watch one wait — including through two presses of the wrong button.
the other way to do it
A program parked on a wait block looks identical to a crashed one. This is why the status light or a line on the screen is worth setting before you wait.
The wait is watching one button. Up and right change the (button) reading, and the program does not care. That reading is a number rather than a name: 0 for nothing, then 1 left, 2 centre, 3 right, 4 up, 5 down.
Nearly every machine has a start button that is deliberately separate from switching the power on. A robot that begins moving the instant it is powered up is hard to set down and hard to test — one that waits for a press can be positioned first.
The encoder always knows where the arm is. Teaching is just writing that number down when the user says so.
Every EV3 motor contains a sensor that counts how far it has actually turned. That means a motor is not only an output — you can ask it where it is, and the answer describes what really happened rather than what you asked for.
| Block | What it does |
|---|---|
([A v] degrees counted :: sensors) | Reports how far this motor has actually turned since the count was last reset, in degrees. |
[A v] reset degrees counted :: motors | Sets the count back to zero, making right here the new reference point. |
([A v] speed :: sensors) | Reports how fast the motor is turning right now, as a percentage. A motor that is being driven but reads zero is a motor that is stuck. |
Those two are not always the same. Here are two identical motors, running the same program, with only their mechanisms different.
the same program, on two identical motors
Nothing on the Brick announces a stall. The only evidence is that the counter stopped changing while the motor was still being told to turn.
Nothing on the Brick announces the jam. The motor is still being driven, the program is still sitting on the same block, and the only trace of the problem anywhere is a counter that has stopped climbing. Comparing what you asked for with what was counted is how a robot notices — which is the whole of stall detection.
When the Brick powers on, the count is simply whatever it happens to be. It is not a position on the machine — it becomes one only when you tie it to something physical.
That is what reset degrees counted is for, and it is not just a tidy-up block for the top of a program. Where you put it decides what zero means, so putting it part-way through — after the mechanism has been driven somewhere known — is the normal way to use it, not an abuse of it.
A conveyor has no idea where it is. Give it a touch sensor at one end and it can find out: drive it until the sensor is pressed, and it is now at a place you can name. Only then reset the count, and that end becomes 0.
when program starts :: events hat
[A v] start motor [counterclockwise v] :: motors
[1 v] wait until [pressed v] :: sensors
[A v] stop motor :: motors
[A v] reset degrees counted :: motors
The order is the whole point. Reset before the sensor is pressed and you have zeroed a random spot; reset after it, and every later reading means “how far from home”. This is called homing, and it is why a printer rattles its head to one side when you switch it on.
Drive towards home gently. The mechanism is deliberately being run into its own end stop, so a slow speed saves the gears — and the touch sensor is what stops it, which means it stops in the same place every time regardless of where it started.
Home is often a corner, and a corner is an awkward place to measure from. Say the conveyor carries a chute that dispenses bricks, and you would rather describe its position as left and right of the middle. Then home once, drive the known distance to the middle, and reset again there:
when program starts :: events hat
[A v] start motor [counterclockwise v] :: motors
[1 v] wait until [pressed v] :: sensors
[A v] stop motor :: motors
[A v] reset degrees counted :: motors
[A v] run [clockwise v] for (900) [degrees v] :: motors
[A v] reset degrees counted :: motors
Now the middle is 0. Moving right counts up, moving left counts down past zero into negative numbers — the count is perfectly happy to go negative — and “go back to the middle” becomes the simplest instruction in the program: drive until the count reaches 0.
Both resets earn their place. The first one turns a meaningless number into a distance from a real, repeatable place. The second one moves zero to where the maths is easiest. A reset in the middle of a program is only a mistake when the mechanism is somewhere you cannot name.
Because the count is in degrees, and a wheel of known size travels a known distance per turn, the reading can be converted into how far the robot has actually driven. That is how a robot reports a distance in centimetres rather than in rotations — and it is why changing the wheels changes the answer.
This is how a printer knows the paper jammed, how a car window stops when it meets your hand, and how a robot arm knows it has reached its limit. A machine that can only give orders is fragile; one that can check what happened can recover.
Say this back before moving on: “Put it where you want it, then tell me.”
Try to move each axis by hand with the Brick switched off. Does it move easily, or is it geared too stiff? The answer decides which teaching method you can use.
| Part | What it is doing here |
|---|---|
| EV3 Intelligent Brick | The base and the counterweight. Its screen shows both taught positions, which turns two invisible variables into something the user can trust. |
| Large Motor — the height | Raises the arm and holds a phone up against gravity. Large because it is carrying weight at a distance. |
| Medium Motor — the tilt | Angles the cradle. Medium because tilt is a small, precise adjustment. |
| Touch Sensor — teach / go | One button doing two jobs, decided by how the program is currently behaving — the mode idea from Lesson 7 and the cycling from Lesson 21. |
| The arm and cradle (not electronic) | Must hold a phone without the arm sagging. If it sags after being taught, the taught position is not the position it settles at — and that will look like a program fault. |
Test with the phone in place, not empty. A loaded arm droops further than an empty one, so a position taught empty is wrong once the phone goes in. Teach it as it will be used.
Sensors go in ports 1, 2, 3, 4. Motors go in ports A, B, C, D. They are not interchangeable, and nothing will tell you politely if you swap them.
| Part | Port | Why this one |
|---|---|---|
| Tilt (Medium) | A | The fine adjustment, first port. |
| Height (Large) | B | The load-bearing axis. |
| Teach / go (Touch) | 1 | Touch stays on 1 across the course. |
Check your own build now:
Two routes, and either is fine. USB is the reliable one and the one to fall back on when a room’s Bluetooth is busy; Bluetooth leaves the robot free to move, which some models need.
Do these in order. Naming the Brick after you go looking for it in the list is how groups end up driving each other’s robots.
EV3 until somebody changes it.EV3.The two failures, every class, every time. The Brick has gone to sleep while you were building — press the centre button to wake it. Or you have paired with the group at the next table, which is why the name matters.
The long version, including Port View and how to read the port tiles, is in the Brick & Bluetooth guide.
Download it and then unplug. Like Lessons 20 and 21 this is a machine meant to be used, not demonstrated — and a phone stand tethered to a laptop is not a phone stand.
Stuck? The long version, with a photograph of every screen, is in the Brick & Bluetooth guide.
One change at a time. Predict, then run, then look.
Let the user set it, then write it down. A machine that must be told is not a worse machine — it is an honest one.
Your stand waits to be told where to go. Every sensing machine you have built has waited too — for a hand, a wall, a ticket, an obstacle to arrive in front of it.
But something that has not arrived yet is not necessarily absent. It might be just out of view, or to one side, and a machine that only ever looks straight ahead will never know.
A machine can go and look instead of waiting to be found. Sweeping a sensor across an area in a deliberate pattern, and stopping when something turns up, is the next lesson — and it is how radar, sonar and every scanning instrument works.
Waiting finds what comes to you. Searching finds what does not.
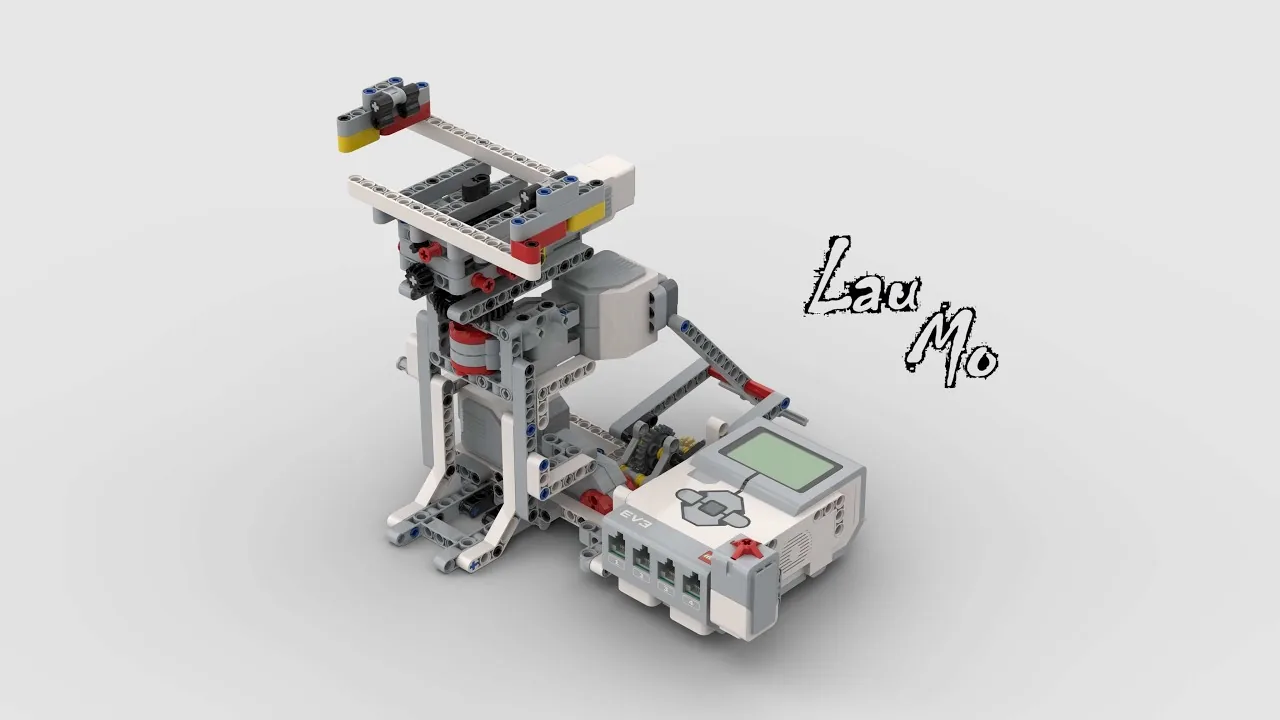
Build the model before you read any further. Everything after this is about making it do something, and none of it will make much sense with nothing on the table in front of you.
Use the viewer's own controls to zoom and turn pages. Fullscreen makes it big enough to build from.
The same build on Google Drive — sometimes a video, sometimes a scan:
Use the viewer's own controls to zoom and turn pages. Fullscreen makes it big enough to build from.
Check the finished build against the picture before you switch anything on. A motor mounted the wrong way round is far easier to spot now than it is to debug later, when it looks like a program fault.
Work through them in order — each is harder than the last. The extra challenge comes after all three, and it is meant to make you plan before you build.
Teach it three positions in a row. Move it, press, move it, press, move it, press. Each new teaching replaces the last. Say out loud what you would need in order to keep all three.
Teach it empty, then load it. Teach a position with no phone in the cradle, then put the phone in. Watch the arm sag and the loop pull it back. Now teach it loaded and compare. Write one sentence on why you teach a machine in the state it will be used.
Add button teaching. In the loose mode, let the Brick Up and Down buttons drive the height motor while held, so a stiffly geared model can be positioned without forcing anything by hand. Then say which of the two teaching methods you would fit to a real product, and why.
Build a stand with two remembered positions and an honest interface. The stand must hold two taught positions — say reading and filming — chosen with the Brick Left and Right buttons, with one button to teach and one to hold. Requirements: - the motors are genuinely OFF while being positioned, never fighting the user - both taught positions visible on the screen, so "not taught yet" and "forgot" look different - it returns to a taught position after being pushed away - it is taught with the phone in place, not empty Then hand it to somebody who has not seen it, with no instructions, and ask them to set it up the way they like. Watch without helping. Every hesitation is something the screen should have said. Finally: restart the program and note that everything is forgotten. Write two sentences on what the Brick would need to keep it, and why a car seat can and this cannot.
Three modes on one button: set it up, remember it, go back to it. The button cycles between them exactly as the fairground ride did in Lesson 21.
when program starts :: events hat
[A v] reset degrees counted :: motors
[B v] reset degrees counted :: motors
set [taught height v] to (0) :: variables
set [taught tilt v] to (0) :: variables
set [taught v] to (0) :: variables
set [mode v] to (1) :: variables
clear display :: display

// ---- the one button, cycling through three modes ----
when program starts :: events hat
forever
  wait until <[1 v] is pressed? :: sensors>
  wait until <not <[1 v] is pressed? :: sensors>> :: control

  if <(mode) = (1)> then
    // was SET UP -> record it
    set [taught height v] to ([B v] degrees counted) :: variables
    set [taught tilt v] to ([A v] degrees counted) :: variables
    set [taught v] to (1) :: variables
    play sound [Mechanical / Blip 4 v] :: sound
    set [mode v] to (2) :: variables
  else
    // was HOLDING -> release so it can be moved again
    set [mode v] to (1) :: variables
    play sound [Mechanical / Blip 1 v] :: sound
  end
end

// ---- what the machine does in each mode ----
when program starts :: events hat
forever
  if <(mode) = (1)> then
    [A v] stop motor :: motors
    [B v] stop motor :: motors
    write [MOVE ME, THEN PRESS] at line (1) :: display
    set status light to [orange v] :: display
  end

  if <(mode) = (2)> then
    write [HOLDING] at line (1) :: display
    set status light to [green v] :: display

    set [h error v] to ((taught height) - ([B v] degrees counted)) :: variables
    if <([abs v] of (h error)) > (10)> then
      [B v] start motor at ((h error) * (0.5)) % speed :: motors
    else
      [B v] stop motor :: motors
    end

    set [t error v] to ((taught tilt) - ([A v] degrees counted)) :: variables
    if <([abs v] of (t error)) > (10)> then
      [A v] start motor at ((t error) * (0.5)) % speed :: motors
    else
      [A v] stop motor :: motors
    end
  end

  write (taught height) at line (3) :: display
  write (taught tilt) at line (5) :: display
endWhat success looks like: move the stand by hand to a comfortable angle, press once, and it holds there — push it away and it comes back. Press again and it goes soft so you can reposition it.
If it fights you in mode 1, a motor is still being commanded — look for a
start motorthat runs whatever the mode is. If it drifts in mode 2, the deadband is bigger than the sag; tighten it or add a stiffer arm.