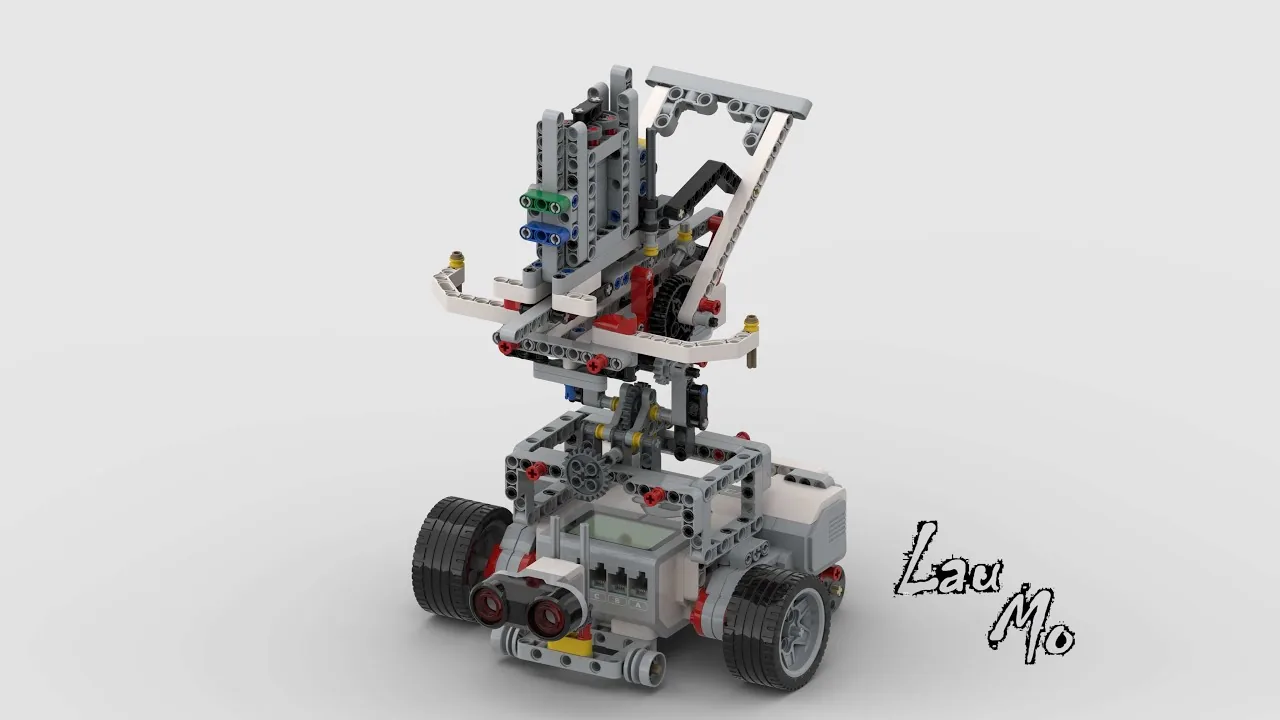
The Crossbow Tank: a tracked vehicle with a repeating crossbow on top and an Ultrasonic Sensor looking straight ahead.
Every sensing model you have built has been passive. The gate waited for a passenger. The chicken waited for something in front of it. The flower waited for a hand. If nothing came, nothing happened.
By the end of the lesson your tank will sweep an area looking for a target, stop when it finds one, and only then commit — and you will know how fast it can sweep before it starts missing things.
In the real world 5 min
Where you have seen it
A radar antenna turns because its beam is narrow. It cannot see everywhere at once, so it looks at one direction at a time and sweeps through them all — and the display you have seen in films, with a line going round and blips lighting up, is literally a picture of where it has just looked.
The rotation speed is a genuine engineering compromise. Turn slowly and you get a good look at each direction but a stale picture of the whole sky. Turn quickly and the picture is fresh but each direction gets less attention.
Why it is built that way
Anything with a narrow field of view has this problem. A lighthouse sweeps. A security camera pans. A bat sweeps its sonar by turning its head. A supermarket barcode scanner throws its laser through a fan of angles because it cannot know which way you are holding the packet.
A scanning machine trades “seeing everything badly” for “seeing one thing at a time well” — and the sweep rate is where that trade is set.
What would go wrong without it
A sensor that only looks one way finds only what happens to be in front of it. Everything to the side might as well not exist — and the machine has no way to know the difference between “nothing there” and “not looking”.
If you can only look one way at a time, look everywhere in turn — and know how fast you may do it.
The main concept — a deliberate sweep 6 min
A search is a loop that moves and looks at the same time, and leaves the loop the moment it finds something. Two numbers define it: how far it sweeps, and how fast.
// sweep right until something is found or the limit is reached
turn [right v] at (15) % speed :: movement
wait until <<([4 v] distance in cm) < (50)> or <([abs v] of ([B v] degrees counted)) > (400)>> :: control
stop moving :: movement
Two ways out: found something, or ran out of sweep. A search must always have both, or it becomes a machine that turns for ever.
Every search needs a give-up condition. Without the second half of that or, a tank in an empty room turns until its battery dies. “I looked everywhere and found nothing” is a legitimate and necessary outcome.
How fast may it sweep?
This is the real question, and it is the same one Level 2’s minesweeper asked. The sensor is read between blocks, not continuously. Sweep too fast and the target passes through the beam between two readings — the machine looked, and looked again, and the target was there in the gap.
Sweep speed
Finds things?
Cost
Very slow (5%)
Reliably.
Takes an age to cover the area.
Moderate (15–25%)
Usually. Start here.
Reasonable.
Fast (60%)
Misses things — and worse, misses them sometimes.
Covers ground quickly and cannot be trusted, which is the worst combination.
An intermittent miss is far worse than a consistent one. A machine that never finds anything is obviously broken; one that finds things four times in five looks like it works, and will be trusted.
Search patterns
Pattern
What it does
Use when
Sweep and return
Left to right, then back. Simple and complete.
The target could be anywhere in the arc.
Expanding sweep
Small arc first, widening. Finds nearby things fastest.
The target is probably close to where you are pointing.
Full rotation
All the way round, once.
No idea at all which way to look.
Stop searching before you act
Once something is found, the search must end. A machine that keeps sweeping while it aims is aiming at where the target was a moment ago — and after Lesson 22 you know that a committed action fired while still moving is wasted.
ComponentSensing6 min
The Ultrasonic Sensor
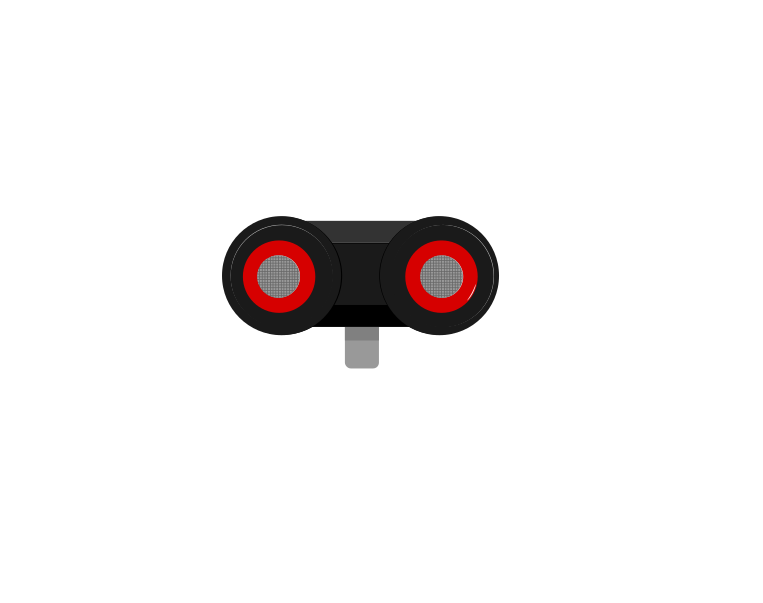
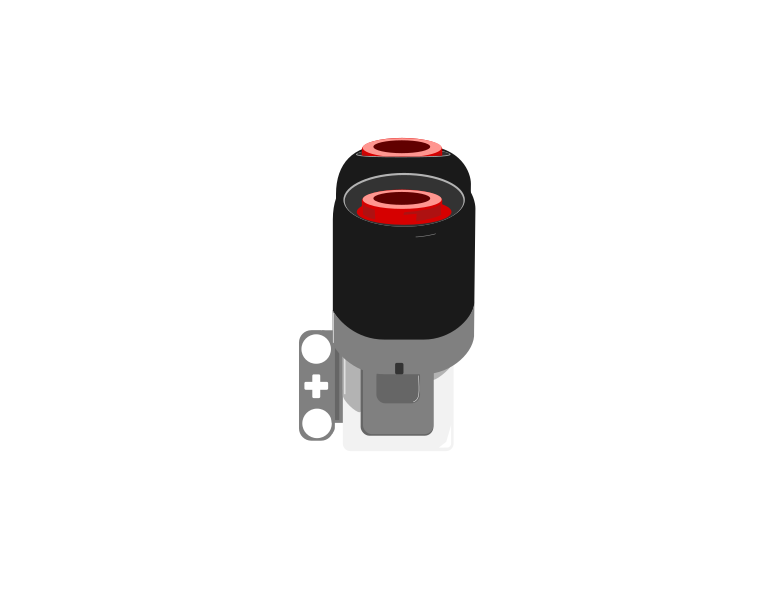
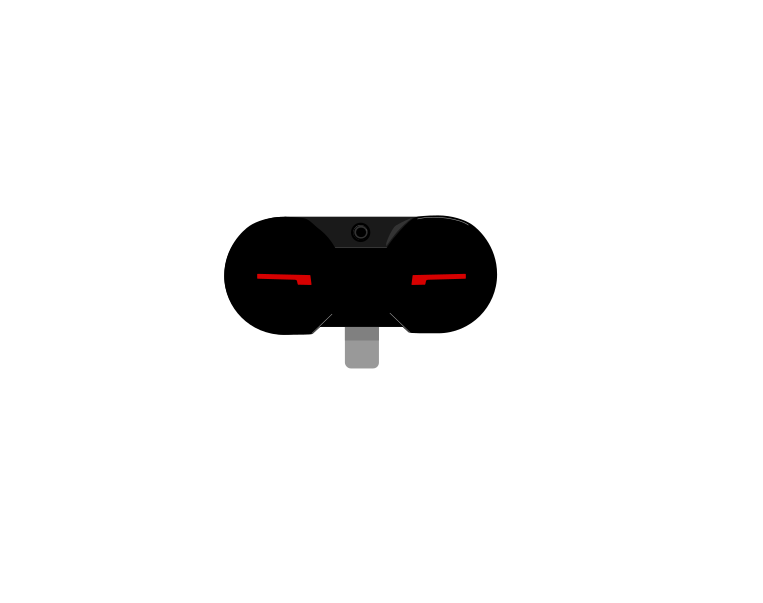
The Ultrasonic Sensor measures distance. It sends out a burst of sound too high for people to hear, listens for the echo, and works out how far away the surface is from how long the echo took — exactly how a bat finds a moth, and how a submarine uses sonar.
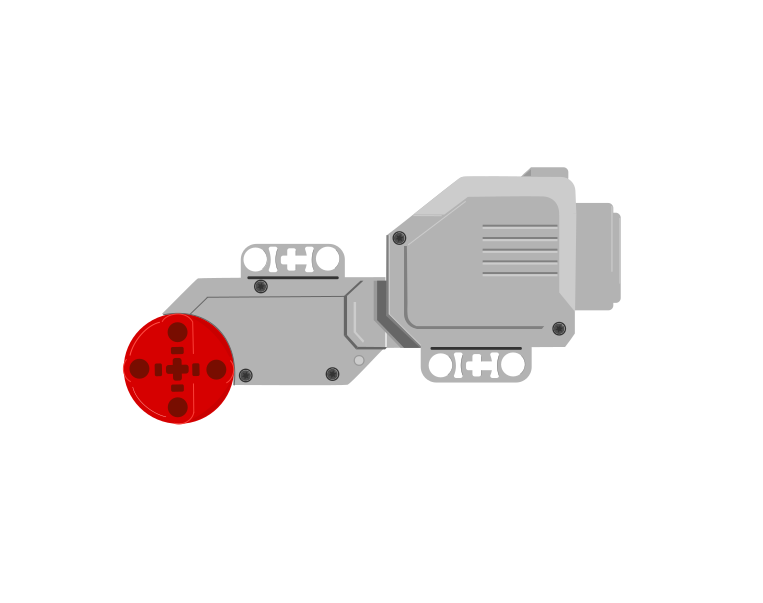
front
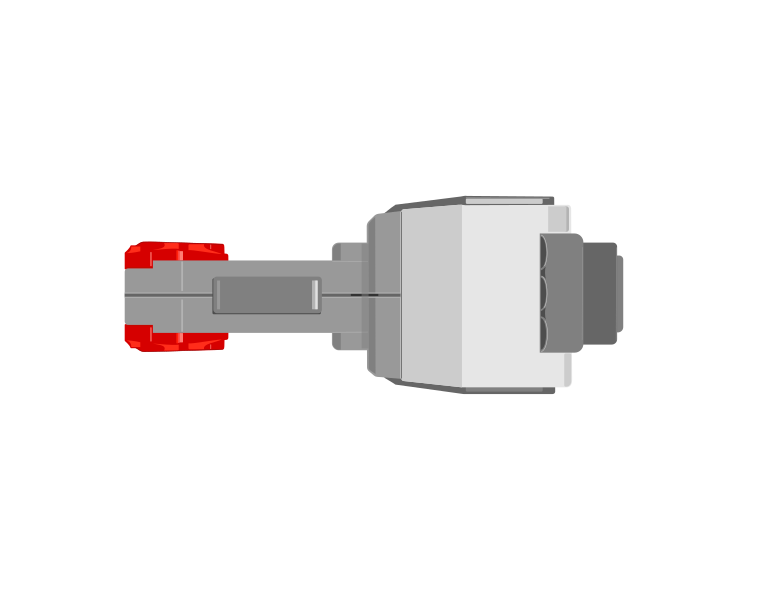
side
The two round openings on the front are the point of this sensor: one sends the burst of sound out, the other listens for the echo coming back.
Blocks reference
Block
What it does
([4 v] distance in [cm v] :: sensors)
Reports how far away the nearest thing in front of the sensor is, as a number in centimetres.
wait until <([4 v] distance in [cm v] :: sensors) < (15)>
Holds the program until something comes closer than 15 cm.
A number, not a yes or no
This is the important step up from the Touch Sensor. Touch gives you true or false; the Ultrasonic gives you a number, and the deciding is left to you. Pick a threshold below and watch where the robot ends up.
when program starts
start moving straight: 0
4 wait until distance <15cm
stop moving
60cm · reading15cm · threshold
Nothing is close. The sensor reports about 60 cm and the program waits.The robot drives forward. The sensor is sending a burst of sound and timing its echo, over and over, and the number falls.The reading has dropped past the threshold. The condition is true, so the robot stops.Try another threshold. The program is identical — only that one number is different.Finished. The threshold is yours to choose — the sensor only supplies the number.
stopped
The black line on the bar is the threshold; the blue fill is the reading. The robot stops the instant the fill crosses the line.
Three different robots, and only one number is different between them. That is what having a number rather than a yes-or-no buys you: the behaviour is tuned by editing one slot, not by rebuilding the program. It also means the sensor can never tell you it is “close” — close is a decision you make about a reading.
Why it matters
Car parking sensors, automatic doors at a shopping centre, and the sensor that stops a lift door closing on somebody all work this way. Reacting before contact is what makes a machine feel safe.
If your set has an Infrared Sensor instead
The Home/Retail EV3 set (31313) ships an Infrared Sensor and a Beacon in place of the Ultrasonic and Gyro sensors. The Infrared Sensor also measures distance, so the programs in this module work with it — but it reports a rough 0–100 proximity rather than real centimetres, and it is affected by sunlight and by dark surfaces in ways the Ultrasonic is not.
IR Sensor
Beacon
The Infrared Sensor and its Beacon, from the Home set. If your kit has these, expect proximity numbers rather than centimetres — and retune any threshold accordingly.
ComponentMotion6 min
Driving with two motors
A driving base has two Large Motors, one per wheel. You could drive them with two separate motor blocks — but they would never start at quite the same instant, and the robot would curve away. EV3 has a separate family of Movement blocks that treat the pair as a single driving base.
port B
port C
A driving base is two Large Motors, normally in ports B and C. The Movement blocks treat this pair as one machine rather than two separate motors.
Blocks reference
Block
What it does
set movement motors to [B v] and [C v] :: movement
Tells the Movement blocks which two ports are the driving wheels. Put it at the top of the program, before any movement.
move [forward v] for (2) [rotations v] :: movement
Drives both wheels together, so the robot travels in a straight line.
move for (1) [rotations v] at (75) (25) % speed :: movement
Drives the two wheels at different speeds, which makes the robot curve.
set movement speed to (50) % :: movement
Sets how fast the driving base travels from now on.
The letters must match the sockets
set movement motors to [B] and [C] is the block that decides which two motors every Movement block after it will drive. It does not look at the robot. It drives the two ports you name, whether or not there is a motor in them — so those two letters have to be the two sockets the cables are actually in.
This is the single commonest reason a driving base does nothing, and it is invisible in the program: every block is spelled correctly and the robot still will not go.
Two robots, and the very same program: drive the motors in ports B and C forward.Check the cables. The left robot's motors are in B and C — the two the block names. The right robot's are in A and B.Run it. On the left both wheels are driven and the robot goes straight. On the right only port B has a motor the block is talking to; port C is empty, and the motor in A is never mentioned.So one wheel turns and the other does not, and the robot swings round its dead wheel. Nothing failed, nothing was reported — the program drove the ports it was told to.Finished. Identical programs, identical robots — different sockets.
stopped
The yellow outline marks the two ports the block is driving. A robot only goes straight when both of them have a motor in them.
Both robots run the identical program. The left one has its motors in B and C, so both named ports have a motor and the robot drives straight. The right one is plugged into A and B: the block drives B, finds nothing in C, and never mentions the motor in A at all — so one wheel turns, one wheel sits there, and the robot swings round the dead one instead of driving.
If neither named port has a motor in it — cables in A and D, say, with the block still set to B and C — the robot does not move at all. The program runs happily to the end and the Brick reports nothing wrong, because as far as it is concerned it did exactly what it was told.
So before you look for a bug in the program, look at the cables: read the port letters off the Brick, then make the block say those two. B and C are only the usual choice, not a rule — if your build has the driving motors in A and D, set the block to A and D and everything works.
Straight, curved, and on the spot
Everything a driving base can do comes from those two speed numbers. Try each button below and watch the trail the robot leaves.
when program starts
set movement motors to B and C
move for 2rotations at 5050 % speed
50left wheel · B50right wheel · C
Equal speeds → a straight line
Both wheels are set to the same speed.Equal speeds, so the robot tracks straight — the trail is a straight line.Two rotations later it is exactly where it was pointed.Finished — it will run again in a moment.
stopped
The path is worked out from the two wheel speeds in the block, not drawn by hand — so changing the preset changes the numbers and the shape together.
Both wheels the same speed — the robot goes straight.
One wheel faster than the other — it curves towards the slower side. The bigger the difference, the tighter the curve.
One wheel forward, the other backward — it spins on the spot, which is how a robot turns in a space no wider than itself.
Notice there is no steering block anywhere in that program, and no steering part anywhere on the robot. The turn is made entirely by driving the two wheels different amounts.
when program starts :: events hat
set movement motors to [B v] and [C v] :: movement
move [forward v] for (2) [rotations v] :: movement
move for (1) [rotations v] at (50) (-50) % speed :: movement
How far is one rotation?
“Move forward 2 rotations” says nothing about the floor — it says how many times the wheels go round. How far the robot actually travels depends on how big the wheels are, and once round a standard EV3 driving wheel is about 17.5 cm.
Before doing any sums, get a feel for it. Drag the robot along and watch both scales at once — rotations on top, centimetres underneath, the same line. Land on the half marks: there is a number between 1 and 2, and it is 1.5.
Drag the robot, or use the arrow keys — it moves in half rotations. Rotations above the line, centimetres below.
1.5 rotations26.3 cm
1.5 — a half rotation past 1. Half a turn of the wheels is 8.75 cm, so halves matter.
cm=2rotations
35 ÷ 17.5 = 2. That is a number you can type straight into the block.
1 rotation = 17.5 cm. Two rotations is 35, three is 52.5.
Halves are real. 1.5 rotations is a perfectly good thing to type into the block, and it is 26.25 cm — right between the 1 and the 2 you already tried.
To go a distance you have chosen, divide by 17.5. The calculator does it, but do a few by hand first — 35 ÷ 17.5 = 2 is worth seeing.
Measure your own wheels before trusting the number. A base built with different wheels travels a different distance per rotation, and every calculation on this page moves with it.
set movement motors to [B v] and [C v] :: movement
set movement speed to (30) % :: movement
move [forward v] for (2) [rotations v] :: movement
Turning on the spot
Steering at right 100 or left 100 drives the two wheels in opposite directions, so the base stops travelling and pivots where it stands. The angle it sweeps is a simple doubling of the rotations:
Half a rotation is the one worth remembering: a square corner, 90°.
Rotations
The robot turns
0.25
45° — half a corner
0.5
90° — a square corner
1
180° — turn round and face back
2
360° — all the way round
The one to memorise is 0.5 rotations = 90°. Everything else follows from doubling or halving it.
set movement speed to (20) % :: movement
move [right: 100] for (0.5) [rotations v] :: movement
Turn slowly. The wheels on a driving base are big and the robot carries a lot of weight, so at full speed it keeps going after the motors stop and lands past the angle you asked for. Somewhere between 15% and 30% speed is where turns become repeatable. A turn that overshoots is almost always a turn taken too fast, not a wrong number.
These figures belong to your robot. The distance depends on the wheels and the angle depends on how far apart they are, so a wider base needs a different number for 90°. Test it, measure what actually happened, and adjust — the same discipline as the Gyro Sensor tolerance.
Why it matters
Every wheeled vehicle steers this way — a tank, a digger, an office chair with two driven castors. Cars use a steering rack instead, but a robot that turns by driving its wheels at different speeds needs no steering mechanism at all.
ComponentSensing5 min
Reading a motor's position
Every EV3 motor contains a sensor that counts how far it has actually turned. That means a motor is not only an output — you can ask it where it is, and the answer describes what really happened rather than what you asked for.
The counting happens inside the motor housing, on this shaft. That is why the reading describes what the motor did — not necessarily what the robot did, if a wheel slipped.
Blocks reference
Block
What it does
([A v] degrees counted :: sensors)
Reports how far this motor has actually turned since the count was last reset, in degrees.
[A v] reset degrees counted :: motors
Sets the count back to zero, making right here the new reference point.
([A v] speed :: sensors)
Reports how fast the motor is turning right now, as a percentage. A motor that is being driven but reads zero is a motor that is stuck.
Asked for, versus achieved
Those two are not always the same. Here are two identical motors, running the same program, with only their mechanisms different.
Both motors are told to turn two rotations — 720 degrees. Both counters start at zero.Both turning. The counters climb together, and so far the two motors agree.The right-hand arm has run into the post and cannot go past it. The motor is still straining against it, the counter has stopped, and the program is still waiting on that block.The left motor finished at 720. The right is stuck at 284 — it never got past the post, and that gap is the only way the robot can tell.Finished on the left. The right-hand program is still waiting, and will wait for ever.
stopped
Nothing on the Brick announces a stall. The only evidence is that the counter stopped changing while the motor was still being told to turn.
Nothing on the Brick announces the jam. The motor is still being driven, the program is still sitting on the same block, and the only trace of the problem anywhere is a counter that has stopped climbing. Comparing what you asked for with what was counted is how a robot notices — which is the whole of stall detection.
Zero is wherever you say it is
When the Brick powers on, the count is simply whatever it happens to be. It is not a position on the machine — it becomes one only when you tie it to something physical.
That is what reset degrees counted is for, and it is not just a tidy-up block for the top of a program. Where you put it decides what zero means, so putting it part-way through — after the mechanism has been driven somewhere known — is the normal way to use it, not an abuse of it.
Find home first, then reset
A conveyor has no idea where it is. Give it a touch sensor at one end and it can find out: drive it until the sensor is pressed, and it is now at a place you can name. Only then reset the count, and that end becomes 0.
when program starts :: events hat
[A v] start motor [counterclockwise v] :: motors
[1 v] wait until [pressed v] :: sensors
[A v] stop motor :: motors
[A v] reset degrees counted :: motors
The order is the whole point. Reset before the sensor is pressed and you have zeroed a random spot; reset after it, and every later reading means “how far from home”. This is called homing, and it is why a printer rattles its head to one side when you switch it on.
Drive towards home gently. The mechanism is deliberately being run into its own end stop, so a slow speed saves the gears — and the touch sensor is what stops it, which means it stops in the same place every time regardless of where it started.
Putting zero somewhere more useful
Home is often a corner, and a corner is an awkward place to measure from. Say the conveyor carries a chute that dispenses bricks, and you would rather describe its position as left and right of the middle. Then home once, drive the known distance to the middle, and reset again there:
when program starts :: events hat
[A v] start motor [counterclockwise v] :: motors
[1 v] wait until [pressed v] :: sensors
[A v] stop motor :: motors
[A v] reset degrees counted :: motors
[A v] run [clockwise v] for (900) [degrees v] :: motors
[A v] reset degrees counted :: motors
Now the middle is 0. Moving right counts up, moving left counts down past zero into negative numbers — the count is perfectly happy to go negative — and “go back to the middle” becomes the simplest instruction in the program: drive until the count reaches 0.
Both resets earn their place. The first one turns a meaningless number into a distance from a real, repeatable place. The second one moves zero to where the maths is easiest. A reset in the middle of a program is only a mistake when the mechanism is somewhere you cannot name.
Turning turns into distance
Because the count is in degrees, and a wheel of known size travels a known distance per turn, the reading can be converted into how far the robot has actually driven. That is how a robot reports a distance in centimetres rather than in rotations — and it is why changing the wheels changes the answer.
Why it matters
This is how a printer knows the paper jammed, how a car window stops when it meets your hand, and how a robot arm knows it has reached its limit. A machine that can only give orders is fragile; one that can check what happened can recover.
Sweep, with a limit and a give-up. Slowly enough to see. Then stop sweeping before you do anything about it.
▶Sampling and coverageFrom Level 2, Lesson 47 — how fast can you move before you miss something between readings.Show meHide
ComponentSensing6 min
The Ultrasonic Sensor
The Ultrasonic Sensor measures distance. It sends out a burst of sound too high for people to hear, listens for the echo, and works out how far away the surface is from how long the echo took — exactly how a bat finds a moth, and how a submarine uses sonar.
front
side
The two round openings on the front are the point of this sensor: one sends the burst of sound out, the other listens for the echo coming back.
Blocks reference
Block
What it does
([4 v] distance in [cm v] :: sensors)
Reports how far away the nearest thing in front of the sensor is, as a number in centimetres.
wait until <([4 v] distance in [cm v] :: sensors) < (15)>
Holds the program until something comes closer than 15 cm.
A number, not a yes or no
This is the important step up from the Touch Sensor. Touch gives you true or false; the Ultrasonic gives you a number, and the deciding is left to you. Pick a threshold below and watch where the robot ends up.
when program starts
start moving straight: 0
4 wait until distance <15cm
stop moving
60cm · reading15cm · threshold
Nothing is close. The sensor reports about 60 cm and the program waits.The robot drives forward. The sensor is sending a burst of sound and timing its echo, over and over, and the number falls.The reading has dropped past the threshold. The condition is true, so the robot stops.Try another threshold. The program is identical — only that one number is different.Finished. The threshold is yours to choose — the sensor only supplies the number.
stopped
The black line on the bar is the threshold; the blue fill is the reading. The robot stops the instant the fill crosses the line.
Three different robots, and only one number is different between them. That is what having a number rather than a yes-or-no buys you: the behaviour is tuned by editing one slot, not by rebuilding the program. It also means the sensor can never tell you it is “close” — close is a decision you make about a reading.
Why it matters
Car parking sensors, automatic doors at a shopping centre, and the sensor that stops a lift door closing on somebody all work this way. Reacting before contact is what makes a machine feel safe.
If your set has an Infrared Sensor instead
The Home/Retail EV3 set (31313) ships an Infrared Sensor and a Beacon in place of the Ultrasonic and Gyro sensors. The Infrared Sensor also measures distance, so the programs in this module work with it — but it reports a rough 0–100 proximity rather than real centimetres, and it is affected by sunlight and by dark surfaces in ways the Ultrasonic is not.
IR Sensor
Beacon
The Infrared Sensor and its Beacon, from the Home set. If your kit has these, expect proximity numbers rather than centimetres — and retune any threshold accordingly.
Say this back before moving on: “Look everywhere in turn — and stop when you find it.”
What’s in this build 4 min
Turn the tank on the spot by hand and watch where the sensor points. How wide an arc does one full turn of the tracks cover?
Part
What it is doing here
EV3 Intelligent Brick
The hull. Its screen reports what the sweep is doing — the angle searched and whether anything was found — which is how a search becomes debuggable.
Large Motor ×2 — the tracks
Turn the whole tank, which is how the sensor sweeps. Tracks slip on turning, so the encoder count and the real angle disagree — which matters for knowing how much has been searched.
Medium Motor — the crossbow
The committed action, from Lesson 22. It fires; nothing after that can be changed.
Ultrasonic Sensor — the eye
Narrow field of view, which is exactly why sweeping is necessary. Mounted facing dead ahead so the tank’s heading is also the sensor’s.
The tracks (not electronic)
Turn on the spot by scrubbing sideways, so they slip. Check both are tensioned the same — one loose track makes the tank sweep further one way than the other, and the search becomes lopsided without anybody noticing.
The sensor must point where the crossbow points. If they are not aligned, the tank will find a target, stop, and fire past it — and the fault will look like bad aiming rather than bad mounting.
Ports — and the rule 4 min
Sensors go in ports 1, 2, 3, 4. Motors go in ports A, B, C, D. They are not interchangeable, and nothing will tell you politely if you swap them.
Part
Port
Why this one
Crossbow (Medium)
A
The committed action, on its own port.
Left track (Large)
B
The movement pair, which is also the sweep mechanism.
Right track (Large)
C
The other half.
The eye (Ultrasonic)
4
Ultrasonic stays on 4 across the course.
Check your own build now:
Crossbow in A, tracks in B and C, sensor in 4.
Mark the tank’s starting heading on the floor with tape. A search is measured from somewhere, and after a few sweeps you will not remember where it began.
Check the crossbow is loaded and its mechanism runs freely by hand.
Set a target at a known distance and angle off to one side — you want something the tank genuinely has to find.
Connect the Brick 4 min
Two routes, and either is fine. USB is the reliable one and the one to fall back on when a room’s Bluetooth is busy; Bluetooth leaves the robot free to move, which some models need.
▶How to connect the BrickUSB and Bluetooth, step by step, with a photograph of every screen. Open it if you have not done this before — or if pairing is not working.Show meHide
USB — the reliable one
Switch the Brick on with the dark grey centre button.
Cable into the Brick’s PC port — the small square socket beside the numbered ports, not one of the numbered ones.
Other end into the computer.
Bluetooth — name it first
Do these in order. Naming the Brick after you go looking for it in the list is how groups end up driving each other’s robots.
Name your Brick. On the Brick: Settings (the spanner) → Brick Name. Type something nobody else will pick, then press the tick. Every Brick is called EV3 until somebody changes it.
Turn Bluetooth on. Settings → Bluetooth. Tick Bluetooth and Visibility. Leave iPhone/iPad/iPod unticked.
Connect from EV3 Classroom. Click the Brick icon at the top of the programming area, find your Brick by name, and click Connect.
Say yes on the Brick. It asks “Connect?” with the computer’s name — choose the tick, then accept the passkey, which is already 1234.
Where to read it. The name sits in the bar across the very top of the screen, on every screen — so you can check which Brick you are holding at any moment without going into a menu. This one is EV3VE. A Brick nobody has renamed says EV3.Step 3, and the reason step 1 exists. Three Bricks in range — read the name before you click Connect. Pairing with the wrong one is not an error: it works perfectly, on somebody else’s robot.
Step 2.Bluetooth switches the radio on; Visibility is what lets the computer find you. With Visibility off your Brick works perfectly and simply never appears in the list.Step 4. Look at the Brick. It asks whether to accept and names the computer. Choose the tick.Then the passkey, already 1234. Press the tick again and you are connected.
The two failures, every class, every time. The Brick has gone to sleep while you were building — press the centre button to wake it. Or you have paired with the group at the next table, which is why the name matters.
The long version, including Port View and how to read the port tiles, is in the Brick & Bluetooth guide.
Bluetooth — this one turns on the spot repeatedly. A USB lead wraps round a rotating vehicle within about two sweeps, and the drag will make one direction slower than the other.
Confirm the connection 2 min
Check the Brick icon: connected, or not.
Three motor tiles — A, B and C.
One sensor tile — 4.
Turn the tank through a right angle and read the track encoder. Note the degrees. That number converts “how far it has swept” into “how much of the room it has searched”, and you need it for the give-up limit.
Stuck? The long version, with a photograph of every screen, is in the Brick & Bluetooth guide.
Change it and test 8 min
One change at a time. Predict, then run, then look. Run each setting five times — a search that works once has told you nothing.
Sweep at 15%, five times. Count how many find the target. Write it down. That is your baseline.
Sweep at 60%, five times. Count again. If it finds it three times out of five, you have built the worst kind of machine — one that mostly works.
Find your fastest reliable sweep. Raise the speed until a miss appears, then come back. Write the number on the board with your target size — a smaller target needs a slower sweep, and that relationship is the lesson.
Remove the give-up limit and run it in an empty room. The tank turns for ever. Put it back and say why a search needs a way to fail.
Fire while still sweeping. Move the crossbow block before stop moving. Watch where the bolts go, then put it back — Lessons 22 and 27 meeting.
A search that finds things most of the time is worse than one that never does, because it will be believed.
Where this goes 3 min
Your tank turns on the spot to look around. It moves by driving two tracks, and that is the only way anything in this course has moved.
The next model has no wheels and no tracks. A snake moves by passing a wave along its body — each part doing the same thing as the part in front, but a moment later.
The same motion, delayed, is a completely different idea from two motions coordinated. One signal and an offset produces a travelling wave, and it is how snakes, fish, caterpillars and millipedes all get about.
Today the machine looked around. Next it moves by doing the same thing twice, slightly late.
Build it 15 min
Build the model before you read any further. Everything after this is about making it do something, and none of it will make much sense with nothing on the table in front of you.
Use the viewer's own controls to zoom and turn pages. Fullscreen makes it big enough to build from.
Check the finished build against the picture before you switch anything on. A motor mounted the wrong way round is far easier to spot now than it is to debug later, when it looks like a program fault.
Make it move 10 min
Search, then commit. Build the search first and make it report what it found before you let it fire anything.
Step 1 — sweep and report
define search (sweep speed)
set [found v] to (0) :: variables
[B v] reset degrees counted :: motors
turn [right v] at (sweep speed) % speed :: movement
wait until <<([4 v] distance in cm) < (50)> or <([abs v] of ([B v] degrees counted)) > (400)>> :: control
stop moving :: movement
if <([4 v] distance in cm) < (50)> then
  set [found v] to (1) :: variables
end

when program starts :: events hat
set movement motors to [B v] and [C v] :: movement
clear display :: display
search (15) :: custom
if <(found) = (1)> then
  write [TARGET FOUND] at line (1) :: display
  write ([4 v] distance in cm) at line (3) :: display
  set status light to [red v] :: display
else
  write [NOTHING THERE] at line (1) :: display
  set status light to [green v] :: display
end
No firing yet. Run it with a target in the arc and again with an empty room — both outcomes must be reported clearly.
Step 2 — search, then commit
when program starts :: events hat
set movement motors to [B v] and [C v] :: movement
clear display :: display

forever
  search (15) :: custom

  if <(found) = (1)> then
    // the search has STOPPED. now, and only now, commit.
    write [ENGAGING] at line (1) :: display
    wait (0.5) seconds :: control
    [A v] run [clockwise v] for (360) [degrees v] at (100) % speed :: motors
    wait (1) seconds :: control
  else
    // nothing in that arc — sweep back the other way
    write [SEARCHING] at line (1) :: display
    turn [left v] for (2) [rotations v] at (25) % speed :: movement
  end
end
Find, stop, settle, fire. The half-second settle is Lesson 22 — a tank still rotating when the bolt leaves is aiming somewhere it no longer is.
** The sweep speed is an input to search. ** You will be changing it repeatedly in step 10, and an input beats editing the definition each time.
The give-up limit is 400 degrees of track — use your own number from step 8 so the sweep covers a sensible arc rather than an arbitrary one.
** stop moving comes before anything else happens. ** Searching and acting are separate phases and must not overlap.
Nothing-found is a real outcome with its own branch. A search that can only succeed is a search that hangs.
What success looks like: the tank sweeps, stops crisply when the target enters its view, pauses, fires, and resumes searching — and in an empty room it sweeps one way, gives up, and sweeps back.
If it fires at nothing, it found a wall — narrow the detection range from 50 cm to something inside your room. If it sweeps past the target, it is sweeping too fast, which is step 10’s first experiment.
This is what you are building: the EV3 Robot Repeating Crossbow Tank.
Challenges 27 min
Work through them in order — each is harder than the last. The extra challenge comes after all three, and it is meant to make you plan before you build.
Challenge 1
Find your fastest reliable sweep.
Run the search five times at 15% and count the finds. Then five at 60%.
If the fast one finds it three times in five, you have built the worst kind of machine — one that mostly works. Write down the fastest speed that found it five times out of five.
Challenge 2
Give it something to give up on.
Run your search in an empty room. It must sweep, reach its limit, report that it found nothing, and stop.
Then remove the limit and watch it turn for ever. Say in one sentence why "I looked and found nothing" has to be a real outcome.
Challenge 3
Fire while still sweeping.
Move the crossbow block to before the "stop moving" and watch where the bolts go.
Put it back, then explain how this connects to Lesson 22 — what exactly is being decided before the point of no return?
Extra challenge
Sweep a room and report what is in it.
The tank must search a full rotation, and instead of firing, record every direction in which it found something — and how far away it was.
At the end it reports how many objects it found and reads back each one: the angle and the distance.
Three rules:
1. The sweep speed is a named value you have tested, and you can state how you chose it.
2. Two objects close together must be reported as two, not one. Work out what makes them separate — this is the hard part, and it is a real problem for real radars.
3. The same room, searched twice, must give the same answer. If it does not, your sweep is too fast, and you now have proof rather than opinion.
Then run it in a room somebody else set up, and check its report against what is actually there.