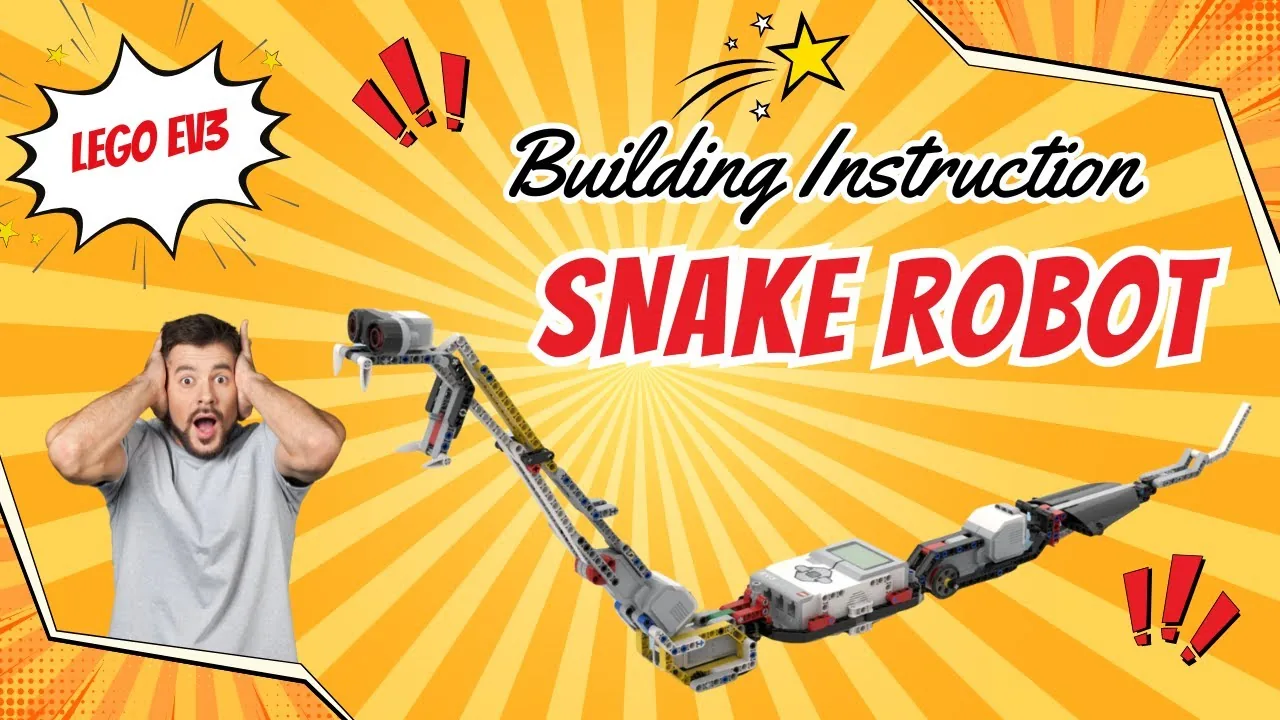
The Snake: a jointed body with a motor at each joint and a sensor in the head. No wheels, no tracks, no legs.
It moves the way a real snake does — by sending a wave of bending down its body. Each joint does exactly the same thing as the one in front of it, only slightly later, and that delay is what turns wriggling into travelling.
By the end of the lesson one number will decide whether your snake goes somewhere or thrashes on the spot — and it is not a speed.
In the real world 5 min
Where you have seen it
A snake in grass looks as though a single S-shape is sliding backwards along its body while the animal moves forwards. That is exactly what is happening. Each part of the snake bends, then straightens, then bends the other way — and each part starts its cycle a fraction after the part ahead of it.
A snake in motion. Photo: NPS/Diane Renkin / Wikimedia Commons (Public domain).
The curves push sideways and backwards against the ground, and the ground pushes back. Put a snake on smooth glass and it can barely move — not because the muscles have changed, but because there is nothing for the wave to push against.
Why it is built that way
The same wave moves an enormous range of animals. A fish beats its body from head to tail. A caterpillar passes a ripple along its underside. A millipede runs waves down two hundred legs. An earthworm squeezes a wave of thickness along itself.
None of them has a central plan for each part. Each part copies its neighbour, a moment later — which means the same simple rule works whether an animal has two segments or two hundred.
What would go wrong without it
If every segment bent at the same instant, the body would flex as one and snap back — a lot of effort, no travel. That is not a hypothetical: it is exactly what your snake will do in step 9 when you set the delay to zero.
A wave travels because the parts are out of step. In step, they only shake.
The main concept — one motion, offset 6 min
Lesson 24 had two motors doing different things at once, and their ratio made a shape. Today two motors do the same thing, and the delay between them makes movement.
The naive version, and why it fails
forever
  [B v] run [clockwise v] for (90) [degrees v] at (40) % speed :: motors
  [A v] run [clockwise v] for (90) [degrees v] at (40) % speed :: motors
  [B v] run [counterclockwise v] for (90) [degrees v] at (40) % speed :: motors
  [A v] run [counterclockwise v] for (90) [degrees v] at (40) % speed :: motors
end
Both segments bend and both straighten, one after the other in sequence. The snake flexes and unflexes and stays where it is.
run for waits, so these four blocks happen one at a time. A wave needs both segments moving simultaneously at different points of the same cycle — which means start motor, exactly as in Lesson 24.
The wave
when program starts :: events hat
reset timer :: control
set [period v] to (2) :: variables
set [offset v] to (0.5) :: variables

forever
  set [front phase v] to (timer) :: variables
  set [rear phase v] to ((timer) - (offset)) :: variables
  // each segment bends one way for half a period, then the other
  if <(([front phase v] mod (period))) < ((period) / (2))> then
    [B v] start motor at (40) % speed :: motors
  else
    [B v] start motor at (-40) % speed :: motors
  end
  if <(([rear phase v] mod (period))) < ((period) / (2))> then
    [A v] start motor at (40) % speed :: motors
  else
    [A v] start motor at (-40) % speed :: motors
  end
end
One cycle, two segments reading it at different points. offset is the delay, and it is the only number that decides whether the snake travels.
Offset (of a 2-second cycle)
What the snake does
0 — no delay
Both segments in step. It flexes and shudders. No travel.
0.5 s — a quarter cycle
A clear wave. Usually the best travel.
1.0 s — half a cycle
Exactly opposite. The two ends fight and it goes almost nowhere.
1.5 s — three quarters
A wave travelling the other way — it reverses.
Notice that reversing does not need a single minus sign. Change which way the wave travels along the body and the snake goes the other way — which is precisely how a real snake reverses.
Why the offset is measured in fractions of a cycle
An offset of half a second means nothing on its own. Half a second of a two-second cycle is a quarter turn of the wave; half a second of a half-second cycle is a whole one, which is the same as none at all.
Always think of the offset as a fraction of the period. Change the period and the offset must change with it, or a snake that walked at one speed will thrash at another — and that is a genuinely confusing bug to meet without warning.
ComponentControl4 min
The Timer
A wait pauses for a length of time. The timer is different: it runs in the background and can be read at any moment, so the robot can know how long something has taken while it is still happening.
Blocks reference
Block
What it does
(timer)
Reports the seconds since the timer was last reset.
reset timer
Sets it back to zero, so the next reading counts from here.
The timeout — a safety net
The most valuable use of a timer is escaping a wait that might never end. A robot told to drive until it sees a wall will drive for ever if the wall is not there. Combined with a timer, it can give up:
Repeat until the wall is close or five seconds have passed. That one change turns a program that can hang into one that always finishes. Both robots below are looking for a wall that is not there.
no way out
repeat until distance < 15
start moving straight: 0
with a timeout
reset timer
repeat until distance < 15 or timer> 5
start moving straight: 0
write GAVE UP at line 1
1.2stimer212cm · distance
Both robots are told to drive until something is within 15 cm. The room ahead is empty.Three seconds. No wall. Both are still driving — and the right-hand program is also watching its timer.The timer passes 5. The right-hand robot gives up, stops, and says so.The left robot is still going. Its condition can never become true, so that block will hold the program for ever.The right-hand program finished. The left one has not, and there is nothing to say why.
timer 1.2 s
The sensor is not faulty and the program is not wrong. There is simply no wall, and only one of these two programs has a way of noticing that.
The left-hand robot is not broken, and neither is its sensor. Its condition is simply one that will never come true, so the program sits on that block for ever — with nothing on the Brick to say so. The right-hand program asks the same question with an escape route bolted on, and finishes every time.
Why it matters
Real systems time themselves out constantly — a lift that cannot close its doors eventually gives up and beeps rather than trying for ever. A robot with no timeout simply stops responding, and there is nothing on screen to say why.
ComponentControl5 min
Comparing and combining
A sensor that reports a number cannot be used to make a decision on its own — 23 is neither true nor false. An operator turns that number into an answer by comparing it with something.
Blocks reference
Block
What it does
<(x) > (50)>
True when the left value is bigger than the right.
<(x) < (50)>
True when it is smaller.
<<> and <>>
True only when both conditions are true.
<<> or <>>
True when at least one of them is.
Try it: which way round does it go?
Forget the symbols for a moment. A comparison is a question about position on a number line: is x to the left of the other number, or to the right? Left is smaller, right is bigger — and that is the whole of it.
Drag the orange x and the black marker, and change the comparison. The green stretch is every position of x that would make the answer true — so you can see where the answer flips before you get there. Turn not on and watch the green jump to the other side.
Drag either marker, or use the arrow keys.
-3 < 4true
is x to the LEFT of it?
< is true while x sits on the left. Slide x past the marker and it flips.
> is the same question the other way round — so exactly one of the two is true, unless the markers are on the same spot.
= is true for one single position out of twenty-one. Try landing on it. That is why a sensor is almost never compared with =: a reading passes straight through the exact number without ever being measured there.
not flips the answer, whatever it was. not (x < 4) covers everything x < 4 does not — including landing exactly on 4.
Try it: which numbers make it true?
The lab above asks one question at a time: is this x true? A robot never has just one x, though — a sensor reading slides up and down all the time, so what really matters is which stretch of the line makes the condition true. This one draws the whole answer at once.
Drag the circle to move the number you are comparing against, and change the comparison. Everything shaded green is a value of x that would make it true.
Drag the circle, or use the arrow keys. It moves in steps of 0.2.
x < 0.2x < 0.2
Every number to the left of 0.2 — but not 0.2 itself, so the circle is hollow.
Watch the circle, because it carries the part everyone gets wrong:
Hollow ○ — the boundary is not included. x < 0.2 shades everything left of 0.2 but leaves 0.2 itself out, because 0.2 is not less than 0.2.
Filled ● — the boundary is included. Choose = and nothing is shaded at all: one single number qualifies.
Now turn not on with x > 2 selected and watch two things happen together. The shading jumps to the other side, and the circle fills in — because “not greater than 2” means 2 or less, and 2 has to be part of it. That pairing is the whole reason a hollow circle is worth drawing.
Why a robot cares. Two conditions that look almost identical — light < 30 and not (light > 30) — differ by exactly one value, the reading of precisely 30. A robot sitting right on its threshold behaves differently under the two, and that is the sort of bug that only shows up occasionally and looks like a broken sensor.
Try it: and, or, not
These three join answers together rather than numbers. The trap is that English is looser than a program: “stop if it is close and the bumper is pressed” sounds like it covers both situations, when it covers neither on its own.
Flip the two conditions and watch the table. There are only four possible situations in total, and and and or differ on exactly two of them.
close: trueandbumper: falsefalse
close
bumper
and
or
true
true
true
true
true
false
false
true
false
true
false
true
false
false
false
false
and is fussy: it wants both. Three of the four rows are false.
and is true on one row out of four. It narrows — the robot acts less often, but more certainly.
or is true on three rows out of four. It widens — the robot acts more readily.
The two agree on the top and bottom rows and disagree in the middle. Whenever swapping one for the other seems to make no difference, you have only tried the rows where they agree.
Watch them decide
Two sensors are running below: an Ultrasonic reporting a number, and a Touch Sensor reporting true or false. Watch the comparison turn the number into an answer, and watch and and or disagree.
when program starts
forever
if distance < 15 and is pressed? then
stop moving
if distance < 15 or is pressed? then
play beep 60 for 0.2 seconds
Nothing is within 15 cm and the bumper is out. Both conditions are false.Something comes close. The comparison flips to true — the bumper has not been touched.It backs away, and instead the bumper is pressed. Now the other condition is the true one.Close AND pressed. Only now is «and» true — while «or» has been true ever since the first of them was.Finished. Four situations, and the two operators disagreed in three of them.
and false · or false
and was true in one row out of four. or was true in three. That is the whole difference, and it is why one of them makes a robot look broken.
The comparison is doing one job: it takes a reading that is neither true nor false and, by holding it against a number you chose, produces something a decision can use. The moment the blue fill crosses the black marker is the moment the answer changes.
Choosing the threshold
The number you compare against is a design decision, not a fact. “Close” for a parking sensor might be 15 cm; for a robot arm it might be 3. Pick it by measuring what the sensor actually reads in the situation you care about, then leave a margin.
Combining two conditions
and narrows: both must hold, so the robot acts less often but more certainly — stop only if something is close and the bumper is pressed. or widens: either will do, so the robot acts more readily — stop if something is close or the bumper is pressed.
In the four situations above, and was true in one of them and or in three. That is the practical difference: swapping one for the other does not adjust a robot slightly, it changes how often it reacts at all.
ComponentControl5 min
Two things at once
A program does not have to be one long column of blocks. Several stacks can run at the same time, each doing its own job — one driving, one watching a sensor, one keeping the display up to date.
How it is done
Give each stack its own hat block. Every stack beginning with when program starts starts at the same instant — not one after another — and from then on they run alongside each other.
Nor is it limited to two. Below, three stacks run together: a Medium Motor turning an attachment, the status light flashing, and the drive base rolling. Watch the arrows at the top — they all begin at once, and no stack waits for any other.
when program starts :: events hat
[A v] start motor [clockwise v] :: motors

when program starts :: events hat
forever
  set status light to [green v] :: display
  wait (0.5) seconds
  set status light to [red v] :: display
  wait (0.5) seconds
end

when program starts :: events hat
start moving [straight: 0] :: movement
Written down they have to go one under another, because a page is a column — but that is an accident of paper. On the Brick they sit side by side, and nothing in the first stack happens before anything in the third.
The rule: one owner per thing
Parallel stacks go wrong when two of them try to control the same thing. Use the switch below to take the wheels away from the third stack and point it at motor A, which the first stack is already driving.
the program starts — all of these begin here
stack 1 · Medium Motor
when program starts
A start motor clockwise
stack 2 · status light
when program starts
forever
set status light to green
wait 0.5 seconds
set status light to red
wait 0.5 seconds
stack 3 · drive base
when program starts
start moving straight: 0
One stack, one jobAll three at once
Three stacks, each with its own hat block. All three start the moment the program starts — none of them waits for the others.All three are running in the same instant: the Medium Motor is turning, the light is flashing, and the drive base is rolling.Each stack owns one thing and never touches another stack's job. That is the rule that makes this work.Finished. All three jobs ran the whole time, and none got in another's way.
three stacks, three jobs
Every stack is highlighted at the same moment on purpose — that is what running in parallel looks like. The switch above changes only what the third stack controls.
With one owner each, all three stacks are highlighted at the same instant and all three jobs get done. With two owners, motor A is handed contradictory orders hundreds of times a second and shivers instead of turning — and notice the second cost, which is easy to miss: the wheels now have nobody driving them. A stack that goes to fight over someone else’s motor has abandoned its own job. Nothing reports an error either way; as far as the Brick is concerned every stack is working perfectly. The same happens to a display line or a variable that two stacks both write to.
The discipline is simple: give each stack sole ownership of what it controls. One stack owns the motors, another owns the screen, another watches the sensors and tells the others what it found — which is what broadcasting is for.
One cycle. Each part reads it a little later than the part in front. That delay is the movement.
▶PhaseFrom Level 2, Lesson 25 — two motors deliberately out of step. Today the offset becomes the thing you tune.Show meHide
ComponentControl5 min
Two things at once
A program does not have to be one long column of blocks. Several stacks can run at the same time, each doing its own job — one driving, one watching a sensor, one keeping the display up to date.
How it is done
Give each stack its own hat block. Every stack beginning with when program starts starts at the same instant — not one after another — and from then on they run alongside each other.
Nor is it limited to two. Below, three stacks run together: a Medium Motor turning an attachment, the status light flashing, and the drive base rolling. Watch the arrows at the top — they all begin at once, and no stack waits for any other.
when program starts :: events hat
[A v] start motor [clockwise v] :: motors

when program starts :: events hat
forever
  set status light to [green v] :: display
  wait (0.5) seconds
  set status light to [red v] :: display
  wait (0.5) seconds
end

when program starts :: events hat
start moving [straight: 0] :: movement
Written down they have to go one under another, because a page is a column — but that is an accident of paper. On the Brick they sit side by side, and nothing in the first stack happens before anything in the third.
The rule: one owner per thing
Parallel stacks go wrong when two of them try to control the same thing. Use the switch below to take the wheels away from the third stack and point it at motor A, which the first stack is already driving.
the program starts — all of these begin here
stack 1 · Medium Motor
when program starts
A start motor clockwise
stack 2 · status light
when program starts
forever
set status light to green
wait 0.5 seconds
set status light to red
wait 0.5 seconds
stack 3 · drive base
when program starts
start moving straight: 0
One stack, one jobAll three at once
Three stacks, each with its own hat block. All three start the moment the program starts — none of them waits for the others.All three are running in the same instant: the Medium Motor is turning, the light is flashing, and the drive base is rolling.Each stack owns one thing and never touches another stack's job. That is the rule that makes this work.Finished. All three jobs ran the whole time, and none got in another's way.
three stacks, three jobs
Every stack is highlighted at the same moment on purpose — that is what running in parallel looks like. The switch above changes only what the third stack controls.
With one owner each, all three stacks are highlighted at the same instant and all three jobs get done. With two owners, motor A is handed contradictory orders hundreds of times a second and shivers instead of turning — and notice the second cost, which is easy to miss: the wheels now have nobody driving them. A stack that goes to fight over someone else’s motor has abandoned its own job. Nothing reports an error either way; as far as the Brick is concerned every stack is working perfectly. The same happens to a display line or a variable that two stacks both write to.
The discipline is simple: give each stack sole ownership of what it controls. One stack owns the motors, another owns the screen, another watches the sensors and tells the others what it found — which is what broadcasting is for.
Say this back before moving on: “Same motion, a little later, all the way down.”
What’s in this build 4 min
Push the snake along the floor by hand, bending it as you go. Which way does it grip, and which way does it slide? If it slides equally in all directions it will never travel.
Part
What it is doing here
EV3 Intelligent Brick
A body segment, and most of the snake’s weight — which is why the segments either side of it have to work hardest.
Large Motor — front joint
Bends the front of the body. Large because it swings the whole head end against friction.
Medium Motor — rear joint
Bends the rear, running the same cycle a moment later. Together they are the wave.
Ultrasonic Sensor — the head
Looks ahead. It swings side to side with every bend, which means its readings swing too — Lesson 14’s smoothing is genuinely needed here.
The underside (not electronic)
Where the whole model succeeds or fails. A snake needs to grip sideways and slide forwards. Smooth beams on a smooth table give no grip at all, and no program can fix it — rubber bands, tyres on their sides, or a cloth surface will.
Try the surface before you blame the program. Run the same snake on a table, on carpet and on a cloth. If it travels on one and not another, the mechanics were never the problem.
Ports — and the rule 4 min
Sensors go in ports 1, 2, 3, 4. Motors go in ports A, B, C, D. They are not interchangeable, and nothing will tell you politely if you swap them.
Part
Port
Why this one
Rear joint (Medium)
A
The trailing segment — the one that lags.
Front joint (Large)
B
The leading segment. Keeping front on B and rear on A means the offset always runs A-behind-B, which is one less thing to get backwards.
The head (Ultrasonic)
4
Ultrasonic stays on 4 across the course.
Check your own build now:
Rear in A, front in B, sensor in 4.
Straighten the snake before every run. A wave started from a bent body is half a cycle out before it begins.
Give both cables plenty of slack. Every joint moves through its full range constantly, and a taut cable becomes a spring that fights the wave.
Clear a run of at least a metre. A snake travels slowly, and a short table teaches you nothing.
Connect the Brick 4 min
Two routes, and either is fine. USB is the reliable one and the one to fall back on when a room’s Bluetooth is busy; Bluetooth leaves the robot free to move, which some models need.
▶How to connect the BrickUSB and Bluetooth, step by step, with a photograph of every screen. Open it if you have not done this before — or if pairing is not working.Show meHide
USB — the reliable one
Switch the Brick on with the dark grey centre button.
Cable into the Brick’s PC port — the small square socket beside the numbered ports, not one of the numbered ones.
Other end into the computer.
Bluetooth — name it first
Do these in order. Naming the Brick after you go looking for it in the list is how groups end up driving each other’s robots.
Name your Brick. On the Brick: Settings (the spanner) → Brick Name. Type something nobody else will pick, then press the tick. Every Brick is called EV3 until somebody changes it.
Turn Bluetooth on. Settings → Bluetooth. Tick Bluetooth and Visibility. Leave iPhone/iPad/iPod unticked.
Connect from EV3 Classroom. Click the Brick icon at the top of the programming area, find your Brick by name, and click Connect.
Say yes on the Brick. It asks “Connect?” with the computer’s name — choose the tick, then accept the passkey, which is already 1234.
Where to read it. The name sits in the bar across the very top of the screen, on every screen — so you can check which Brick you are holding at any moment without going into a menu. This one is EV3VE. A Brick nobody has renamed says EV3.Step 3, and the reason step 1 exists. Three Bricks in range — read the name before you click Connect. Pairing with the wrong one is not an error: it works perfectly, on somebody else’s robot.
Step 2.Bluetooth switches the radio on; Visibility is what lets the computer find you. With Visibility off your Brick works perfectly and simply never appears in the list.Step 4. Look at the Brick. It asks whether to accept and names the computer. Choose the tick.Then the passkey, already 1234. Press the tick again and you are connected.
The two failures, every class, every time. The Brick has gone to sleep while you were building — press the centre button to wake it. Or you have paired with the group at the next table, which is why the name matters.
The long version, including Port View and how to read the port tiles, is in the Brick & Bluetooth guide.
Bluetooth, without question. A snake generates almost no traction, so a USB cable trailing behind it is not a nuisance — it is more force than the snake produces, and the model will simply not move.
Confirm the connection 2 min
Check the Brick icon: connected, or not.
Two motor tiles — A and B.
One sensor tile — 4.
Bend each joint fully both ways from the tiles and note the degrees. That travel is the amplitude of your wave — bend further than the joint allows and it stalls at the end of every half-cycle instead of turning round.
Stuck? The long version, with a photograph of every screen, is in the Brick & Bluetooth guide.
Change it and test 8 min
One change at a time. Predict, then run, then look. Measure travel over ten seconds from a tape mark each time.
Offsets 0, 0.25, 0.5, 0.75, 1.0, 1.5. Measure the distance for each. Plot them if you can — there is a clear best, and a clear worst at half a period.
Halve the period to 1 second and keep offset at 0.5. The offset is now half a cycle rather than a quarter, and the snake stops travelling. Nothing about the offset changed — its meaning did.
Halve both — period 1, offset 0.25. The wave is back, faster. That is why an offset must be thought of as a fraction.
Change the swing from 40 to 15, then 80. Too small and there is not enough bend to push with; too large and the joints stall at their limits.
Run it on three surfaces — bare table, paper, cloth — with your best settings. Report the distances. The best program on the worst surface loses to the worst program on the best one.
The offset is a fraction of the cycle, not a number of seconds. Change the period and you have changed the offset.
Where this goes 3 min
Your snake reacts to one number from one sensor: near or far. Every sensing decision you have made in twenty-eight lessons has been that shape — a measurement compared against a threshold.
The next model asks something different. It does not want to know how much; it wants to know which kind. A red brick and a blue brick are not more or less of anything — they are different categories, and they go in different places.
Turning a measurement into a category is a distinct step, and it is where machines start to make judgements rather than comparisons. It also introduces a problem thresholds never had: what to do with something that fits no category at all.
How much? has been the question all course. Next: which one?
Build it 15 min
Build the model before you read any further. Everything after this is about making it do something, and none of it will make much sense with nothing on the table in front of you.
Use the viewer's own controls to zoom and turn pages. Fullscreen makes it big enough to build from.
Check the finished build against the picture before you switch anything on. A motor mounted the wrong way round is far easier to spot now than it is to debug later, when it looks like a program fault.
This is what you are building: the EV3 Snake Robot.
Make it move 10 min
Set the offset to zero first. You need to see the thrashing before the wave is worth anything.
Step 1 — no offset, on purpose
when program starts :: events hat
reset timer :: control
set [period v] to (2) :: variables
set [offset v] to (0) :: variables
set [swing v] to (40) :: variables
clear display :: display

forever
  set [f v] to ((timer) mod (period)) :: variables
  set [r v] to (((timer) - (offset)) mod (period)) :: variables

  if <(f) < ((period) / (2))> then
    [B v] start motor at (swing) % speed :: motors
  else
    [B v] start motor at ((0) - (swing)) % speed :: motors
  end

  if <(r) < ((period) / (2))> then
    [A v] start motor at (swing) % speed :: motors
  else
    [A v] start motor at ((0) - (swing)) % speed :: motors
  end

  write (offset) at line (1) :: display
end
Both joints in step. The snake flexes hard and travels nowhere. Mark where its head is with tape.
Step 2 — introduce the delay
Change one number — offset to 0.5 — and run it again from the same tape mark. Nothing else changes.
That is the entire lesson. Same motors, same speeds, same swing, same period. One number, and a machine that shook itself becomes a machine that travels.
Step 3 — let the head steer
```ev3blocks A second stack writes offset and nothing else. Put a hand in front of the snake and it reverses — by changing the direction of the wave, not the direction of a motor.
when program starts :: events hat
forever
// smooth the reading — the head swings with every bend (Lesson 14)
set [total v] to (0) :: variables
repeat (5)
set [total v] to ((total) + ([4 v] distance in cm)) :: variables
end
set [gap v] to ((total) / (5)) :: variables
write (gap) at line (3) :: display
if <(gap) < (20)> then
// reverse the wave: the snake backs away
set [offset v] to (1.5) :: variables
set status light to [red v] :: display
else
set [offset v] to (0.5) :: variables
set status light to [green v] :: display
end
end
1. ** `start motor`, never `run for`. ** Both joints must be moving at once at different points of the cycle. A `run for` anywhere collapses the wave into a sequence.
2. ** `mod` is what makes the cycle repeat. ** It gives the position within the current period, and the rear joint reads it at a time that is `offset` seconds behind.
3. **The head reading is smoothed** because the head swings with every bend — Lesson 14 doing exactly the job it was taught for.
4. **One writer for `offset`** (Lesson 11). The steering stack sets it; the wave stack only reads it.

**What success looks like:** with offset 0 the snake shakes in place; with 0.5 it travels; put a hand in front and it reverses without any motor direction being changed.

> **If it never travels at any offset**, the problem is grip, not programming. Try it on cloth or carpet before changing another number.
Challenges 27 min
Work through them in order — each is harder than the last. The extra challenge comes after all three, and it is meant to make you plan before you build.
Challenge 1
Set the offset to zero.
Watch the snake flex hard and travel nowhere. Mark its head position with tape.
Then set the offset to a quarter of the period, run it from the same mark, and measure. One number, and the difference between shaking and travelling.
Challenge 2
Measure travel against offset.
Try offsets of 0, a quarter, a half and three quarters of the period. Measure the distance travelled in ten seconds for each.
There is a best and there is a worst. Explain what is happening at the half-period offset that makes it so bad.
Challenge 3
Change the period and watch the offset stop working.
Halve the period without changing the offset. The snake stops travelling, even though you did not touch the offset.
Fix it by halving the offset too. Then write one sentence explaining why an offset must be thought of as a fraction of a cycle rather than a number of seconds.
Extra challenge
Make the snake navigate, not just travel.
The snake must move towards a target, stop when it reaches it, and back away if something gets too close — changing direction by reversing the WAVE, not by reversing a motor.
Requirements:
1. Nothing in your program changes a motor direction to reverse the snake. The offset does it.
2. The head reading is smoothed, because the head swings with every bend.
3. Exactly one stack writes the offset. Everything else reads it.
Then the honest part. Run the same program on three surfaces — bare table, paper, cloth — and measure the travel on each. Report all three.
A snake is the first model in this course where the mechanics matter more than the program, and finding out which one is limiting you is worth more than any tuning. If your best surface is three times your worst, say what that means for how you would improve the machine.