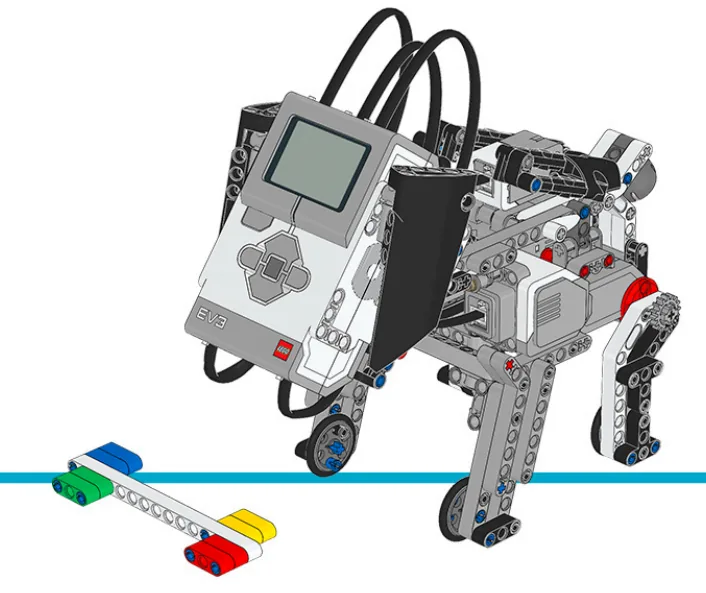
The Puppy: legs, a head that lifts and tilts, a Colour Sensor that can recognise its bone and its ball, and a Touch Sensor on its back for being petted.
Every model so far has waited. Something happens, the machine responds; nothing happens, the machine sits there. This one keeps a set of numbers that change by themselves, and acts on those.
By the end of the lesson your puppy will get hungry, tired and lonely whether or not anybody is watching, and will ask for whichever it needs most.
In the real world 5 min
Where you have seen it
A puppy left alone in a room does not stay still. It gets hungry, then bored, then sleepy, and each of those changes what it does next — without anything happening to it from outside.
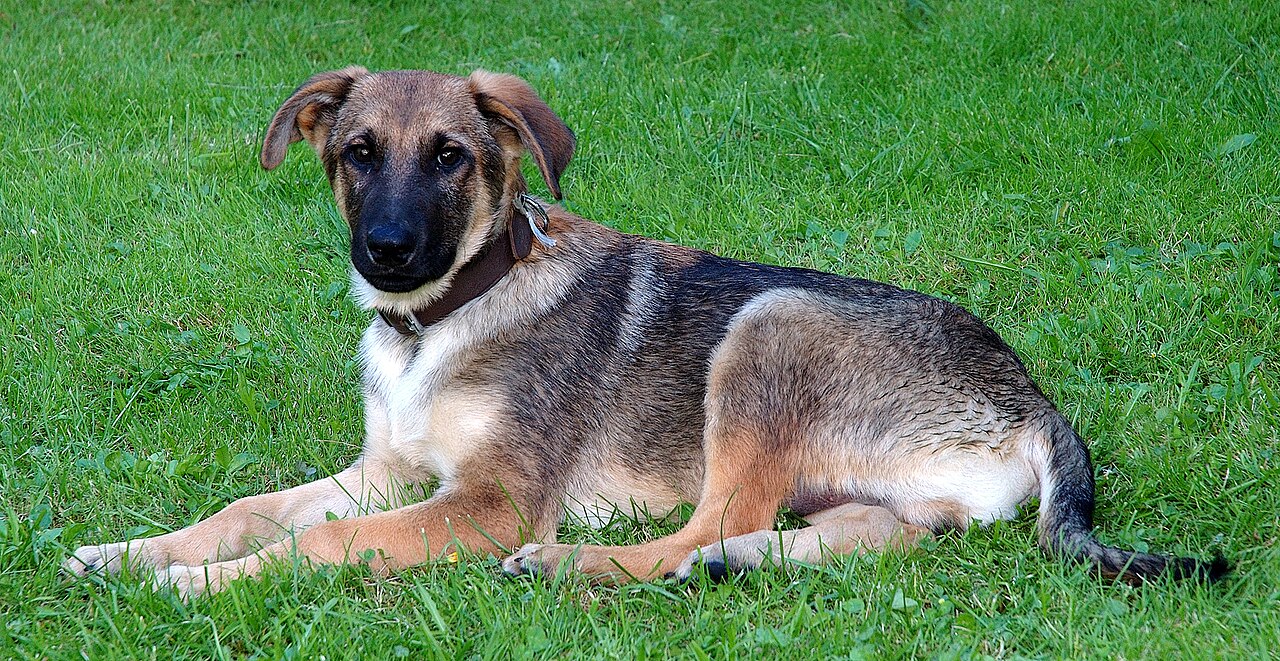
A young mixed-breed dog. Photo: André Karwath aka Aka / Wikimedia Commons (CC BY-SA 2.5).
Watch a dog choose. Hungry and lonely at once, it goes to whichever is worse — and a dog that has just eaten will ignore food it would have run across a garden for ten minutes earlier. The food did not change.
Why it is built that way
Because an animal has several needs and one body. Something has to decide, and the decision cannot be a fixed order — “always eat before playing” produces an animal that never plays until it is completely full.
The trick biology uses is to make every need a number that grows, and to act on whichever number is highest. No rules about which need matters more; the urgencies compare themselves.
What would go wrong without it
A machine with no internal state is a vending machine with fur. Push a button, get a behaviour, nothing in between. It is not that such a robot is broken — it is that it has no character, because character is what a thing does when nobody is asking.
A machine with needs behaves when nobody is watching. That is where character lives.
The main concept — needs that grow 6 min
A drive is a number with three rules: it rises on its own, it falls when satisfied, and it competes with the other drives for the body.
Drive
Rises
Falls when
Shows as
Hunger
Steadily, all the time.
The bone is shown.
Nosing at the ground, a whine.
Boredom
Faster than hunger.
The ball is shown.
Bouncing, a bark.
Loneliness
Slowly.
It is petted.
Head tilt, a small sound.
Tiredness
With activity, not with time.
It rests.
Lying down and ignoring everything.
Tiredness is the interesting one — it rises from what the puppy does rather than from the clock, so a puppy that has been played with hard behaves differently from one that has been ignored for the same length of time. One line, and the machine suddenly has a history.
Rising is a rate, not an event
when program starts :: events hat
reset timer :: control
set [last v] to (0) :: variables
forever
  set [dt v] to ((timer) - (last)) :: variables
  set [last v] to (timer) :: variables
  change [hunger v] by ((dt) * (1.5)) :: variables
  change [boredom v] by ((dt) * (2.5)) :: variables
  change [lonely v] by ((dt) * (0.8)) :: variables
end
Multiply by elapsed time, not by a loop count. A loop that ran faster would otherwise produce a hungrier puppy, which is nonsense.
Satisfaction should reduce, not erase
Setting hunger to zero when the bone appears gives a puppy that can be fully fed by a glimpse of food. Subtract instead, and cap at zero — then a hungry puppy needs feeding several times, and a nearly-full one barely reacts.
Cap the top as well. Without a ceiling, an ignored puppy accumulates a hunger of nine hundred and then ignores everything else for the rest of the session.
The most urgent need wins
// no fixed order of importance - the numbers decide
set [top v] to (hunger) :: variables
set [want v] to [FOOD] :: variables
if <(boredom) > (top)> then
  set [top v] to (boredom) :: variables
  set [want v] to [PLAY] :: variables
end
if <(lonely) > (top)> then
  set [top v] to (lonely) :: variables
  set [want v] to [YOU] :: variables
end
if <(top) < (30)> then
  set [want v] to [CONTENT] :: variables
end
Whichever number is highest chooses the behaviour — and if none of them is high enough, the puppy is simply content and does nothing.
The contentment threshold matters more than it looks. Without it the puppy always wants something, however faintly, and a creature that is permanently demanding is exhausting rather than alive.
ComponentData6 min
Variables
Why anybody needs one
Long before there were computers, people had exactly this problem. A shepherd counting sheep through a gate, a trader counting sacks of grain, a builder counting days — none of them can hold the number in their head while they get on with the work. So they scratched a mark on a wall, cut a notch in a stick, or wrote a number on a piece of paper. The number lived outside the person, in a place they had agreed on, and they could go back to it, read it, and change it.
Better still, once the number is written down somebody else can use it. Watch these two: one of them counts and writes, the other never sees a single animal and simply reads the wall.
Abby never remembers the numberBen never sees a henThe wall holds it for both
Abby has a gate and a wall. Before a single hen comes through she chalks 0 on the wall — that is where the number is going to live.A hen goes through. Abby rubs out the 0 and chalks 1. Another goes through, and she does it again.Three hens have been through, and the wall says 3. Abby is not remembering the number — she is reading her own wall each time and writing the next one.Ben has been at the market all morning. He has not seen one hen. He walks up, reads the wall, and knows the answer — without asking Abby anything.That is a variable. Not a number in somebody's head, but a place both of them agreed on: one writes to it, the other reads from it, and it keeps the number in between.Finished. Abby wrote, Ben read, and the wall is what joined them up.
the wall holds it
Notice what never happens: Ben never asks Abby. He does not need to — the number is not in her head, it is on the wall, and the wall is there for anyone who needs it.
Neither Abby nor Ben is holding the number — the wall is. And notice what never happens: Ben does not ask Abby. He does not need to, because the count is not in her head. It is in a place they both agreed on, which is what makes it useful to more than one of them.
That is all a variable is. The robot cannot hold a number in its head either, so you give it a wall of its own, write a name at the top so everyone knows which wall is which — score, count, degree_turn — and the program can read what is on it and write something new. One part of the program writes; another part reads. Exactly Abby and Ben.
The paper, and the two things you can do to it
Say we are counting rotations of a motor. Before we start we write 0 on the paper. Every time the motor completes a turn we cross out what is there and write one more: 0 becomes 1, then 2, then 3. That is change — it has to read the old number to work out the new one.
set is the other thing you can do, and it is completely different: rub the whole paper out and write the number you want. It does not care what was there. Press the buttons and watch what happens to the crossings-out.
score
0
The paper starts blank, so we write 0 on it. That is what a variable is: a place to keep a number while the robot works.
change leaves a trail — every value follows from the one before it. This is what counting is.
set wipes the sheet. Use it to start a count, never to continue one.
Press set score to 0 after counting up a few times and watch the whole history vanish. That is what happens to a count when a set block ends up in the wrong place — and it is the commonest variable bug there is.
Blocks reference
Block
What it does
set [count v] to (0)
Puts a value in, replacing whatever was there.
change [count v] by (1)
Adds to what is already there.
(count)
Reports the current value, for use in a comparison or on the display.
Set, or change?
set replaces; change adds. Counting things needs change. Starting a count needs set. Both programs below have both blocks — the only difference is whether the set block is inside the loop or above it.
set before the loop
when program starts
set count to 0
repeat 4
A run clockwise for 1rotations
change count by 1
set inside it
repeat 4
set count to 0
A run clockwise for 1rotations
change count by 1
Before the loop: counted 0Inside the loop: stuck at 0
Both programs count the turns of a motor. The left sets the count to zero before the loop; the right sets it inside.Turn 1. Both counters read 1, and so far the two programs agree.Turn 2. The left count is 2. The right was set back to zero at the top of the loop, so it is 1 again.Turn 3. The left reads 3. The right still reads 1.Turn 4. The motor turned four times on both robots — only one of them counted them.Finished. Four turns, and one of the two counts is fiction.
stopped
Both programs contain both blocks. Only the position of set [count] to 0 is different.
The count on the right is not broken; it is being told to start again on every pass. Each time round the loop it is wiped back to zero and then changed by one, so the honest answer is always 1 — while the motor cheerfully turns four times. A counter stuck at 1 almost always means a set block that has slipped inside the loop.
Anything oval is a number you can pick up
EV3 Classroom tells you what a block does by its shape, and once you have noticed that, a whole set of questions answers itself:
Oval — reports a number. The blue degrees counted, the timer, a distance, your own variable.
Pointed — reports true or false. These go in an if or a wait until, not in a variable.
Block-shaped — does something. These stack up; they do not fit inside anything.
So when a slot is oval, any oval fits it — and it does not matter in the least where that number came from. You can take the motor’s own A degrees counted and keep it in a variable you named degree_turn, then compare that with a number later. Pick an oval below and watch the same one drop into all three kinds of slot.
pick an oval
the same oval fits all three
set degree_turn to A degrees countedkeep it in a variable of your own
A degrees counted+10do arithmetic with it
A degrees counted>50compare it with a number
Every one of those slots is oval-shaped, and A degrees counted is an oval — so it drops in. Nothing about where the number came from matters.
This is what makes a variable more than a counter. A sensor reading is true only at the instant you read it; copying it into a variable freezes it, so the robot can compare where it is now against where it was when something happened:
when program starts :: events hat
[A v] reset degrees counted :: motors
set [degree_turn v] to ([A v] degrees counted :: sensors)
start moving [right: 30] :: movement
wait until <(([A v] degrees counted :: sensors) - (degree_turn)) > (400)>
stop moving :: movement
Read the condition aloud: how far the motor has gone now, minus where it was when we started, is more than 400. Both are ovals, so both can go into a subtraction, and the subtraction is an oval too — which is why it can go into a comparison. Ovals nest inside ovals as deep as you need.
Reset at the start, every time
A variable keeps its value after the program ends. Run the program again without setting it back and the second run begins where the first left off — the count starts at 14, the robot thinks it has already done the job. Every variable a program changes must be set to its starting value at the top.
Why it matters
A variable is the difference between a machine that repeats a fixed routine and one that responds to how things have gone — counting parts, tracking a score, remembering where it started.
ComponentControl4 min
The Timer
A wait pauses for a length of time. The timer is different: it runs in the background and can be read at any moment, so the robot can know how long something has taken while it is still happening.
Blocks reference
Block
What it does
(timer)
Reports the seconds since the timer was last reset.
reset timer
Sets it back to zero, so the next reading counts from here.
The timeout — a safety net
The most valuable use of a timer is escaping a wait that might never end. A robot told to drive until it sees a wall will drive for ever if the wall is not there. Combined with a timer, it can give up:
Repeat until the wall is close or five seconds have passed. That one change turns a program that can hang into one that always finishes. Both robots below are looking for a wall that is not there.
no way out
repeat until distance < 15
start moving straight: 0
with a timeout
reset timer
repeat until distance < 15 or timer> 5
start moving straight: 0
write GAVE UP at line 1
1.2stimer212cm · distance
Both robots are told to drive until something is within 15 cm. The room ahead is empty.Three seconds. No wall. Both are still driving — and the right-hand program is also watching its timer.The timer passes 5. The right-hand robot gives up, stops, and says so.The left robot is still going. Its condition can never become true, so that block will hold the program for ever.The right-hand program finished. The left one has not, and there is nothing to say why.
timer 1.2 s
The sensor is not faulty and the program is not wrong. There is simply no wall, and only one of these two programs has a way of noticing that.
The left-hand robot is not broken, and neither is its sensor. Its condition is simply one that will never come true, so the program sits on that block for ever — with nothing on the Brick to say so. The right-hand program asks the same question with an escape route bolted on, and finishes every time.
Why it matters
Real systems time themselves out constantly — a lift that cannot close its doors eventually gives up and beeps rather than trying for ever. A robot with no timeout simply stops responding, and there is nothing on screen to say why.
ComponentSensing6 min
The Colour Sensor
The Colour Sensor looks down at a surface and can answer three quite different questions: what colour is this?, how bright is this? and how light is the room? Choosing the wrong one is the usual reason a line-following robot refuses to work.
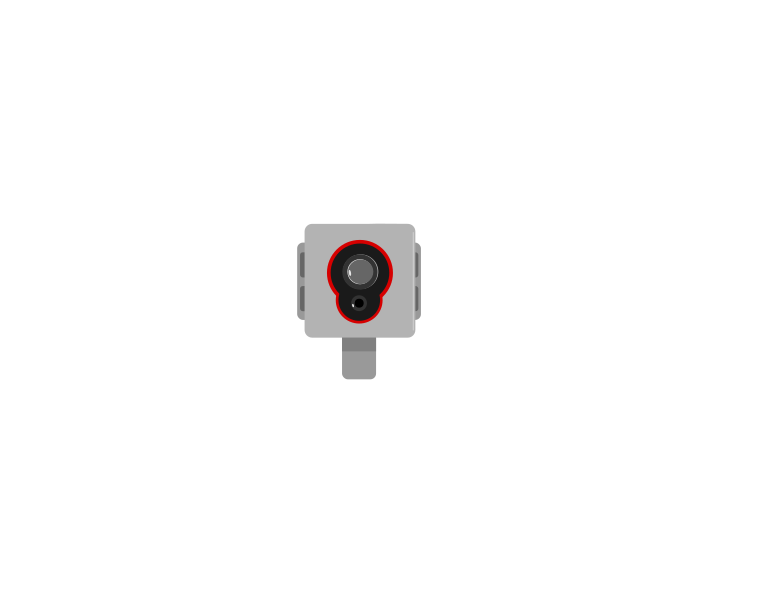
front
side
The sensor has its own lamp beside its detector. That is why it must sit close to the surface and at a steady height — lifting it changes the reading even though the surface has not changed.
Blocks reference
Block
What it does
([3 v] color :: sensors)
Reports which colour it sees, from a short list — red, blue, green, black, white and a few more.
([3 v] reflected light intensity :: sensors)
Reports how bright the surface is, as a number from 0 (black) to 100 (white).
<[3 v] is color [red v]? :: sensors>
Reports true or false for one particular colour.
([3 v] ambient light intensity :: sensors)
Reports how much light is falling on the sensor, 0 to 100, with its own lamp switched off.
Which colour, exactly?
The sensor does not describe a colour — it picks one from a list of eight, and that list is the whole of what it can ever say:
Reports
Means
0
no colour — too far away, or too dark to call
1 · 2 · 3
black, blue, green
4 · 5 · 6
yellow, red, white
7
brown
Anything you put under it is forced into one of those eight. There is no orange and no purple: an orange brick comes back as red or as yellow, and often as red one moment and yellow the next as the robot creeps along. Light blue and grey are the other classic pair to avoid — grey is neither black nor white, so it flips between them.
This is why colour mode is a good fit for a task you control and a bad fit for one you do not. Sorting the LEGO bricks that come in the set works, because they are made in exactly these colours. Reading a printed sheet, a coloured tile from another set, or anything pastel is asking the sensor to answer a question it does not have a word for.
Two practical points follow from how it decides. It shines its own lamp and looks at how much red, green and blue comes back, so it must be close — about half a centimetre, and no more than a centimetre. Lift it and the answer decays to 0. And because it takes those three readings before it can answer, colour mode is the slowest thing this sensor does; a robot driving quickly can pass right over a small patch without ever reporting it.
When a colour must be recognised reliably, test it. Drive the robot slowly over the real surface with color shown on the screen and watch what it actually says — including what it says at the edges between two colours, which is where the wrong answers live.
Colour, or brightness?
Both questions are asked of the same surface at the same moment. Watch the two answers travel across a strip of colours and then over the edge of a black line.
when program starts
forever
write 3 color at line 1
write 3 reflected light intensity at line 3
colour: 2 possible answers herereflected light: every value from 88 down to 8
The sensor sits a few millimetres above the surface, with its own lamp shining down.It travels across the coloured patches. One read-out names what it sees; the other says how much light came back.Now the edge of a black line. The name only ever says white or black — but the number slides all the way down, and every value in between means something.Names for sorting. Numbers for following.Finished. Same sensor, same surface, two very different kinds of answer.
reflected light 88
Watch the two read-outs over the last third of the strip. One of them changes once. The other changes the whole way across.
Over the patches, both read-outs are useful. Over the edge of the line they part company: the colour name has only two answers to give and jumps between them, while the number slides smoothly from 88 down to 8. Every value in that slide tells you how far onto the line the sensor is — which is information the name simply does not carry.
Use colour when the answer really is a name — sorting red bricks from blue ones, stopping on a green square.
Use reflected light when the answer is a matter of degree — following the edge of a black line, where the useful readings are all the greys between black and white.
A line follower built on colour names only knows “black” or “not black”, so it can only lurch. Built on reflected light it can tell how far onto the line it has drifted, which is what makes smooth following possible.
The third mode: ambient light
The first two modes both switch the sensor’s own lamp on and measure what bounces back off the surface. Ambient light intensity does the opposite: the lamp goes off, and the sensor simply reports how much light is arriving from wherever — 0 in the dark, up to 100 in bright light.
Mode
Own lamp
Measures
Points
colour
on
which of eight colours the surface is
at the surface, very close
reflected light
on
how much of its own light comes back
at the surface, very close
ambient light
off
how bright the surroundings are
wherever you want to measure
That makes it the only one of the three that is not really about the floor. A number between 0 and 100 means very little on its own, so watch the same sensor sit through five different rooms — nothing underneath it changes at any point.
the sensor’s own lamp is off — it is measuring the room
Start in the dark — a hand over the lens, or the lights off. Almost no light reaches the sensor, and it reports 0.Curtains drawn with one small lamp on. Enough to see by, and the sensor climbs to about 12.An ordinary classroom with the lights on sits somewhere around 38 — the middle of the scale, not the top of it.Move it beside a bright window and the same sensor, in the same room, reads about 72.A torch pointed straight into it pushes the reading to nearly 100 — which is how a light can be used as a signal to a robot.Finished. Same sensor, same floor underneath it — the only thing that changed was the room.
ambient 0
Nothing under the sensor changed at any point in this run. Ambient light is the one mode that is not asking about the surface at all.
Those are the shape of the scale rather than exact figures, but the shape is the useful part: a lit room is nowhere near 100, and the top of the range is reserved for a light pointed straight at the sensor. Cover it with your hand and the number drops to near zero — which is the easiest way to check the sensor is doing what you think.
Point it at the ceiling and it tells you whether the room lights are on; point it forwards and a torch will spike the reading, which is a way of signalling to a robot without touching it.
Do not reach for it as a substitute for reflected light. Room light falling on a black line and on white paper is almost the same, so ambient mode can barely tell them apart — the reason reflected light works is precisely that the sensor brings its own light and measures how much of it survives.
It is also the mode most at the mercy of the room. A reading taken by a window in the morning will not match the same spot in the afternoon, so anything built on ambient light needs measuring on the day, in the place, with the lights as they will be.
Light and height matter
Even the two lamp-on modes are affected by room lighting — a reading taken by a sunny window differs from one taken in a corner. The sensor must also sit close to the surface and at a constant height, because lifting it changes the reading even though the surface has not changed.
ComponentSensing5 min
The Touch Sensor
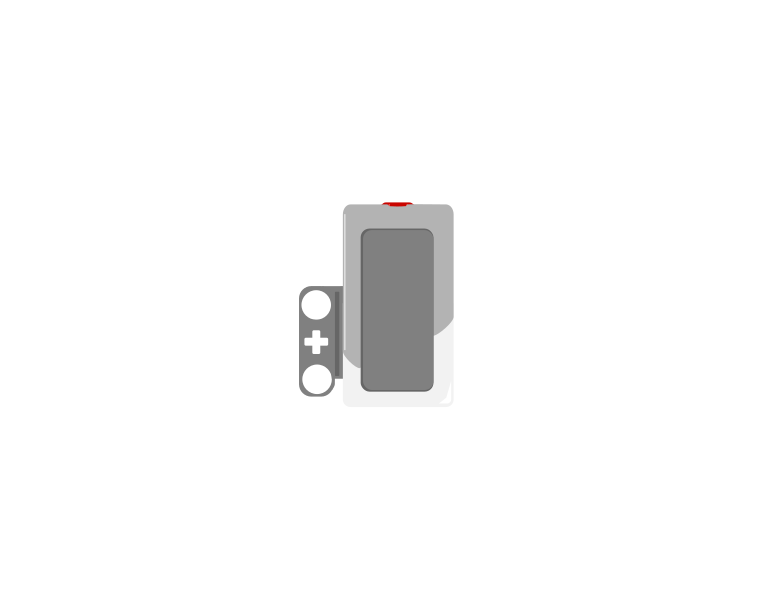
The Touch Sensor is the simplest input the EV3 has: a button that is either pressed or not. That sounds trivial, but it is how a robot knows it has hit a wall, reached the end of a track, or been told to start by a person.
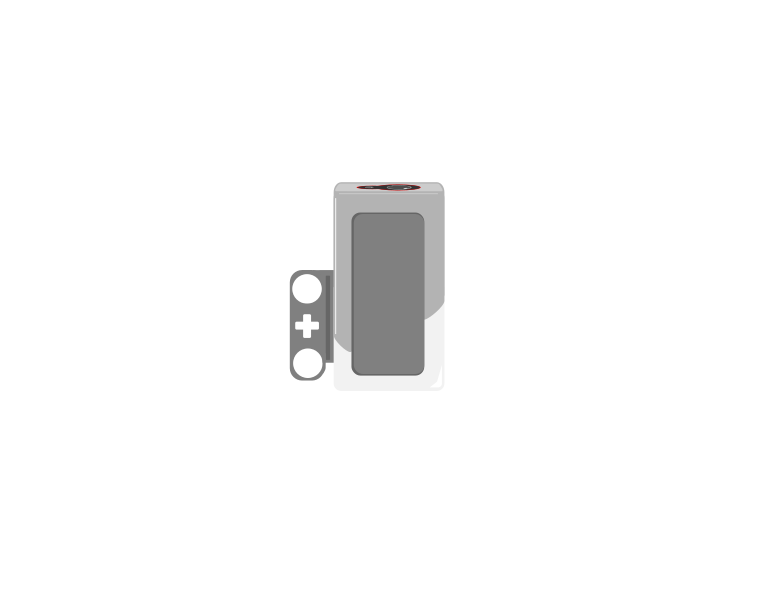
released
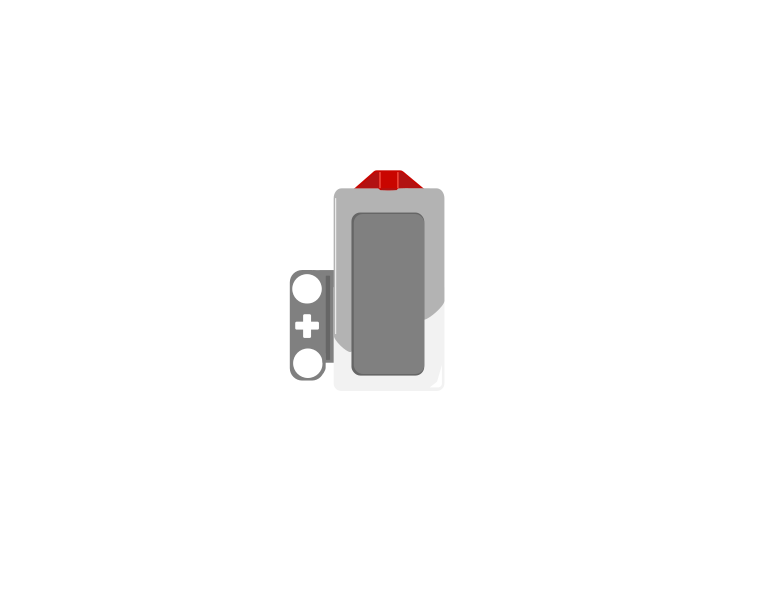
pressed
The red button out, and the same sensor with it pushed in. These two states are the entire output of this sensor — there is nothing in between.
Blocks reference
Block
What it does
wait until <[1 v] is pressed? :: sensors>
Holds the program here until somebody presses the sensor.
<[1 v] is pressed? :: sensors>
Reports true or false. Drop it into a condition to make a decision rather than a wait.
[1 v] when [bumped v] :: events hat
Starts a whole stack of its own. The dropdown chooses the moment: pressed, released or bumped.
Three different events
A button is not only “pressed”. One press is three things: the moment it goes down, the time it stays down, and the moment it comes back up. Watch what a single press does to three programs at once.
when program starts
forever
if 1 is pressed? then
change count by 1
versus two hat blocks
1 when pressed
1 when bumped
0is pressed? in a loop0when pressed0when bumped
In a loop: 0 answers from one pressBumped: exactly one
Nobody is touching the sensor. All three programs are watching it.A finger presses the button. Watch the red button go in — a couple of millimetres is the sensor's entire movement.The finger is still down. The loop checking «is pressed?» has already run hundreds of times, and every one of them counted.The finger lifts. Only now does «bumped» count, because bumped means pressed AND released.One press. Three completely different answers.Finished. The same press, counted three ways.
released
The middle counter is the one that surprises people. Nothing is wrong with it — a loop really does check that fast, and every check really is a separate answer.
Nothing there is broken. A loop really does get round hundreds of times a second, and each time it asks is pressed? the honest answer is still yes — so if that loop plays a sound or counts something, it does it hundreds of times from one finger. The two hat blocks each fire once, and they fire at different moments: pressed the instant the button goes down, bumped only when it comes back up.
The three options, and what each is for:
Pressed — the button is down right now. Good for “hold to run”.
Released — it is up again. Good for acting when somebody lets go.
Bumped — pressed and released. This is what you want for “click to start”, because it will not fire repeatedly while a finger stays down.
The classic bumper
when program starts :: events hat
set movement motors to [B v] and [C v] :: movement
start moving [straight: 0] :: movement
wait until <[1 v] is pressed? :: sensors>
stop moving :: movement
The robot drives until something presses the sensor. Note that the movement is started unmeasured on purpose — the sensor decides when to stop, not a distance.
Why it matters
Touch sensors are everywhere in machines you cannot see into: a lift knows the doors are shut, a printer knows the lid is closed, a washing machine will not spin until it is latched. They are safety devices as much as inputs.
Needs rise with time, fall when met, and the biggest one gets the body.
▶PriorityFrom Lesson 32 — deciding which of two things gets the motors. Here both competitors are internal, and both are always present.Show meHide
ComponentData6 min
Variables
Why anybody needs one
Long before there were computers, people had exactly this problem. A shepherd counting sheep through a gate, a trader counting sacks of grain, a builder counting days — none of them can hold the number in their head while they get on with the work. So they scratched a mark on a wall, cut a notch in a stick, or wrote a number on a piece of paper. The number lived outside the person, in a place they had agreed on, and they could go back to it, read it, and change it.
Better still, once the number is written down somebody else can use it. Watch these two: one of them counts and writes, the other never sees a single animal and simply reads the wall.
Abby never remembers the numberBen never sees a henThe wall holds it for both
Abby has a gate and a wall. Before a single hen comes through she chalks 0 on the wall — that is where the number is going to live.A hen goes through. Abby rubs out the 0 and chalks 1. Another goes through, and she does it again.Three hens have been through, and the wall says 3. Abby is not remembering the number — she is reading her own wall each time and writing the next one.Ben has been at the market all morning. He has not seen one hen. He walks up, reads the wall, and knows the answer — without asking Abby anything.That is a variable. Not a number in somebody's head, but a place both of them agreed on: one writes to it, the other reads from it, and it keeps the number in between.Finished. Abby wrote, Ben read, and the wall is what joined them up.
the wall holds it
Notice what never happens: Ben never asks Abby. He does not need to — the number is not in her head, it is on the wall, and the wall is there for anyone who needs it.
Neither Abby nor Ben is holding the number — the wall is. And notice what never happens: Ben does not ask Abby. He does not need to, because the count is not in her head. It is in a place they both agreed on, which is what makes it useful to more than one of them.
That is all a variable is. The robot cannot hold a number in its head either, so you give it a wall of its own, write a name at the top so everyone knows which wall is which — score, count, degree_turn — and the program can read what is on it and write something new. One part of the program writes; another part reads. Exactly Abby and Ben.
The paper, and the two things you can do to it
Say we are counting rotations of a motor. Before we start we write 0 on the paper. Every time the motor completes a turn we cross out what is there and write one more: 0 becomes 1, then 2, then 3. That is change — it has to read the old number to work out the new one.
set is the other thing you can do, and it is completely different: rub the whole paper out and write the number you want. It does not care what was there. Press the buttons and watch what happens to the crossings-out.
score
0
The paper starts blank, so we write 0 on it. That is what a variable is: a place to keep a number while the robot works.
change leaves a trail — every value follows from the one before it. This is what counting is.
set wipes the sheet. Use it to start a count, never to continue one.
Press set score to 0 after counting up a few times and watch the whole history vanish. That is what happens to a count when a set block ends up in the wrong place — and it is the commonest variable bug there is.
Blocks reference
Block
What it does
set [count v] to (0)
Puts a value in, replacing whatever was there.
change [count v] by (1)
Adds to what is already there.
(count)
Reports the current value, for use in a comparison or on the display.
Set, or change?
set replaces; change adds. Counting things needs change. Starting a count needs set. Both programs below have both blocks — the only difference is whether the set block is inside the loop or above it.
set before the loop
when program starts
set count to 0
repeat 4
A run clockwise for 1rotations
change count by 1
set inside it
repeat 4
set count to 0
A run clockwise for 1rotations
change count by 1
Before the loop: counted 0Inside the loop: stuck at 0
Both programs count the turns of a motor. The left sets the count to zero before the loop; the right sets it inside.Turn 1. Both counters read 1, and so far the two programs agree.Turn 2. The left count is 2. The right was set back to zero at the top of the loop, so it is 1 again.Turn 3. The left reads 3. The right still reads 1.Turn 4. The motor turned four times on both robots — only one of them counted them.Finished. Four turns, and one of the two counts is fiction.
stopped
Both programs contain both blocks. Only the position of set [count] to 0 is different.
The count on the right is not broken; it is being told to start again on every pass. Each time round the loop it is wiped back to zero and then changed by one, so the honest answer is always 1 — while the motor cheerfully turns four times. A counter stuck at 1 almost always means a set block that has slipped inside the loop.
Anything oval is a number you can pick up
EV3 Classroom tells you what a block does by its shape, and once you have noticed that, a whole set of questions answers itself:
Oval — reports a number. The blue degrees counted, the timer, a distance, your own variable.
Pointed — reports true or false. These go in an if or a wait until, not in a variable.
Block-shaped — does something. These stack up; they do not fit inside anything.
So when a slot is oval, any oval fits it — and it does not matter in the least where that number came from. You can take the motor’s own A degrees counted and keep it in a variable you named degree_turn, then compare that with a number later. Pick an oval below and watch the same one drop into all three kinds of slot.
pick an oval
the same oval fits all three
set degree_turn to A degrees countedkeep it in a variable of your own
A degrees counted+10do arithmetic with it
A degrees counted>50compare it with a number
Every one of those slots is oval-shaped, and A degrees counted is an oval — so it drops in. Nothing about where the number came from matters.
This is what makes a variable more than a counter. A sensor reading is true only at the instant you read it; copying it into a variable freezes it, so the robot can compare where it is now against where it was when something happened:
when program starts :: events hat
[A v] reset degrees counted :: motors
set [degree_turn v] to ([A v] degrees counted :: sensors)
start moving [right: 30] :: movement
wait until <(([A v] degrees counted :: sensors) - (degree_turn)) > (400)>
stop moving :: movement
Read the condition aloud: how far the motor has gone now, minus where it was when we started, is more than 400. Both are ovals, so both can go into a subtraction, and the subtraction is an oval too — which is why it can go into a comparison. Ovals nest inside ovals as deep as you need.
Reset at the start, every time
A variable keeps its value after the program ends. Run the program again without setting it back and the second run begins where the first left off — the count starts at 14, the robot thinks it has already done the job. Every variable a program changes must be set to its starting value at the top.
Why it matters
A variable is the difference between a machine that repeats a fixed routine and one that responds to how things have gone — counting parts, tracking a score, remembering where it started.
Say this back before moving on: “What does it want right now, and how badly?”
What’s in this build 4 min
Work out the four things the puppy can do with its body: eat, play, greet, sleep. Each needs a movement that is recognisable from across the room, or the drives are invisible no matter how well they are modelled.
Part
What it is doing here
EV3 Intelligent Brick
The inner life. During development the four numbers go on screen; for the final demonstration they come off, and the behaviour has to speak for itself.
Large Motor ×2 — the legs
Bouncing, walking, settling. Whole-body movements — a bored puppy uses its legs, a tired one folds them.
Medium Motor — the head
Carries most of the expression. A head tilt reads as curiosity, a lowered head as hunger or sleep. Small movements, big effect.
Colour Sensor — bone and ball
Distinguishes food from toy. The same sensor satisfies two different drives depending on what it sees.
Touch Sensor — being petted
On the back or the head. Contact reduces loneliness — and holding it down should not reduce it for ever.
Pick your rates so a session is interesting. If hunger takes twenty minutes to matter, nobody will ever see the puppy hungry. Aim for every drive to become urgent at least once in five minutes, then slow them down once the behaviour works.
Ports — and the rule 4 min
Sensors go in ports 1, 2, 3, 4. Motors go in ports A, B, C, D. They are not interchangeable, and nothing will tell you politely if you swap them.
Part
Port
Why this one
Head (Medium)
A
The expressive joint.
Left leg (Large)
B
The movement pair.
Right leg (Large)
C
The other half.
Petting (Touch)
1
Touch stays on 1 across the course.
Bone and ball (Colour)
3
Colour stays on 3 across the course.
Check your own build now:
Head in A, legs in B and C, petting in 1, sensor in 3.
Choose a bone colour and a ball colour the sensor never confuses. A puppy that eats its ball is a sensor problem wearing a behaviour costume.
Check the Touch Sensor is somewhere a person would naturally pet. If it has to be hunted for, loneliness will never fall.
Give the puppy a clear patch of table where it can bounce without falling off.
Connect the Brick 4 min
Two routes, and either is fine. USB is the reliable one and the one to fall back on when a room’s Bluetooth is busy; Bluetooth leaves the robot free to move, which some models need.
▶How to connect the BrickUSB and Bluetooth, step by step, with a photograph of every screen. Open it if you have not done this before — or if pairing is not working.Show meHide
USB — the reliable one
Switch the Brick on with the dark grey centre button.
Cable into the Brick’s PC port — the small square socket beside the numbered ports, not one of the numbered ones.
Other end into the computer.
Bluetooth — name it first
Do these in order. Naming the Brick after you go looking for it in the list is how groups end up driving each other’s robots.
Name your Brick. On the Brick: Settings (the spanner) → Brick Name. Type something nobody else will pick, then press the tick. Every Brick is called EV3 until somebody changes it.
Turn Bluetooth on. Settings → Bluetooth. Tick Bluetooth and Visibility. Leave iPhone/iPad/iPod unticked.
Connect from EV3 Classroom. Click the Brick icon at the top of the programming area, find your Brick by name, and click Connect.
Say yes on the Brick. It asks “Connect?” with the computer’s name — choose the tick, then accept the passkey, which is already 1234.
Where to read it. The name sits in the bar across the very top of the screen, on every screen — so you can check which Brick you are holding at any moment without going into a menu. This one is EV3VE. A Brick nobody has renamed says EV3.Step 3, and the reason step 1 exists. Three Bricks in range — read the name before you click Connect. Pairing with the wrong one is not an error: it works perfectly, on somebody else’s robot.
Step 2.Bluetooth switches the radio on; Visibility is what lets the computer find you. With Visibility off your Brick works perfectly and simply never appears in the list.Step 4. Look at the Brick. It asks whether to accept and names the computer. Choose the tick.Then the passkey, already 1234. Press the tick again and you are connected.
The two failures, every class, every time. The Brick has gone to sleep while you were building — press the centre button to wake it. Or you have paired with the group at the next table, which is why the name matters.
The long version, including Port View and how to read the port tiles, is in the Brick & Bluetooth guide.
Unplug for the real test. The whole claim of this lesson is that the puppy does things when nobody is interacting with it — which cannot be judged with it tethered to a laptop somebody is leaning over.
Confirm the connection 2 min
Check the Brick icon: connected, or not.
Three motor tiles — A, B and C.
Two sensor tiles — 1 and 3.
Show the bone and the ball to tile 3 five times each, from slightly different distances. Both must be named correctly every time. A drive satisfied by the wrong object makes the puppy look mad rather than alive.
Stuck? The long version, with a photograph of every screen, is in the Brick & Bluetooth guide.
Change it and test 8 min
One change at a time. Predict, then run, then look. Judge each version by watching it for two minutes without touching it.
Set hunger to zero when the bone is seen, instead of subtracting. Feeding is now instant and total. Say why that feels less like an animal.
Remove the 100 cap and ignore it for five minutes. Then try to satisfy it — a hunger of four hundred cannot be fed back down, and the puppy is permanently broken.
Remove the contentment threshold. It now always wants something. Watch somebody interact with it for a minute and ask whether they enjoyed it.
Make loneliness the fastest drive. A needy puppy. Same program, different personality, one number.
Add a memory: a drive that only falls if it is satisfied twice in a minute. A puppy that does not trust a single meal — and a demonstration that character is entirely in these rules.
Personality is not extra behaviours. It is the rates at which the same needs grow.
Where this goes 3 min
The puppy knows what it wants, but it has no idea what its own body is doing. If a leg jammed, it would keep asking the motor to move and never notice.
The next model has to notice. The Robot Arm grips things of unknown size, and the only way it can tell it has hold of something is by how hard it is having to work.
There is no gripping sensor. There is a motor that stops moving while still being told to move — and reading that correctly is what lets a machine handle objects it was never measured for.
Today the machine had wants. Next it learns to feel what its own body is doing.
This is what you are building: the Puppy.
Make it move 10 min
Four stacks: one grows the drives, one satisfies them, one chooses, one acts. Keeping them apart is what makes the puppy tunable.
when program starts :: events hat
set [hunger v] to (10) :: variables
set [boredom v] to (10) :: variables
set [lonely v] to (10) :: variables
set [tired v] to (0) :: variables
reset timer :: control
set [last v] to (0) :: variables
clear display :: display

// ---- 1. the drives grow on their own ----
when program starts :: events hat
forever
  set [dt v] to ((timer) - (last)) :: variables
  set [last v] to (timer) :: variables
  change [hunger v] by ((dt) * (1.5)) :: variables
  change [boredom v] by ((dt) * (2.5)) :: variables
  change [lonely v] by ((dt) * (0.8)) :: variables
  // resting is the only thing that reduces tiredness
  if <(want) = [SLEEP]> then
    change [tired v] by ((dt) * (-4)) :: variables
  end
  // nothing is allowed past 100 or below 0
  if <(hunger) > (100)> then
    set [hunger v] to (100) :: variables
  end
  if <(boredom) > (100)> then
    set [boredom v] to (100) :: variables
  end
  if <(lonely) > (100)> then
    set [lonely v] to (100) :: variables
  end
  if <(tired) < (0)> then
    set [tired v] to (0) :: variables
  end
end

// ---- 2. the world satisfies them ----
when program starts :: events hat
forever
  if <([3 v] colour) = (5)> then
    change [hunger v] by (-25) :: variables
    change [tired v] by (3) :: variables
    wait (1) seconds :: control
  end
  if <([3 v] colour) = (2)> then
    change [boredom v] by (-30) :: variables
    change [tired v] by (8) :: variables
    wait (1) seconds :: control
  end
  if <[1 v] is pressed? :: sensors> then
    change [lonely v] by (-20) :: variables
    wait (1) seconds :: control
  end
  if <(hunger) < (0)> then
    set [hunger v] to (0) :: variables
  end
  if <(boredom) < (0)> then
    set [boredom v] to (0) :: variables
  end
  if <(lonely) < (0)> then
    set [lonely v] to (0) :: variables
  end
end

// ---- 3. whichever need is worst gets the body ----
when program starts :: events hat
forever
  if <(tired) > (80)> then
    set [want v] to [SLEEP] :: variables
  else
    set [top v] to (hunger) :: variables
    set [want v] to [FOOD] :: variables
    if <(boredom) > (top)> then
      set [top v] to (boredom) :: variables
      set [want v] to [PLAY] :: variables
    end
    if <(lonely) > (top)> then
      set [top v] to (lonely) :: variables
      set [want v] to [YOU] :: variables
    end
    if <(top) < (30)> then
      set [want v] to [CONTENT] :: variables
    end
  end
  write (want) at line (1) :: display
  write (hunger) at line (3) :: display
  write (boredom) at line (4) :: display
  write (lonely) at line (5) :: display
  write (tired) at line (6) :: display
end

// ---- 4. and shows it ----
when program starts :: events hat
forever
  if <(want) = [FOOD]> then
    [A v] run to position (-30) [degrees v] at (40) % speed :: motors
    play sound [Animals / Dog whine v] :: sound
    [A v] run to position (0) [degrees v] at (40) % speed :: motors
  end
  if <(want) = [PLAY]> then
    [B v] run for (0.3) [rotations v] at (70) % speed :: motors
    [C v] run for (0.3) [rotations v] at (-70) % speed :: motors
    play sound [Animals / Dog bark 1 v] :: sound
    change [tired v] by (1) :: variables
  end
  if <(want) = [YOU]> then
    [A v] run to position (35) [degrees v] at (30) % speed :: motors
    play sound [Animals / Dog sniff v] :: sound
    [A v] run to position (0) [degrees v] at (30) % speed :: motors
  end
  if <(want) = [SLEEP]> then
    [A v] run to position (-45) [degrees v] at (15) % speed :: motors
    play sound [Animals / Dog snoring v] :: sound
    wait (3) seconds :: control
  end
  if <(want) = [CONTENT]> then
    wait (1) seconds :: control
  end
end
Grow, satisfy, choose, show — four stacks that can each be adjusted without touching the others. The numbers are on screen while you tune, and come off afterwards.
Every drive is multiplied by elapsed time, so the puppy behaves the same whether the loop is fast or slow.
Satisfying subtracts and clamps at zero. One glimpse of the bone is not a meal.
Tiredness rises from playing and only falls from sleeping — it is the one drive that depends on what the puppy did rather than how long it waited.
Sleep overrides the comparison entirely. A very tired animal ignores everything, and that is deliberate: one drive that can outrank all the others, exactly as in Lesson 32.
What success looks like: leave it alone for two minutes and it asks for different things at different times without anybody touching it. Play with it hard and it goes to sleep.
If it only ever wants one thing, that drive’s rate is far above the others. Watch the four numbers on screen for a minute and you will see which one is running away.
Build it 15 min
Build the model before you read any further. Everything after this is about making it do something, and none of it will make much sense with nothing on the table in front of you.
Use the viewer's own controls to zoom and turn pages. Fullscreen makes it big enough to build from.
Check the finished build against the picture before you switch anything on. A motor mounted the wrong way round is far easier to spot now than it is to debug later, when it looks like a program fault.
Challenges 27 min
Work through them in order — each is harder than the last. The extra challenge comes after all three, and it is meant to make you plan before you build.
Challenge 1
Watch the numbers for two minutes without touching it.
Put all four drives on screen and leave the puppy alone. Record what it asked for and when.
If it only ever wanted one thing, one rate is far above the others. Report the four rates you ended up with and why.
Challenge 2
Break satisfaction two ways.
First set hunger to zero when the bone is seen, instead of subtracting. Then remove the cap at 100 and ignore the puppy for five minutes before trying to feed it.
Report what each version does, and say which one leaves a puppy that can never be satisfied again.
Challenge 3
Remove the contentment threshold.
The puppy now always wants something, however faintly. Let somebody interact with it for a minute.
Ask them whether they enjoyed it, and write down what they said. A creature that is permanently demanding is exhausting, not alive.
Extra challenge
Two puppies, one program.
Produce two clearly different personalities by changing only the rate numbers — not by adding behaviours. A needy one and an independent one, say, or a greedy one and a sleepy one.
Requirements:
1. Every drive multiplied by elapsed time, so the puppy behaves the same however fast the loop runs.
2. Satisfying subtracts and clamps at zero; every drive capped at the top.
3. Tiredness rising from what the puppy DID, not from the clock, so a hard play session shows up later.
4. A contentment threshold, so it can be happy and do nothing.
5. The four numbers on screen while you tune, and OFF for the demonstration.
Then show both to somebody who cannot see the screen, for two minutes each, and ask them to describe each puppy in a sentence.
Write down what they said. If they used personality words — clingy, lazy, greedy, calm — without ever seeing a number, then the character really is in the rates. That is the claim, and a stranger's description is the only fair way to test it.