Challenge 1
Drive from HOME to the solar panel at F, following the line, and stop square on the station.
Quick Learn — the model, the instructions, the program and the challenges. The theory is in Full Lesson.
EV3 Robotics›Level 4 · WRO Prep›Lesson 7
Level 4 · Lesson 7 · EV3-L04-0760 minutes · Block 1 of 6 · Mat: WRO 2021 — POWERBOTS, Energy at Home
Drive from HOME to the solar panel at F, collect the energy module, bring it back, and release it in the delivery yard — three times in a row without touching the robot.
Nothing new is taught today. That is what makes it hard. Calibration, line following, squaring and distance all have to hold together for a whole round trip, and the failure you meet will almost certainly be in the joins rather than in any one piece.
Three in a row, no resets. One good run is luck. A WRO round gives you two attempts and no chance to straighten the robot between missions, so “it worked once” is not a result.
HOME → F → HOME. Out along the line, collect, come back. Write it as legs before you program it:
| Leg | What happens | Which lesson it came from |
|---|---|---|
| 1 | Leave the starting area, find the line | Lesson 3 — drive a measured distance |
| 2 | Follow the line towards F | Lesson 5 — two-state follower |
| 3 | Stop square at the solar panel zone | Lesson 6 — squaring |
| 4 | Collect the module | Today — the attachment |
| 5 | Return to HOME | Lessons 3 and 5 |
| 6 | Release inside the delivery yard | Today |
Test each leg on its own before joining any of them. A team that writes all six and then presses play has six suspects when it fails.
Individually your legs work. Joined up they often do not, and there are three usual reasons.
Leg 2 ends wherever the follower happened to stop. Leg 3 assumes the robot is somewhere specific. Every join needs an agreed handover state: where the robot is, which way it faces, and what the sensor should be reading. Write it between each pair of legs.
A robot at 40% speed does not stop where stop moving is called — it slides a little further. Add a short wait (0.2) seconds after a stop and before a measurement, so the robot has actually finished moving before the next leg assumes it has.
All the error from legs 1 to 4 is still there when leg 5 starts. Square on a line at the start of the return and the robot comes home from a known position instead of a hopeful one.
The attachment mounting points from lesson 2 are what today is for. Build the simplest thing that traps a module — a passive fork, no motor.
Resist the motorised gripper. A motor on port A is lesson 10’s job. Adding one today means that when the mission fails you will not know whether it was the gripper, the follower or the join. One new thing at a time.
when program starts :: events hat
set movement motors to [B v] and [C v] :: movement
clear display :: display
write [LEG 1 - LEAVE HOME] at line (1) :: display
move [forward v] for (1.5) [rotations v] at (30) % speed :: movement

write [LEG 2 - FOLLOW] at line (1) :: display
reset timer :: sensors
repeat until <(timer :: sensors) > (8)>
  if <([3 v] reflected light intensity :: sensors) < (50)> then
    start moving [right: 50] at (30) % speed :: movement
  else
    start moving [left: 50] at (30) % speed :: movement
  end
end
stop moving :: movement
wait (0.2) seconds

write [LEG 4 - COLLECT] at line (1) :: display
move [forward v] for (0.5) [rotations v] at (20) % speed :: movement
wait (0.5) seconds

write [LEG 5 - RETURN] at line (1) :: display
move [backward v] for (2) [rotations v] at (30) % speed :: movement
turn [right v] for (1) [rotations v] at (25) % speed :: movement
stop moving :: movement
play sound [Communication / Goodbye v] until done :: sound
The screen is your debugger. Writing the leg name costs nothing and turns “it went wrong somewhere” into “it went wrong in leg 4”. Keep this habit for the rest of the level.
The turn and reverse numbers above are a starting point, not an answer. Yours come from your own distance-per-rotation measurement in lesson 3.
Run it. It will fail. Work the failure properly instead of changing numbers hopefully:
A prediction that comes true means you understand the robot. A fix that works for a reason you cannot state will come back in Block 4.
Place the robot at HOME, press play, and do not touch it. Reset the module by hand between runs; the robot goes back to the start but is not straightened, adjusted or nudged.
If run 2 or 3 fails where run 1 succeeded, something is not repeatable — usually the starting position, or a battery that has dropped since you tuned. Both are real competition problems and both belong in the journal.
A journal showing a mission that worked immediately tells a judge nothing. A journal showing four failures, what each one taught you and the change that fixed it is exactly the evidence WRO judging asks for. The log is not an admission — it is the deliverable.
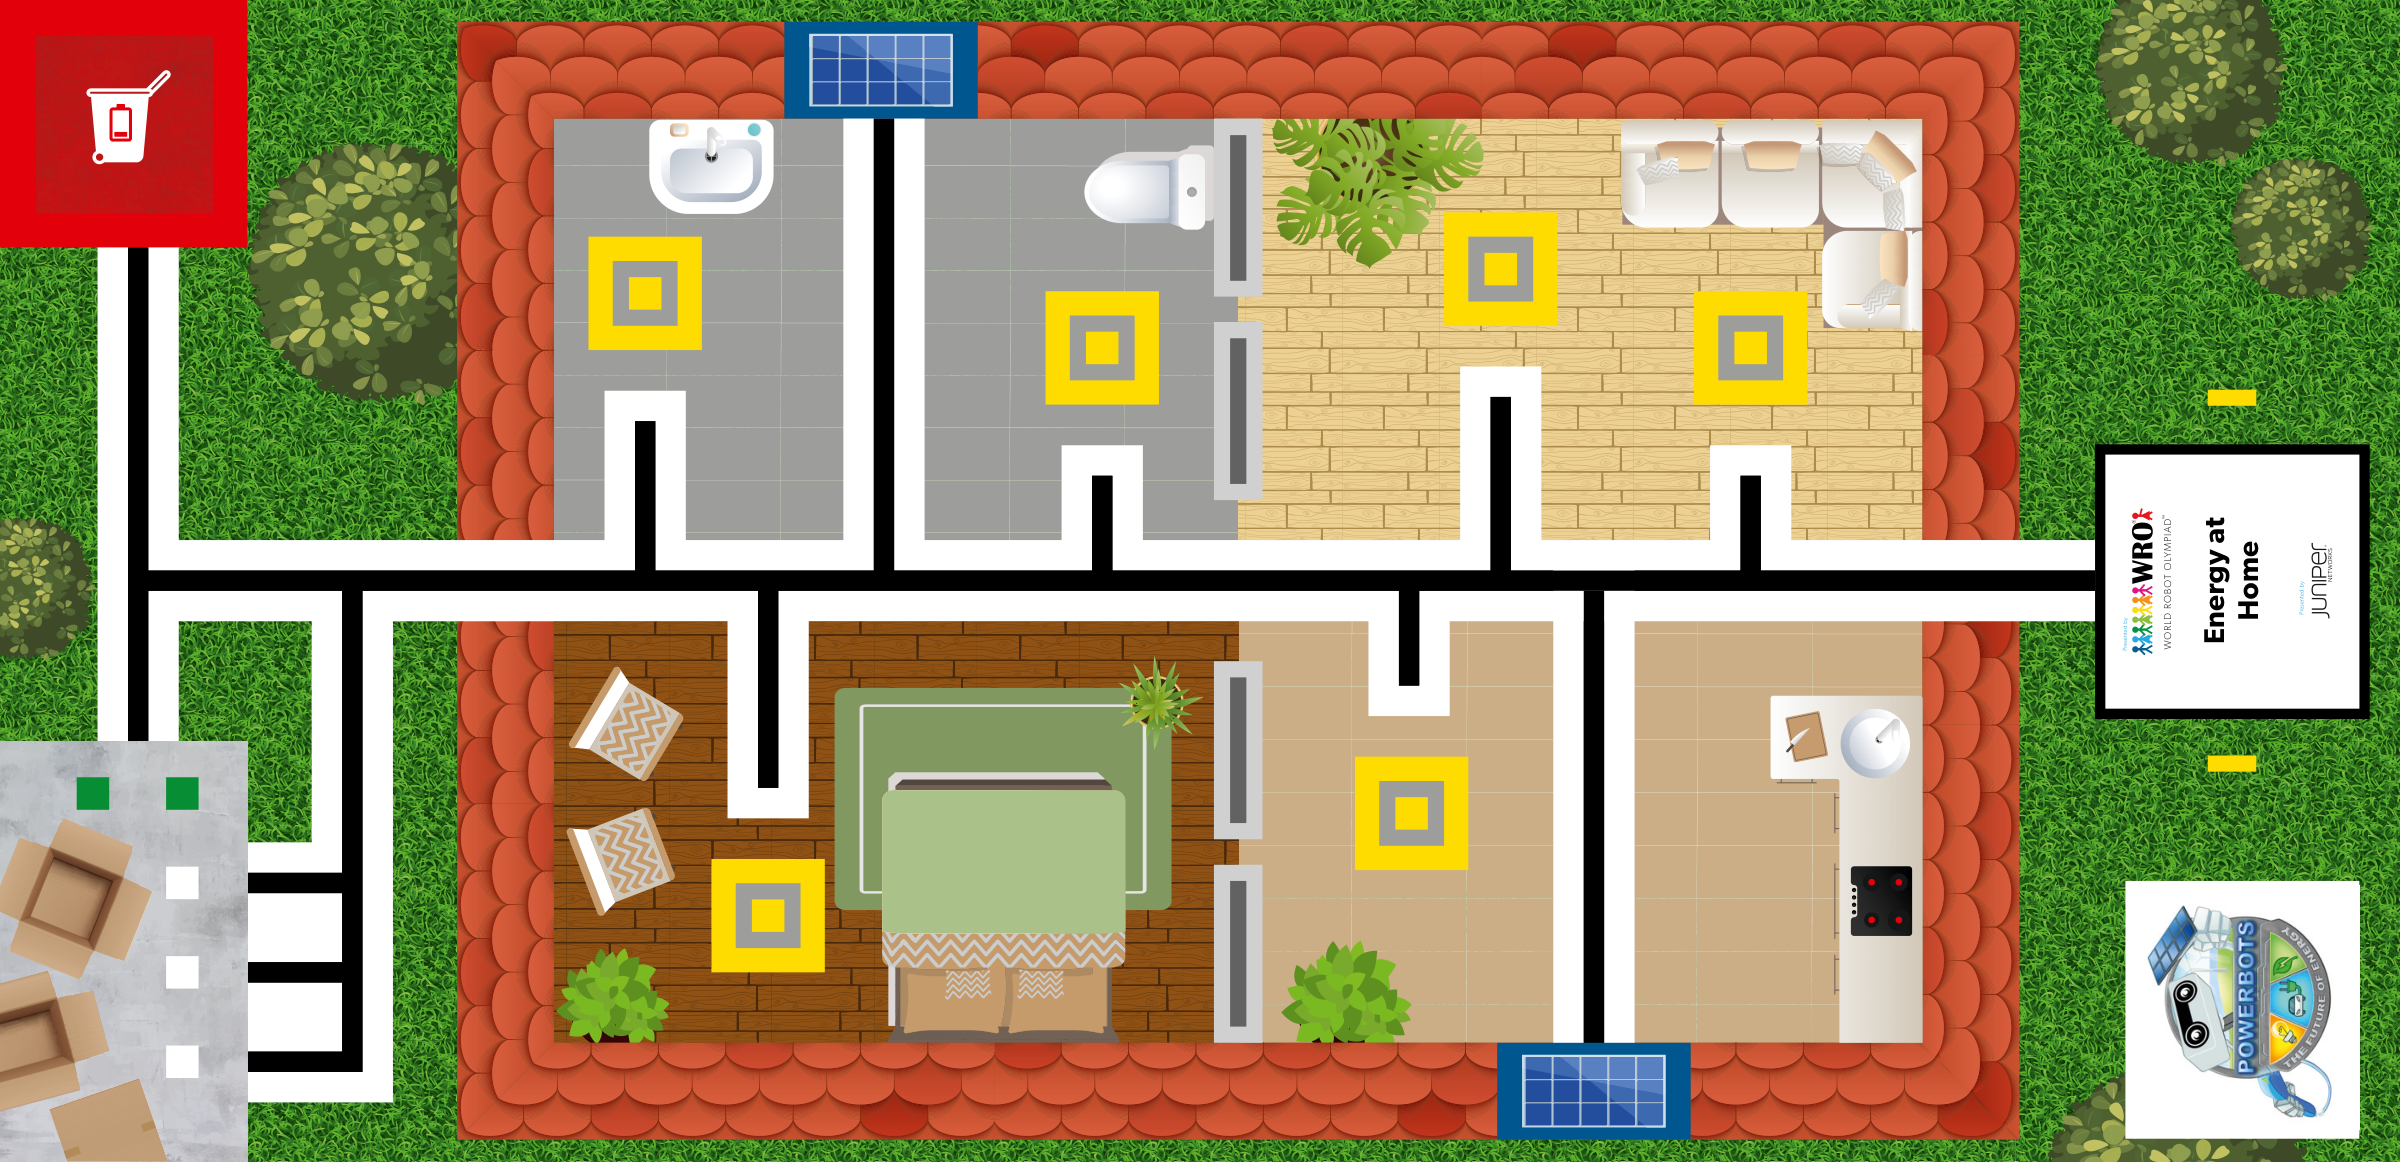
This model drives, so its challenges are run on a mat. Mats differ between branches — check you are looking at the one in your room.
WRO 2021 RoboMission Elementary — POWERBOTS — Energy at Home · official WRO game mat, 2362 × 1143 mm
The challenges name these places rather than distances, so the same challenge works on any mat:
Switch mats above and every route below is redrawn on the mat you chose.
Work through them in order — each is harder than the last. The extra challenge comes after all three, and it is meant to make you plan before you build.
Drive from HOME to the solar panel at F, following the line, and stop square on the station.
Add the attachment action: collect the energy module at F and hold it.
Return to HOME with the module still held and release it inside the delivery yard.
Complete the full collect-and-deliver mission three times in a row without a reset. If it fails, log what failed and what you changed, and do not clear the log.