Challenge 1
Sketch the attachment from the side and from above, marking the mouth, the compartments, the mount and where the motor sits, before you pick up a brick.
Quick Learn — the model, the instructions, the program and the challenges. The theory is in Full Lesson.
EV3 Robotics›Level 4 · WRO Prep›Lesson 18
Level 4 · Lesson 18 · EV3-L04-1860 minutes · Block 3 of 6 · Mat: WRO 2023 — Connecting the World, Marine Life Preservation
Collect the marine items, keep them told apart, and still have them aboard after the robot spins on the spot.
Read your sorter sentence from lesson 17 aloud before anyone opens a box. Block 2’s arm only had to hold one thing. This mat asks for more, and the difference is where most teams over-engineer.
Port 2 stays empty. It has been reserved since lesson 2 and the Gyro Sensor goes in it next hour. Whatever you build today must leave that port and its mounting space clear — finding out in lesson 19 that the sorter is sitting where the gyro goes costs you both.
The four reefs — A and B across the north, C and D across the south — are where the collecting happens, and they are arranged in a square. That means the route between them is mostly corners.
So the attachment has to survive turning. Not a gentle arc: a point turn, where the robot spins about its own centre and everything on board swings sideways. Test that today, at a reef, with the mechanism loaded.
The lighthouse island at E and the octopus at F sit between the reefs and the harbour dock. Whether they are on your route was decided in lesson 17; if they are, check the attachment reaches them too, because they are not shaped like reefs.
“Sorting” sounds like a programming problem and it is almost never solved that way. The cheapest, most reliable sorter is two places to put things.
If items of one kind go into one compartment and items of another kind into a second, the robot has sorted them without a single extra block of code, and nothing can get muddled by a sensor misreading. Compare that with detecting each item and steering it — more failure modes, more tuning, more to go wrong in a round.
Three principles to design against:
Ask what happens if the robot arrives crooked. It will. An attachment with a wide mouth that funnels items in is worth more than a precise one that only works from dead ahead — and by lesson 23 the route is four legs long, so “dead ahead” is not a safe assumption.
Sketch first — side and top — marking the mouth, the compartments, the mount and where the motor sits. Then build.
Keep lesson 10’s interface rules. It fits one way. It locates before it fastens. It does not move the wheels, the Colour Sensor or the Ultrasonic Sensor, because your follower is tuned to where those sit and lesson 21 is about to depend on the geometry as well.
Drive it from port A as before, keeping the motor on the robot rather than on the removable part. And leave port 2 and its mounting space alone.
You already have a Collect My Block from lesson 13. Today it either gains an input or gains a sibling, and which one is a genuine design decision.
If your sorter separates items mechanically, Collect probably does not change at all — the compartments do the work and the program never knows the difference. That is the good outcome.
If your design needs the robot to act differently for different items, give Collect an input saying which — and remember lesson 14’s warning that not every block wants one. An input here has to earn its place.
Find the motor numbers by hand as before, read the degrees off the port view, and write them in the journal. Whatever you build, the main canvas should still read as intentions, not motor blocks.
Load the attachment as it would be mid-route, then run a full point turn on the spot. Then another, the other way. Then a fast one.
Anything that falls out, shifts compartment or jams is a failure you have just found for free. Fix it mechanically — a lip, a higher wall, a lighter load — and repeat until three spins in a row change nothing.
Then re-run lesson 10’s check that still matters: put the attachment on and off three times and confirm the Colour Sensor still reads the same value over the same patch of mat. If that number moves, the interface has quietly regressed.
Drive from HOME to the north-west reef at A, collect, point-turn towards the north-east reef at B, drive across, collect again, and return to HOME with both items still aboard and still in the right compartments.
Two stations and one turn is the smallest honest test of a sorter, because one item can be held by luck and two cannot.
Today’s entry:
This model drives, so its challenges are run on a mat. Mats differ between branches — check you are looking at the one in your room.
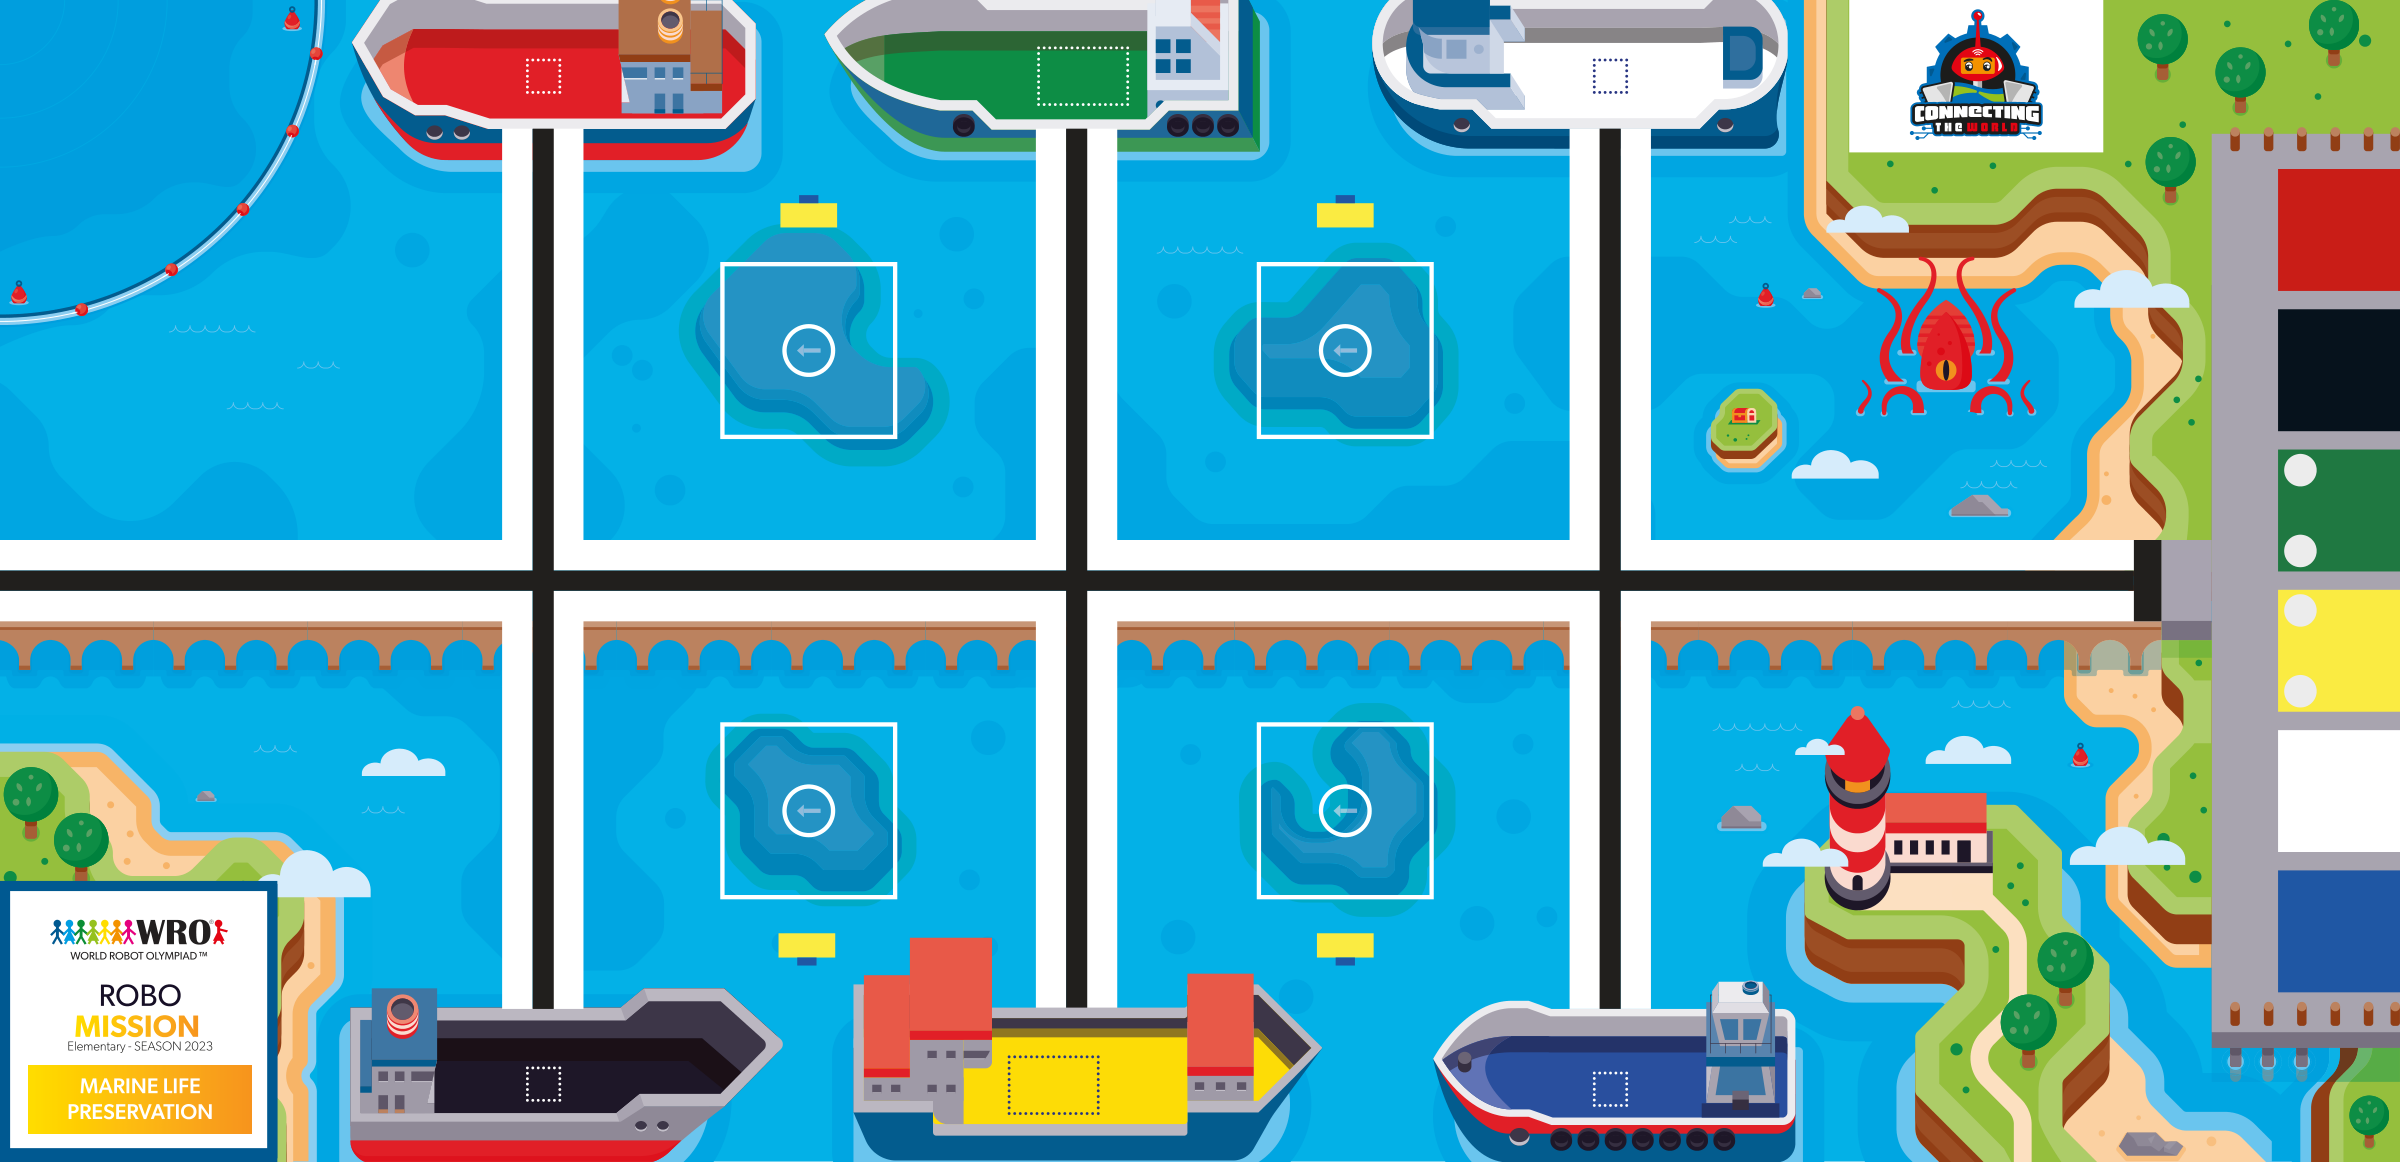
WRO 2023 RoboMission Elementary — Connecting the World — Marine Life Preservation · official WRO game mat, 2362 × 1143 mm
The challenges name these places rather than distances, so the same challenge works on any mat:
Switch mats above and every route below is redrawn on the mat you chose.
Work through them in order — each is harder than the last. The extra challenge comes after all three, and it is meant to make you plan before you build.
Sketch the attachment from the side and from above, marking the mouth, the compartments, the mount and where the motor sits, before you pick up a brick.
Load it as it would be mid-route and run a full point turn on the spot, then the other way, then a fast one. Anything that falls out or changes compartment is a failure to fix mechanically.
Put the attachment on and off three times, and confirm the Colour Sensor still reads the same value over the same patch of mat.
Drive from HOME to the north-west reef at A, collect, point-turn towards the north-east reef at B, cross and collect again, then return to HOME with both items still aboard and still in the right compartments.