Challenge 1
Mount the Gyro Sensor in port 2 so it cannot move relative to the frame, and put its angle on the Brick screen.
Quick Learn — the model, the instructions, the program and the challenges. The theory is in Full Lesson.
EV3 Robotics›Level 4 · WRO Prep›Lesson 19
Level 4 · Lesson 19 · EV3-L04-1960 minutes · Block 3 of 6 · Mat: WRO 2023 — Connecting the World, Marine Life Preservation
Meet the sensor that knows which way the robot is facing — and catch it lying to you while the robot is standing perfectly still.
In lesson 14 you measured your turns and found that 90, 45 and 180 did not all come out the same. You were told not to fix it. This is the block that fixes it, and today is the groundwork.
No turning today. None. Turns are next lesson and heading hold is the one after. If you start turning before you trust the reading, you will not be able to tell a drifting sensor from a lagging one, and you will lose two lessons instead of gaining one.
The four reefs sit in a square, so the route between them is corners: A to B across the north, B to D down the east side, D to C along the south. Every one of those is a turn your wheels currently guess at.
Worse, the long crossings between the reefs and the harbour dock at HOME are open mat. No line to follow, nothing to square against — just a heading you have to hold. That is what lessons 20 and 21 are for, and neither works without a reading you can believe.
The Gyro Sensor reports an angle: how far the robot has rotated since the sensor was last zeroed. Not a direction like a compass — a running total of turning.
That distinction matters. A compass knows where north is whatever you do. A gyro only knows how much you have turned since you told it to start counting, which is why zeroing it at the right moment is half the skill.
Now the defect. Put the robot on the table, zero the gyro, and do not touch it. Watch the reading on the port view for three full minutes.
The number moves. Nothing is turning, and the angle creeps anyway — perhaps a degree, perhaps several. That is drift, and it is not a broken sensor. Every gyro of this kind does it, because it measures the rate of turning and adds it up, so a tiny error in the rate accumulates into a growing error in the angle.
Drift is a clock, not a distance. It gets worse with time, not with how far you drive. A long, slow run accumulates more drift than a short fast one — which is exactly backwards from how students expect errors to behave, and worth saying out loud.
The fix is not to eliminate drift, which you cannot. It is to calibrate immediately before every run so the count starts from zero and has as little time as possible to accumulate. Calibration means letting the sensor sit still while it works out its own resting rate — so the robot must be motionless, on the mat, and nobody may lean on it.
The gyro goes in port 2, which lesson 2 reserved for it and lesson 18 was told to leave clear.
Three things decide whether it works:
If your Block 3 attachment has grown into the space port 2 needs, now is when you move the attachment — not the gyro.
Two short programs today, and neither one drives anywhere.
One — show the angle. A forever loop that displays the gyro reading on the Brick screen. This is your instrument for the rest of the block, and you will use it constantly.
Two — the calibration routine. At the very start of any program: robot still, calibrate the sensor, wait a moment, then reset the angle to zero. Make it a My Block called Calibrate Gyro — lesson 13’s habit — because it now belongs at the top of every program you write for the rest of the season.
Nothing may move during calibration. Not the wheels, not the attachment, not the table. A robot calibrated while somebody nudges it starts the run believing a lie, and the run curves for no visible reason.
Every gyro drifts differently, so measure yours rather than trusting a number from a book.
Calibrate, zero, and leave the robot still. Read the angle at thirty seconds, one minute and three minutes, and write all three down.
Now compare that against your round length from lesson 17. If your drift over the length of a round is small, you can trust the gyro for the whole run. If it is not, you will need to re-zero partway — and knowing which of those is true is worth more than any tuning you do later.
Try it once without calibrating first, for contrast. The creep is usually markedly worse, and that comparison is what makes the ritual stick.
Put the robot at HOME on the harbour dock, exactly as you would to start a round. Run Calibrate Gyro. Then leave it alone for as long as a competition round lasts.
Read the angle at the end. That number is the error your route inherits for free, before the robot has moved a millimetre — and it is the number lesson 23 will fight when it strings four legs together.
Today’s entry:
Lesson 20 needs lesson 14’s numbers. Find the turn measurements you took then — 90, 45 and 180 asked for against what the robot achieved. Next hour turns those into a before-and-after.
This model drives, so its challenges are run on a mat. Mats differ between branches — check you are looking at the one in your room.
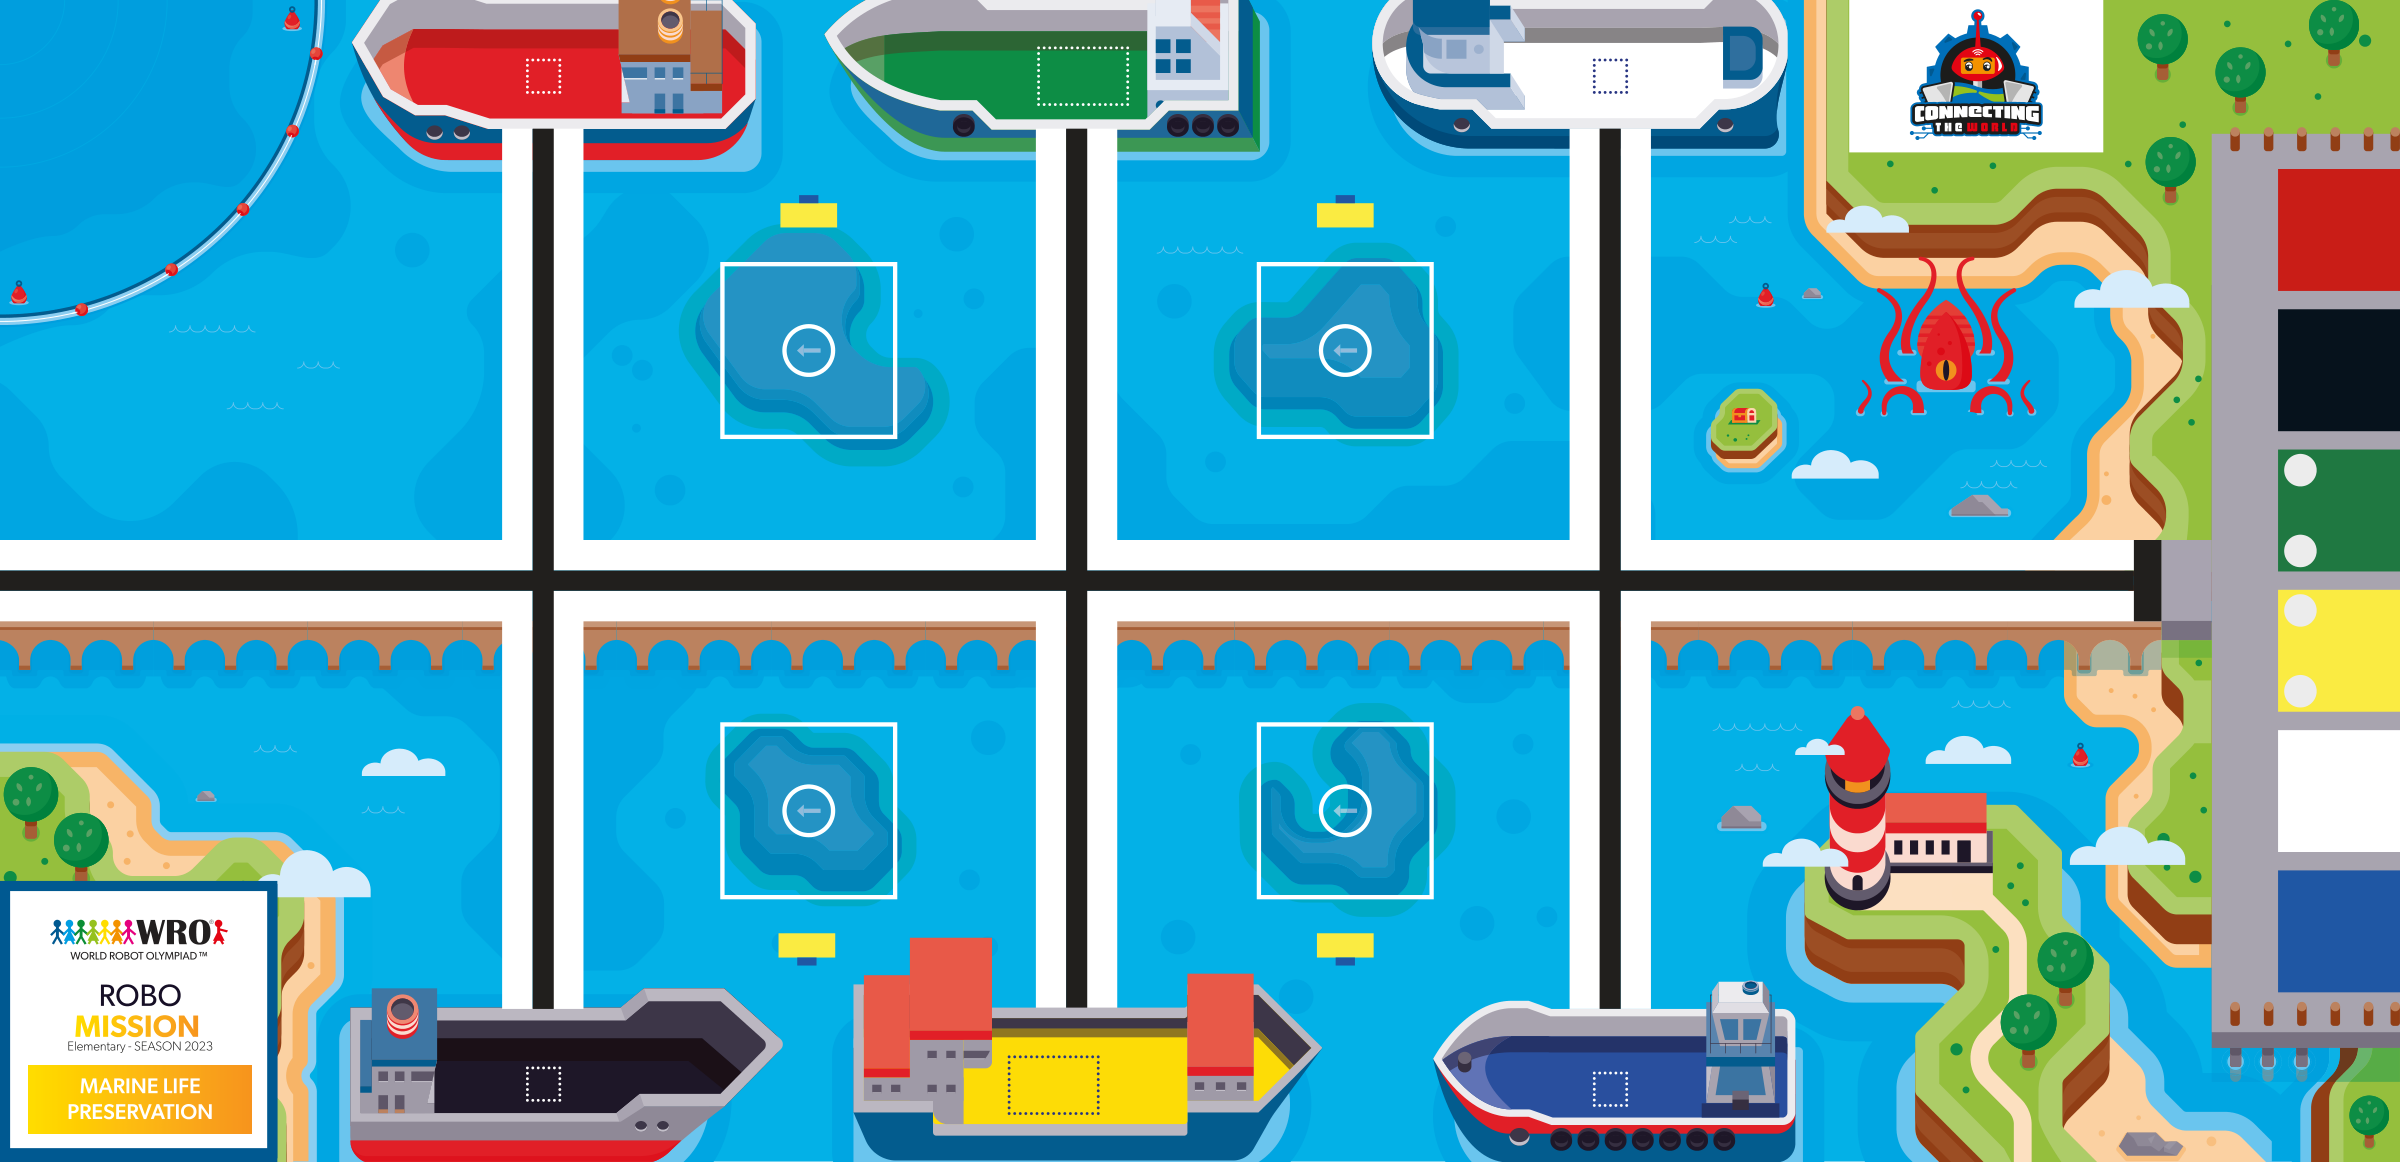
WRO 2023 RoboMission Elementary — Connecting the World — Marine Life Preservation · official WRO game mat, 2362 × 1143 mm
The challenges name these places rather than distances, so the same challenge works on any mat:
Switch mats above and every route below is redrawn on the mat you chose.
Work through them in order — each is harder than the last. The extra challenge comes after all three, and it is meant to make you plan before you build.
Mount the Gyro Sensor in port 2 so it cannot move relative to the frame, and put its angle on the Brick screen.
Zero the gyro and leave the robot completely still. Read the angle at thirty seconds, at one minute and at three minutes, and write all three down.
Do it again without calibrating first, and compare that creep against your calibrated readings.
Place the robot at HOME on the harbour dock exactly as you would to start a round, run Calibrate Gyro, and leave it untouched for a full round length. The angle at the end is the error your route inherits before the robot has moved — record it, and decide whether one calibration per round is enough.