Challenge 1
Build the menu loop: initialise the choice at the top, then loop — display the choice, wait for a brick button, act on it. Set the button block to BUMPED, not PRESSED, or one held button races the loop and the selection flies past.
Quick Learn — the model, the instructions, the program and the challenges. The theory is in Full Lesson.
EV3 Robotics›Level 4 · WRO Prep›Lesson 35
Level 4 · Lesson 35 · EV3-L04-3560 minutes · Block 5 of 6 · Mat: WRO 2025 — The Future of Robots
Choose the mission on the Brick, before the robot moves.
Lesson 33 said six fixed programs is six ways to load the wrong one. Today that becomes one program with a menu: press left and right to change the choice, press centre to run it.
A variable is a named box that holds a number. My Block inputs passed a value into a block. A variable holds a value across the program — which is how a choice made by a human before the start is still there when the robot needs it.
Start with the three pad runs, because they are the clearest case: launch pad 1 at A, pad 3 at B, pad 5 at C. Same drive along the bottom, same delivery to the gantry at D, different stopping point.
Three entries is the right size for today. It is enough to prove the menu works and small enough to fit the Brick screen without any of the scrolling machinery that lesson 36 adds.
Leave the satellite row at E out for now. It needs a different module, so it is a configuration question as well as a menu question, and adding it today doubles the debugging.
The program splits into two halves that never overlap.
The menu half runs first, while the robot is stationary. It shows a choice on the screen and lets the buttons change it. It ends the moment somebody presses centre.
The mission half reads the variable once and runs the matching sequence. By then the choice is fixed and nothing can change it.
The menu half is a loop with three things inside it: show the current choice, wait for a button, act on it.
Set the button block to BUMPED, not PRESSED. Bumped means pressed and released. On “pressed”, a button held for even a moment is seen many times as the loop races round, and the selection shoots past everything. This is the most common failure in this lesson by a wide margin, and it looks like a broken menu rather than a wrong setting.
Then the mission half is a Switch set to read a number, with one case per mission and a default case. Not three nested yes-or-no Switches: those cannot be extended tomorrow and they do not read as a menu to anybody looking at the canvas.
The default case matters. If the variable somehow holds a value with no case, the robot must display an error and stop — never fall quietly through into driving. A robot that moves when nobody chose anything is dangerous on a competition table.
On the canvas, in this order:
Initialise the variable at the top even though it looks unnecessary. EV3 variables keep their value between runs of the same program. Without step one, the menu opens on whatever was chosen last time — which works in practice all lesson and then fails on the day, when the run before it chose something else.
With three entries, the choice must stay between 1 and 3. Left at 1 and right at 3 have to do something sensible, and there are two reasonable answers.
Clamp — refuse to go below 1 or above 3. Simple, and the user can tell they are at the end because nothing happens.
Wrap — right at 3 goes to 1, left at 1 goes to 3. Faster to use, because the last entry is one press away from the first, and that matters when somebody is choosing under pressure.
Pick one and write down which. Either is fine; a menu that does neither and lets the choice reach 4 or 0 falls into the default case and stops, which teams read as a crash.
Display the choice as something a person can read at a glance — Pad 1, Pad 3, Pad 5, not 1, 2, 3. The names come from your menu list in lesson 33. A number on the screen is a thing to misremember at exactly the wrong moment.
And put Calibrate Gyro before the menu, not after. The robot is standing still during the menu, so calibrating first costs nothing and means the gyro is ready the instant somebody presses centre.
Four tests, all on the bench with the robot not driving:
Do all four before the robot is allowed to move. A menu bug found on the bench costs a minute; the same bug found mid-route looks like a navigation fault and costs the lesson.
Robot at HOME. Choose Pad 1, press centre, and let it run to A, do the job, deliver to the gantry at D and return.
Without touching the computer, run the program again and choose Pad 3. Then again, and choose Pad 5.
Three different missions, one program, no reloading. That is the claim, and either the robot goes to a different pad each time or it does not.
If the second run repeats the first mission, the variable is stale — go back to the initialisation at the top. That bug is the whole reason step one exists.
Today’s entry:
Three entries fit the screen. Six will not. Tomorrow the menu has to show a window onto a longer list and redraw as the selection moves — which is why today’s Switch had to be a numeric one that can grow, rather than nested yes-or-no Switches that cannot.
This model drives, so its challenges are run on a mat. Mats differ between branches — check you are looking at the one in your room.
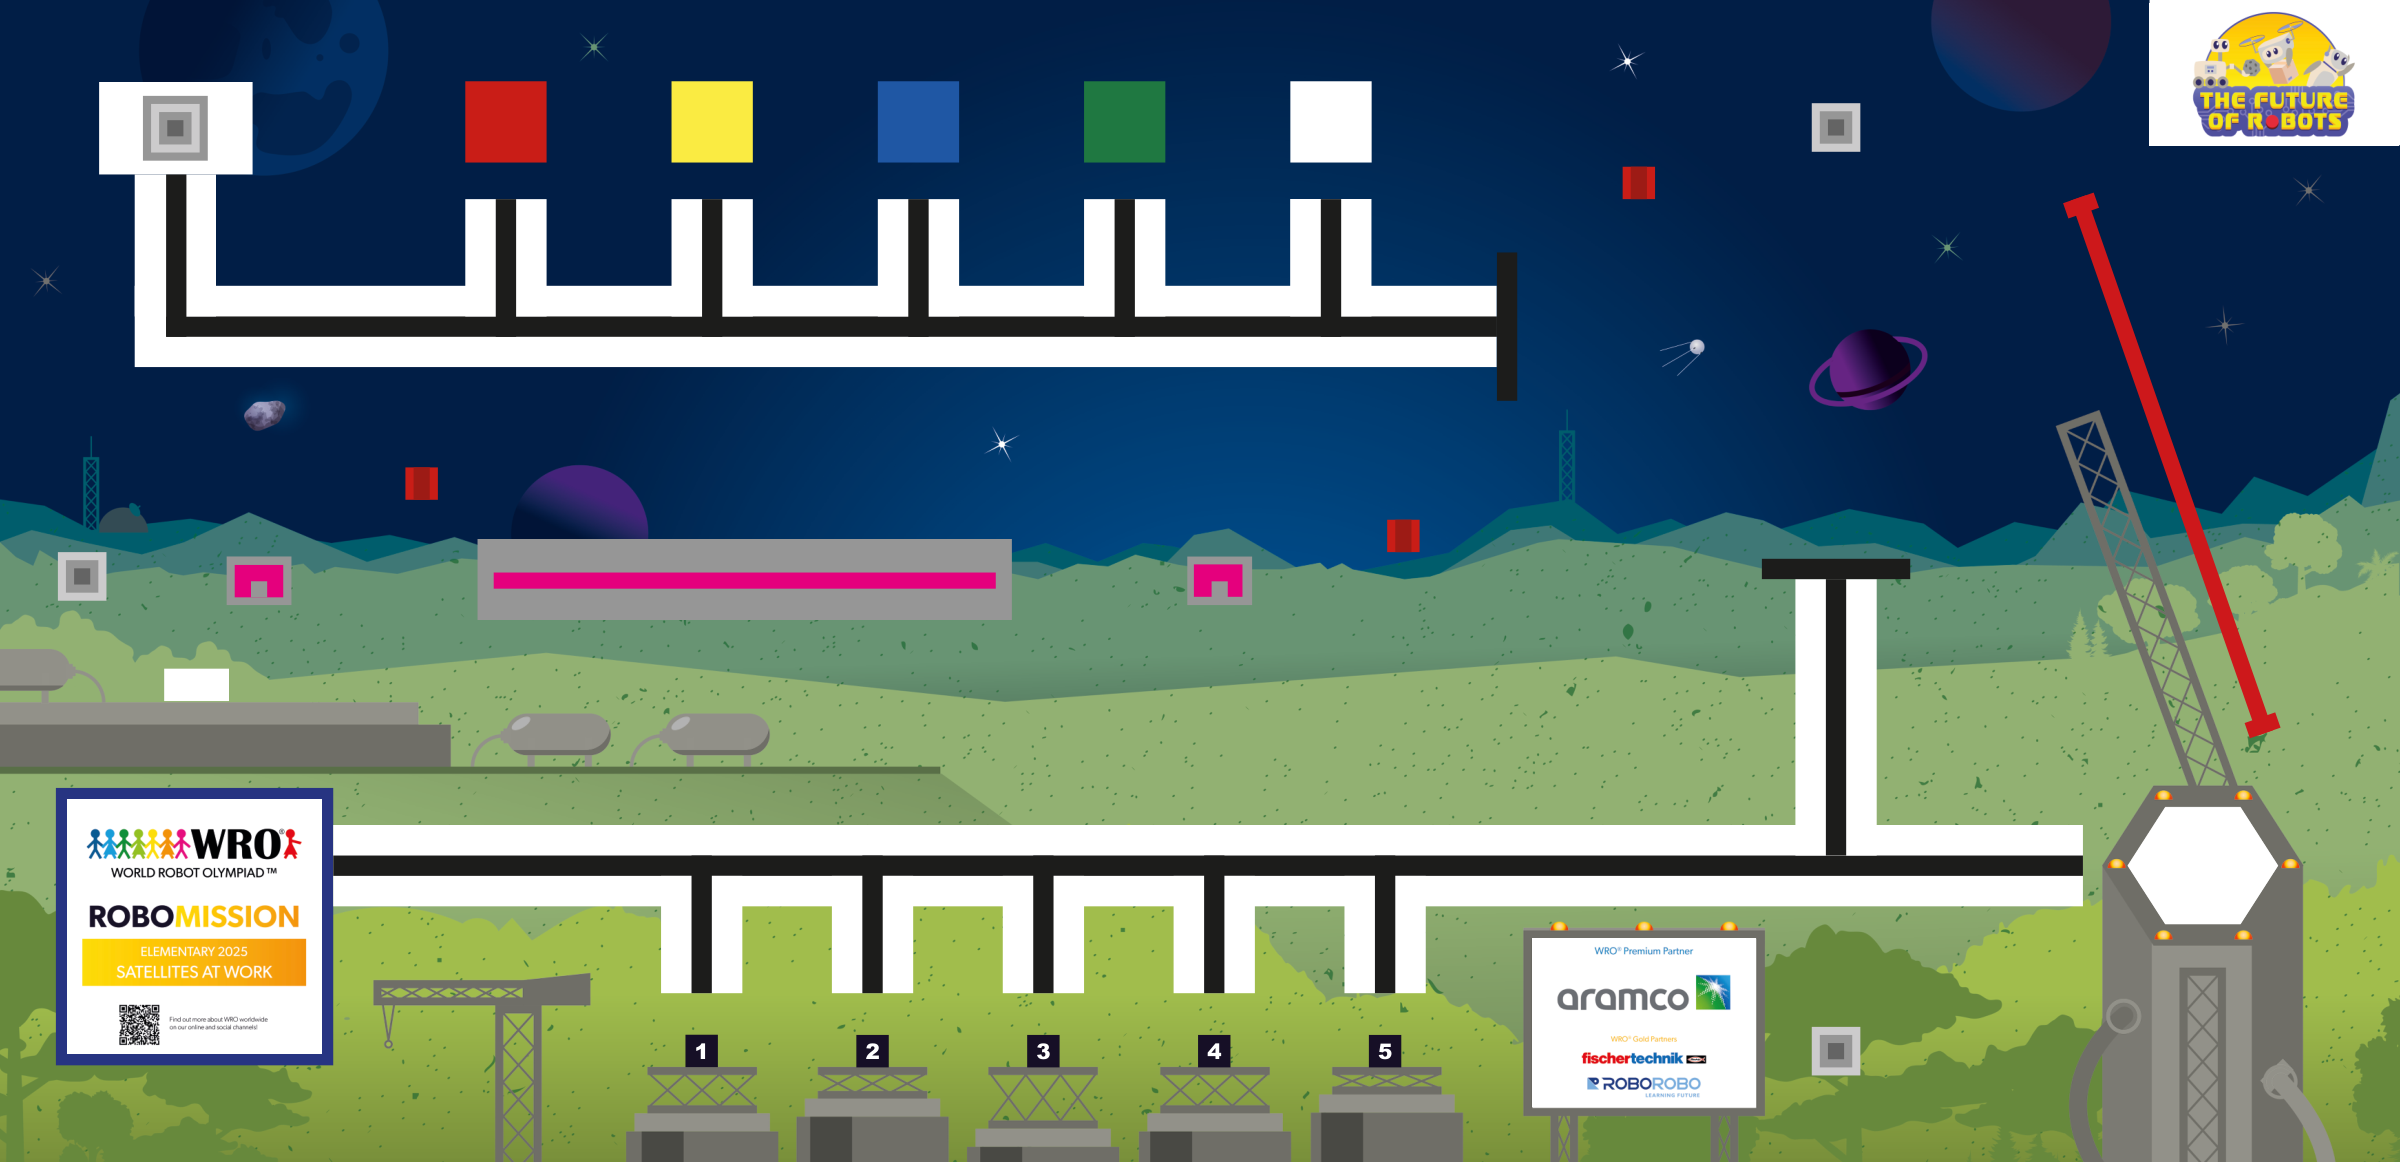
WRO 2025 RoboMission Elementary — The Future of Robots · official WRO game mat, 2362 × 1143 mm
The challenges name these places rather than distances, so the same challenge works on any mat:
Switch mats above and every route below is redrawn on the mat you chose.
Work through them in order — each is harder than the last. The extra challenge comes after all three, and it is meant to make you plan before you build.
Build the menu loop: initialise the choice at the top, then loop — display the choice, wait for a brick button, act on it. Set the button block to BUMPED, not PRESSED, or one held button races the loop and the selection flies past.
Dispatch with ONE numeric Switch on the choice — a case per mission plus a default that displays an error and stops. Not nested yes-or-no Switches: those cannot grow tomorrow and read as nothing on the canvas.
Four bench tests before the robot moves: press right fast (one move per press), hold right down (never races), reach both ends (clamps or wraps, never hits 0 or 4), and run the program twice (the menu must open on the same entry both times).
From HOME, choose Pad 1 and run it. Then, without touching the computer, run again and choose Pad 3, then again and choose Pad 5. Three different missions, one program, no reloading. If the second run repeats the first, the variable is stale — EV3 variables keep their value between runs, which is why it is initialised at the top even though the menu sets it anyway.