60 minutes · Ages 9–16 · Model: Elastic Car · No Brick, no program
What you are building 3 min
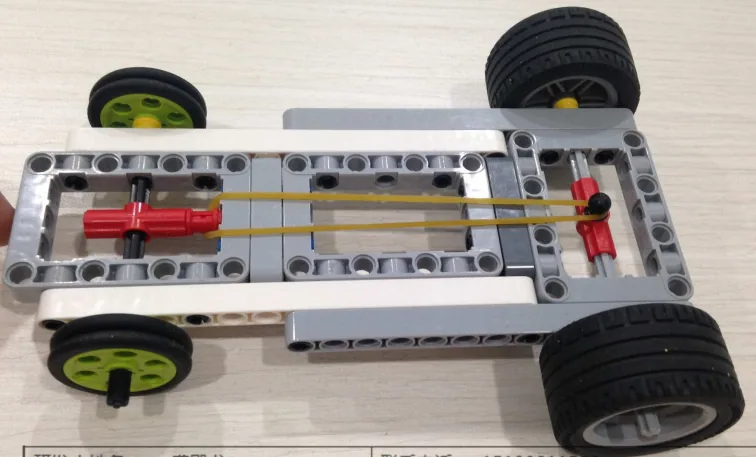
The Elastic Car: a chassis on four wheels with a rubber band hooked to the rear axle. Roll it backwards to wind the band up, let go, and it drives itself across the room.
There is no Brick in this model, no motor, and no program. That is not a mistake and you have not been given the wrong page. This is the one build in Level 1 with no electronics in it at all, and it is here on purpose.
Thirteen lessons have taught you to make things move by telling a motor what to do. Today you make something move by putting energy into it with your own hand and letting it back out. Same job. No electricity anywhere.
By the end you will have measured how far your car goes, found the point where pulling it back harder stops helping, and be able to explain why.
In the real world 5 min
Where you have seen it
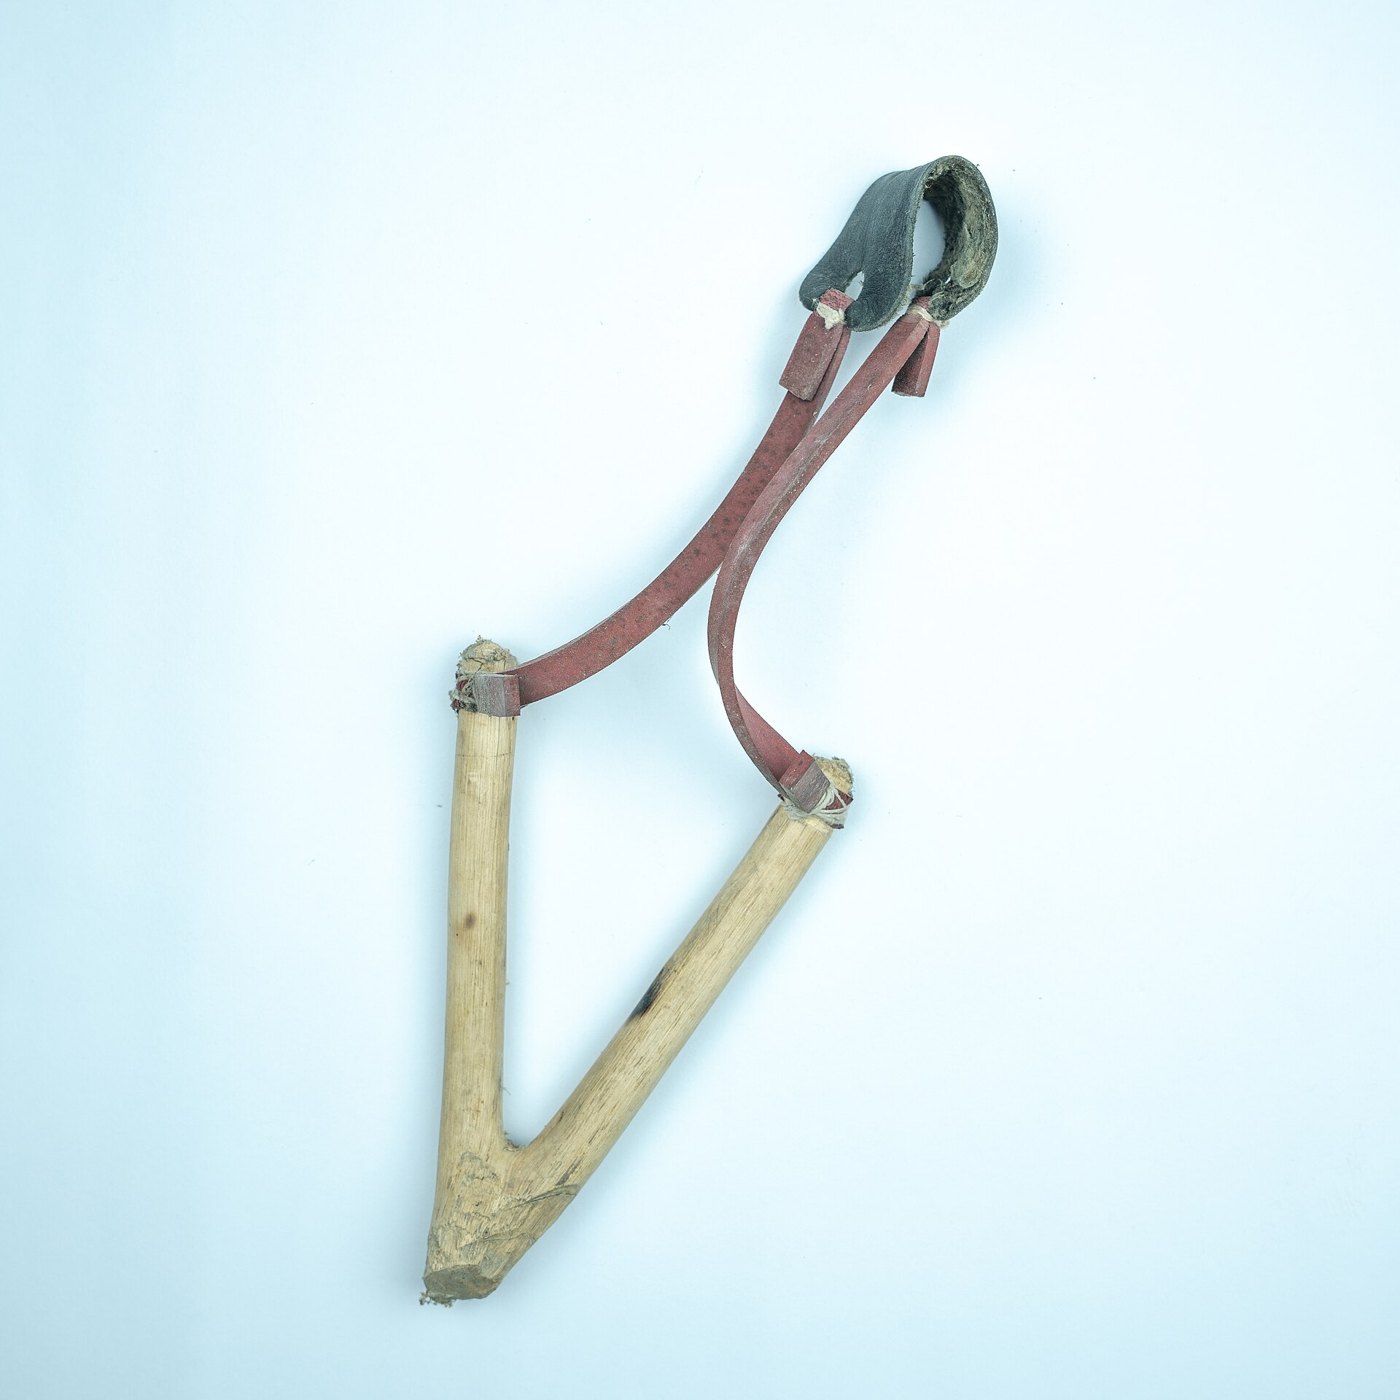
A lastik — a slingshot. A forked stick, two rubber straps and a leather pouch. Stretch it, let go, and something flies. Nobody needs to be taught how one works, which is exactly why it is the right place to start.
A slingshot from Bangladesh — a forked branch, two rubber straps and a leather pouch. Photo: Moheen / Wikimedia Commons (CC BY-SA 4.0).
Why it is built that way
When you stretch rubber you are doing work on it, and the rubber keeps that work. It is called elastic potential energy — potential meaning stored up, not being used yet. Let go and the rubber gives it straight back, as movement.
Rubber is good at this because it stretches a long way and comes back without breaking. Stretch a piece of wire the same distance and it stays bent: the energy went into damaging it rather than into storing.
The same trick is everywhere once you look. A bow and arrow. The spring in a mousetrap. A pole vaulter’s pole. The tendons in your own legs, which stretch and snap back on every single step and give you back some of the energy you would otherwise spend.
What would go wrong without it
Energy has to come from somewhere and it has to go somewhere. You cannot get more out than you put in. Your car will travel exactly as far as the energy your arm put into the band allows, minus whatever friction takes on the way.
Stored energy is borrowed, not made. Everything the car does on the floor, you did first with your hand.
The main concept — stored, then released 6 min
Two kinds of energy, and one turning into the other. That is the whole model.
When
What the energy is doing
You roll the car backwards
Your arm does work on the band. The energy is now stored — elastic potential energy. Nothing is moving.
You let go
The band unwinds the axle. The stored energy becomes movement — kinetic energy.
The car rolls to a stop
Friction and air have taken it all, mostly as a tiny amount of heat. It has not vanished; it has spread out where you cannot use it.
Now the part that catches everyone out. Pull the band back twice as far and you do not store twice the energy — you store about four times as much. Three times the stretch stores about nine times as much. The energy climbs far faster than the stretch does.
And yet the car does not go four times as far. Try the lab below and watch the two lines come apart.
Drag the car back, or use the arrow keys. Watch the two curves come apart.
50%of full stretch×1.0energy, against half stretch25distance travelled0%lost to spinning wheels
Every bit of the extra stretch is still turning into distance. Double this stretch and you store four times the energy — energy goes as the SQUARE of how far you pull.
Find the place where the green curve stops rising as fast as the orange one. That is the setting worth building for — and it is a number you measure, not one you can reason out.
The reason they come apart is grip. Past a certain point the axle is turning harder than the tyres can hold onto the floor, so the wheels spin instead of pushing. All that extra stored energy goes into a squeal and a puff of rubber dust.
The fastest car is not the one pulled back hardest. It is the one pulled back as far as the wheels can still grip.
▶Elastic energy, and mechanisms without motorsThe full reference for storing energy in rubber, and for the family of models that work with no electronics at all.Show meHide
ComponentMechanics5 min
Elastic and stored energy
A stretched rubber band is a store. Pull it and you put energy in; let go and it gives the energy back. Nothing about that is obvious from looking at the band, and two things about it are genuinely surprising.
Potential, then kinetic
While it is stretched and held, the energy is not doing anything — it is potential energy, stored in the shape of the material. Release it and that becomes kinetic energy: the energy of something moving. A pull-back car is a machine for making that swap at a moment of your choosing.
The same store shows up all over a LEGO set:
a rubber band stretched between two pins — a catapult, a launcher, a pull-back car;
a torsion spring wound up — a mousetrap-style snap mechanism;
a weight raised up — gravity is a store too, and a falling counterweight is a battery.
Double the pull is four times the energy
This is the first surprise. Energy stored in a spring or a band goes as the square of how far it is stretched — pull back twice as far and you have stored four times as much, not twice.
Which sounds like excellent news, and leads directly to the second surprise: the car does not go four times as far. Find out where the two part company.
Drag the car back, or use the arrow keys. Watch the two curves come apart.
50%of full stretch×1.0energy, against half stretch25distance travelled0%lost to spinning wheels
Every bit of the extra stretch is still turning into distance. Double this stretch and you store four times the energy — energy goes as the SQUARE of how far you pull.
Find the place where the green curve stops rising as fast as the orange one. That is the setting worth building for — and it is a number you measure, not one you can reason out.
Where the extra energy goes
Past a certain stretch the wheels can no longer grip hard enough to turn all that force into movement, so they spin. The energy still leaves the band — it goes into noise, heat and rubber marks on the table instead of into distance.
That ceiling is a property of your car on that surface: its weight, its tyres, how much of it is over the driven wheels. It is not something to look up. It is something to measure, and finding it is one of the most satisfying things a mechanical build has to offer.
Three things move the ceiling up, and all of them are build changes rather than bigger bands: more weight over the driving wheels, grippier tyres, and gearing the launch down so the same energy arrives as more force over more time.
Testing it properly
Change one thing at a time and run each setting three times, not once. Pull back 5 cm, then 10, then 15, measuring from the same starting line every time and recording every run. Three readings tell you whether a difference is real; one reading tells you nothing at all.
That is the discipline the whole of Mechanisms without motors is built around, and it is the same habit that makes debugging a program work.
Why it matters
Bows, clockwork, suspension springs and the recoil mechanism in a car door all store energy and give it back on demand. Storing energy slowly and releasing it quickly is how a small muscle — or a small motor — produces a large, brief force.
ComponentMechanics4 min
Mechanisms without motors
Some models have no motors and no sensors at all. They are not lesser lessons — they are where the physics lives. A build that stores energy, changes a force, or turns one kind of motion into another explains why the powered models later need the gearing and the speeds they do.
The one bargain behind all of it
Gears, pulleys and levers look like three different topics and are three shapes of the same deal: whatever you gain in force, you pay for in distance. Halve the effort and you move twice as far; move half as far and you need twice the effort. No arrangement of anything gives you both, and recognising that saves a great deal of time hunting for one.
What a mechanism actually does is let you spend the same effort in a form you can manage — a little at a time instead of all at once, or all at once instead of a little at a time.
How does a machine walk without ever being told to?
Friction — the one that is in all of them
Friction is what makes wheels grip and also what wastes effort. Every mesh, pin and rope turn loses a little to it, so a mechanism with more parts delivers less than the arithmetic promises. A build that binds — that is stiff to move by hand — is losing far more than that, and no amount of extra motor power fixes a mechanism that is rubbing.
Before measuring anything, turn the mechanism by hand. It should move smoothly and coast a little. If it does not, fix the build first; numbers taken off a binding mechanism describe the binding, not the idea you were trying to test.
How to investigate a mechanism
Since there is nothing to program, the work is measuring. Change one thing, keep everything else the same, and record what happened — pull the car back 5 cm, then 10, then 15, and measure how far each one travels. Three readings at each setting, not one, because a single run is not evidence.
That is genuinely how engineers test, and it is the same discipline that makes debugging a program work: change one thing at a time.
Say this back before moving on: “Pulling back further stores much more energy — but only some of it becomes distance.”
What’s in this build 4 min
Same question as every lesson: look at your model and find the electronic parts. Today the answer is the interesting bit.
There are none. No Brick, no motor, no sensor, not one cable.
So what is doing the work? Four things, and none of them plug in:
Part
Its job
The rubber band
The engine. It is the only thing in the model that holds energy.
The rear axle
Where the band winds on. Rolling the car back turns the axle, and the turning axle twists the band tighter.
The rear tyres
Grip. These are the big ones. They decide how much of the stored energy becomes movement rather than spin.
The chassis
Holds the front and rear axles square to each other. A twisted chassis is a car that curves.
Check the mechanism by hand
Spin each wheel with a finger. All four should turn freely and keep turning for a moment after you let go. A wheel that stops dead is rubbing.
Roll the car backwards slowly and watch the band. It should wind onto the axle, getting visibly tighter.
Roll it backwards the other way — that is, forwards. The band should unwind and go slack. If it tightens both ways, something is hooked wrong.
Hold the car still and look at the band anchor. Is it firmly attached at the front end? That anchor takes the whole force.
No ports today — and why that is worth noticing 3 min
Every other lesson in this course has a ports section, and it always says the same two lines. Today there is nothing to plug in, so read them once anyway — you will need them again next week.
Sensors go in ports 1, 2, 3, 4. Motors go in ports A, B, C, D. They are not interchangeable, and nothing will tell you politely if you swap them.
There is a real point hiding in the empty table. Ports, cables, Bricks and programs are not what makes a machine work — they are what makes a machine controllable. This car works perfectly and cannot be controlled at all. Once it is rolling you have no say in where it goes, how far it goes, or when it stops.
Keep that in mind for the challenges. Everything you want this car to do, you have to build in before you let go.
Check it before you launch 3 min
Normally this is where you confirm the Brick can see your motor. There is no Brick, but the job is identical: make sure the machine is right before you set it going, rather than debugging a launch you could have prevented.
Clear a run of at least three metres of smooth floor. Not carpet — the car will barely move on carpet, and you will blame the band.
Put a strip of tape across the floor as a start line. Every measurement today needs the same starting point or none of them can be compared.
Sight along the car from behind. Do all four wheels point the same way? A car that curves is a chassis problem and no amount of winding fixes it.
Check nobody is lying on the floor in the landing zone. This is a genuinely fast little car.
Change it and test 10 min
This is a proper experiment, so it has proper rules. Change one thing, run it three times, take the middle result. Predict before each set.
Keep a table. Three columns: what you changed, your prediction, what happened.
Three backward turns instead of five. Predict the distance before you run it.
Ten turns. Predict again. Most groups guess double the distance of five turns and get rather less — this is the lab from section 4 happening on your own floor.
Keep going up — fifteen, twenty turns — until adding more turns stops adding distance. Write down the number of turns where it stops helping. That is your car’s limit and nobody could have told it to you.
Back to your best number of turns, and now add a second rubber band. Predict: further, or just harder to wind?
Same again on a different surface — tile, then a sheet of paper laid flat, then carpet if you have it. Same energy in every time. The only thing changing is grip.
Step 3 is the finding worth keeping. Somewhere on your floor, with your tyres, there is a number of turns beyond which the wheels simply spin. Past that point every extra turn you wind on is wasted work — and you found where it is by measuring rather than being told.
A machine has a best setting, not a maximum setting. Finding it is engineering.
This is what you are building: the Elastic Car.
Build it 15 min
Build the model before you read any further. Everything after this is about making it do something, and none of it will make much sense with nothing on the table in front of you.
Use the viewer's own controls to zoom and turn pages. Fullscreen makes it big enough to build from.
Check the finished build against the picture before you switch anything on. A motor mounted the wrong way round is far easier to spot now than it is to debug later, when it looks like a program fault.
Make it move 10 min
No program to write. The winding is the program, and you run it with your hand.
Hold the car on the start line, wheels down, and roll it backwards — count the turns of the rear wheels out loud as you go. Stop at five.
Keep hold of it. Feel the band pulling the car forwards against your hand. That pull is the stored energy, and you can feel exactly how much you have put in.
Set it down gently, still holding.
Let go cleanly — no push. A push is you adding energy that is not in the band, and it ruins every measurement that follows.
Mark where the front of the car stops. Measure from the start line and write the number down.
Do it twice more with the same five turns.
What success looks like: the car runs reasonably straight and the three distances are close to each other. They will not be identical — this is a real machine on a real floor — but they should be in the same neighbourhood.
If the three runs are wildly different, something is inconsistent in how you are letting go. Are you always releasing at the same moment, without a shove? Is the band snagging on the chassis as it unwinds? Fix that before you change anything else, or every number after this is noise.
Challenges 27 min
Work through them in order — each is harder than the last. The extra challenge comes after all three, and it is meant to make you plan before you build.
Challenge 1
Hit the target. Mark a finishing zone the width of a ruler, a metre and a half from the start line, and land your car inside it. Find the number of backward turns by testing, then prove it: three runs in a row that all finish inside the zone, with no adjustment in between.
Challenge 2
Make it predictable. Build a table of backward turns against distance travelled, with at least four different numbers of turns and three runs each. Then have somebody call out a distance you have not tested, work out the turns from your table, and hit it first time.
Challenge 3
Find where the wheels start slipping and prove it with numbers. Keep adding turns and measuring until extra turns stop adding distance, then show your evidence — the turns, the distances, and the point where the line flattens. Say in one sentence where the extra energy is going once the wheels slip.
Extra challenge
Make a car that arrives, three times running, and then make it go further without winding it more.
Two parts. First, your car must finish inside a target zone your teacher picks, three consecutive times, with the wind set before the zone is announced — so you must have a rule, not a lucky number.
Then change the car itself so it travels further from the same number of turns. You may not add rubber bands and you may not wind it more. Everything else about the model is yours to change.
Plan on paper before you rebuild. Only some of the energy in the band becomes distance; the rest is lost to slip, to friction in the axles, and to air. Work out which of those you can attack with the parts you have, and predict how much it will buy you before you find out.
Two questions when you demonstrate it. What did you change, and which loss were you attacking? And why does pulling the car back twice as far not send it twice as far?