Challenge 1
Row an exact number of strokes. Your teacher names a number, say ten. The boat must row just that many and stop. The drum beats once at the start and once at the end. Someone should be able to count along out loud and finish with you.
Quick Learn — the model, the instructions, the program and the challenges. The theory is in Full Lesson.
EV3 Robotics›Level 1 · Beginner›Lesson 17
Level 1 · Lesson 17 · EV3-L01-1760 minutes · Ages 7+ · Model: Dragon Boat
The Dragon Boat: a long, thin boat. It has a row of paddles down each side. One motor works them all, through a line of gears. Switch it on, and the paddles row together.
The interesting part is how they row. The main gear is not fixed at its centre. So the paddles do not sweep round evenly. They pull through the water fast, and come back slowly. A stroke and a rest, again and again.
By the end, you will be able to explain something. An uneven movement is just what a rowing boat wants. A perfectly smooth one would be worse!
Dragon boat racing is over two thousand years old. Now people race dragon boats all over the world. Twenty paddlers sit in pairs down a long boat. A drummer at the front beats time. Someone at the back steers. Every paddle goes in and out of the water on one beat.

A paddle stroke has two halves. They do different jobs. In the catch, the paddle is in the water, pushing hard. That half moves the boat. In the recovery, the paddle is in the air. It comes back to the front. It does no useful work at all.
So a good team makes the catch quick and strong. They do the recovery more gently. The two halves take different times on purpose. What if each half took the same time? Then half the race would go on rushing paddles through the air.
What if the paddles were not all on the same beat? The boat would be worse than slow. Paddles would bang into each other. The boat would rock from side to side. A rocking boat pushes water down, not backwards.
That is what the drummer is for. Not to cheer, but to keep time. Twenty people rowing to different beats are not a team.
A push, then a rest. A rowing stroke is uneven on purpose, and everyone is uneven together.
This model has no step-by-step instructions. We have a video of the finished boat instead. It shows what you are aiming for. It shows how the paddles should move. That really helps! But you will work out the build with your teacher. There are no pages to turn.
Watch it twice before you touch a brick. The first time, watch the boat. The second time, watch just one paddle all the way round. How long does it spend going backwards fast? How long going forwards slowly?
Move the turning point away from the centre of a wheel. Then one steady turn becomes a fast half and a slow half.
In most models so far, a steady motor made a steady movement. That is what you would expect. The motor keeps one speed. So the machine keeps one speed.
The Dragon Boat breaks that rule. It does it with shape, not with any block. The main gear is fixed off its centre. The point it turns round is called the pivot. Look at a point on the gear’s edge. Sometimes it is close to the pivot. Sometimes it is far away. Near the pivot, it moves a short way. Far from it, it moves a long way. One steady turn gives two very different speeds at the paddle.
| What you want | Where it comes from |
|---|---|
| The whole crew rowing faster or slower | The program — [A v] set speed to (50) % |
| A set number of strokes, then stop | The program — [A v] run [clockwise v] for (4) [rotations v] |
| The catch being quicker than the recovery | The build. That is the pivot that is off the centre. No block can change it. |
You can build a rhythm into a machine. Then a motor at one steady speed plays it for you. It keeps going as long as you like.
Everything an EV3 does begins with a motor turning. Before worrying about how far or how fast, there are only two things to say to a motor: start and stop. The blocks are the same whichever motor you use — only the port letter changes.
| Block | What it does |
|---|---|
[A v] start motor [clockwise v] :: motors | Starts the motor and immediately carries on to the next block. The motor keeps turning on its own. |
[A v] stop motor :: motors | Stops the motor. |
wait (2) seconds | Holds the program here, which is how you control how long a motor runs. |
Because start motor does not wait, a motor started on its own would run until the program ended. The pattern that gives a motor a length is three blocks:
when program starts :: events hat
[A v] start motor [clockwise v] :: motors
wait (2) seconds
[A v] stop motor :: motors
Read it aloud: start it, leave it two seconds, stop it. Change the wait and you change how far the motor gets.
The highlight below follows the block the Brick is running, and the shaft turns only while the program is between start motor and stop motor. Notice that the count keeps climbing all the way through the wait — the wait does not pause the motor, it pauses the program.
0.00rotations so farnoshaft turning
The count does not pause when the program does. A wait holds up the blocks, and the motor carries on turning underneath it.
This is the whole idea behind start motor: it hands the motor its instruction and moves on, leaving the motor running behind it. Nothing stops the shaft until a block tells it to.
The direction dropdown says clockwise or counterclockwise — but clockwise seen from where? Always from the axle end: look straight at the shaft coming towards you, and clockwise is the way a clock’s hands go.
Here the Medium Motor faces you, so its output axle points straight out of the page. This is the view to picture when you are choosing a direction.
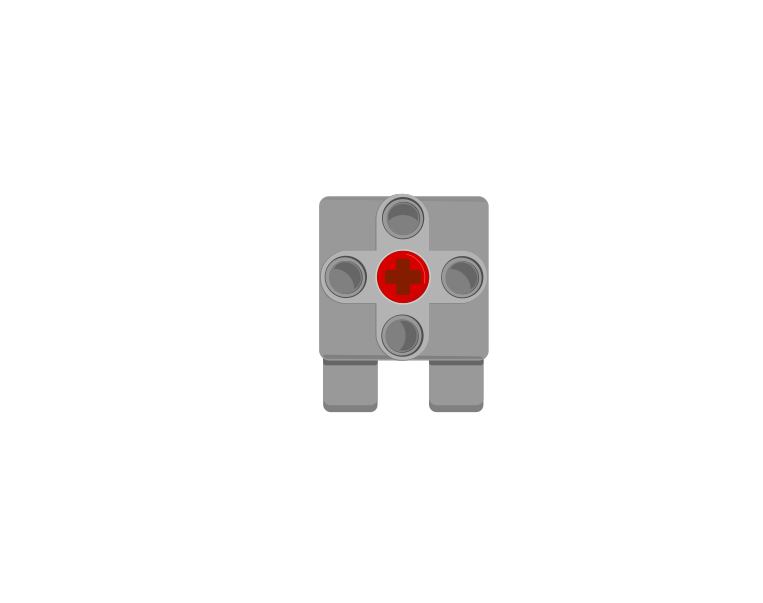
when program starts :: events hat
[A v] start motor [clockwise v] :: motors
wait (2) seconds
[A v] stop motor :: motors
A Medium Motor normally lives in port A or D.
The Large Motor is shown from the side, which is the face its axle comes out of — so once again you are looking straight down the shaft.
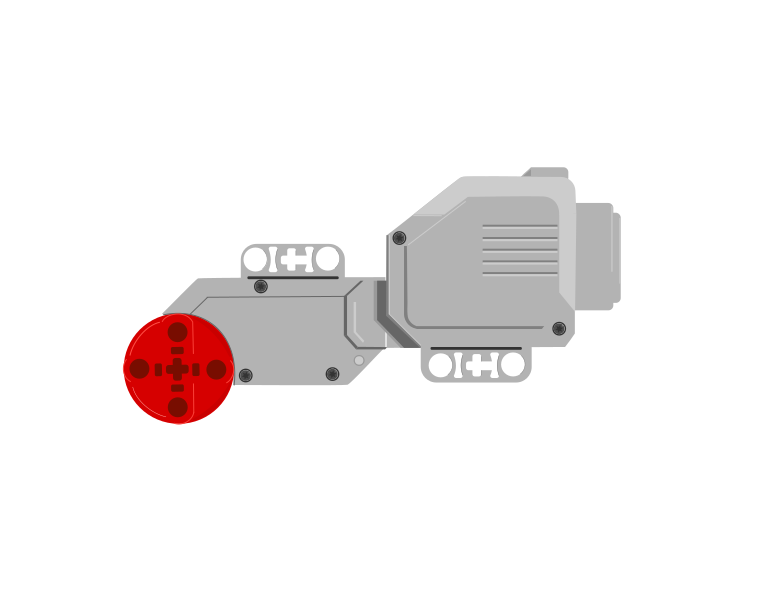
when program starts :: events hat
[B v] start motor [clockwise v] :: motors
wait (2) seconds
[B v] stop motor :: motors
A Large Motor normally lives in port B or C. Compare the two programs: they are the same three blocks, and only A has become B.
Medium · port ALarge · port BA fan, a conveyor belt or a spinning ride does not need to stop at an exact position — it just needs to run while something is happening. For those, timing the motor is simpler and perfectly good enough.
Speed is set separately from movement. You tell the motor how fast it should go, and then you tell it to go — two blocks, in that order.
| Block | What it does |
|---|---|
[A v] set speed to (25) % :: motors | Sets the speed for this motor from now on. Nothing moves — it only changes what the next movement will do. |
[A v] run [clockwise v] for (2) [rotations v] :: motors | Now moves, at whatever speed was last set. |
when program starts :: events hat
[A v] set speed to (25) % :: motors
[A v] run [clockwise v] for (2) [rotations v] :: motors
Swap those two blocks round and the program still contains a speed of 25 % — it just never gets used. Both shafts below are asked for exactly 2 rotations; watch how long each one takes.
speed first — works
speed last — does nothing
Both shafts turn exactly 2 rotations. Only the time they take is different — and the right-hand program never gets the slow movement it was written to have.
The right-hand movement is over before the left is a third of the way round, because it ran at the default speed. Its set speed to () block does run — you can see it light up — but by then the movement it was meant to slow down has already happened. A speed block only ever affects the movements after it. This catches people out constantly.
A high speed is not a better program. Slow movements are gentler on the gears, easier to watch and debug, and look more like the real machine — a barrier that snaps up in a fraction of a second reads as broken rather than fast.
Two meshed gears are a bargain. Whatever one of them gains in turns it loses in force, and whatever it loses in turns it gains in force. There is no arrangement of gears that gives you more of both, and no amount of building will find one.
Count the teeth on the gear you are turning (the driver) and the teeth on the one being turned (the follower). That is the whole calculation:
turns out = turns in × driver teeth ÷ follower teeth
An 8-tooth gear driving a 24 gives ⅓ of a turn out for every turn in — and three times the turning force. Turn the pair round and you get three turns out and a third of the force. Count the turns yourself below.
The number of teeth is the whole story. 8 teeth driving 24 means 8 ÷ 24 of a turn out for every turn in — and the force changes by exactly the opposite amount.
| Arrangement | Turns | Force | What it is for |
|---|---|---|---|
| Gearing down — small driving large | fewer | more | winches, lifts, robot arms, anything that has to move a weight |
| Gearing up — large driving small | more | less | fans, spinners, launchers, wheels on a light fast robot |
| 1 : 1 — same size | same | same | moving the drive to a different axle, or fixing a direction |
The names are worth getting right because they are backwards from what people expect: gearing down makes the output slower, not smaller, and it is the setting that makes a weak motor able to lift things.
Put several pairs in a row and the ratios multiply. Two 1:3 reductions in series give 1:9 — which is how a Medium Motor ends up able to raise something it could never shift directly. This is also how a gearbox with a sensible number of parts reaches a ratio that a single pair never could: a 40-tooth gear driven by an 8 is 1:5, and doing it twice is 1:25.
Only the first and last gear affect the ratio. Anything in the middle passes the motion along and changes nothing but the direction — which is a whole idea of its own, in Changing the direction of a turn.
Every mesh loses a little to friction, so a long train is less efficient than a short one. Gearing down far enough to lift a heavy load also makes the mechanism slow, and slow is not always acceptable. And a gear train that is geared down hard is very hard to turn backwards by hand, which is either a useful brake or a nuisance depending on what you are building.
A bicycle is the same idea with a chain instead of teeth in mesh: the low gear that gets you up a hill is turning the back wheel slowly and pushing hard, and the high gear you use going downhill does the opposite. Cars, drills, cranes and clocks are all making the same trade.
Say this back before you move on: “The motor turns at one speed all the time. The paddle does not, because the pivot is off the centre.”
Look at your boat. Which parts have a cable? This model has lots of moving paddles. But only one part has a cable!
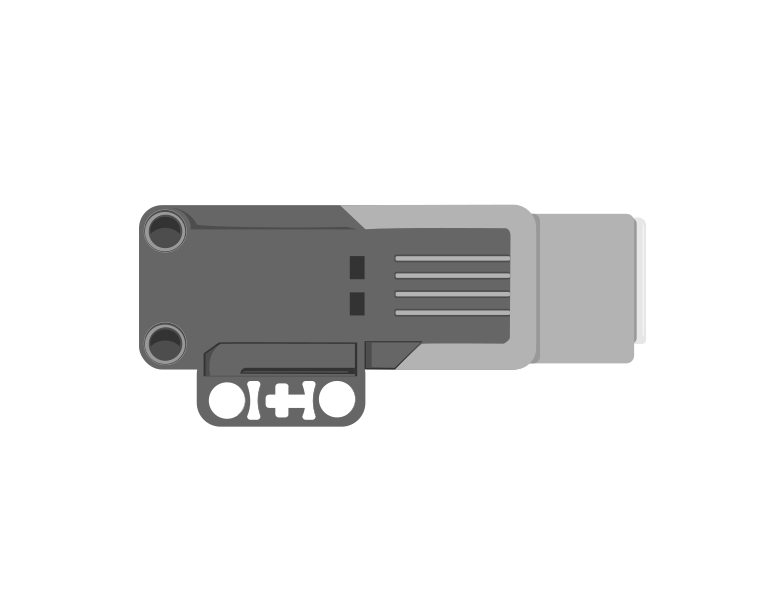
Which motor is it? This model has no instructions. So no page can tell you. You have to look at the one in your hand. Hold it next to these two pictures, and decide.
Medium MotorLarge Motor| Part | What it is doing here |
|---|---|
| EV3 Intelligent Brick | Runs the program. It is the body of the boat. It is also nearly all of the weight. So where it sits decides if the boat is level. |
| One motor, port A | Drives every paddle through the gears. The program says A. It works the same with either motor. |
| Sensors | None. The boat cannot count its own strokes. But you can, and you will! |
Turn the drive by hand before plugging anything in. Every paddle should move. They should all reach the back of the stroke together. If one paddle is late, a gear is one tooth out. Fix it now. Right now, it is easy to see it is a build problem.
Sensors go in ports 1, 2, 3, 4. Motors go in ports A, B, C, D. You cannot swap them. If you do, nothing warns you. The robot just will not work.
With no instructions, nothing tells you which port to use. So we use the course’s usual port. The program names the port, not the motor. So it works whichever motor you found in the box.
| Part | Port | Why this one |
|---|---|---|
| The motor (all the paddles) | A | A single motor with its own job goes in A. B and C are kept for a pair of motors. There is no pair here. |
| Sensors | none | Ports 1–4 stay empty. |
Check your own build now:
Two routes, and either is fine. USB is the reliable one and the one to fall back on when a room’s Bluetooth is busy; Bluetooth leaves the robot free to move, which some models need.
Do these in order. Naming the Brick after you go looking for it in the list is how groups end up driving each other’s robots.
EV3 until somebody changes it.EV3.The two failures, every class, every time. The Brick has gone to sleep while you were building — press the centre button to wake it. Or you have paired with the group at the next table, which is why the name matters.
The long version, including Port View and how to read the port tiles, is in the Brick & Bluetooth guide.
Make one change at a time. Guess what will happen before each run. Keep watching one paddle, not all of them. The beat is easier to see in one than in twenty.
Step 1 surprises people. A faster motor speeds up both halves of the stroke together. The beat gets quicker. It does not get more even.
A rhythm built into a machine stays the same at every speed. That is why it is worth building in.
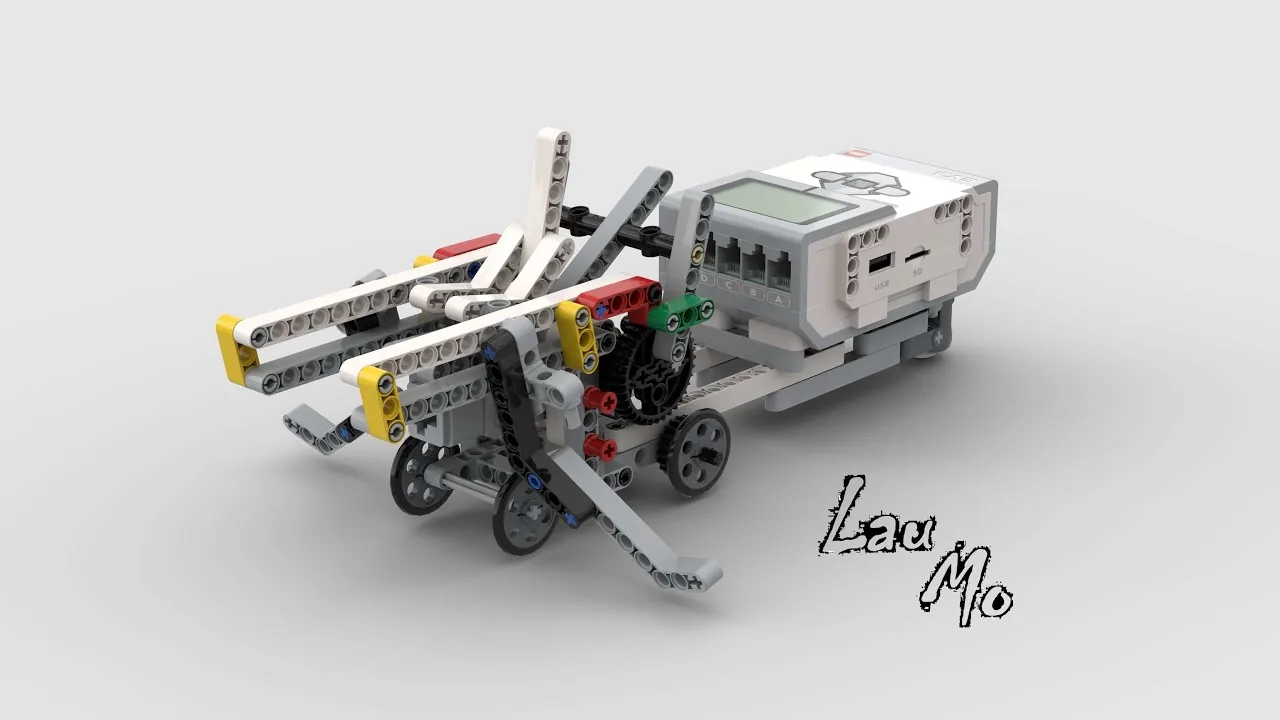
Build the model before you read any further. Everything after this is about making it do something, and none of it will make much sense with nothing on the table in front of you.
One page at a time — use Next and Previous, or the ← → keys. Fullscreen makes it big enough to build from.
The same build on Google Drive — sometimes a video, sometimes a scan:
Fullscreen it while you build — you can pause and scrub with the player's own controls.
Check the finished build against the picture before you switch anything on. A motor mounted the wrong way round is far easier to spot now than it is to debug later, when it looks like a program fault.
Six blocks. The drum sets the beat. Then the team rows a set number of strokes, and stops.
when program starts :: events hat
clear display :: display
write [ROWING] at line (1) :: display
play beep (60) for (0.3) seconds :: sound
[A v] set speed to (35) % :: motors
[A v] run [clockwise v] for (4) [rotations v] :: motors
Go through it in the order the Brick runs it:
Nothing in this program is uneven. One speed, one direction, one steady run. The rowing rhythm you will see was built into the boat. It was there before you wrote a block.
What success looks like: the paddles row to a clear beat. A quick sweep, then a slower return. All of them keep to the same beat. Watch one paddle for the whole run, and count the strokes. Then work out how many strokes one turn gives you.
Work through them in order — each is harder than the last. The extra challenge comes after all three, and it is meant to make you plan before you build.
Row an exact number of strokes. Your teacher names a number, say ten. The boat must row just that many and stop. The drum beats once at the start and once at the end. Someone should be able to count along out loud and finish with you.
Race start. Build a start with three drumbeats and a pause before the crew moves. Then row a fast burst. Then row at a slower, steady pace. The change from fast to slow must be easy to see in the paddles.
Drum in time with the crew. Make the boat beat once for each stroke, not once for each run. Then the drum and the paddles stay together. You will need the degrees for one stroke. You wrote them down in step 8, when you checked the connection. Think about how a loop and a measured motor block fit together.
Plan a race and run it. Real crews do not row a race at one speed. They start fast to get the boat moving. Then they settle into a pace they can keep up. At the end they speed up again. Your job is to plan that race for your boat and program it. Plan on paper before you build. Each part of the race is a phase. Decide how many strokes each phase gets. Decide what speed it runs at. Write it down as a table before you write a single block. The drum must let you hear each change of phase. The screen must say which phase the crew is in. There is a choice here that you must make yourself. A fast start gets the boat going sooner. But a crew cannot keep it up. Decide where your phases change. Be ready to say why. You will be asked two questions when you show it. Why did your phases change where they did? And if the race were twice as long, what would you change? What would stay the same?