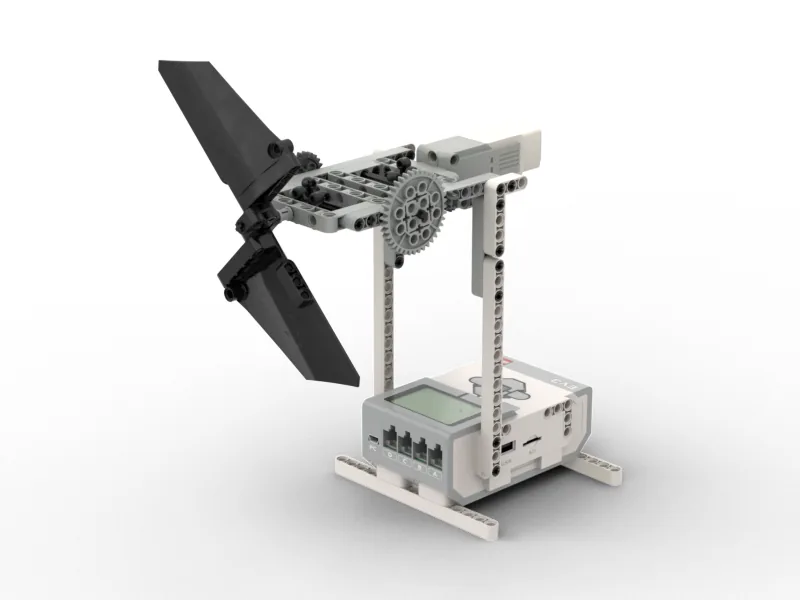
The EV3 Fan: a motor driving a set of blades through a pair of gears. It genuinely moves air — you will feel it on your hand.
The Folding Fan Robot in Lesson 4 waved a fan about. This one spins one, and spinning is where a fan gets serious.
It is also the model that is going to run you into a wall, on purpose. You will want it to blow harder, you will turn the speed up to 100 %, and then there will be nowhere left to go — because 100 % is all there is. What happens next is the lesson.
In the real world 5 min
Where you have seen it
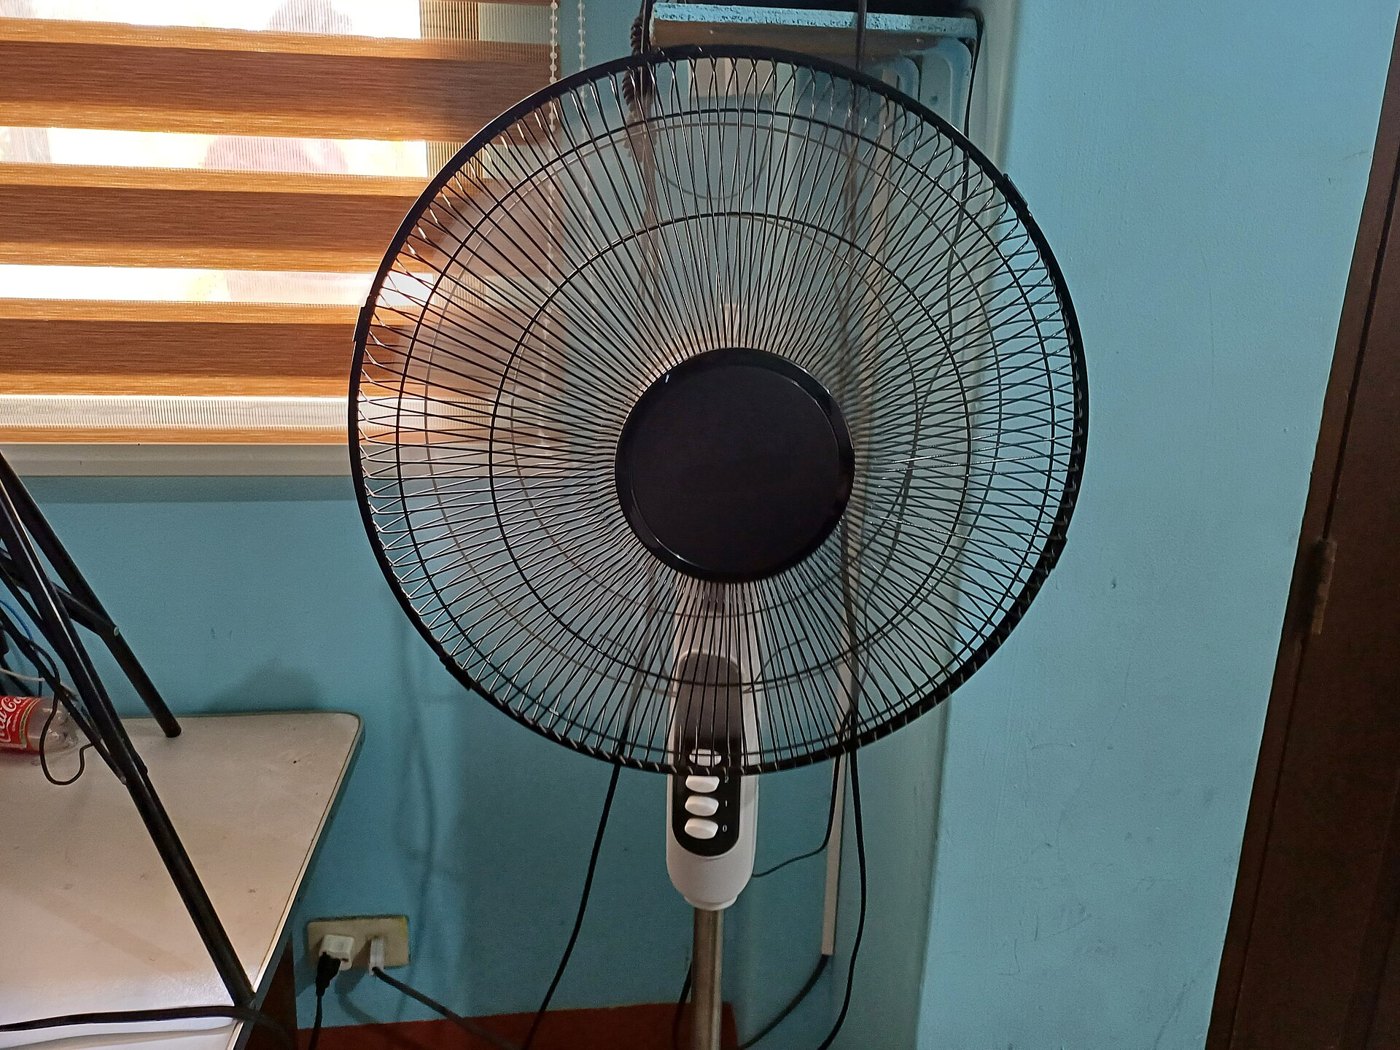
Every classroom where you live has one on the ceiling, and most houses have a standing fan in the corner as well. In a country this warm, a fan is not a luxury — it is how a room becomes usable in the afternoon.
An electric fan in a school. Photo: Curpharar / Wikimedia Commons (CC BY-SA 4.0).
Why it is built that way
A fan blade is set at an angle. As it sweeps round it meets the air edge-on and pushes it sideways — out of the way, and therefore forwards. Turn the blade faster and it shifts more air every second.
Notice what a fan does not do: it does not cool the air. The air coming out is exactly as warm as the air going in. It cools you, by carrying the heat and sweat off your skin. That is why a fan in an empty room is doing nothing useful at all.
What would go wrong without it
Here is the engineering problem. A fan wants speed — lots of turns per second — and a motor has a top speed it cannot exceed, no matter what you write in a program.
So real fans do not rely on the motor alone. They are designed around the speed they need: the blade size, the angle and any gearing are all chosen before anyone switches it on. Get that wrong and no amount of fiddling with the controls will fix it.
A program can only ask for what the machine is able to do. If the machine cannot do it, the answer is a different machine.
The main concept — fix it in the build, not the program 6 min
Two meshed gears trade speed against force. You cannot have more of both — but you get to choose which one you want.
Arrangement
What you get
Good for
Small gear driving a big one
Geared down: slower, stronger
Lifting, walking, a barrier arm
Big gear driving a small one
Geared up: faster, weaker
A saw blade. A fan.
You met this with the Gear Shooter in Lesson 5 and again with the Timber Saw in Lesson 13. What is new today is when you reach for it.
0.00turns in0.00turns out×3turning force
strongerslowerslow and strong — a lifting winch
Two gears, meshed. The one on the left is being turned; the one on the right is along for the ride.Watch the two counters. They are not climbing at the same rate.Whatever the follower loses in turns, it gains in force — and whatever it gains in turns, it loses in force. There is no setting that gives you both.Finished. Count the turns again with a different pair and the trade goes the other way.
stopped
The number of teeth is the whole story. 8 teeth driving 24 means 8 ÷ 24 of a turn out for every turn in — and the force changes by exactly the opposite amount.
Count the teeth in the demo and the trade is exact rather than vague: three turns of the driver make one turn of the follower, and the force is trebled. Reverse the pair and you get the deal the other way round.
The moment that matters
Your program is going to say set speed to (100) %. That is the largest number the block accepts. There is no 150.
So when somebody asks for a stronger breeze, there is nothing to type. The keyboard is finished. The next move is to take the model apart and put a bigger gear on the motor — and that is a completely different kind of thinking from everything you have done in this course so far.
Before you spend an hour on a program, ask whether the machine can physically do what you are asking. Sometimes the fix is a gear, not a block.
▶Gear ratios, and motor speedThe full reference for gearing and for the speed block. Open either if it is not clear yet.Show meHide
ComponentMechanics5 min
Gearing up and gearing down
Two meshed gears are a bargain. Whatever one of them gains in turns it loses in force, and whatever it loses in turns it gains in force. There is no arrangement of gears that gives you more of both, and no amount of building will find one.
The ratio is the teeth
Count the teeth on the gear you are turning (the driver) and the teeth on the one being turned (the follower). That is the whole calculation:
turns out = turns in × driver teeth ÷ follower teeth
An 8-tooth gear driving a 24 gives ⅓ of a turn out for every turn in — and three times the turning force. Turn the pair round and you get three turns out and a third of the force. Count the turns yourself below.
0.00turns in0.00turns out×3turning force
strongerslowerslow and strong — a lifting winch
Two gears, meshed. The one on the left is being turned; the one on the right is along for the ride.Watch the two counters. They are not climbing at the same rate.Whatever the follower loses in turns, it gains in force — and whatever it gains in turns, it loses in force. There is no setting that gives you both.Finished. Count the turns again with a different pair and the trade goes the other way.
stopped
The number of teeth is the whole story. 8 teeth driving 24 means 8 ÷ 24 of a turn out for every turn in — and the force changes by exactly the opposite amount.
Gearing down, gearing up
Arrangement
Turns
Force
What it is for
Gearing down — small driving large
fewer
more
winches, lifts, robot arms, anything that has to move a weight
Gearing up — large driving small
more
less
fans, spinners, launchers, wheels on a light fast robot
1 : 1 — same size
same
same
moving the drive to a different axle, or fixing a direction
The names are worth getting right because they are backwards from what people expect: gearing down makes the output slower, not smaller, and it is the setting that makes a weak motor able to lift things.
Gear trains
Put several pairs in a row and the ratios multiply. Two 1:3 reductions in series give 1:9 — which is how a Medium Motor ends up able to raise something it could never shift directly. This is also how a gearbox with a sensible number of parts reaches a ratio that a single pair never could: a 40-tooth gear driven by an 8 is 1:5, and doing it twice is 1:25.
Only the first and last gear affect the ratio. Anything in the middle passes the motion along and changes nothing but the direction — which is a whole idea of its own, in Changing the direction of a turn.
What it costs
Every mesh loses a little to friction, so a long train is less efficient than a short one. Gearing down far enough to lift a heavy load also makes the mechanism slow, and slow is not always acceptable. And a gear train that is geared down hard is very hard to turn backwards by hand, which is either a useful brake or a nuisance depending on what you are building.
Why it matters
A bicycle is the same idea with a chain instead of teeth in mesh: the low gear that gets you up a hill is turning the back wheel slowly and pushing hard, and the high gear you use going downhill does the opposite. Cars, drills, cranes and clocks are all making the same trade.
ComponentMotion4 min
Speed and power
Speed is set separately from movement. You tell the motor how fast it should go, and then you tell it to go — two blocks, in that order.
Speed is a percentage of what this motor can do, not a real-world unit — the same 50 % moves a light arm quickly and a heavy one slowly.
Blocks reference
Block
What it does
[A v] set speed to (25) % :: motors
Sets the speed for this motor from now on. Nothing moves — it only changes what the next movement will do.
[A v] run [clockwise v] for (2) [rotations v] :: motors
Now moves, at whatever speed was last set.
Set it first
when program starts :: events hat
[A v] set speed to (25) % :: motors
[A v] run [clockwise v] for (2) [rotations v] :: motors
Swap those two blocks round and the program still contains a speed of 25 % — it just never gets used. Both shafts below are asked for exactly 2 rotations; watch how long each one takes.
speed first — works
A set speed to 25 %
A run clockwise for 2rotations
speed last — does nothing
A run clockwise for 2rotations
A set speed to 25 %
0.00rotations · slow0.00rotations · fast
Speed first: the movement was slowSpeed last: it only affects the NEXT movement
Two programs. Same two blocks in each — only the order is different.Both are running — and the right-hand one is already finished. The left is barely a third of the way.Its speed block runs now, far too late to affect the movement above it. The left motor is still going, slowly, as it was told to.Both turned exactly 2 rotations. Only one of them did it at the speed the program asked for.Finished — it will run again in a moment.
stopped
Both shafts turn exactly 2 rotations. Only the time they take is different — and the right-hand program never gets the slow movement it was written to have.
The right-hand movement is over before the left is a third of the way round, because it ran at the default speed. Its set speed to () block does run — you can see it light up — but by then the movement it was meant to slow down has already happened. A speed block only ever affects the movements after it. This catches people out constantly.
Slow is often better
A high speed is not a better program. Slow movements are gentler on the gears, easier to watch and debug, and look more like the real machine — a barrier that snaps up in a fraction of a second reads as broken rather than fast.
Say this back before moving on: “A big gear driving a small gear makes the small one spin faster, and push less hard.”
What’s in this build 4 min
Two electronic parts, and a gear pair that is really the third.
Part
What it is doing here
EV3 Intelligent Brick
Runs the program and holds the whole thing down. A spinning fan pushes back, and the Brick’s weight is what stops the model walking across the table.
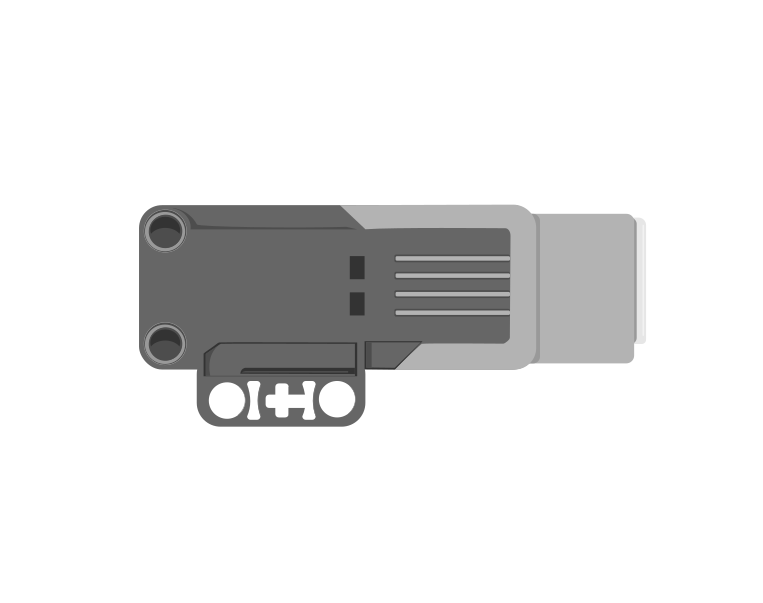
Medium Motor
Drives the gear train. The fast one of the pair, which is the right choice for something that only has to move air.
The gear pair (no cable)
Sets how fast the blades turn for each turn of the motor. This is the part you are going to change.
Count your gearing before you run anything
Find the gear on the motor and the gear on the blade axle. Which is bigger?
Count the teeth on each. Mark your starting tooth with a fingernail so you know where you began — it is easy to lose count on a 40-tooth gear.
Turn the motor drum one full turn by hand and count the blade’s turns. Write the number down: that is your ratio.
Predict from your two tooth counts what that number should have been. Did the counting and the turning agree?
Keep this number. Everything in the last two sections is a comparison against it, and you cannot compare against a number you never wrote down.
Ports — and the rule 4 min
Sensors go in ports 1, 2, 3, 4. Motors go in ports A, B, C, D. They are not interchangeable, and nothing will tell you politely if you swap them.
Part
Port
Why this one
Medium Motor (drives the blades)
A
Unusually, the manual itself says so — its last step is captioned “Connect Medium Motor to Port A”. Most of the manuals in this course say nothing about ports, so when one does, follow it.
Sensors
none
The fan has no idea whether anyone is in the room.
Check your own build now:
Motor cable in port A — a letter, not a number.
Spin the blades by hand. They should turn freely and coast for a moment. If they stop dead, the gears are meshed too tightly.
Nothing within reach of the blades. Cables, hair, paper, sleeves. A geared-up fan is quick.
Is the model on a flat surface with the Brick’s weight over the base? It will try to move.
Connect the Brick 4 min
Two routes, and either is fine. USB is the reliable one and the one to fall back on when a room’s Bluetooth is busy; Bluetooth leaves the robot free to move, which some models need.
▶How to connect the BrickUSB and Bluetooth, step by step, with a photograph of every screen. Open it if you have not done this before — or if pairing is not working.Show meHide
USB — the reliable one
Switch the Brick on with the dark grey centre button.
Cable into the Brick’s PC port — the small square socket beside the numbered ports, not one of the numbered ones.
Other end into the computer.
Bluetooth — name it first
Do these in order. Naming the Brick after you go looking for it in the list is how groups end up driving each other’s robots.
Name your Brick. On the Brick: Settings (the spanner) → Brick Name. Type something nobody else will pick, then press the tick. Every Brick is called EV3 until somebody changes it.
Turn Bluetooth on. Settings → Bluetooth. Tick Bluetooth and Visibility. Leave iPhone/iPad/iPod unticked.
Connect from EV3 Classroom. Click the Brick icon at the top of the programming area, find your Brick by name, and click Connect.
Say yes on the Brick. It asks “Connect?” with the computer’s name — choose the tick, then accept the passkey, which is already 1234.
Where to read it. The name sits in the bar across the very top of the screen, on every screen — so you can check which Brick you are holding at any moment without going into a menu. This one is EV3VE. A Brick nobody has renamed says EV3.Step 3, and the reason step 1 exists. Three Bricks in range — read the name before you click Connect. Pairing with the wrong one is not an error: it works perfectly, on somebody else’s robot.
Step 2.Bluetooth switches the radio on; Visibility is what lets the computer find you. With Visibility off your Brick works perfectly and simply never appears in the list.Step 4. Look at the Brick. It asks whether to accept and names the computer. Choose the tick.Then the passkey, already 1234. Press the tick again and you are connected.
The two failures, every class, every time. The Brick has gone to sleep while you were building — press the centre button to wake it. Or you have paired with the group at the next table, which is why the name matters.
The long version, including Port View and how to read the port tiles, is in the Brick & Bluetooth guide.
Route the cable behind the model. You are about to build a machine whose entire job is to blow loose things around, and a USB lead drifting into the blades will stop the fan and possibly the lesson.
Confirm the connection 2 min
Check the Brick icon: connected, or not.
Check the port tiles. A Medium Motor on A. If it says Large, you have the wrong part — this model is built around the fast one.
Spin the blades by hand and watch degrees counted move on the tile. Note that the number counts the motor’s turns, not the blades’ — the gears sit between them, and the Brick has no idea the gears exist.
The Brick can only count the motor. Everything the gears do to that movement is invisible to the program — which is exactly why gearing is a build decision and not a programming one.
Change it and test 8 min
The first two changes are in the program. The rest are not — and noticing where that line falls is the point of the section.
Set the speed to 50 %. Feel the breeze at the same distance. Half the speed is much less than half the wind.
Now set it to 150. Read what the block does with that. Then set it back to 100 and accept that you have run out of program.
Stop typing. Take the fan apart and swap the two gears over — the big one onto the motor, the small one onto the blades. Rebuild, run the identical program, and feel the difference.
Count the ratio again by hand, the way you did in section 5. Write both numbers side by side. That is your evidence.
Last one, and it has a catch. Geared up, does the fan get up to speed faster or slower than before? You traded force away to buy that speed, and force is what accelerates the blades from standing still.
Step 3 is the whole lesson in one instruction. The program did not change by a single character and the machine got better, because the limit was never in the program.
“Turn it up” runs out. “Rebuild it” does not.
This is what you are building: the EV3 Fan.
Build it 15 min
Build the model before you read any further. Everything after this is about making it do something, and none of it will make much sense with nothing on the table in front of you.
Use the viewer's own controls to zoom and turn pages. Fullscreen makes it big enough to build from.
Check the finished build against the picture before you switch anything on. A motor mounted the wrong way round is far easier to spot now than it is to debug later, when it looks like a program fault.
Make it move 10 min
Five blocks, and there is deliberately nothing clever in them. The program is as good as it is going to get on the very first try.
when program starts :: events hat
[A v] set speed to (100) % :: motors
[A v] start motor [clockwise v] :: motors
wait (10) seconds
[A v] stop motor :: motors
Full speed, run for ten seconds, stop. There is no bigger number than 100 — this program cannot be improved.
Walk it in the order the Brick runs it:
set speed to 100 % — nothing moves. The maximum the block accepts, chosen on the first attempt because there is no point working up to it.
start motor clockwise — the blades spin up, and the program carries straight on to the next block while they do.
wait 10 seconds — the length of the run. Hold your hand in front and feel it.
stop motor — and watch how long the blades keep turning after this block. They have weight and speed, and stopping the motor is not the same as stopping the fan.
What success looks like: a breeze you can feel at about thirty centimetres, a steady note from the gears, and no wandering across the table.
If the blades turn the wrong way — you will know, because the air pulls towards the fan instead of pushing away — change clockwise to counterclockwise. A fan blade set at an angle only works in one direction; the other way it just stirs.
Challenges 27 min
Work through them in order — each is harder than the last. The extra challenge comes after all three, and it is meant to make you plan before you build.
Challenge 1
Measure what you have. Count the teeth on both gears, work out how many times the blades turn for one turn of the motor, and check your answer by turning the drum by hand ten times and counting. Report the predicted ratio and the measured one, and explain any difference.
Challenge 2
Make it blow harder without touching the program. Rebuild the gear train so the blades spin faster, run the identical program, and prove the improvement with something better than an opinion — a strip of paper at a fixed distance, or how far away you can still feel it.
Challenge 3
Find the point where gearing up stops helping. Keep increasing the ratio and testing until more gearing makes the fan worse rather than better, then say what has gone wrong. Somewhere past a certain ratio the motor can no longer get the blades up to speed at all.
Extra challenge
Design a fan for a job, and defend the gear ratio you chose.
Pick one: a fan that must blow a paper ball across a desk, or a fan that must keep going for five minutes on one battery charge. Then build the gearing that suits it. These want opposite answers, and that is the point.
Plan on paper before you rebuild. Decide what you are optimising for, predict which way the gearing should go, and write that prediction down before you test it. A prediction you make afterwards is not a prediction.
Two questions when you demonstrate it. Why is your ratio right for your job and wrong for the other one? And what did you have to give up to get what you wanted, in your own words?