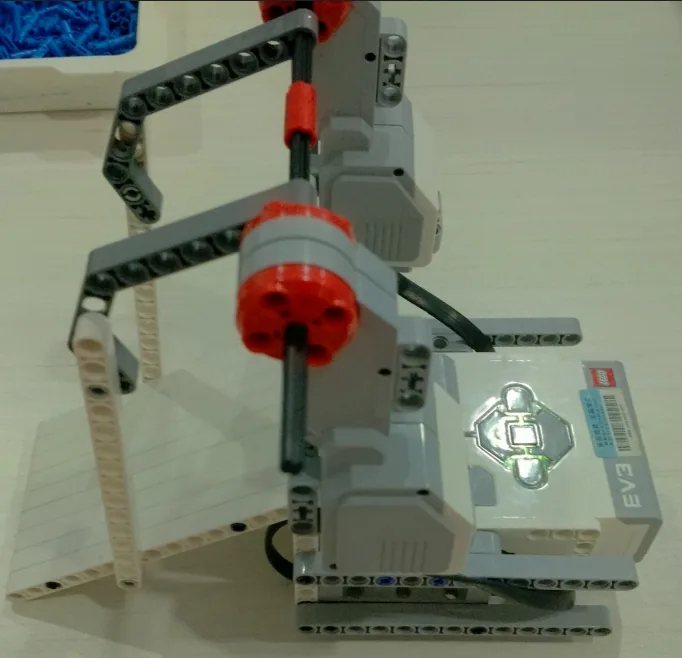
The Castle Gate: a heavy slatted drawbridge on one axle, with a Large Motor at each end of that axle. Lower it and it becomes a bridge across the moat; raise it and the castle is shut.
Two motors, one shaft — exactly the arrangement that could have broken the Toddle Bot in Lesson 26.
So why would anyone build a machine that way on purpose? Because a drawbridge is heavy, and one motor is not enough. Today you meet the other side of the shared axle: not the danger, but the reason it is worth the danger.
In the real world 5 min
Where you have seen it
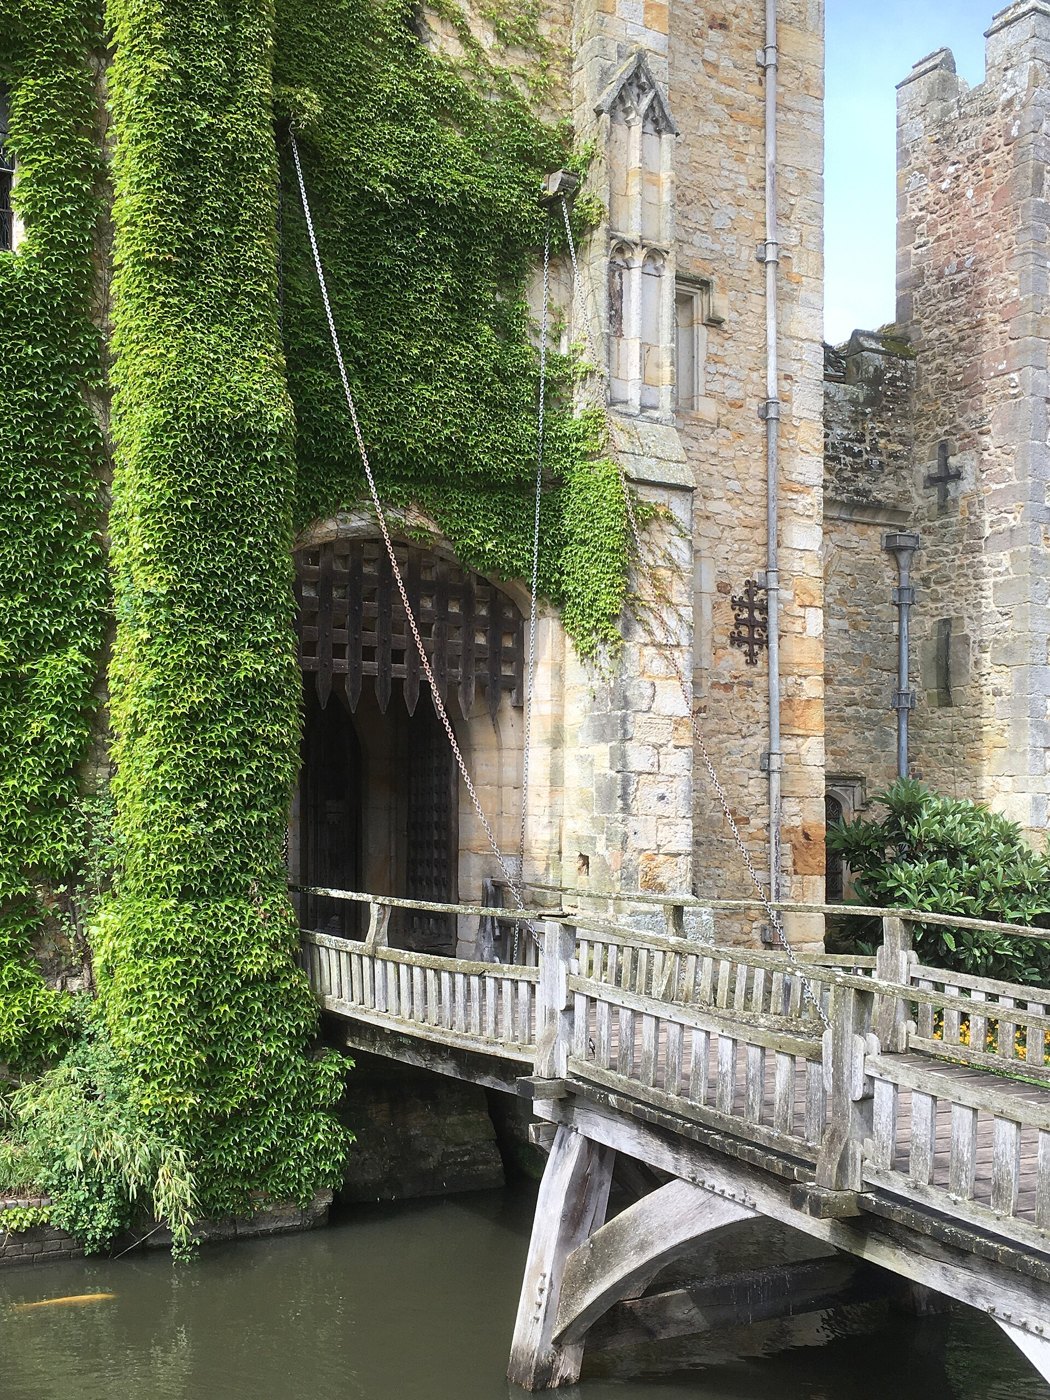
A castle drawbridge: a slab of oak that drops across the moat to let people in and lifts to shut them out. The one below, at Hever Castle in Kent, still has the chains that raised it.
The drawbridge, portcullis and lifting chains at Hever Castle, Kent. Photo: Martinvl / Wikimedia Commons (CC BY 4.0).
Why it is built that way
Look at the picture and count the chains. There are two, one at each side, and that is not for looks.
A drawbridge is enormously heavy, and it is wide. Lift it from one side only and the bridge twists: that corner comes up, the far corner lags behind, and the whole thing racks in its frame and jams. Two chains, one at each end, lift it flat.
Your model has the same problem and the same answer, with motors instead of chains — and it gets a bonus, because two motors also means twice the turning force on the axle.
What would go wrong without it
One motor on a load like this does one of two things, and neither is good. Either it stalls — the failure you met on the Push-up Robot in Lesson 27, where the program simply hangs — or it lifts one corner and twists the bridge.
Two motors on one shaft is not a mistake somebody made. It is how you lift something a single motor cannot.
The main concept — sharing a load 6 min
Two motors turning the same shaft the same way do not take turns and do not get in each other’s way. Their turning force adds.
One motor lifts its own end and drags the other. Two motors, one at each end, lift the bridge level.
The rule for driving them is the one from the Toddle Bot, word for word: same direction, same speed, always. What has changed is why you would want to.
Lesson
Two motors on one shaft, because…
26 — Toddle Bot
…that is how the model happens to be built, and you must not make them disagree.
33 — Castle Gate
…the load genuinely needs two: twice the force, and lifted level rather than twisted.
And the block that does it is the one you have used since Lesson 24. A move block on a pair drives both motors, same direction, same speed, started and stopped together. It was designed for wheels, but a shared axle wants exactly the same treatment.
When one motor is not strong enough, two on the same shaft is the answer — as long as they always agree.
▶The Large Motor, and driving with two motorsThe full reference for the strong motor and for the pair blocks. Open either if it is not clear yet.Show meHide
ComponentMotion4 min
The Large Motor
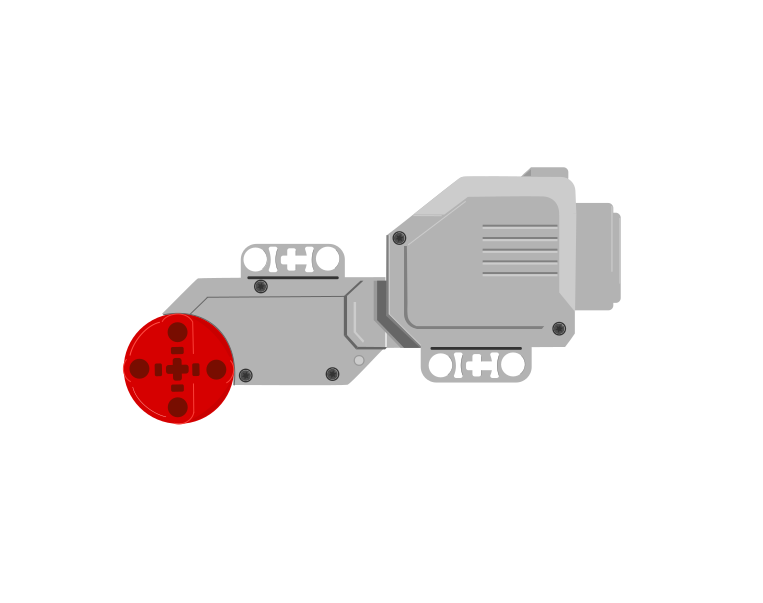
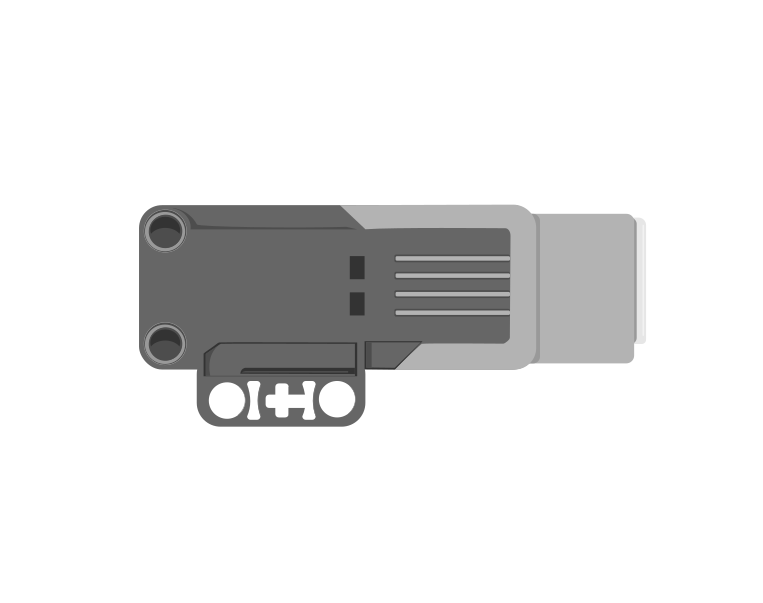
The Large Motor is the bigger of the two EV3 motors. It turns more slowly than the Medium Motor but pushes far harder, which is why it drives wheels and lifts loads. If a mechanism struggles or stalls with a Medium Motor, this is usually the answer.
Large Motor
Medium Motor
The two motors at the same scale. The Large Motor is visibly bigger and heavier — that extra size is what gives it more turning force and less speed.
Blocks reference
Block
What it does
[B v] run [clockwise v] for (3) [rotations v] :: motors
Turns the motor a measured amount, then stops.
[B v] run [clockwise v] for (2) [seconds v] :: motors
Turns it for a length of time rather than a distance, then stops — however far the shaft actually got.
[B v] set speed to (40) % :: motors
Sets how fast the next movement will be.
[B v] start motor [clockwise v] :: motors
Starts it turning and carries straight on.
Watch them race, then watch them lift
Give both motors the same program and the same arm. With nothing on the arm the Medium Motor wins easily — which is why it is tempting to treat it as simply the better motor. Then the demo hangs a weight on both arms and runs it again.
when program starts
A run clockwise for 1rotations
and on the Large Motor, only the port changes
B run clockwise for 1rotations
0%medium lifted0%large liftednoneload
Medium: not enough forceLarge: slower, but it lifts
) : clock.step === 1 ? (
With nothing to lift, the Medium Motor is quicker
The same program, the same arm, one on each motor. Nothing to lift yet.No load: the Medium Motor is clearly the quicker of the two.Now hang a heavy weight on both arms and run exactly the same program.The Medium Motor stalls a third of the way up. The Large Motor keeps lifting.Same program, same weight — the motor was the difference.Finished — it will run again in a moment.
at rest
Turning the speed up would not rescue the Medium Motor here — a stalled motor needs more force, which means gearing it down or using the Large Motor.
That is the whole difference. The Medium Motor is quicker; the Large Motor is stronger. A motor that cannot produce enough force does not move slowly — it stops altogether and strains, which is the buzzing, going-nowhere failure almost every LEGO builder meets sooner or later.
A stalled Large Motor hangs the program too
Being stronger buys the Large Motor a bigger load, not an infinite one. Every winch runs out of cable and every lift reaches the top of its rails, and when a motor arrives at a limit it stalls: the shaft stops turning and the motor sits there straining.
That is a problem for the program, not just the mechanism. run for (3) rotations does not finish when three rotations’ worth of time has gone by — it finishes when the shaft has actually turned three times. A winch that reaches the top after two and a half will never report three, so the block waits, and every block after it is unreachable. Nothing crashes. The motor keeps pushing and the rest of the program simply never happens.
The third setting in that dropdown is the way out. for () seconds drives the motor for a duration and then stops regardless, so it always finishes and the program always moves on. Drive into a limit slowly, for a comfortably long time, and then call that position zero:
when program starts :: events hat
[B v] set speed to (30) % :: motors
[B v] run [counterclockwise v] for (3) [seconds v] :: motors
[B v] reset degrees counted :: motors
The lift ends up against its own stop, the encoder is zeroed there, and every measured move afterwards starts from a place you know. The rule is the same for both motors: if the movement ends against something solid, run for seconds; if it ends somewhere in the middle, measure it. The Medium Motor module has the animation for it — see The Medium Motor, which is where this bites hardest, because a Medium Motor is usually the one doing the lifting.
Which motor for which job
Large Motor — wheels, winches, anything lifting weight. Strong, slower. Normally ports B and C.
Medium Motor — arms, gates, jaws, pointers. Quick, lighter. Normally ports A and D.
The blocks are identical apart from the port letter, so swapping one motor for the other is a build change, not a programming change.
Why it matters
Real machines match the motor to the load. A lift uses a powerful, slow motor; the button panel beside it uses tiny ones. Choosing the wrong size is the most common reason a LEGO mechanism whines but does not move.
ComponentMotion6 min
Driving with two motors
A driving base has two Large Motors, one per wheel. You could drive them with two separate motor blocks — but they would never start at quite the same instant, and the robot would curve away. EV3 has a separate family of Movement blocks that treat the pair as a single driving base.
port B
port C
A driving base is two Large Motors, normally in ports B and C. The Movement blocks treat this pair as one machine rather than two separate motors.
Blocks reference
Block
What it does
set movement motors to [B v] and [C v] :: movement
Tells the Movement blocks which two ports are the driving wheels. Put it at the top of the program, before any movement.
move [forward v] for (2) [rotations v] :: movement
Drives both wheels together, so the robot travels in a straight line.
move for (1) [rotations v] at (75) (25) % speed :: movement
Drives the two wheels at different speeds, which makes the robot curve.
set movement speed to (50) % :: movement
Sets how fast the driving base travels from now on.
The letters must match the sockets
set movement motors to [B] and [C] is the block that decides which two motors every Movement block after it will drive. It does not look at the robot. It drives the two ports you name, whether or not there is a motor in them — so those two letters have to be the two sockets the cables are actually in.
This is the single commonest reason a driving base does nothing, and it is invisible in the program: every block is spelled correctly and the robot still will not go.
Two robots, and the very same program: drive the motors in ports B and C forward.Check the cables. The left robot's motors are in B and C — the two the block names. The right robot's are in A and B.Run it. On the left both wheels are driven and the robot goes straight. On the right only port B has a motor the block is talking to; port C is empty, and the motor in A is never mentioned.So one wheel turns and the other does not, and the robot swings round its dead wheel. Nothing failed, nothing was reported — the program drove the ports it was told to.Finished. Identical programs, identical robots — different sockets.
stopped
The yellow outline marks the two ports the block is driving. A robot only goes straight when both of them have a motor in them.
Both robots run the identical program. The left one has its motors in B and C, so both named ports have a motor and the robot drives straight. The right one is plugged into A and B: the block drives B, finds nothing in C, and never mentions the motor in A at all — so one wheel turns, one wheel sits there, and the robot swings round the dead one instead of driving.
If neither named port has a motor in it — cables in A and D, say, with the block still set to B and C — the robot does not move at all. The program runs happily to the end and the Brick reports nothing wrong, because as far as it is concerned it did exactly what it was told.
So before you look for a bug in the program, look at the cables: read the port letters off the Brick, then make the block say those two. B and C are only the usual choice, not a rule — if your build has the driving motors in A and D, set the block to A and D and everything works.
Straight, curved, and on the spot
Everything a driving base can do comes from those two speed numbers. Try each button below and watch the trail the robot leaves.
when program starts
set movement motors to B and C
move for 2rotations at 5050 % speed
50left wheel · B50right wheel · C
Equal speeds → a straight line
Both wheels are set to the same speed.Equal speeds, so the robot tracks straight — the trail is a straight line.Two rotations later it is exactly where it was pointed.Finished — it will run again in a moment.
stopped
The path is worked out from the two wheel speeds in the block, not drawn by hand — so changing the preset changes the numbers and the shape together.
Both wheels the same speed — the robot goes straight.
One wheel faster than the other — it curves towards the slower side. The bigger the difference, the tighter the curve.
One wheel forward, the other backward — it spins on the spot, which is how a robot turns in a space no wider than itself.
Notice there is no steering block anywhere in that program, and no steering part anywhere on the robot. The turn is made entirely by driving the two wheels different amounts.
when program starts :: events hat
set movement motors to [B v] and [C v] :: movement
move [forward v] for (2) [rotations v] :: movement
move for (1) [rotations v] at (50) (-50) % speed :: movement
How far is one rotation?
“Move forward 2 rotations” says nothing about the floor — it says how many times the wheels go round. How far the robot actually travels depends on how big the wheels are, and once round a standard EV3 driving wheel is about 17.5 cm.
Before doing any sums, get a feel for it. Drag the robot along and watch both scales at once — rotations on top, centimetres underneath, the same line. Land on the half marks: there is a number between 1 and 2, and it is 1.5.
Drag the robot, or use the arrow keys — it moves in half rotations. Rotations above the line, centimetres below.
1.5 rotations26.3 cm
1.5 — a half rotation past 1. Half a turn of the wheels is 8.75 cm, so halves matter.
cm=2rotations
35 ÷ 17.5 = 2. That is a number you can type straight into the block.
1 rotation = 17.5 cm. Two rotations is 35, three is 52.5.
Halves are real. 1.5 rotations is a perfectly good thing to type into the block, and it is 26.25 cm — right between the 1 and the 2 you already tried.
To go a distance you have chosen, divide by 17.5. The calculator does it, but do a few by hand first — 35 ÷ 17.5 = 2 is worth seeing.
Measure your own wheels before trusting the number. A base built with different wheels travels a different distance per rotation, and every calculation on this page moves with it.
set movement motors to [B v] and [C v] :: movement
set movement speed to (30) % :: movement
move [forward v] for (2) [rotations v] :: movement
Turning on the spot
Steering at right 100 or left 100 drives the two wheels in opposite directions, so the base stops travelling and pivots where it stands. The angle it sweeps is a simple doubling of the rotations:
Half a rotation is the one worth remembering: a square corner, 90°.
Rotations
The robot turns
0.25
45° — half a corner
0.5
90° — a square corner
1
180° — turn round and face back
2
360° — all the way round
The one to memorise is 0.5 rotations = 90°. Everything else follows from doubling or halving it.
set movement speed to (20) % :: movement
move [right: 100] for (0.5) [rotations v] :: movement
Turn slowly. The wheels on a driving base are big and the robot carries a lot of weight, so at full speed it keeps going after the motors stop and lands past the angle you asked for. Somewhere between 15% and 30% speed is where turns become repeatable. A turn that overshoots is almost always a turn taken too fast, not a wrong number.
These figures belong to your robot. The distance depends on the wheels and the angle depends on how far apart they are, so a wider base needs a different number for 90°. Test it, measure what actually happened, and adjust — the same discipline as the Gyro Sensor tolerance.
Why it matters
Every wheeled vehicle steers this way — a tank, a digger, an office chair with two driven castors. Cars use a steering rack instead, but a robot that turns by driving its wheels at different speeds needs no steering mechanism at all.
Say this back before moving on: “Two motors on one shaft, turning the same way, push twice as hard.”
What’s in this build 4 min
Part
What it is doing here
EV3 Intelligent Brick
Runs the program and is the castle wall the whole gate hangs from.
Large Motor ×2
One at each end of the bridge axle, ports B and C. Both must be Large — a Medium on one end would be the weaker chain.
The bridge and its axle (no cable)
The load. Heavier than anything you have lifted so far in this course.
Feel why one motor would not do
Brick off. This is the demonstration that makes the lesson land.
Take hold of the axle at one end only and try to lift the bridge from horizontal to upright. Notice how hard it is, and notice the far end lagging behind as it goes.
Now hold both ends and lift. Easier, and the bridge comes up flat.
That difference is exactly what the two motors are for. One of them would be your one-handed lift.
Lower it slowly and feel where it is heaviest. It is at the start, lying flat — that is the moment the motors have to be strongest.
Both motors must be the same kind. Two motors of different strengths on one shaft do not share a load evenly — the stronger one does most of the work and drags the weaker one along, and you have the twisting problem back.
Ports — and the rule 4 min
Sensors go in ports 1, 2, 3, 4. Motors go in ports A, B, C, D. They are not interchangeable, and nothing will tell you politely if you swap them.
Part
Port
Why this one
Large Motor (one end of the axle)
B
B and C are the pair. These two do one job together, which is precisely what the pair is for — as on the Push-up Robot in Lesson 27.
Large Motor (other end)
C
Which end is which matters less than usual, because they are joined — but note it down anyway.
Sensors
none
Not in the worked program. Adding a button to open the gate is one of today’s challenges.
Check your own build now:
Cables in B and C, and both tiles reading Large Motor.
Start with the bridge up (closed) before every run. The program assumes it and has no way to check.
Turn the axle by hand through the full lift. Smooth all the way? Anything catching will be a stall waiting to happen.
Nothing under the bridge. It comes down with real weight behind it.
Connect the Brick 4 min
Two routes, and either is fine. USB is the reliable one and the one to fall back on when a room’s Bluetooth is busy; Bluetooth leaves the robot free to move, which some models need.
▶How to connect the BrickUSB and Bluetooth, step by step, with a photograph of every screen. Open it if you have not done this before — or if pairing is not working.Show meHide
USB — the reliable one
Switch the Brick on with the dark grey centre button.
Cable into the Brick’s PC port — the small square socket beside the numbered ports, not one of the numbered ones.
Other end into the computer.
Bluetooth — name it first
Do these in order. Naming the Brick after you go looking for it in the list is how groups end up driving each other’s robots.
Name your Brick. On the Brick: Settings (the spanner) → Brick Name. Type something nobody else will pick, then press the tick. Every Brick is called EV3 until somebody changes it.
Turn Bluetooth on. Settings → Bluetooth. Tick Bluetooth and Visibility. Leave iPhone/iPad/iPod unticked.
Connect from EV3 Classroom. Click the Brick icon at the top of the programming area, find your Brick by name, and click Connect.
Say yes on the Brick. It asks “Connect?” with the computer’s name — choose the tick, then accept the passkey, which is already 1234.
Where to read it. The name sits in the bar across the very top of the screen, on every screen — so you can check which Brick you are holding at any moment without going into a menu. This one is EV3VE. A Brick nobody has renamed says EV3.Step 3, and the reason step 1 exists. Three Bricks in range — read the name before you click Connect. Pairing with the wrong one is not an error: it works perfectly, on somebody else’s robot.
Step 2.Bluetooth switches the radio on; Visibility is what lets the computer find you. With Visibility off your Brick works perfectly and simply never appears in the list.Step 4. Look at the Brick. It asks whether to accept and names the computer. Choose the tick.Then the passkey, already 1234. Press the tick again and you are connected.
The two failures, every class, every time. The Brick has gone to sleep while you were building — press the centre button to wake it. Or you have paired with the group at the next table, which is why the name matters.
The long version, including Port View and how to read the port tiles, is in the Brick & Bluetooth guide.
Stay connected while you tune the numbers. A heavy bridge is the kind of load that stalls, and if it does you will want the stop button — the Lesson 27 problem, on a bigger model.
Confirm the connection 2 min
Check the Brick icon: connected, or not.
A Large Motor on B and one on C, nothing on A or D.
Turn the axle by hand and watch both degree counters move together at the same rate — the shared-shaft proof from Lesson 26.
Note the reading at bridge-up and at bridge-down. The difference is how far the motors must turn for a full gate, and that is the number your program needs.
Change it and test 8 min
One change at a time, and predict before each run. Watch both ends of the bridge on every single run.
Set the speed to 60 %. Predict what happens at the end of the lift. A heavy bridge arriving fast bounces, and a measured block cannot un-bounce it.
Back to 25 %, then unplug the motor in C and run it again. One motor, same program. Does the bridge lift at all? Does it twist? Stop it quickly if it strains.
Plug C back in. That test is the whole lesson, felt rather than read: one motor was not enough, and now you know by how much.
Add weight to the far end of the bridge — a spare Brick, a book — and run it again at 25 %. Find the load at which even two motors stall.
Lower the speed to 10 % and try that same load again. Slower often lifts more, because a motor asked for less speed has more to give as force.
Step 2 is the demonstration. Everything else in this lesson is a sentence about force; that is the ten seconds where you watch the sentence be true.
If a machine will not lift something, the question is not always “what speed?” Sometimes it is “how many motors?”
Build it 15 min
Build the model before you read any further. Everything after this is about making it do something, and none of it will make much sense with nothing on the table in front of you.
Use the viewer's own controls to zoom and turn pages. Fullscreen makes it big enough to build from.
Check the finished build against the picture before you switch anything on. A motor mounted the wrong way round is far easier to spot now than it is to debug later, when it looks like a program fault.
Make it move 10 min
Six blocks: lower the bridge, hold it for a moment, raise it. Use your own measured number in place of the 90.
when program starts :: events hat
set movement motors to [B v] and [C v] :: movement
set movement speed to (25) % :: movement
move [forward v] for (90) [degrees v] :: movement
wait (3) seconds
move [backward v] for (90) [degrees v] :: movement
One instruction to the pair each way. Both motors push together, so the bridge comes down level and goes back up level.
Walk it in the order the Brick runs it:
set movement motors to B and C — a setting. It also guarantees the two motors can never disagree, which on a shared axle is a safety feature and not just a convenience.
set movement speed to 25 % — slow. A drawbridge that slams is a drawbridge that breaks its own hinges, and slow also gives the two motors the best chance of pulling together.
move forward for 90 degrees — the bridge lowers. Measured, so it finishes in the same place every time.
wait 3 seconds — the bridge is down. This is when somebody crosses.
move backward for 90 degrees — up again, the same measured amount, so the gate closes exactly.
What success looks like: a slow, even lowering with both ends moving together, three seconds down, and a clean lift back to closed. Watch the two ends of the bridge rather than the middle — that is where twisting shows.
If the bridge stalls part-way up, that is Lesson 27 happening on a heavier model. Lower the speed a little, check nothing is catching, and make sure both cables really are in B and C — one motor trying to lift this on its own is exactly what it cannot do.
Challenges 27 min
Work through them in order — each is harder than the last. The extra challenge comes after all three, and it is meant to make you plan before you build.
Challenge 1
Make the gate open and close cleanly, on demand, five times in a row, finishing closed every time. Both ends of the bridge must stay level throughout — watch the ends, not the middle. If it twists at any point, slow it down or check your ports.
Challenge 2
Add a button so a person opens the gate rather than the program deciding. The gate must stay closed until the button is pressed, open, wait long enough for somebody to cross, and close again on its own. Then say where you mounted the button and why that position is right for a castle.
Challenge 3
Find the load limit, with two motors and with one. Add weight to the bridge until it will not lift, and record the load. Then unplug one motor and find the limit again. Report both numbers and the ratio between them — and say whether two motors gave you exactly twice as much.
Extra challenge
Build a gate that behaves properly when things go wrong.
Your castle gate must be operated by a person, warn before it moves in either direction, and — the real test — it must not be left half open. If the sequence is interrupted, the gate should end up definitely closed or definitely open, never stuck across the moat.
Plan on paper before you build. A heavy bridge can stall, and a measured block that stalls never finishes. Work out where in your sequence a stall would leave the gate, and what you can do about it.
Two questions when you demonstrate it. Why does this model need two motors when the Auto Gate in Lesson 15 managed with one? And where in your sequence would a stall be most dangerous, and what did you do about it?