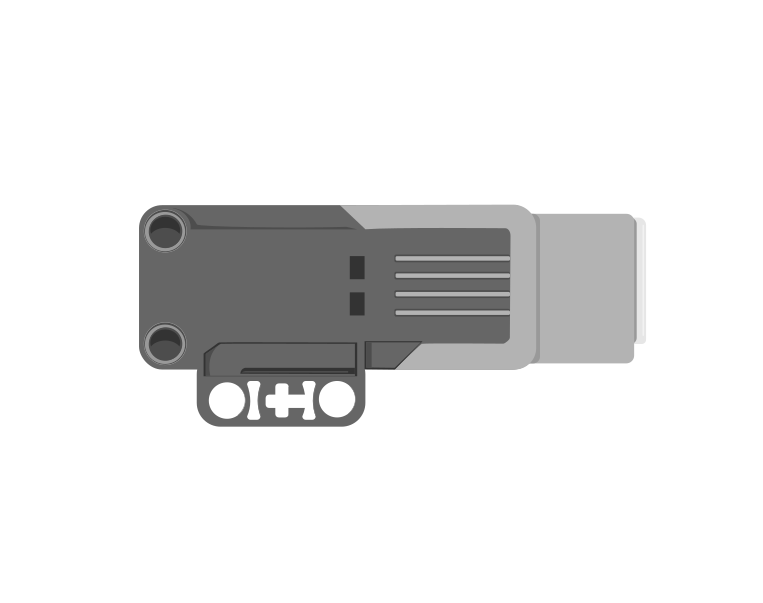
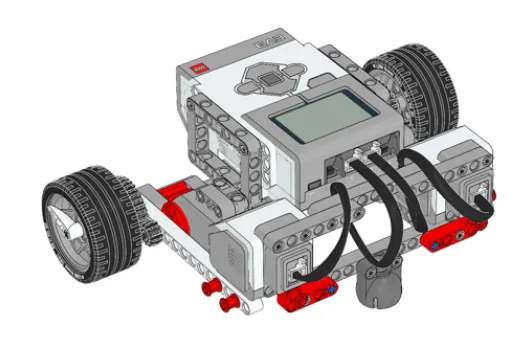
The Gear Bot: a LEGO Official driving base built so that its gear train can be taken apart and rebuilt. It exists to be changed.
You have been saying “speed” since Lesson 3, and you have always meant a number between 0 and 100 in a block. That number is not a speed. It is a setting — a request for how hard the motor should try.
Today you find out how fast the robot actually goes, in centimetres every second, measured with a tape and a clock. And then you change the gears and watch the real number move.
In the real world 5 min
Where you have seen it
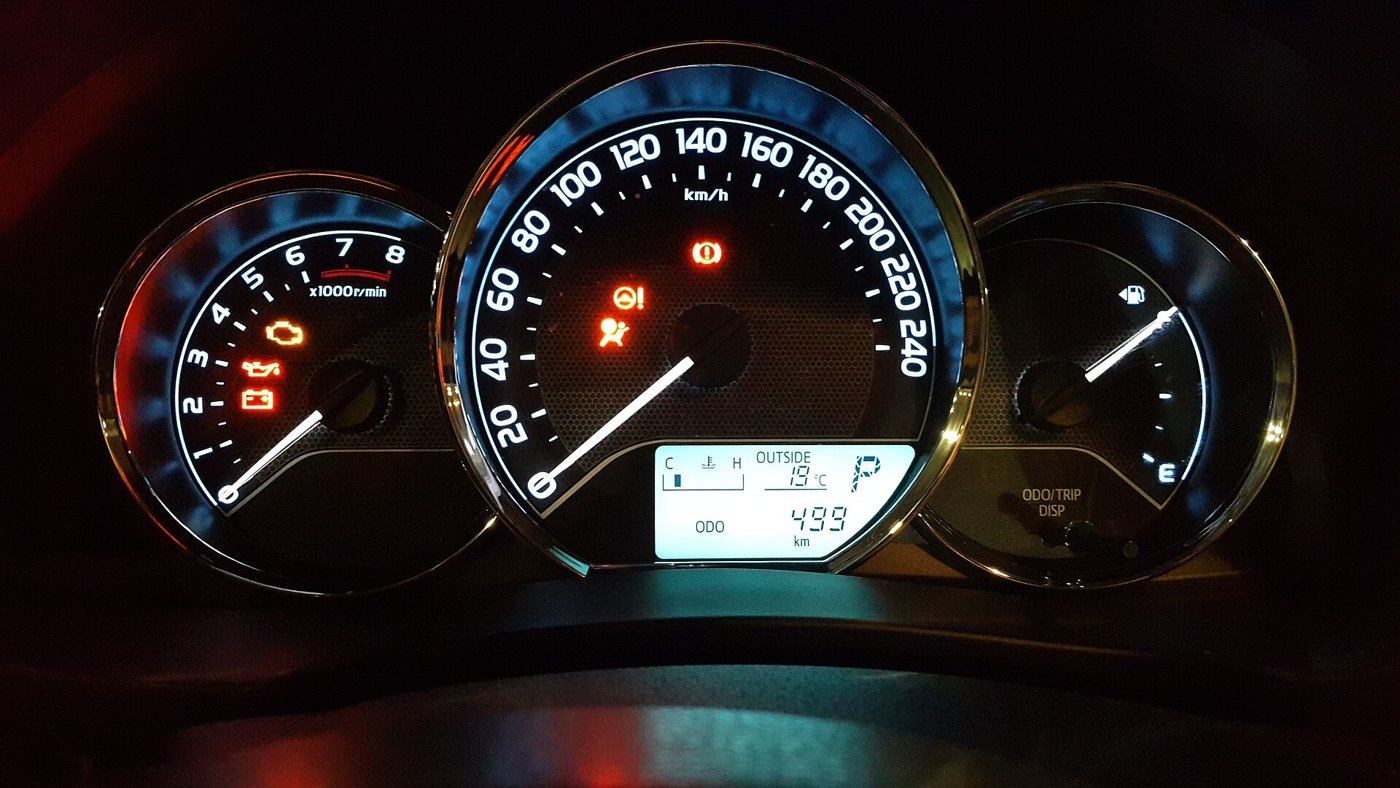
The dial in front of every driver. It does not say “70 %” — it says kilometres per hour, a distance and a time joined together.
A car speedometer, marked in kilometres per hour. Photo: Kskhh / Wikimedia Commons (CC BY-SA 4.0).
Why it is built that way
A speed is always two measurements divided: how far, and how long it took.
Speed = distance ÷ time. Travel 90 centimetres in 3 seconds and you were doing 30 centimetres per second. It works at any scale — the same arithmetic gives you the reading on a lorry’s dashboard and the reading on your Gear Bot.
The accelerator pedal is not a speed either. It is a request, exactly like your speed block, and how fast the car actually goes depends on the hill, the load and the gear it is in.
What would go wrong without it
Two robots can both be set to 50 % and travel at completely different speeds — different wheels, different gears, different battery charge. So “50 %” tells another group nothing at all about your robot.
“Thirty-two centimetres per second” tells them everything. It is a fact about the machine rather than a setting inside it, and it can be compared, predicted from, and checked.
A percentage is what you asked for. A speed in centimetres per second is what you got.
The main concept — measuring a real speed 6 min
Two numbers and one division. The robot can measure the time for you; the distance is yours to measure with a tape.
What you need
How you get it
Distance, in centimetres
A tape measure on the floor. Mark the start, mark where it stopped, measure between them.
Time, in seconds
The Brick’s own clock, from Lesson 20: reset timer before the run and read timer after it.
Speed, in cm per second
Divide the first by the second. On paper, not in a block.
You are doing the division, not the robot. EV3 can do arithmetic, but the blocks for it belong to a later level. That is no loss today: writing the sum out yourself is what makes it stick, and a calculator is fine.
Why the Gear Bot in particular
Because the speed you measure is not fixed. It depends on three things, and this model lets you change all of them:
The speed setting — how hard the motor tries.
The gear ratio — how many wheel turns you get per motor turn. This is Lesson 5 and Lesson 18, now with a number attached to the outcome.
The wheel size — a bigger wheel covers more ground per turn.
Change the middle one and the same program, at the same percentage, gives you a different measured speed. That is the experiment.
Measure it before you argue about it. Distance divided by time settles what an opinion cannot.
▶Gearing, speed and power, and the timerThe full reference for gear ratios, the speed block and the Brick's clock. Open whichever is not clear yet.Show meHide
ComponentMechanics5 min
Gearing up and gearing down
Two meshed gears are a bargain. Whatever one of them gains in turns it loses in force, and whatever it loses in turns it gains in force. There is no arrangement of gears that gives you more of both, and no amount of building will find one.
The ratio is the teeth
Count the teeth on the gear you are turning (the driver) and the teeth on the one being turned (the follower). That is the whole calculation:
turns out = turns in × driver teeth ÷ follower teeth
An 8-tooth gear driving a 24 gives ⅓ of a turn out for every turn in — and three times the turning force. Turn the pair round and you get three turns out and a third of the force. Count the turns yourself below.
0.00turns in0.00turns out×3turning force
strongerslowerslow and strong — a lifting winch
Two gears, meshed. The one on the left is being turned; the one on the right is along for the ride.Watch the two counters. They are not climbing at the same rate.Whatever the follower loses in turns, it gains in force — and whatever it gains in turns, it loses in force. There is no setting that gives you both.Finished. Count the turns again with a different pair and the trade goes the other way.
stopped
The number of teeth is the whole story. 8 teeth driving 24 means 8 ÷ 24 of a turn out for every turn in — and the force changes by exactly the opposite amount.
Gearing down, gearing up
Arrangement
Turns
Force
What it is for
Gearing down — small driving large
fewer
more
winches, lifts, robot arms, anything that has to move a weight
Gearing up — large driving small
more
less
fans, spinners, launchers, wheels on a light fast robot
1 : 1 — same size
same
same
moving the drive to a different axle, or fixing a direction
The names are worth getting right because they are backwards from what people expect: gearing down makes the output slower, not smaller, and it is the setting that makes a weak motor able to lift things.
Gear trains
Put several pairs in a row and the ratios multiply. Two 1:3 reductions in series give 1:9 — which is how a Medium Motor ends up able to raise something it could never shift directly. This is also how a gearbox with a sensible number of parts reaches a ratio that a single pair never could: a 40-tooth gear driven by an 8 is 1:5, and doing it twice is 1:25.
Only the first and last gear affect the ratio. Anything in the middle passes the motion along and changes nothing but the direction — which is a whole idea of its own, in Changing the direction of a turn.
What it costs
Every mesh loses a little to friction, so a long train is less efficient than a short one. Gearing down far enough to lift a heavy load also makes the mechanism slow, and slow is not always acceptable. And a gear train that is geared down hard is very hard to turn backwards by hand, which is either a useful brake or a nuisance depending on what you are building.
Why it matters
A bicycle is the same idea with a chain instead of teeth in mesh: the low gear that gets you up a hill is turning the back wheel slowly and pushing hard, and the high gear you use going downhill does the opposite. Cars, drills, cranes and clocks are all making the same trade.
ComponentMotion4 min
Speed and power
Speed is set separately from movement. You tell the motor how fast it should go, and then you tell it to go — two blocks, in that order.
Speed is a percentage of what this motor can do, not a real-world unit — the same 50 % moves a light arm quickly and a heavy one slowly.
Blocks reference
Block
What it does
[A v] set speed to (25) % :: motors
Sets the speed for this motor from now on. Nothing moves — it only changes what the next movement will do.
[A v] run [clockwise v] for (2) [rotations v] :: motors
Now moves, at whatever speed was last set.
Set it first
when program starts :: events hat
[A v] set speed to (25) % :: motors
[A v] run [clockwise v] for (2) [rotations v] :: motors
Swap those two blocks round and the program still contains a speed of 25 % — it just never gets used. Both shafts below are asked for exactly 2 rotations; watch how long each one takes.
speed first — works
A set speed to 25 %
A run clockwise for 2rotations
speed last — does nothing
A run clockwise for 2rotations
A set speed to 25 %
0.00rotations · slow0.00rotations · fast
Speed first: the movement was slowSpeed last: it only affects the NEXT movement
Two programs. Same two blocks in each — only the order is different.Both are running — and the right-hand one is already finished. The left is barely a third of the way.Its speed block runs now, far too late to affect the movement above it. The left motor is still going, slowly, as it was told to.Both turned exactly 2 rotations. Only one of them did it at the speed the program asked for.Finished — it will run again in a moment.
stopped
Both shafts turn exactly 2 rotations. Only the time they take is different — and the right-hand program never gets the slow movement it was written to have.
The right-hand movement is over before the left is a third of the way round, because it ran at the default speed. Its set speed to () block does run — you can see it light up — but by then the movement it was meant to slow down has already happened. A speed block only ever affects the movements after it. This catches people out constantly.
Slow is often better
A high speed is not a better program. Slow movements are gentler on the gears, easier to watch and debug, and look more like the real machine — a barrier that snaps up in a fraction of a second reads as broken rather than fast.
ComponentControl4 min
The Timer
A wait pauses for a length of time. The timer is different: it runs in the background and can be read at any moment, so the robot can know how long something has taken while it is still happening.
Blocks reference
Block
What it does
(timer)
Reports the seconds since the timer was last reset.
reset timer
Sets it back to zero, so the next reading counts from here.
The timeout — a safety net
The most valuable use of a timer is escaping a wait that might never end. A robot told to drive until it sees a wall will drive for ever if the wall is not there. Combined with a timer, it can give up:
Repeat until the wall is close or five seconds have passed. That one change turns a program that can hang into one that always finishes. Both robots below are looking for a wall that is not there.
no way out
repeat until distance < 15
start moving straight: 0
with a timeout
reset timer
repeat until distance < 15 or timer> 5
start moving straight: 0
write GAVE UP at line 1
1.2stimer212cm · distance
Both robots are told to drive until something is within 15 cm. The room ahead is empty.Three seconds. No wall. Both are still driving — and the right-hand program is also watching its timer.The timer passes 5. The right-hand robot gives up, stops, and says so.The left robot is still going. Its condition can never become true, so that block will hold the program for ever.The right-hand program finished. The left one has not, and there is nothing to say why.
timer 1.2 s
The sensor is not faulty and the program is not wrong. There is simply no wall, and only one of these two programs has a way of noticing that.
The left-hand robot is not broken, and neither is its sensor. Its condition is simply one that will never come true, so the program sits on that block for ever — with nothing on the Brick to say so. The right-hand program asks the same question with an escape route bolted on, and finishes every time.
Why it matters
Real systems time themselves out constantly — a lift that cannot close its doors eventually gives up and beeps rather than trying for ever. A robot with no timeout simply stops responding, and there is nothing on screen to say why.
Say this back before moving on: “Speed is distance divided by time.”
What’s in this build 4 min
The catalogue says this model has one Large Motor. It has two. The manual’s last step shows two cables labelled B and C. Trust the manual — and get into the habit, because this is the second row in nine lessons whose parts list is wrong.
Part
What it is doing here
EV3 Intelligent Brick
Runs the program and times the run.
Large Motor ×2
Ports B and C, driving through the gear train.
The gear train (no cable)
The part this model exists for. Built to be taken off and rebuilt.
Measure the machine before you drive it
Three numbers, and you will use all three today.
Count the gear ratio. Turn the motor one full turn by hand and count the wheel turns. Write it down.
Measure the wheel. Mark a spot on the tyre, roll the robot along a ruler through exactly one wheel turn, and measure how far it went in centimetres. That is the distance per wheel turn.
Multiply the two together and you can predict how far the robot should travel for five motor rotations, before you run anything. Write your prediction down.
Check both wheels are the same size and both spin equally freely. A mismatched pair makes every measurement today unreliable.
Ports — and the rule 4 min
Sensors go in ports 1, 2, 3, 4. Motors go in ports A, B, C, D. They are not interchangeable, and nothing will tell you politely if you swap them.
Part
Port
Why this one
Left drive motor
B
The manual itself labels the cables B and C — follow it.
Right drive motor
C
The standard pair, as on every driving model.
The clock
none
The timer is inside the Brick and has been running since it was switched on. Nothing to plug in.
Check your own build now:
Cables in B and C.
Lay out a measured course. Tape at the start, a tape measure or metre rule along the floor. You need to read a distance to the nearest centimetre.
A long clear run — at least a metre and a half — with nothing to hit at the end.
Line the robot up on the start mark the same way every single run.
Connect the Brick 4 min
Two routes, and either is fine. USB is the reliable one and the one to fall back on when a room’s Bluetooth is busy; Bluetooth leaves the robot free to move, which some models need.
▶How to connect the BrickUSB and Bluetooth, step by step, with a photograph of every screen. Open it if you have not done this before — or if pairing is not working.Show meHide
USB — the reliable one
Switch the Brick on with the dark grey centre button.
Cable into the Brick’s PC port — the small square socket beside the numbered ports, not one of the numbered ones.
Other end into the computer.
Bluetooth — name it first
Do these in order. Naming the Brick after you go looking for it in the list is how groups end up driving each other’s robots.
Name your Brick. On the Brick: Settings (the spanner) → Brick Name. Type something nobody else will pick, then press the tick. Every Brick is called EV3 until somebody changes it.
Turn Bluetooth on. Settings → Bluetooth. Tick Bluetooth and Visibility. Leave iPhone/iPad/iPod unticked.
Connect from EV3 Classroom. Click the Brick icon at the top of the programming area, find your Brick by name, and click Connect.
Say yes on the Brick. It asks “Connect?” with the computer’s name — choose the tick, then accept the passkey, which is already 1234.
Where to read it. The name sits in the bar across the very top of the screen, on every screen — so you can check which Brick you are holding at any moment without going into a menu. This one is EV3VE. A Brick nobody has renamed says EV3.Step 3, and the reason step 1 exists. Three Bricks in range — read the name before you click Connect. Pairing with the wrong one is not an error: it works perfectly, on somebody else’s robot.
Step 2.Bluetooth switches the radio on; Visibility is what lets the computer find you. With Visibility off your Brick works perfectly and simply never appears in the list.Step 4. Look at the Brick. It asks whether to accept and names the computer. Choose the tick.Then the passkey, already 1234. Press the tick again and you are connected.
The two failures, every class, every time. The Brick has gone to sleep while you were building — press the centre button to wake it. Or you have paired with the group at the next table, which is why the name matters.
The long version, including Port View and how to read the port tiles, is in the Brick & Bluetooth guide.
Bluetooth, because a cable changes the answer. You are measuring a speed to the nearest centimetre per second, and a USB lead dragging behind the robot slows it down by a real, measurable amount.
Confirm the connection 2 min
Check the Brick icon: connected, or not.
A Large Motor on B and one on C — confirming for yourself that the catalogue was wrong and the manual was right.
Turn the left wheel and check tile B counts, then the right and C.
Roll the robot forward by hand a little and watch the degree counters climb together. If one runs ahead, the two sides are geared differently and the robot will curve.
Change it and test 8 min
Keep a table: what you changed, the distance, the time, and the speed you worked out. Three runs per setting, and use the middle one.
Run at 25 % and at 100 %. Work out the speed for each. Is 100 % exactly four times 25 %? It will not be, and that is worth noticing — the percentage is not a speed.
Predict, before running: if you double the rotations from 5 to 10, does the speed change? Test it. The distance and the time both double, so the speed should not — and if it does, something in your method is inconsistent.
Now change the machine. Rebuild the gear train geared up — a bigger gear driving a smaller one. Run the identical program at the identical 50 % and measure again.
Recount the ratio after the rebuild, and check: did the speed change by roughly the amount the new ratio predicts?
Last one, and it costs you something. At the fastest gearing, try to drive the robot up a gentle slope — a book under one end of a board. What have you given away to get that speed?
Step 5 brings the whole run of gearing lessons together. The Gear Shooter (5) traded force for speed, the EV3 Fan (18) hit the limit of what a program could do, and here you can finally put a number on both sides of the trade.
Gearing does not create speed. It moves it from one column to the other, and now you can measure both columns.
Make it move 10 min
Six blocks. Start the clock, drive a fixed number of rotations, and put the elapsed time on the screen. You supply the tape measure.
when program starts :: events hat
set movement motors to [B v] and [C v] :: movement
set movement speed to (50) % :: movement
reset timer
move [forward v] for (5) [rotations v] :: movement
write (timer) at line (1) :: display
The robot measures the time. You measure the distance. The speed is the two of them divided.
Walk it in the order the Brick runs it:
set movement motors to B and C — a setting.
set movement speed to 50 % — also a setting, and remember: this is a request, not the speed.
reset timer — the clock goes to zero. It must be the block immediately before the movement, or you are timing your own button press too.
move forward for 5 rotations — the run. The block waits until all five have happened.
write (timer) at line 1 — the elapsed seconds go on the screen.
Now do the sum
Measure from the start mark to where the robot stopped, in cm.
Read the time off the Brick’s screen.
Divide the distance by the time. That is your robot’s speed in centimetres per second — a real number about a real machine.
Compare the distance with the prediction you made in section 5. How close were you, and if you were out, which of the two measurements do you trust less?
What success looks like: a straight run, a sensible time on the screen, and a speed you can state in cm/s. Write it on the board next to the other groups’ — they will not all be the same, and that is the interesting part.
This is what you are building: the Gear Bot.
Build it 15 min
Build the model before you read any further. Everything after this is about making it do something, and none of it will make much sense with nothing on the table in front of you.
Use the viewer's own controls to zoom and turn pages. Fullscreen makes it big enough to build from.
Check the finished build against the picture before you switch anything on. A motor mounted the wrong way round is far easier to spot now than it is to debug later, when it looks like a program fault.
Challenges 27 min
Work through them in order — each is harder than the last. The extra challenge comes after all three, and it is meant to make you plan before you build.
Challenge 1
Measure your robot's speed in centimetres per second, at three different speed settings, three runs each. Report the nine measurements and the three speeds you calculated. Then answer one question: is a setting of 100 twice the real speed of a setting of 50?
Challenge 2
Predict before you measure. Using your gear ratio and your wheel size, work out on paper how far the robot should travel for eight motor rotations. Write the prediction down, then run it and measure. Report both numbers and explain any difference.
Challenge 3
Change the gearing and measure again. Rebuild the gear train for more speed, recount the ratio, and measure the new speed with the identical program. Report the old ratio, the new ratio, the old speed and the new speed — and say whether the speed changed by the amount the ratios predicted.
Extra challenge
Build the fastest Gear Bot in the room, then prove it can still work.
Two parts, and they pull against each other. First, gear your robot for the highest measured speed you can achieve in centimetres per second, and prove it with measurements rather than a race.
Then make it climb a gentle slope. If your fastest gearing cannot, gear it back until it can — and report both the speed you lost and the slope you gained.
Plan on paper before you rebuild. Predict what each gearing change will do to the measured speed, then check whether you were right.
Two questions when you demonstrate it. What is your robot's speed, in units, and how do you know? And what exactly did you trade away to get it?