Challenge 1
Add 2 touch sensors onto your robot, one touch sensor is to make the bionic leg move forward (clockwise), another touch sensor is to make it run backward (counter-clockwise). If no touch sensor is pressed, the motor will stop.
Quick Learn — the model, the instructions, the program and the challenges. The theory is in Full Lesson.
EV3 Robotics›Level 2 · Intermediate›Lesson 10
Level 2 · Lesson 10 · EV3-L02-1060 minutes · Ages 9–16 · Model: Bionic movement
The Bionic movement model: a limb driven by one Large Motor through a linkage, built to copy the way a living joint moves.
Every lesson so far has worked the same way. The model stayed as it was built, and you changed the program.
Today it is the other way round. The program is written once, and then never touched again. What changes is the machine — and because the program is fixed, any difference you measure is the build’s doing and nothing else.
Prosthetic limbs have stopped looking like replacements and started looking like equipment. A modern bionic hand is 3D-printed, driven by small motors and tendons, and costs a fraction of what one did a decade ago.
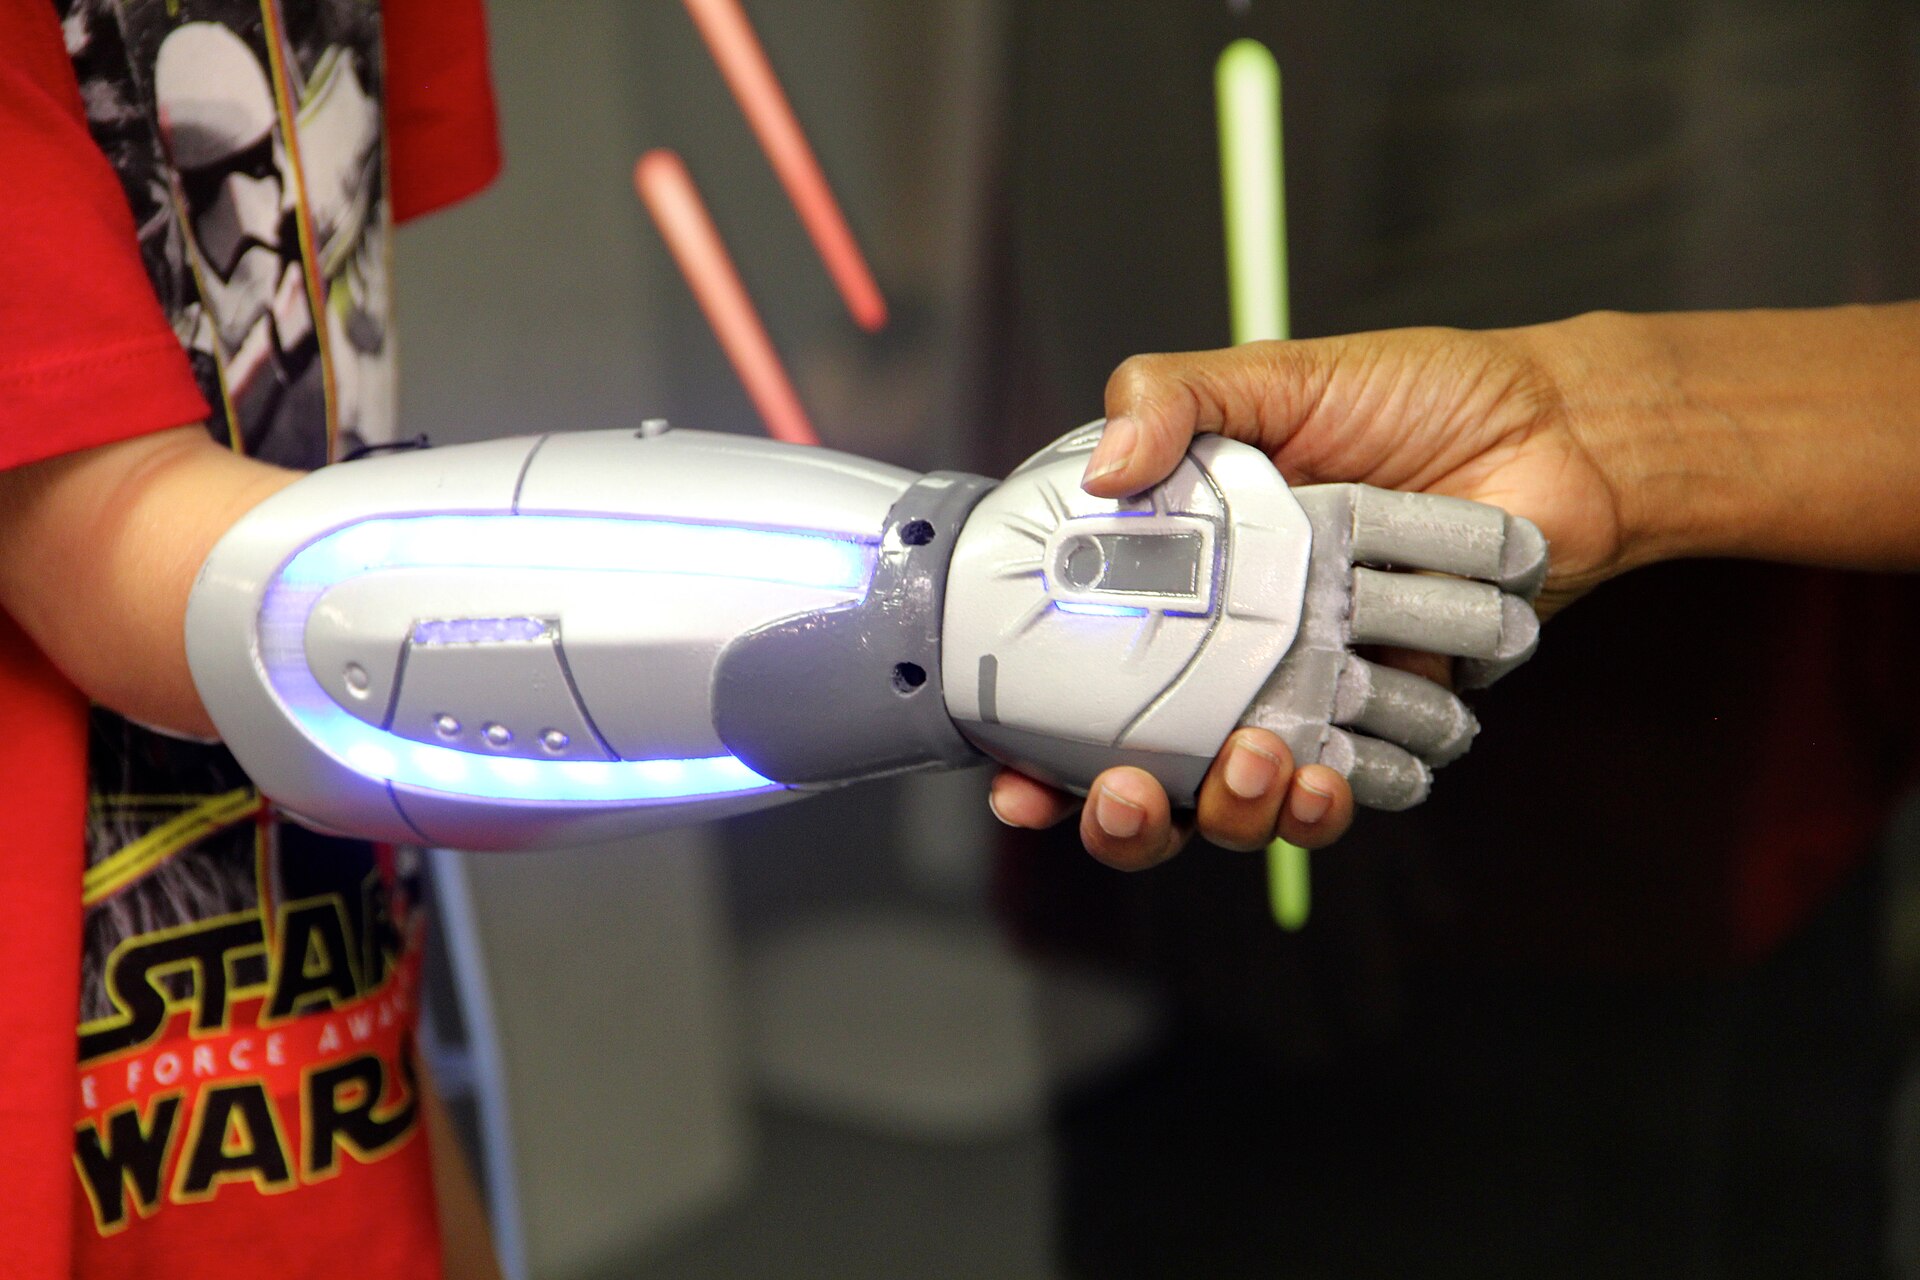
A hand like that is the result of hundreds of versions. Change the length of one tendon, the position of one pivot, the gearing of one motor — then test, measure, compare, and keep the better one.
And the testing only means anything because everything except the one change stays the same. Same grip test, same object, same control signal. Change the tendon and the software in the same week and you will never know which one made the difference — you will just have a hand that is different.
Engineers who change two things at once and measure an improvement have learned nothing. They cannot repeat it deliberately, they cannot undo the half that made it worse, and the next change they make will be a guess built on a guess.
If you change two things and it gets better, you do not know why — and not knowing why is the same as not knowing.
A fair test has one thing you change, one thing you measure, and a long list of things you deliberately leave alone.
| Role | Today that is… |
|---|---|
| What you change | One thing about the mechanism — a gear, a linkage length, a pivot point. One. |
| What you measure | How long a fixed movement takes, from the Brick’s own timer. |
| What you hold still | The program, the speed, the number of rotations, the surface, the battery, the load — and the person doing the timing. |
This is a short program and it is not the point of the lesson. It exists to be identical across every test, the way a ruler is identical across every measurement:
when program starts :: events hat
clear display :: display
[A v] reset degrees counted :: motors
reset timer :: sensors
[A v] run for (5) [rotations v] at (50) % speed :: motors
write [Masa:] at line (1) :: display
write (timer) at line (2) :: display
Resist changing the program. Every instinct built up over eighteen lessons will tell you to adjust the speed when a modification is disappointing. If you do, you have thrown away every measurement you took before it, because they were taken with a different instrument.
Batteries drain, linkages bed in, and a motor that has just been running is warmer than one that has not. So run every version three times and take the middle number. If the three disagree wildly, that is the finding — something about your build is inconsistent, and no single number would have told you.
Some models have no motors and no sensors at all. They are not lesser lessons — they are where the physics lives. A build that stores energy, changes a force, or turns one kind of motion into another explains why the powered models later need the gearing and the speeds they do.
Gears, pulleys and levers look like three different topics and are three shapes of the same deal: whatever you gain in force, you pay for in distance. Halve the effort and you move twice as far; move half as far and you need twice the effort. No arrangement of anything gives you both, and recognising that saves a great deal of time hunting for one.
What a mechanism actually does is let you spend the same effort in a form you can manage — a little at a time instead of all at once, or all at once instead of a little at a time.
| Tutorial | The question it answers |
|---|---|
| Gearing up and gearing down | How do I trade turns for force? |
| Changing the direction of a turn | Why is it going backwards, and how do I drive an axle at 90°? |
| Pulley systems | How does a rope let a small motor lift a big load? |
| Levers — effort, load and pivot | Where should the pivot go? |
| Elastic and stored energy | How much further does pulling back twice as far actually get me? |
| Scissor mechanisms | How do I make something extend a long way — and why won’t it start? |
| Oscillatory motion | How do I turn going round into going back and forth? |
| Centre of gravity | Why does it keep falling over? |
| Biomimetic mechanisms | How does a machine walk without ever being told to? |
Friction is what makes wheels grip and also what wastes effort. Every mesh, pin and rope turn loses a little to it, so a mechanism with more parts delivers less than the arithmetic promises. A build that binds — that is stiff to move by hand — is losing far more than that, and no amount of extra motor power fixes a mechanism that is rubbing.
Before measuring anything, turn the mechanism by hand. It should move smoothly and coast a little. If it does not, fix the build first; numbers taken off a binding mechanism describe the binding, not the idea you were trying to test.
Since there is nothing to program, the work is measuring. Change one thing, keep everything else the same, and record what happened — pull the car back 5 cm, then 10, then 15, and measure how far each one travels. Three readings at each setting, not one, because a single run is not evidence.
That is genuinely how engineers test, and it is the same discipline that makes debugging a program work: change one thing at a time.
Change one thing. Measure the same way. Write it down before you touch anything else.
Two meshed gears are a bargain. Whatever one of them gains in turns it loses in force, and whatever it loses in turns it gains in force. There is no arrangement of gears that gives you more of both, and no amount of building will find one.
Count the teeth on the gear you are turning (the driver) and the teeth on the one being turned (the follower). That is the whole calculation:
turns out = turns in × driver teeth ÷ follower teeth
An 8-tooth gear driving a 24 gives ⅓ of a turn out for every turn in — and three times the turning force. Turn the pair round and you get three turns out and a third of the force. Count the turns yourself below.
The number of teeth is the whole story. 8 teeth driving 24 means 8 ÷ 24 of a turn out for every turn in — and the force changes by exactly the opposite amount.
| Arrangement | Turns | Force | What it is for |
|---|---|---|---|
| Gearing down — small driving large | fewer | more | winches, lifts, robot arms, anything that has to move a weight |
| Gearing up — large driving small | more | less | fans, spinners, launchers, wheels on a light fast robot |
| 1 : 1 — same size | same | same | moving the drive to a different axle, or fixing a direction |
The names are worth getting right because they are backwards from what people expect: gearing down makes the output slower, not smaller, and it is the setting that makes a weak motor able to lift things.
Put several pairs in a row and the ratios multiply. Two 1:3 reductions in series give 1:9 — which is how a Medium Motor ends up able to raise something it could never shift directly. This is also how a gearbox with a sensible number of parts reaches a ratio that a single pair never could: a 40-tooth gear driven by an 8 is 1:5, and doing it twice is 1:25.
Only the first and last gear affect the ratio. Anything in the middle passes the motion along and changes nothing but the direction — which is a whole idea of its own, in Changing the direction of a turn.
Every mesh loses a little to friction, so a long train is less efficient than a short one. Gearing down far enough to lift a heavy load also makes the mechanism slow, and slow is not always acceptable. And a gear train that is geared down hard is very hard to turn backwards by hand, which is either a useful brake or a nuisance depending on what you are building.
A bicycle is the same idea with a chain instead of teeth in mesh: the low gear that gets you up a hill is turning the back wheel slowly and pushing hard, and the high gear you use going downhill does the opposite. Cars, drills, cranes and clocks are all making the same trade.
Say this back before moving on: “One change, then measure.”
| Part | What it is doing here |
|---|---|
| EV3 Intelligent Brick | The stopwatch. It is the only part of the test rig that must not change all lesson. |
| Large Motor — the muscle | Drives the limb. Its speed and rotations are fixed by the program, so it applies the same effort to every version you build. |
| The linkage (not electronic) | Everything interesting lives here — the pivots, the arm lengths, the gearing. This is your variable. |
| The load (not electronic) | Whatever the limb has to move. It must be the same weight, in the same place, for every single run. |
Draw this on paper now. It is the actual deliverable of the lesson — more than the model is.
Sensors go in ports 1, 2, 3, 4. Motors go in ports A, B, C, D. They are not interchangeable, and nothing will tell you politely if you swap them.
| Part | Port | Why this one |
|---|---|---|
| Limb motor (Large) | A | One job motor — and it must stay in A across every version, or the program is not identical after all. |
| Sensors | none | The measurement comes from the Brick’s timer, not from anything plugged in. |
Check your own build now:
Two routes, and either is fine. USB is the reliable one and the one to fall back on when a room’s Bluetooth is busy; Bluetooth leaves the robot free to move, which some models need.
Do these in order. Naming the Brick after you go looking for it in the list is how groups end up driving each other’s robots.
EV3 until somebody changes it.EV3.The two failures, every class, every time. The Brick has gone to sleep while you were building — press the centre button to wake it. Or you have paired with the group at the next table, which is why the name matters.
The long version, including Port View and how to read the port tiles, is in the Brick & Bluetooth guide.
Whichever you choose, keep it the same all lesson. It sounds fussy. It is exactly the kind of thing that quietly changes a measurement — a cable can add drag to a linkage, and if you switch to Bluetooth halfway through your afternoon results will not match your morning ones.
Now the model changes and the program does not. One modification, three runs, one row of the table — then decide whether to keep it or put it back.
Step 4 is the honest one and it is the step people skip. Going back to the start and getting the start’s numbers again is the only proof that your experiment was controlled. If the baseline has moved, one of the things you promised to hold still did not.
The last run of the day should be the first one again. If it does not match, the day’s results are a story rather than a measurement.
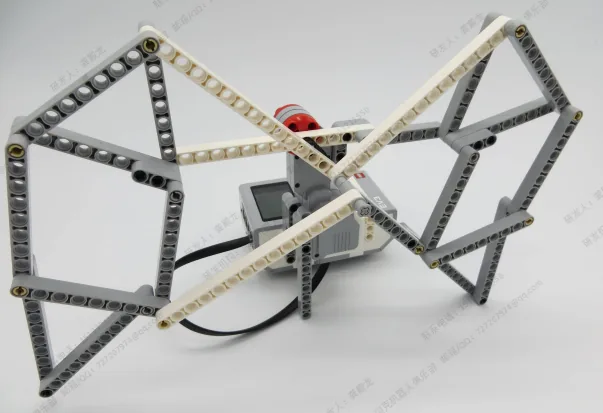
Build the model before you read any further. Everything after this is about making it do something, and none of it will make much sense with nothing on the table in front of you.
Use the viewer's own controls to zoom and turn pages. Fullscreen makes it big enough to build from.
Check the finished build against the picture before you switch anything on. A motor mounted the wrong way round is far easier to spot now than it is to debug later, when it looks like a program fault.
Establish the baseline properly. Three runs of the unmodified model, recorded before anything is touched.
when program starts :: events hat
clear display :: display
[A v] reset degrees counted :: motors
reset timer :: sensors
[A v] run for (5) [rotations v] at (50) % speed :: motors
write [Masa:] at line (1) :: display
write (timer) at line (2) :: display
write [Darjah:] at line (4) :: display
write ([A v] degrees counted) at line (5) :: display
play beep (65) for (0.2) seconds :: sound
What success looks like: three runs whose times agree closely, and a degrees reading near 1800 every time. If your three baseline runs already disagree by a lot, fix that before you modify anything — you cannot detect a small improvement with a noisy instrument.
If the degrees come up short, the linkage is jamming or the motor is stalling under load. That is worth knowing on its own, and it may be the very thing your modification should fix.
Work through them in order — each is harder than the last. The extra challenge comes after all three, and it is meant to make you plan before you build.
Add 2 touch sensors onto your robot, one touch sensor is to make the bionic leg move forward (clockwise), another touch sensor is to make it run backward (counter-clockwise). If no touch sensor is pressed, the motor will stop.
Only use one touch sensor to control the movement, when the touch sensor is pressed for the first time, the bionic leg will run forward (clockwise), once touch sensor is released, the bionic leg will stop moving. If touch sensor is pressed the second time, the bionic leg will run backward (counter-clockwise). Make this program run in a loop, so third time pressing the touch sensor will make it move forward, 4th time will make it move backward, so and so on. Display the degree counted of the motor on the display screen.
Build a symmetrical bionic left on the other side, modify it so that when both legs run it will move the whole robot. Station your 2 touch sensors onto the robot, when you press one of the touch sensors, it will make the robot move forward for 3 runs, and another touch sensor make it move backward. Display how many run has the robot done (direction doesn't matter in this case).
Improve the mechanism, and prove it was you who improved it. Pick one thing you want the limb to do better — faster, stronger, smoother, further — and say which before you begin. You cannot improve everything and a design that claims to has not been measured. Work in versions. One change per version, three runs per version, all of it recorded in the table, and the program never touched. Keep the versions that helped and undo the ones that did not, one at a time, so you always know which change is responsible for what. Finish by running your best version and your original back to back, in front of somebody. Two questions when you present it. What did you give up to get the improvement — because a mechanism nearly always trades one thing for another, and if you cannot name what you lost you may not have looked. And your best version came from about four attempts; describe what you would test next and why that one.