Unpredictable Without Trying: The Lucky Draw Machine
60 minutes · Ages 8+ · Model: Lucky Draw Machine
What you are building 3 min
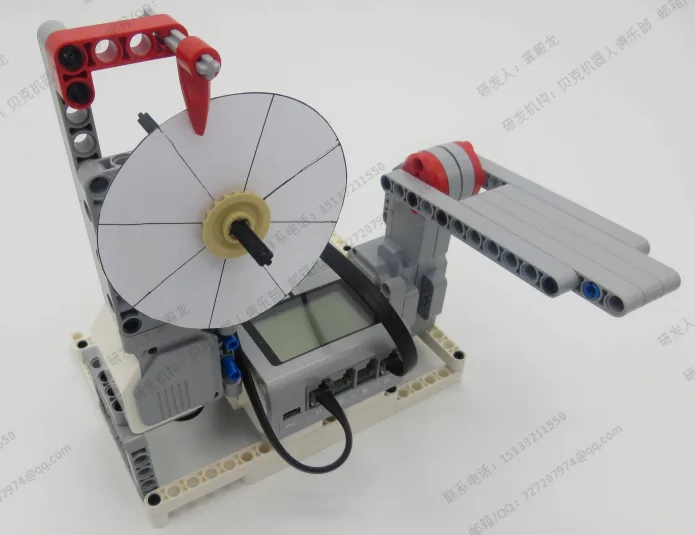
The Lucky Draw Machine: a paper wheel cut into parts, a pointer at the top, and a motor that spins the wheel. The wheel slows down, rolls on, and stops. The part under the pointer is your prize.
Here is a good question to ask before you build it. How does the machine choose where to stop?
It does not. Nothing in the program picks a part. No block in this lesson makes a random number. The wheel just spins until it runs out of speed. And that is enough.
In the real world 5 min
Where you have seen it
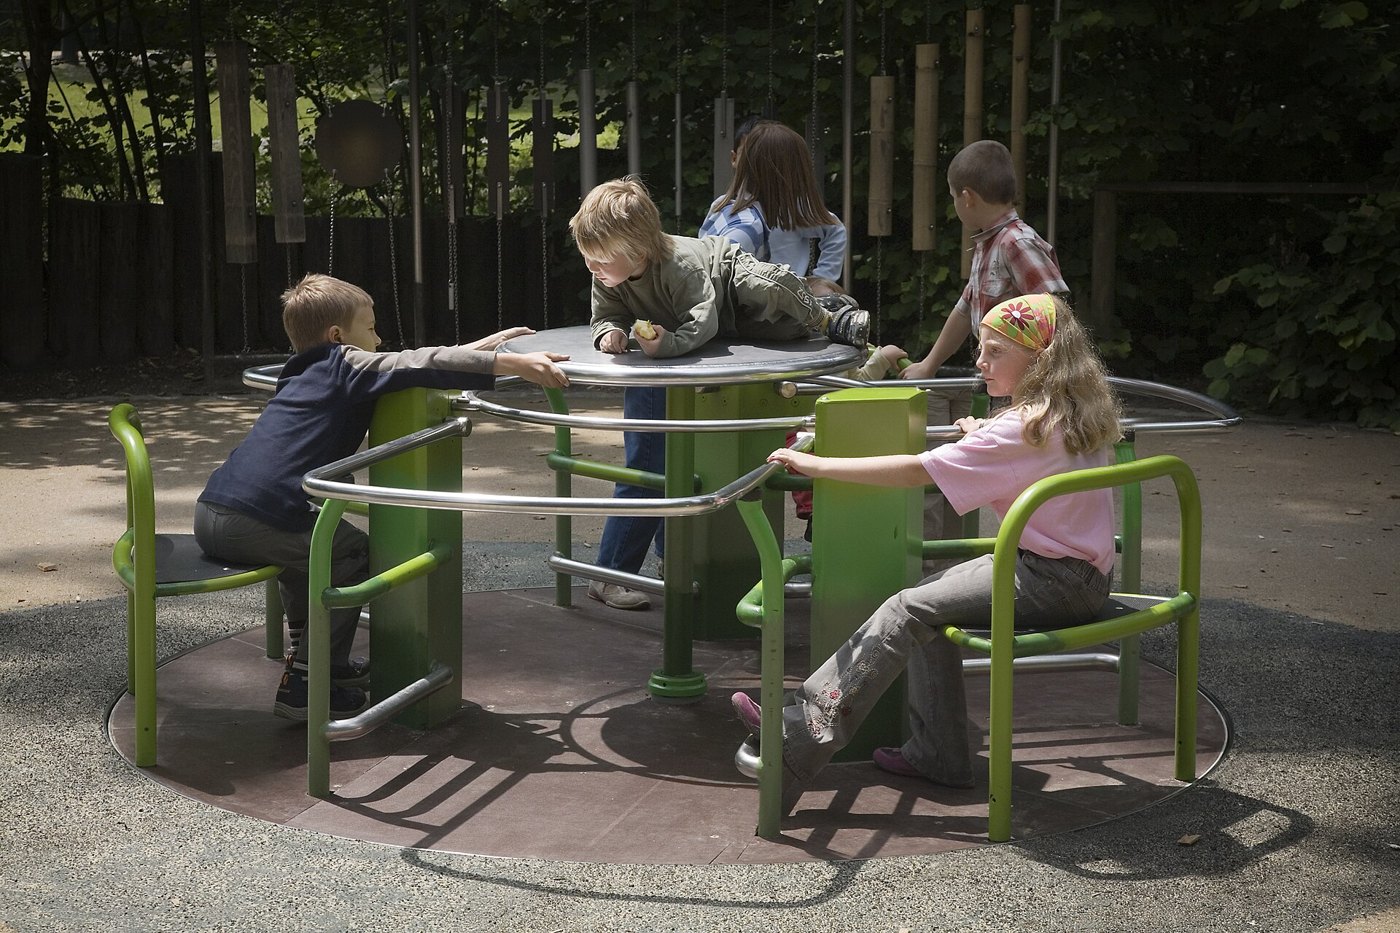
Think of the roundabout in a playground. You push it as hard as you can and jump on. It goes round and round. Bit by bit, it slows and stops. You have no idea which way you will be facing when it does.
A playground roundabout, pushed once, then left to roll on. Photo: Jorge Royan / Wikimedia Commons (CC BY-SA 3.0).
Why it is built that way
Once a heavy wheel is turning, it keeps turning. That is called momentum. You met it on the Stone Grinder, in Level 1, Lesson 20. There it got in the way. Here it is what makes the machine work.
What stops the wheel is friction. That is the rubbing that slows things down. A little comes from where the axle turns. A little comes from the air. Friction is small and steady. So a fast wheel takes a long time to stop. It makes many turns on the way.
That is why you cannot guess where it will stop. You would need to know just how hard the push was. You would need to know just how much friction there is today, and just how the paper is sitting. A difference too small to see at the start grows into half a turn by the end.
What would go wrong without it
Imagine a prize wheel that always stopped in the same place. It would be useless. Everybody would get the same prize. After one go, nobody would want another.
Nobody should be able to guess a draw, not even the person who built it. That is the whole reason the machine is there.
A long roll turns a tiny difference at the start into a totally different answer at the end.
The main concept — you do not need a random block 6 min
You already know these blocks. Today you use them in a new way. Start the motor, stop the motor, and let the wheel carry on by itself.
Block
What happens to the wheel
[B v] run [clockwise v] for (3) [rotations v] :: motors
Just three turns, then it holds still. You can guess it. It is the same three turns every time.
[B v] start motor [clockwise v] :: motors
Spins up and keeps going. It has no end built in. You met it on the Ferris Wheel, in Level 1.
[B v] stop motor :: motors
Stops driving it. The wheel keeps turning on its own. It rolls on until it stops. Nobody chooses where it lands. Rolling on like this is called coasting.
That third row is the whole lesson. You saw it on the Stone Grinder. The stone kept turning after the program had finished, and it was a bit annoying. Here, it is the machine.
The program controls the blue part. The brown part is just the wheel rolling on. It is much longer. That is why you cannot choose where it ends.
EV3 does have a random block. You are not using it. It belongs to a later level. And it would be the wrong tool here anyway. A random number would tell the wheel where to stop. Then you would have to make it stop there. That is far more work than just letting go.
The real world is already hard to guess. Sometimes the easiest way to get a surprise is to stop controlling something.
▶The Large Motor, and the Brick buttonsAll about this motor, and the Brick buttons that start today's draw. Open one if it is not clear yet.Show meHide
ComponentMotion4 min
The Large Motor
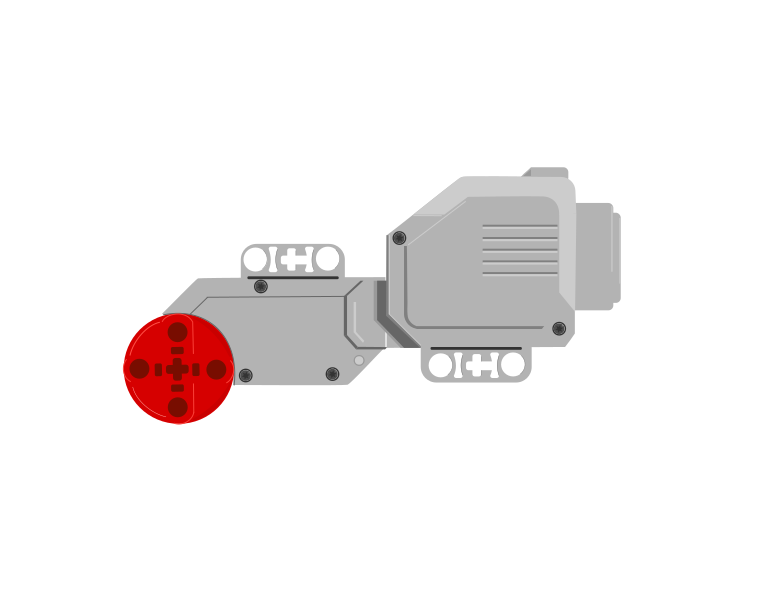
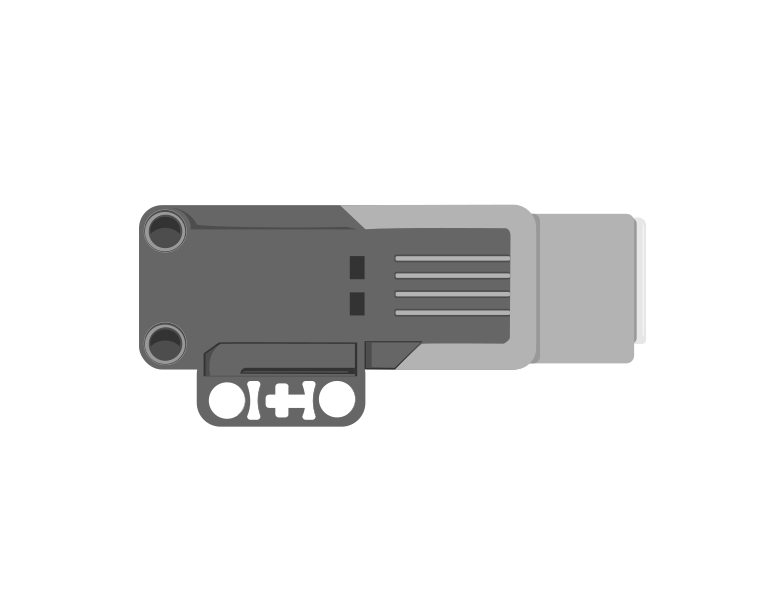
The Large Motor is the bigger of the two EV3 motors. It turns more slowly than the Medium Motor but pushes far harder, which is why it drives wheels and lifts loads. If a mechanism struggles or stalls with a Medium Motor, this is usually the answer.
Large Motor
Medium Motor
The two motors at the same scale. The Large Motor is visibly bigger and heavier — that extra size is what gives it more turning force and less speed.
Blocks reference
Block
What it does
[B v] run [clockwise v] for (3) [rotations v] :: motors
Turns the motor a measured amount, then stops.
[B v] run [clockwise v] for (2) [seconds v] :: motors
Turns it for a length of time rather than a distance, then stops — however far the shaft actually got.
[B v] set speed to (40) % :: motors
Sets how fast the next movement will be.
[B v] start motor [clockwise v] :: motors
Starts it turning and carries straight on.
Watch them race, then watch them lift
Give both motors the same program and the same arm. With nothing on the arm the Medium Motor wins easily — which is why it is tempting to treat it as simply the better motor. Then the demo hangs a weight on both arms and runs it again.
when program starts
A run clockwise for 1rotations
and on the Large Motor, only the port changes
B run clockwise for 1rotations
0%medium lifted0%large liftednoneload
Medium: not enough forceLarge: slower, but it lifts
) : clock.step === 1 ? (
With nothing to lift, the Medium Motor is quicker
The same program, the same arm, one on each motor. Nothing to lift yet.No load: the Medium Motor is clearly the quicker of the two.Now hang a heavy weight on both arms and run exactly the same program.The Medium Motor stalls a third of the way up. The Large Motor keeps lifting.Same program, same weight — the motor was the difference.Finished — it will run again in a moment.
at rest
Turning the speed up would not rescue the Medium Motor here — a stalled motor needs more force, which means gearing it down or using the Large Motor.
That is the whole difference. The Medium Motor is quicker; the Large Motor is stronger. A motor that cannot produce enough force does not move slowly — it stops altogether and strains, which is the buzzing, going-nowhere failure almost every LEGO builder meets sooner or later.
A stalled Large Motor hangs the program too
Being stronger buys the Large Motor a bigger load, not an infinite one. Every winch runs out of cable and every lift reaches the top of its rails, and when a motor arrives at a limit it stalls: the shaft stops turning and the motor sits there straining.
That is a problem for the program, not just the mechanism. run for (3) rotations does not finish when three rotations’ worth of time has gone by — it finishes when the shaft has actually turned three times. A winch that reaches the top after two and a half will never report three, so the block waits, and every block after it is unreachable. Nothing crashes. The motor keeps pushing and the rest of the program simply never happens.
The third setting in that dropdown is the way out. for () seconds drives the motor for a duration and then stops regardless, so it always finishes and the program always moves on. Drive into a limit slowly, for a comfortably long time, and then call that position zero:
when program starts :: events hat
[B v] set speed to (30) % :: motors
[B v] run [counterclockwise v] for (3) [seconds v] :: motors
[B v] reset degrees counted :: motors
The lift ends up against its own stop, the encoder is zeroed there, and every measured move afterwards starts from a place you know. The rule is the same for both motors: if the movement ends against something solid, run for seconds; if it ends somewhere in the middle, measure it. The Medium Motor module has the animation for it — see The Medium Motor, which is where this bites hardest, because a Medium Motor is usually the one doing the lifting.
Which motor for which job
Large Motor — wheels, winches, anything lifting weight. Strong, slower. Normally ports B and C.
Medium Motor — arms, gates, jaws, pointers. Quick, lighter. Normally ports A and D.
The blocks are identical apart from the port letter, so swapping one motor for the other is a build change, not a programming change.
Why it matters
Real machines match the motor to the load. A lift uses a powerful, slow motor; the button panel beside it uses tiny ones. Choosing the wrong size is the most common reason a LEGO mechanism whines but does not move.
ComponentSensing4 min
The Brick buttons
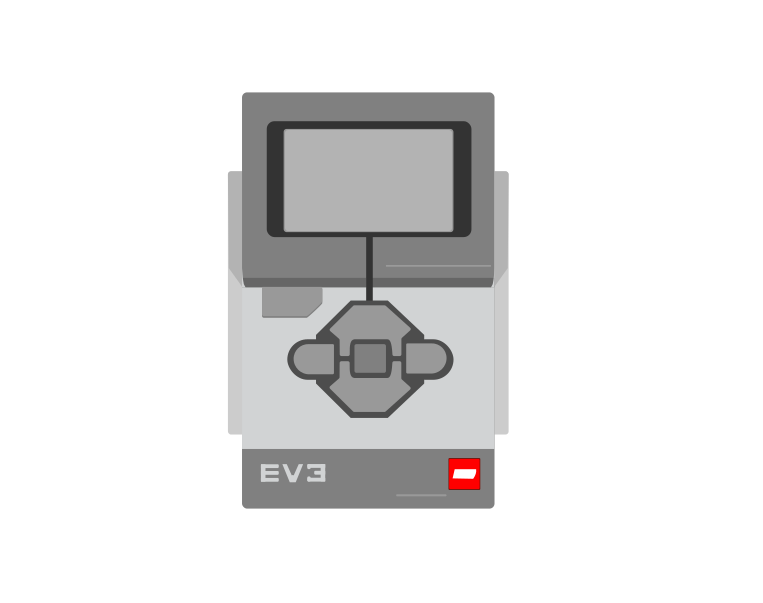
The Brick has five buttons of its own — up, down, left, right and centre. They need no sensor, no cable and no port, which makes them the easiest way to let a person tell the robot to do something.
Five buttons — up, down, left, right and centre — built into the Brick. No cable, no port, no sensor to plug in.
Blocks reference
Block
What it does
when [center v] button [pressed v] :: events hat
Starts a whole stack when that button is pressed.
wait until <is [center v] button pressed? :: sensors>
Holds an existing program until the button is pressed.
Press to begin
A program sitting on a wait block looks exactly like a program that has crashed. Watch one wait — including through two presses of the wrong button.
when program starts
wait until is center button pressed?
A run clockwise for 1rotations
the other way to do it
when center button pressed
A run clockwise for 1rotations
The program has reached the wait block. It is not stuck — it is waiting, and nothing below it will run until the centre button goes down.Up is pressed. The button reporter changes to 4, but this wait is watching the centre button, so the program stays where it is.Right: 3. Still not the one.Centre: 2. The condition is true and the wait lets go.The motor runs. One press, at the moment a person chose.Finished. The robot did nothing at all until a person said so.
waiting for centre
A program parked on a wait block looks identical to a crashed one. This is why the status light or a line on the screen is worth setting before you wait.
The wait is watching one button. Up and right change the (button) reading, and the program does not care. That reading is a number rather than a name: 0 for nothing, then 1 left, 2 centre, 3 right, 4 up, 5 down.
A hat, or a wait?
A hat gives the button its own separate stack, which can run at any time. Good for a control the user may press whenever they like.
A wait puts the button in the middle of a sequence. Good for “press to begin”, where nothing should happen before it.
Why it matters
Nearly every machine has a start button that is deliberately separate from switching the power on. A robot that begins moving the instant it is powered up is hard to set down and hard to test — one that waits for a press can be positioned first.
Say this back before you move on: “Stop motor stops driving it. It does not stop the wheel.”
What’s in this build 4 min
Part
What it is doing here
EV3 Intelligent Brick
Runs the program. Its centre button starts the draw.
Large Motor, port B
Spins the wheel. It needs to be strong, because a paper wheel on an arm swings a lot.
Large Motor, port C
The lever the player pulls down. See the note below. Your program does not read this one.
The paper wheel (no cable)
You cut this yourself: a circle split into 8 to 12 parts.
The truth about the lever. To make the program notice someone pulling it, you would read that motor backwards. You would ask it how far a hand has turned it. You know the block for that, degrees counted, from Lesson 11. But today is about something else. So for now, the lever is just fun to pull. The Brick’s centre button is what really starts the draw. Once the draw works, you could come back and wire it up.
Make the wheel, and make it easy to read
Cut a paper circle that fits your holder. Split it into 8 to 12 equal parts. With fewer than 8, the draw feels unfair. With more than 12, the pointer may sit between two parts.
Colour and label each part differently. From a metre away, can you tell straight away which one the pointer is on?
Check that the pointer at the top really points at one part, not at a line. If it is not clear, make the pointer thinner.
Spin the wheel hard by hand. Count how long it keeps rolling. Under two seconds? Then the axle is too tight. Find what is rubbing and free it. A short roll is easy to guess.
Ports — and the rule 4 min
Sensors go in ports 1, 2, 3, 4. Motors go in ports A, B, C, D. You cannot swap them. If you do, nothing warns you. The robot just will not work.
Part
Port
Why this one
Large Motor (spins the wheel)
B
The motor the program really drives. Every block below says B.
Large Motor (the player’s lever)
C
Plugged in and doing nothing, on purpose. It stays connected, so it is ready if you wire it up later.
The centre button
none
Part of the Brick, like the screen and the speaker.
Check your own build now:
Wheel motor in B, lever motor in C.
Spin the wheel by hand. Does it turn freely and smoothly? Does it keep rolling for a good few seconds?
Is the pointer fixed on firmly? If it wobbles as the wheel stops, people will argue about the result. A draw people argue about is a bad draw.
Is the machine on a steady table? A wheel this big will make a light frame shuffle about.
Connect the Brick 4 min
Two routes, and either is fine. USB is the reliable one and the one to fall back on when a room’s Bluetooth is busy; Bluetooth leaves the robot free to move, which some models need.
▶How to connect the BrickUSB and Bluetooth, step by step, with a photograph of every screen. Open it if you have not done this before — or if pairing is not working.Show meHide
USB — the reliable one
Switch the Brick on with the dark grey centre button.
Cable into the Brick’s PC port — the small square socket beside the numbered ports, not one of the numbered ones.
Other end into the computer.
Bluetooth — name it first
Do these in order. Naming the Brick after you go looking for it in the list is how groups end up driving each other’s robots.
Name your Brick. On the Brick: Settings (the spanner) → Brick Name. Type something nobody else will pick, then press the tick. Every Brick is called EV3 until somebody changes it.
Turn Bluetooth on. Settings → Bluetooth. Tick Bluetooth and Visibility. Leave iPhone/iPad/iPod unticked.
Connect from EV3 Classroom. Click the Brick icon at the top of the programming area, find your Brick by name, and click Connect.
Say yes on the Brick. It asks “Connect?” with the computer’s name — choose the tick, then accept the passkey, which is already 1234.
Where to read it. The name sits in the bar across the very top of the screen, on every screen — so you can check which Brick you are holding at any moment without going into a menu. This one is EV3VE. A Brick nobody has renamed says EV3.Step 3, and the reason step 1 exists. Three Bricks in range — read the name before you click Connect. Pairing with the wrong one is not an error: it works perfectly, on somebody else’s robot.
Step 2.Bluetooth switches the radio on; Visibility is what lets the computer find you. With Visibility off your Brick works perfectly and simply never appears in the list.Step 4. Look at the Brick. It asks whether to accept and names the computer. Choose the tick.Then the passkey, already 1234. Press the tick again and you are connected.
The two failures, every class, every time. The Brick has gone to sleep while you were building — press the centre button to wake it. Or you have paired with the group at the next table, which is why the name matters.
The long version, including Port View and how to read the port tiles, is in the Brick & Bluetooth guide.
Players must reach the Brick today. The centre button starts the draw. So put the Brick where a player can press it without leaning over the spinning wheel.
Confirm the connection 2 min
Check the Brick icon: connected, or not.
A Large Motor on B and one on C.
Turn the wheel by hand. Check that tile B counts. If it is C, swap the cables. If not, you would be spinning the lever and pulling the wheel.
Now here is something worth seeing. Spin the wheel hard by hand. Watch tile B’s degrees counted shoot up on its own. The Brick can see the wheel rolling on. It just is not using that number yet.
That number goes up with no program running. That shows the motor is a sensor as well as a motor. You read it the same way in Lesson 11.
Change it and test 8 min
In this part you measure. You are not just playing about. Run each version ten times. Write down which part came up each time. Ten is not many, but it is enough to see the difference.
Run the program as it is, ten times. Add up the results. How many different parts came up?
Change the spin-up to 0.3 seconds. Do ten more runs. Now the wheel hardly gets going, and the roll is short. You should see the same few parts again and again. A short roll is easy to guess.
Go back to 2 seconds. Change the speed to 30 %. Do ten runs. Same problem, different cause.
Now swap start motor and stop motor for just one [B v] run [clockwise v] for (5) [rotations v]. Guess what will happen. Then run it ten times. Now the motor holds still after five rotations. It does not let go. So the wheel hardly rolls on at all, and the draw nearly always gives the same answer.
Put it back. Then look at your results and answer one question. Which version would you really use for a prize draw? How do your results show it?
Step 4 is the surprise. It is the opposite of everything the course has taught so far. Since Level 1, measured moves have been the safe, grown-up choice. Here they are the wrong one. This machine must not do the same thing every time.
Being exact is not always the goal. Ask what the machine is for. Then decide which block is better.
This is what you are building: the Lucky Draw Machine.
Build it 15 min
Build the model before you read any further. Everything after this is about making it do something, and none of it will make much sense with nothing on the table in front of you.
One page at a time — use Next and Previous, or the ← → keys. Fullscreen makes it big enough to build from.
Check the finished build against the picture before you switch anything on. A motor mounted the wrong way round is far easier to spot now than it is to debug later, when it looks like a program fault.
Make it move 10 min
Six blocks: wait for a player, spin up, drive for two seconds, and let go. See how nothing in here chooses an answer.
when program starts :: events hat
wait until <is [center v] button pressed? :: sensors>
[B v] set speed to (100) % :: motors
[B v] start motor [clockwise v] :: motors
wait (2) seconds
[B v] stop motor :: motors
The program ends at the last block. The fun part of the draw happens after that, with nothing running at all.
Go through it in the order the Brick runs it:
wait until centre button pressed. The machine sits ready. This is the player's turn.
set speed to 100 %. This is a setting. It must come before the start, not after. You learned that on the Gyro Launcher. Full speed, because a long roll needs a fast start.
start motor clockwise. It has no end built in. So the wheel spins up, and the program moves on.
wait 2 seconds. This is the spin-up. The wheel gets faster the whole time.
stop motor. Now the program is finished. The wheel is not. It rolls on for far longer than the two seconds you drove it. It stops wherever it stops.
What success looks like: press the button. The wheel speeds up for two seconds. Then it spins freely for several more seconds before it stops. The pointer lands clearly on one part. Run it five times, and get five different answers.
Does it keep landing on the same part? Then the roll is too short. Free up the axle, take weight off the wheel, or drive it for longer. If a wheel stops after half a turn, you could guess where it lands.
Challenges 27 min
Work through them in order — each is harder than the last. The extra challenge comes after all three, and it is meant to make you plan before you build.
Challenge 1
Prove your draw is fair enough to use. Do twenty draws. Each time, mark down which segment comes up. Report the tally. Not every segment has to come up. Twenty is a small number. But what if half of them never come up at all? Then your wheel is not spinning freely enough. Say so.
Challenge 2
Make it a real show. The machine must say that it is starting. It must build suspense while the wheel spins. Suspense is the feeling of waiting to find out. Then it must show clearly that the wheel has stopped. Now the result can be read. Use sound, the screen and the status light. Time it so the signal does not come before the wheel has really stopped.
Challenge 3
Break your own machine, then fix it. Make the draw easy to guess, on purpose. Try a short spin, a tight bearing or a slow speed. Show it landing on the same few segments over twenty runs. Then undo it and show the difference. Report both tallies side by side.
Extra challenge
Build a draw that someone would be happy to lose on.
Another group must be willing to use your machine for a real prize. So they have to be sure they cannot control it or guess it. Run it in front of them. Let them try to work out how to make it land where they want.
Plan on paper before you build. What would make this draw unfair? Maybe the wheel always stops in the same area. Maybe the pointer can be nudged. Maybe the player controls the spin. Design each one out.
When you show it, answer two questions. Nothing in your program chooses a segment. So what does? And how long does your wheel coast after the program has finished? Coasting is when it rolls on by itself. Why does that number matter more than anything you wrote?