Challenge 1
Empty a full magazine with no jams, and record how many bolts actually fed out of how many you loaded.
Quick Learn — the model, the instructions, the program and the challenges. The theory is in Full Lesson.
EV3 Robotics›Level 2 · Intermediate›Lesson 27
Level 2 · Lesson 27 · EV3-L02-2760 minutes · Ages 9–16 · Model: Chu Ko Nu Chinese Crossbow · Mechanical only
The Chu Ko Nu: a repeating crossbow. A magazine of short beams sits on top, and a lever on the side does everything else.
There is no Brick in this model. No motor, no sensor, no cable, no program. That is not an omission — it is the lesson. Push the lever forward and back and the machine loads a bolt, draws the bow and looses it, in that order, every single time.
By the end of the lesson you will have measured how fast it can shoot and how far, and you will be able to say exactly where the “program” is stored.
Safety, before anything else. This machine launches a beam. Point it at a wall or a cardboard box, never at a person, an animal or a window. Everybody within two metres wears eye protection. One rule, no exceptions, all lesson.
The chu ko nu is a Chinese repeating crossbow. Chinese tradition credits it to Zhuge Liang, the strategist of the Three Kingdoms period, though archaeologists have found repeating crossbows older than that — one from a Warring States tomb, centuries earlier.
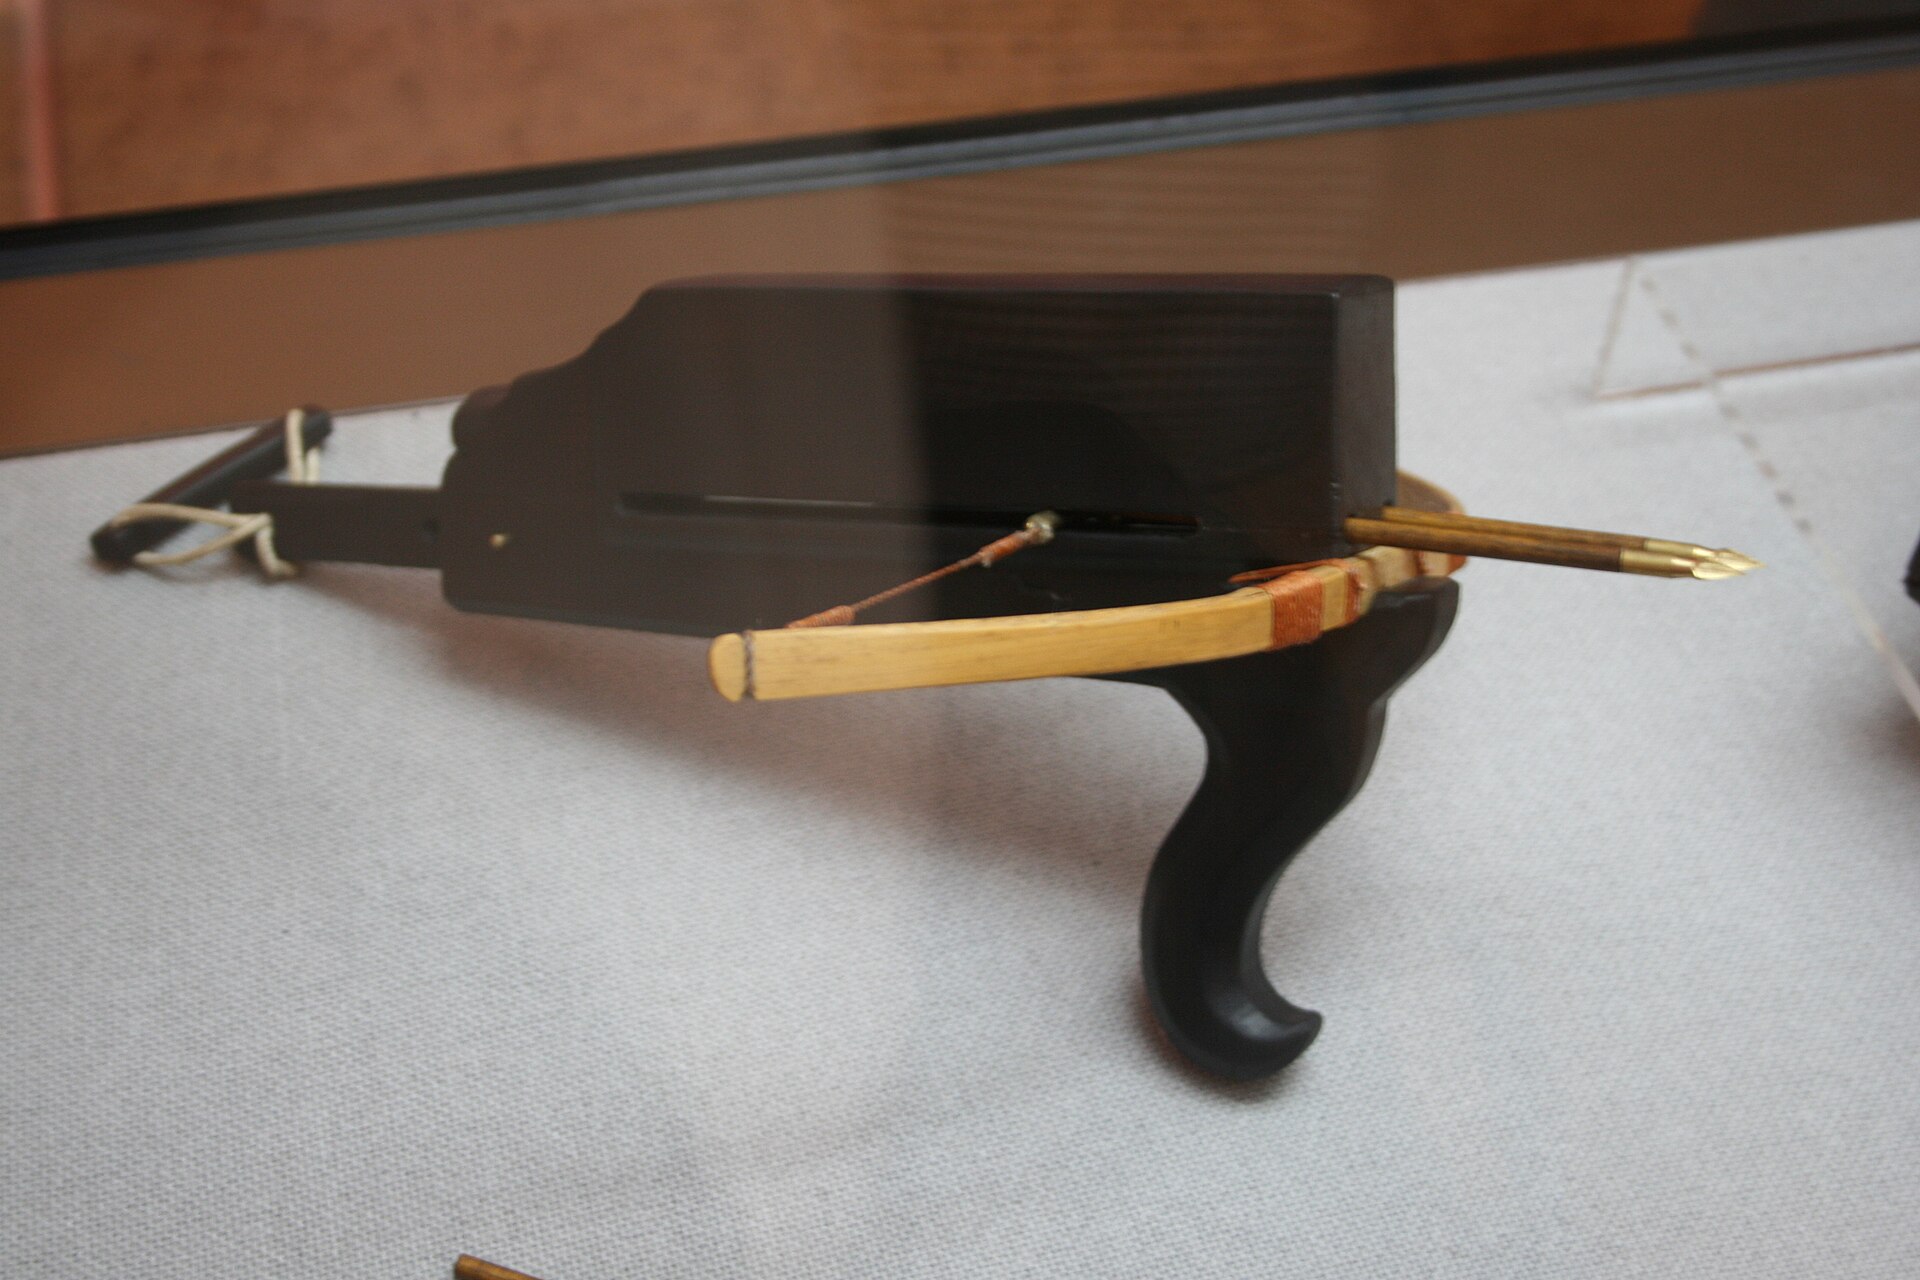
An ordinary crossbow is powerful and slow. Loading one means bracing it against the ground, hauling the string back with both hands, seating a bolt, and aiming — twenty seconds if you are practised, and both hands are busy the whole time.
The chu ko nu gives away a great deal of that power and buys back speed. A magazine sits over the groove, and gravity drops the next bolt into place by itself. Working the lever forward and back draws the string, and at the end of the stroke a peg pushes up through a slot and lifts the string off — loosing the bolt.
One hand. One movement. Perhaps ten shots in fifteen seconds. It was a defensive weapon: not accurate, not powerful, but a wall of them could put an enormous number of bolts in the air very quickly.
The order is not optional. Draw before the bolt has dropped and you shoot nothing. Release before the draw is complete and the bolt falls out of the groove. Every step depends on the one before, and there is no computer anywhere in the machine to check.
The order is not written down. It is built into the shape of the parts.
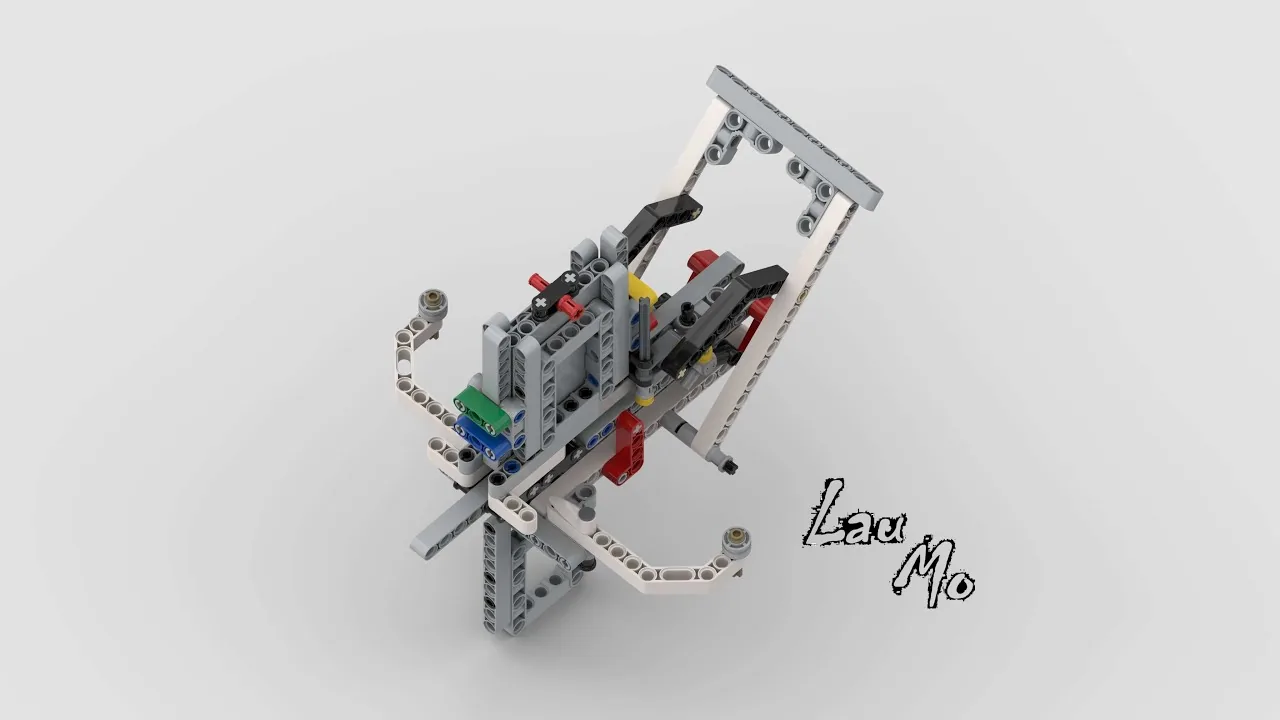
There is no printed manual for this model — but the video above is a real build video, not a demonstration. It is Lau Mo’s assembly walkthrough for the 45544 set, so you can build straight from it. Pause it often; a video cannot be paged at your own speed the way a manual can.
Watch the finished mechanism run slowly, and more than once, before you start. You are looking for two moments: when the bolt drops into the groove, and when the peg lifts the string off. Those two are the whole machine.
Here is what your machine does on every stroke of the lever. Read it as a program, because it is one.
Three steps, always in that order, never overlapping. Nothing checks. Nothing decides. There is no if, no wait until, and nothing that could fail to run.
| In your EV3 programs | In this machine |
|---|---|
| Blocks in a stack, top to bottom | The travel of the lever, front to back |
A wait until that holds the next step back | A peg that is not yet under the slot, because the lever has not reached it |
| Changing the order means dragging blocks | Changing the order means rebuilding the machine |
| An error stops the program | An error jams the mechanism, loudly |
Both are real answers to the same problem, and the trade is worth naming. A program can be changed in ten seconds and can go wrong in ways nobody predicted. A mechanism cannot be changed without tools and cannot get the order wrong at all — the wrong order is physically impossible.
This is not a historical curiosity. A car’s ignition switch will not let you start the engine in gear. A microwave cannot run with the door open — not because the software checks, but because opening the door physically breaks the circuit. A lift door cannot open between floors.
In each case somebody decided the rule was too important to trust to a program. You will meet this again in Lesson 45, where the Archery Robot has to refuse to release an arrow it has not armed — and there you will have to build the interlock in blocks, because the machine will not do it for you.
Some models have no motors and no sensors at all. They are not lesser lessons — they are where the physics lives. A build that stores energy, changes a force, or turns one kind of motion into another explains why the powered models later need the gearing and the speeds they do.
Gears, pulleys and levers look like three different topics and are three shapes of the same deal: whatever you gain in force, you pay for in distance. Halve the effort and you move twice as far; move half as far and you need twice the effort. No arrangement of anything gives you both, and recognising that saves a great deal of time hunting for one.
What a mechanism actually does is let you spend the same effort in a form you can manage — a little at a time instead of all at once, or all at once instead of a little at a time.
| Tutorial | The question it answers |
|---|---|
| Gearing up and gearing down | How do I trade turns for force? |
| Changing the direction of a turn | Why is it going backwards, and how do I drive an axle at 90°? |
| Pulley systems | How does a rope let a small motor lift a big load? |
| Levers — effort, load and pivot | Where should the pivot go? |
| Elastic and stored energy | How much further does pulling back twice as far actually get me? |
| Scissor mechanisms | How do I make something extend a long way — and why won’t it start? |
| Oscillatory motion | How do I turn going round into going back and forth? |
| Centre of gravity | Why does it keep falling over? |
| Biomimetic mechanisms | How does a machine walk without ever being told to? |
Friction is what makes wheels grip and also what wastes effort. Every mesh, pin and rope turn loses a little to it, so a mechanism with more parts delivers less than the arithmetic promises. A build that binds — that is stiff to move by hand — is losing far more than that, and no amount of extra motor power fixes a mechanism that is rubbing.
Before measuring anything, turn the mechanism by hand. It should move smoothly and coast a little. If it does not, fix the build first; numbers taken off a binding mechanism describe the binding, not the idea you were trying to test.
Since there is nothing to program, the work is measuring. Change one thing, keep everything else the same, and record what happened — pull the car back 5 cm, then 10, then 15, and measure how far each one travels. Three readings at each setting, not one, because a single run is not evidence.
That is genuinely how engineers test, and it is the same discipline that makes debugging a program work: change one thing at a time.
A stretched rubber band is a store. Pull it and you put energy in; let go and it gives the energy back. Nothing about that is obvious from looking at the band, and two things about it are genuinely surprising.
While it is stretched and held, the energy is not doing anything — it is potential energy, stored in the shape of the material. Release it and that becomes kinetic energy: the energy of something moving. A pull-back car is a machine for making that swap at a moment of your choosing.
The same store shows up all over a LEGO set:
This is the first surprise. Energy stored in a spring or a band goes as the square of how far it is stretched — pull back twice as far and you have stored four times as much, not twice.
Which sounds like excellent news, and leads directly to the second surprise: the car does not go four times as far. Find out where the two part company.
Drag the car back, or use the arrow keys. Watch the two curves come apart.
Every bit of the extra stretch is still turning into distance. Double this stretch and you store four times the energy — energy goes as the SQUARE of how far you pull.
Find the place where the green curve stops rising as fast as the orange one. That is the setting worth building for — and it is a number you measure, not one you can reason out.
Past a certain stretch the wheels can no longer grip hard enough to turn all that force into movement, so they spin. The energy still leaves the band — it goes into noise, heat and rubber marks on the table instead of into distance.
That ceiling is a property of your car on that surface: its weight, its tyres, how much of it is over the driven wheels. It is not something to look up. It is something to measure, and finding it is one of the most satisfying things a mechanical build has to offer.
Three things move the ceiling up, and all of them are build changes rather than bigger bands: more weight over the driving wheels, grippier tyres, and gearing the launch down so the same energy arrives as more force over more time.
Change one thing at a time and run each setting three times, not once. Pull back 5 cm, then 10, then 15, measuring from the same starting line every time and recording every run. Three readings tell you whether a difference is real; one reading tells you nothing at all.
That is the discipline the whole of Mechanisms without motors is built around, and it is the same habit that makes debugging a program work.
Bows, clockwork, suspension springs and the recoil mechanism in a car door all store energy and give it back on demand. Storing energy slowly and releasing it quickly is how a small muscle — or a small motor — produces a large, brief force.
If the order really matters, build it into the shape. A mechanism cannot forget.
A stretched rubber band is a store. Pull it and you put energy in; let go and it gives the energy back. Nothing about that is obvious from looking at the band, and two things about it are genuinely surprising.
While it is stretched and held, the energy is not doing anything — it is potential energy, stored in the shape of the material. Release it and that becomes kinetic energy: the energy of something moving. A pull-back car is a machine for making that swap at a moment of your choosing.
The same store shows up all over a LEGO set:
This is the first surprise. Energy stored in a spring or a band goes as the square of how far it is stretched — pull back twice as far and you have stored four times as much, not twice.
Which sounds like excellent news, and leads directly to the second surprise: the car does not go four times as far. Find out where the two part company.
Drag the car back, or use the arrow keys. Watch the two curves come apart.
Every bit of the extra stretch is still turning into distance. Double this stretch and you store four times the energy — energy goes as the SQUARE of how far you pull.
Find the place where the green curve stops rising as fast as the orange one. That is the setting worth building for — and it is a number you measure, not one you can reason out.
Past a certain stretch the wheels can no longer grip hard enough to turn all that force into movement, so they spin. The energy still leaves the band — it goes into noise, heat and rubber marks on the table instead of into distance.
That ceiling is a property of your car on that surface: its weight, its tyres, how much of it is over the driven wheels. It is not something to look up. It is something to measure, and finding it is one of the most satisfying things a mechanical build has to offer.
Three things move the ceiling up, and all of them are build changes rather than bigger bands: more weight over the driving wheels, grippier tyres, and gearing the launch down so the same energy arrives as more force over more time.
Change one thing at a time and run each setting three times, not once. Pull back 5 cm, then 10, then 15, measuring from the same starting line every time and recording every run. Three readings tell you whether a difference is real; one reading tells you nothing at all.
That is the discipline the whole of Mechanisms without motors is built around, and it is the same habit that makes debugging a program work.
Bows, clockwork, suspension springs and the recoil mechanism in a car door all store energy and give it back on demand. Storing energy slowly and releasing it quickly is how a small muscle — or a small motor — produces a large, brief force.
Say this back before moving on: “Load, cock, release — and the lever is the program.”
Look at your model. Which electronic parts can you find? Look properly before you read on — this is the second model in the whole course where the honest answer is none.
| Part | What it is doing here |
|---|---|
| The magazine | Holds the bolts and feeds them by gravity. Its height sets how many shots you get; its width must suit exactly one beam. |
| The lever | The only input. Everything the machine does is a consequence of how far it has travelled. |
| The bow and its band | Stores the energy. Level 1’s Elastic Car in a new shape — slow in, fast out. |
| The release peg and slot | The cleverest part. It is a wait until made of plastic: it cannot lift the string until the lever has come far enough. |
| The groove | Guides the bolt. If it is too loose the bolt sits crooked and jams; too tight and friction eats the range. |
The Elastic Car was the first, in Level 1. Two models out of ninety-six with nothing electronic in them, and both are here to make the same point from different sides: the Elastic Car stores energy without a program, and this one stores a sequence without a program.
Sensors go in ports 1, 2, 3, 4. Motors go in ports A, B, C, D. They are not interchangeable, and nothing will tell you politely if you swap them.
This model uses none of them, and the rule is still worth saying — because the interesting question is what it would take to add one.
| If you wanted to… | You would need | And it would go in |
|---|---|---|
| Count the shots fired | a Touch Sensor tripped by the lever at full stroke | port 1 |
| Know when the magazine is empty | a Colour Sensor looking into the magazine | port 3 |
| Work the lever automatically | a Large Motor and a crank | port A |
| Refuse to fire when nobody is clear | an Ultrasonic Sensor down the range | port 4 |
Every one of those is a real challenge for later today. Notice what they all have in common: they add knowing to a machine that already does the job perfectly well without it. The mechanism does not need a sensor. A person who wants to count, or record, or be warned does.
Check your own build now:
Every other lesson checks the Brick’s screen here. There is no screen, so check the machine instead — and do it with the magazine empty.
Step 1 is the equivalent of reading the port tiles. You are confirming the machine can do its job before you ask it to. On an EV3 model that means checking a screen; here it means watching a peg.
This is the body of the lesson, and it is a real measured experiment. Rule up a table with three columns — what I changed, shots that fed, distance — and fill it in as you go. One change at a time, and three shots per setting before you believe anything.
Step 6 is the sting in the tail. The mechanism guarantees the order of the three steps and guarantees nothing about whether each one worked. A shape can enforce a sequence. Only a sensor can notice a failure. That is why you have spent forty lessons on sensors, and why this machine — for all its cleverness — is 2,000 years old and still cannot count.
Build the order into the shape. Build the checking into the program. Do not expect either one to do the other’s job.
Build the model before you read any further. Everything after this is about making it do something, and none of it will make much sense with nothing on the table in front of you.
Use the viewer's own controls to zoom and turn pages. Fullscreen makes it big enough to build from.
The same build on Google Drive — sometimes a video, sometimes a scan:
Use the viewer's own controls to zoom and turn pages. Fullscreen makes it big enough to build from.
Check the finished build against the picture before you switch anything on. A motor mounted the wrong way round is far easier to spot now than it is to debug later, when it looks like a program fault.
There is no program in this lesson. Not a short one — none at all. The lever is the program, and your hand is the processor.
Run the machine properly and pay attention to what your hand is doing.
What success looks like: one continuous back-and-forth movement of the lever produces one shot per stroke, with no fiddling between shots, and the magazine empties without a jam.
Stop and notice what is not happening. ** You are not telling it when to load. You are not telling it when to release. ** You are supplying movement, and the machine is supplying order. Every EV3 model you have built so far has needed you to supply both.
If a stroke fires nothing, the bolt did not drop — check the magazine is not binding. If a bolt falls out of the groove, the release is coming too early: the peg is finding the slot before the draw is complete, which is a build problem and not a technique problem.
Work through them in order — each is harder than the last. The extra challenge comes after all three, and it is meant to make you plan before you build.
Empty a full magazine with no jams, and record how many bolts actually fed out of how many you loaded.
Measure the range at three different draw lengths, three shots at each, and say which gives the most consistent distance.
Modify the magazine or the groove to make the feed more reliable, and prove the improvement with ten shots before and ten after.
Add ONE EV3 part to this purely mechanical machine so that it can count its own shots and say when the magazine is empty — the thing the original could never do. Choose the part and the port yourself, justify the choice in writing, and show it counting correctly through a full magazine.