Challenge 1
Make the dinosaur take ten steps instead of six, and thud twice on every step instead of once. You should be changing one number and adding one block — if you find yourself copying blocks out ten times, stop and look at the loop again.
Quick Learn — the model, the instructions, the program and the challenges. The theory is in Full Lesson.
EV3 Robotics›Level 1 · Beginner›Lesson 22
Level 1 · Lesson 22 · EV3-L01-2260 minutes · Ages 9–16 · Model: Stegosaurus
The Stegosaurus: a four-legged dinosaur with a row of plates down its back, a spiked tail, and one motor that walks all four legs.
Your Hexapod took five strides because you told it five rotations. That worked, but it is not really what you meant. You meant “take five steps, and make a noise on each one” — and there is a block for saying exactly that.
By the end this dinosaur will walk a number of steps you choose, and thud once per step, and you will be able to change the number of steps by editing a single digit.
Stegosaurus lived about 150 million years ago and is one of the most recognisable dinosaurs there has ever been, entirely because of the two rows of tall bony plates along its back.
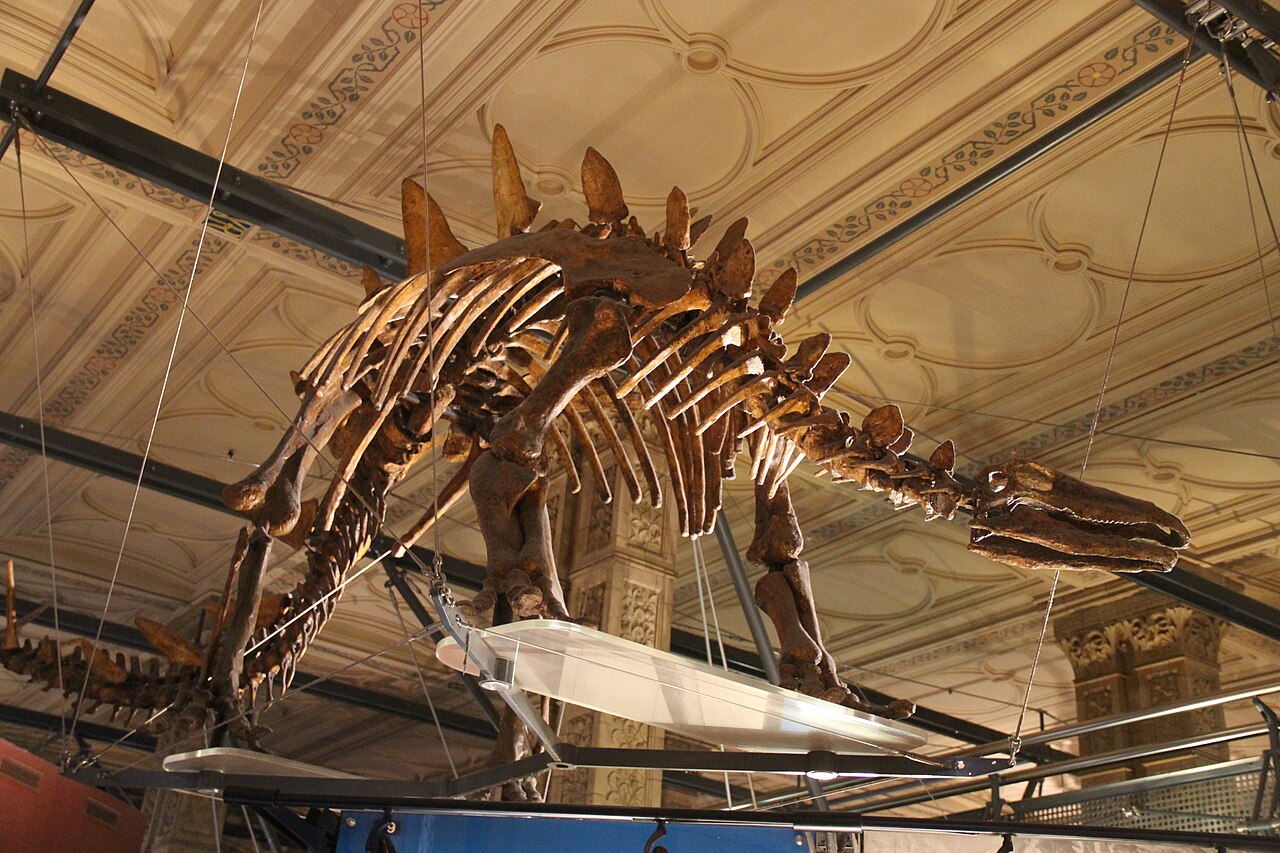
Nobody is completely certain what the plates were for, and that is worth saying out loud — palaeontologists still argue about it. Defence, display to other Stegosaurus, or shedding heat are all still on the table. The tail spikes are less mysterious: there are fossil Allosaurus bones with Stegosaurus-spike-shaped holes in them.
What is certain is the walk. A heavy four-legged animal moves its legs in a fixed repeating pattern — the same cycle, over and over, and each go round is one step.
An animal that had to think out every leg movement separately would be far too slow to survive. Walking is not a long list of different instructions. It is one short pattern, repeated.
That is exactly what a loop is for — and it is why programs that describe repeating things are short.
You have met one loop already. The Drop Tower’s forever loop never stopped, which was right for a ride that runs all day and wrong for almost everything else.
repeat (6) runs the blocks inside it six times and then carries on to whatever comes next. forever never carries on, because there is no next.
The demo runs both side by side. Watch the block below each loop: one of them eventually lights up, and one of them never will.
repeat (3)
forever
↑ this block never runs
Both programs contain the same green-light block. Let it run as long as you like — the right-hand ring will never turn green.
There is a second reason to reach for a loop, and it matters more than it looks. Writing the step blocks out six times works — until you want seven steps, and now there are six places to edit and one of them will get missed. With a loop there is one number.
Machines repeat. A wiper sweeps, a conveyor runs, a ride goes round — and none of that should mean copying the same blocks over and over. A loop says “do this again” once.
| Block | What it does |
|---|---|
repeat (10) end | Runs the blocks inside a set number of times, then carries on below. |
forever end | Runs the blocks inside over and over, and never carries on below. |
repeat until <> end | Repeats until a condition becomes true — a loop with a sensor as its exit. |
Anything placed after a forever loop will never run. Not “runs late” — never. Both programs below end with the same block: set the status light green.
repeat (3)
forever
↑ this block never runs
Both programs contain the same green-light block. Let it run as long as you like — the right-hand ring will never turn green.
The repeat loop counts its three passes, stops, and moves on to the block underneath, so its light turns green. The forever loop reaches the bottom of its own blocks and jumps straight back to the top, so the block underneath is never reached — however long you leave it. If a program seems to stop half way through, look for a forever loop above the blocks that are not happening.
A program is a list, and the Brick works down it once. Every block runs, in order, and when the last one is done the program is over. That is fine for a list of instructions — drive, turn, beep, stop — because each is a thing you do once.
A sensor is not a thing you do once. Asking is 1 pressed? gives you an answer about this instant, and an instant later it may be wrong. Checking a sensor once tells you what the world was like at the moment the program started — which is almost never what you wanted to know.
So a program that has to react must ask again, and again, for as long as it is running. That is the whole job of the loop: not to repeat an action, but to keep the question being asked.
Wrap a sensor check and the motor it controls in a forever loop and you have built a closed-loop control system — the pattern behind every line follower, thermostat and cruise control:
It is called closed because the output feeds back round to the input: the motors move the robot, moving the robot changes what the sensor sees, and what the sensor sees changes the motors. Break the circle at any point and the robot stops responding.
when program starts :: events hat
forever
  if <[1 v] is pressed? :: sensors> then
    [A v] start motor [clockwise v] :: motors
  else
    [A v] stop motor :: motors
  end
end
Read it as a sentence and it is almost too simple to need explaining: for ever, if the button is pressed run the motor, otherwise stop it. The motor now follows the button for as long as the program is running.
This is the mistake nearly everybody makes first, and it is a hard one to spot because nothing about it looks wrong:
when program starts :: events hat
if <[1 v] is pressed? :: sensors> then
  [A v] start motor [clockwise v] :: motors
else
  [A v] stop motor :: motors
end
The logic is perfect. The ports are right. Nothing is misspelled. And the robot will ignore the button completely — because the Brick reaches that if/else a few milliseconds after you press Run, finds the button not pressed, takes the else branch, stops the motor, runs out of blocks and ends. By the time a finger arrives, there is no program left to notice it.
with forever — a closed loop
without it — the common mistake
↑ running — for the only time
Both programs contain exactly the same if/else. The only difference is the forever block around one of them.
Both programs contain exactly the same if/else. The counter is what gives it away: one keeps checking for as long as it runs, the other is stuck on the single check it made before anybody touched anything. A student who has seen this once stops writing it.
The tell on a real robot is a program that ends the instant you start it — the Brick returns to its menu almost immediately. If a sensor program finishes rather than waits, the loop is what is missing.
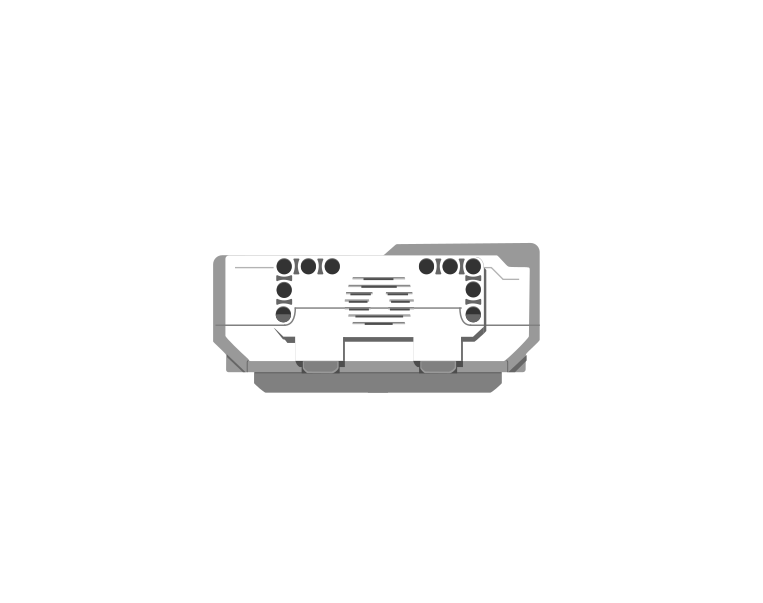
The Brick has a small speaker. It can play one of the built-in sound files, or beep a note you choose. Sound is what makes a machine feel finished — and it is also a way for the robot to tell you something without you having to look at it.
| Block | What it does |
|---|---|
play sound [Communication / Hello v] until done :: sound | Plays the sound and waits for it to finish before the next block runs. |
start sound [Communication / Hello v] :: sound | Starts the sound and moves straight on to the next block, so the sound plays while the robot keeps working. |
play beep (60) for (0.5) seconds :: sound | Plays a single note for a set time — useful for short alerts. The number is a note, not a volume: bigger means higher. |
set volume to (100) % :: sound | Sets how loud everything after it will be. Worth putting at the top of a program — the Brick remembers the last volume it was given, even from somebody else’s program. |
stop all sounds :: sound | Cuts off anything that is still playing, including a long sound started earlier. |
These two blocks play the very same file. The difference is what the rest of the program does while it plays — so it cannot be heard on its own, only seen. Here are both, each lifting a barrier.
play sound until done
start sound
Watch the barriers, not the clock. On the left the warning finishes before anything moves; on the right it sounds while the barrier lifts.
The bars underneath are when the speaker was on and when the motor was turning. On the left they never overlap: the program is stuck at the sound block until the file has finished, and only then does the barrier lift. On the right they overlap almost completely, and the whole job is done in half the time.
Real machines warn before they move, not after: a lift chimes before the doors close, a reversing lorry beeps while it rolls back, a level crossing sounds before the barrier drops. Getting the order right is the difference between a warning and an apology.
Say this back before moving on: “A repeat block does the same thing a set number of times, and I change how many by changing one number.”
One motor again — and this time the Brick is not part of the dinosaur at all. It sits beside it on the table with the cable running across.
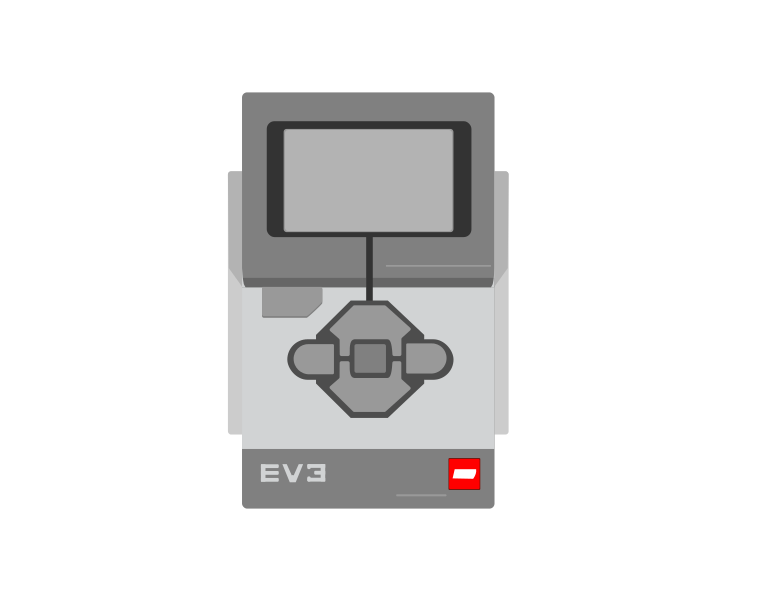 EV3 Brick × 1
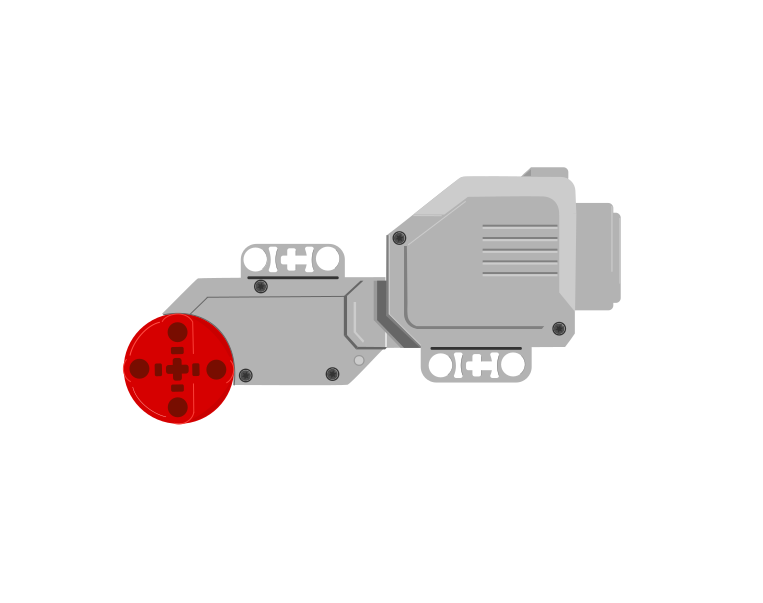 Large Motor × 1
Look at the motor’s axle. The part on it is not a normal gear — it is a worm, a screw thread lying on its side, and it meshes with a 24-tooth gear.
One full turn of a worm moves the gear it drives by exactly one tooth. So a 24-tooth gear needs 24 turns of the motor to go round once — a 24-to-1 reduction from a single pair of parts.
That is a colossal gear-down, far more than the Ferris Wheel’s in Lesson 12, and it is what turns a fast weak motor into a slow heavy-footed dinosaur.
Now try it backwards. Turn the motor axle by hand and the legs move. Now hold a leg and try to turn it by hand — the worm will not budge. A worm drive only works one way round, which is why heavy machinery uses it wherever a load must never run away.
You need one number before you can program this properly. Turn the motor axle steadily by hand and count how many motor turns make one complete step — one full lift-forward-down-back of a front leg. Write it down. Every program below uses your number.
Sensors go in ports 1, 2, 3, 4. Motors go in ports A, B, C, D. They are not interchangeable, and nothing will tell you politely if you swap them.
| Part | Port | Why this one |
|---|---|---|
| Large Motor (drives the worm) | A | A single working motor conventionally takes A. Every program on this page says A. |
Check your own build now:
Two routes, and either is fine. USB is the reliable one and the one to fall back on when a room’s Bluetooth is busy; Bluetooth leaves the robot free to move, which some models need.
Do these in order. Naming the Brick after you go looking for it in the list is how groups end up driving each other’s robots.
EV3 until somebody changes it.EV3.The two failures, every class, every time. The Brick has gone to sleep while you were building — press the centre button to wake it. Or you have paired with the group at the next table, which is why the name matters.
The long version, including Port View and how to read the port tiles, is in the Brick & Bluetooth guide.
The dinosaur walks and the Brick does not, so the motor cable is doing two jobs at once — carrying power and tethering the model. Give it plenty of slack before you press play.
If the number does not move when the axle does, stop here. The cable is in the wrong port or not pushed fully home.
Try the reverse test too: hold the model still and push a leg. The number should not move at all, because the worm cannot be back-driven — which is a useful thing to have seen before you start wondering why a stalled dinosaur reports nothing.
One change at a time, and predict before each run.
end. Predict how many thuds you will hear. Then run it and count. Inside the loop means once per step; outside means once, at the end.Step 2 is the one worth remembering. Where a block sits relative to a loop changes how many times it happens — and a block in the wrong place is not a broken block, it is a misplaced one.
If the dinosaur shuffles without going anywhere, check that its feet reach the table evenly and that it is not sitting on its tail. A worm drive has plenty of force, so a model that fails to move is almost always standing wrong, not underpowered.
Build the model before you read any further. Everything after this is about making it do something, and none of it will make much sense with nothing on the table in front of you.
Use the viewer's own controls to zoom and turn pages. Fullscreen makes it big enough to build from.
The same build on Google Drive — sometimes a video, sometimes a scan:
Use the viewer's own controls to zoom and turn pages. Fullscreen makes it big enough to build from.
Check the finished build against the picture before you switch anything on. A motor mounted the wrong way round is far easier to spot now than it is to debug later, when it looks like a program fault.
Six steps, and a thud on each one. Replace 24 with the number you counted in section 5 — if your dinosaur takes a step every 24 motor turns, leave it as it is.
when program starts :: events hat
[A v] set speed to (40) % :: motors
repeat (6)
  [A v] run [clockwise v] for (24) [rotations v] :: motors
  play beep (50) for (0.2) seconds :: sound
end
Walk it in the order the Brick runs it:
end happens until all six are done.What success looks like: six audible thuds, one per step, and then silence — the program has finished and the dinosaur stops where it is. Count the thuds out loud; if you hear five or seven, your stride number is off, not your loop.
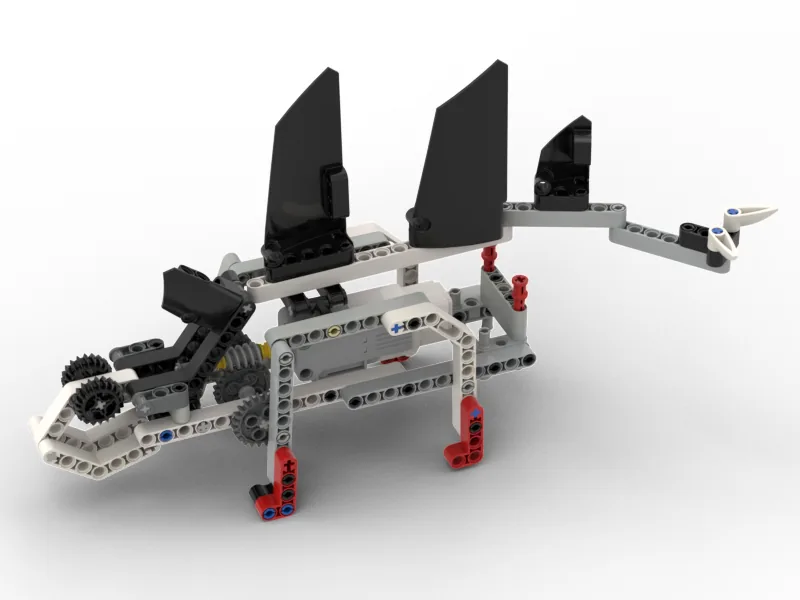
Work through them in order — each is harder than the last. The extra challenge comes after all three, and it is meant to make you plan before you build.
Make the dinosaur take ten steps instead of six, and thud twice on every step instead of once. You should be changing one number and adding one block — if you find yourself copying blocks out ten times, stop and look at the loop again.
Make it walk, pause, and walk again: six steps, a clear two-second rest, then six more, and a different sound at the very end from the one it makes per step. A person listening with their eyes shut should be able to tell the rest from the finish.
Make the dinosaur walk a measured distance rather than a number of steps. Choose a target — say 30 cm — measure how far one step actually carries it, work out how many steps that needs, and put that number in the loop. It must stop within a hand-span of the target on two runs out of three.
A museum wants your Stegosaurus for a display, and it has to behave like an exhibit rather than a toy. Build a program that walks the dinosaur forward along its display case, pauses at the end as if grazing, and walks back to exactly where it started — ending on the same spot it began, ready to run again for the next visitor. Plan on paper first. Returning to the start is the hard part: work out what has to be true about the way back compared with the way out, and how you will check that it really did come home rather than nearly. Two questions when you demonstrate it. What did you have to measure before you could write the program? And after five runs in a row, is it still starting from the same place — and if not, why does the error build up?